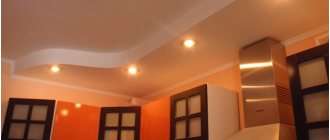
In this article we will look at how to correctly and quickly install a spotlight with your own hands in a plasterboard or slatted ceiling.
To begin installation, we must carry out preparatory work:
first, turn off the power to this group of electrical appliances, but since the installation of a spotlight should be carried out in a well-lit place, it is necessary to take care of sufficient lighting of the room.
Tip: Turn off the electricity using the required automatic circuit breaker or a general switch; do not rely on the room switch, often it opens only “zero” and not “phase”.
Preparatory work
If there are several spotlights and they are located at a small distance from each other (up to 500 mm), then it will be enough to stretch the wire to the nearest one. This process is carried out before the installation of the ceiling structure begins. Then, after the ceiling is completely installed, the cable is routed from device to device. Which wire should I use? Of course, from the point of view of ease of connection to the marks, it is flexible multi-core, but from the point of view of quality and reliability of installation, it is necessary to choose the same one as for all wiring. More often it is a hard copper wire, for example VVG-2x1.5.
We fix the wires in the terminal block
If a step-down transformer is used, then there is one important nuance. When using low supply voltage for halogen lamps (12 Volts), the voltage drop in the wires will be of great importance. In short, the wire must have a cross-section of more than 1.5 sq. mm, preferably 2.5. And the length of the cable to each lamp must be the same, so that the voltage drop is the same.
Installation and laying of wires
For the main cable used to connect lamps, three-core copper wire is used . Its power must correspond to the power of the lamps. It would be optimal to enclose the wire in a corrugated pipe to protect it from harmful environmental factors and moisture.
The connection is made in series or parallel. When connecting luminaires, a grounding wire and an N-phase are passed through them, and the switch is installed through a distribution box in the L-phase. It is not recommended to allow overlapping of wires, the formation of coils and tangled areas.
The transformer and dimmer, if necessary, are installed in the inter-ceiling space above the plasterboard plane. It would be optimal to mark, secure and install wiring before installing the suspended ceiling. In this case, the wires are fixed and connected to the old ceiling, leaving contacts for connection to the lamp terminals.
Making holes for spotlights
The correct installation of a spotlight in drywall or plastic is done as follows: you need to make a hole of the required size for it. The diameter of the hole to be made is often indicated on the packaging of the lamp, but to check it is better to measure it again. The most popular hole diameters for spotlights are 60mm and 75mm .
After marking, we use a drill and a special bit to cut a hole of the required diameter in the drywall (the size of the hole should be as close as possible to the size of the lamp), and pass the connection wires through it.
In Armstrong-type suspended ceilings, drilling is not required - just use a sharp utility knife.
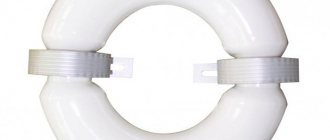
If you have suspended ceilings, then everything is more complicated - here all the holes and their sizes and positions on the canvas are designed in advance at the stage of drawing the ceiling. Special thermal rings are installed that prevent the ceiling film from overheating from the temperature of the lamp. Thermal rings also add mechanical strength to the area where the spotlight is installed.
Some installation details
When installing spots, you should take into account the features of the ceiling covering. So, for example, if the building material used to finish the ceiling is flammable, then the following must be taken into account:
To wire lighting fixtures, you must use special heat-resistant wires.
- to carry out wiring for lighting fixtures, you must use special wires that are heat-resistant; the wiring connection when connecting spotlights must be reliable and insulated; the power of the lamps that are used must correspond to the technical characteristics of the wires, otherwise they will be subject to excessive overheating.
When choosing wires for connecting spotlights, you must be guided by the following criteria:
- they should not burn; they should be resistant to prolonged exposure to high temperatures.
These requirements are met by a cable in which the outer layer of the braid is made of fiberglass, and the internal insulation is made of high-strength organic rubber. These wires allow you to install a spotlight in rooms for any purpose, for example in kitchens, saunas, baths, bathrooms, as well as in unlimited quantities within reasonable limits.
To ensure reliable connection of wires during installation, you can use a special tool - a crimping press. It connects the cables using hollow copper sleeves, which serve as reliable insulation. An alternative to the press can be pliers, which are identical in principle to it.
DIY spotlight installation
Installation must be done after all finishing work has been completed (pasting or painting the ceiling). This process already refers to finishing work.
You need to start by running a wire into each hole.
Afterwards we proceed directly to the installation of the spotlight. Along its edges there are special pressure springs, with the help of which the device is held in the plane of the ceiling. You need to bring them together, then insert the lamp into the drilled hole in the ceiling, and then they will move apart and press the lamp.
All this is not very inconvenient. In addition, there is a possibility of damage to the expensive ceiling, especially if the springs are tight and the lamp does not immediately fall into place and has to be moved.
In this regard, it is better to bring the antennae together “on the ground with a small piece of cable, which is then cut in the ceiling.
This solution is quite convenient when you have to install a lot of expensive lamps in a beautiful ceiling, and when you don’t want it to get dirty and scratched.
Which is better: heated floors or radiators?
Warm floorBatteries
We carefully mount the lamp in place, then cut the wire with wire cutters - and the lighting fixture now stands as it should without much effort or problems.
Types of mounting ceiling lights
There are different spotlights:
- Invoices. They are mounted in frameless bases and brick coverings. Consists of a housing and a mounting base. Installation is carried out in this way: the bar is fixed in the hole, and a lampshade is placed on top.
- Built-in. Space is required between the base and the ceiling. The lamp consists of a solid structure. The lampshade is fixed in the hole with claws, which straighten out from the back and hold the lamp.
- Hanging. There is a certain distance from the ceiling to the lamp. Fixation occurs on a decorative cable.
There are also:
- Rotary - when mounting them, it is necessary to strengthen the place of fixation.
- Fixed - fixation with paws.
- Swivel-and-slide – reinforcement of the base is required.
- The spots are rotating. Several devices are located on one mount.
Before purchasing, you need to familiarize yourself with the type of fastening; it may not fit the base in the apartment.
Connecting spotlights
Connecting recessed luminaires means connecting our mounting wire to a base with flexible leads.
So, let's start electrical installation work, strip the ends of the connection wires from insulation and use terminal blocks to make a connection to the lamp (if you have a 12v lighting device, then the intermediate link in this connection may be a transformer or an electronic converter)
Next, you need to wear gloves if you have halogen lamps.
We put the socket on the lamp, install the lamp in the lamp, and fix it with a latch.
That's it, the installation of the spotlight is complete, we supply electricity and check our work.
Preparation for installation work
Installation diagram of spotlights.
During preparation for installation, it is necessary to decide how and in what quantity to install lamps. First of all, you should clarify whether the gap between the hanging element and the ceiling is sufficient for installing the lighting fixture, based on the condition that for a halogen lamp the minimum depth is 60 mm, and for an incandescent lamp - at least 120 mm.
The number and distance between lamps are determined by the required illumination of the room and its uniformity over the area. When determining these parameters, several conditions should be taken into account:
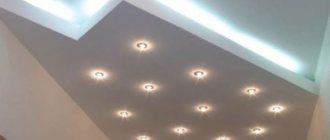
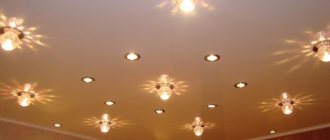
- The power of each lamp should not exceed 40 W to avoid overheating at the installation site. The sector of the light beam from each lighting device is, as a rule, 30º, and to ensure uniform illumination, the light beams must overlap each other. This condition determines that with a ceiling height of 2.5-2.7 m, the minimum distance between lamps is 1 m. And finally, the number of elements is determined by the pattern that should form on the ceiling after installation.
Spotlight device.
Tools required for preparatory work:
- electric drill; milling bit; knife; tape measure; meter ruler.
Preparatory work for installation begins with marking the location of the lamps on the ceiling. First, mark the position of the lamps closest to the wall.
To ensure that the wall is not in the shadow and is evenly illuminated, the distance from the wall to the first lamps should be no more than 60 cm.
Then the position of the remaining lighting fixtures is marked according to the selected location and taking into account that the distance between them is no more than 1 m.
In the marking areas, holes are drilled for spotlights with a diameter corresponding to the diameter of the lamp body. Lighting fixtures with a diameter of 68 mm are most widely used. The hole is made by drilling with an electric drill with a mounted crown (like wood) of the required diameter.
Installation of spotlights in a plasterboard ceiling
Interior design often includes structural changes to the ceiling. Gypsum board is a very popular material used for ceilings. It is used for various design options. This is either a solid suspended ceiling or relief ceiling structures. In any case, a gap is created between the main ceiling slab and the drywall. It is used for installation of spotlights.
In any project, plasterboard lamps built into the ceiling are one of the best solutions for high-quality lighting. In some design projects, these light sources may be the main lighting instead of a chandelier. This article will tell you how to install LED spotlights for plasterboard ceilings, as well as what other light sources can be used in these structures.
Where to begin?
Before starting work on upgrading the ceiling, it is recommended to make a preliminary design. It depicts the ceiling, the contours of plasterboard sheets, if any construction of them is provided, ceiling lights built into the plasterboard structure, electrical wiring to power the light sources. It should be attached to the ceiling with clamping brackets on dowels, in holes drilled in the ceiling slab. Properly installed wiring uses a corrugated tube. If the base of the ceiling is made of wood, the corrugation is selected from metal. If the ceiling is concrete, it can be plastic.
In those places of the supporting ceiling slab, under which the mortise lamps will be located in the plasterboard, a loop is made from the cable. The location of the loop must coincide with the marking at the point for installing the light source on the drywall. It is best to drill small basic holes in the drywall for the lamps before attaching the sheets to the ceiling. This is more reliable than marking with a pencil or marker. After installing the electrical wiring, which is more convenient to do with a multi-core cable on the main ceiling, drywall is attached to it.
Using a jigsaw
A jigsaw is a tool that can cut a hole of any configuration. If during work the circle turns out to be a little uneven, it can be adjusted by sanding the edges of the material with sandpaper.
The process of installing a hole for lamps with a jigsaw
This method has many limitations, for example, it is impossible to make a hole with a diameter below 30 mm with a jigsaw. It is impossible to make cuts on glued drywall. If these restrictions prevent you from making holes, then you can consider another method of arranging holes.
Applicable light sources
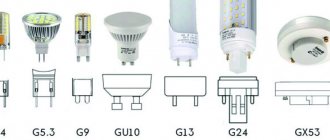
Spotlights are very popular in both residential and office spaces. Structurally, they are all similar, despite the fact that the light sources can be halogen and xenon lamps, as well as LEDs. Models for lamps are made as a reflector with a socket into which the lamp is inserted.
Typically, LED luminaires are equipped with LEDs to achieve minimal dimensions. They are built directly into the reflector or light diffuser. Many spotlights have almost the same diameter. The main differences are in their length and depth. Halogen and xenon lamps installed in ceiling luminaires should not heat the housing more than 60–70 degrees Celsius. High temperatures are not good for drywall.
Classification according to the voltage of the power supply used
According to this criterion, lamps are divided into two categories:
- Devices powered by a standard 220 Volt network.
- Devices designed for low voltage (within 12 Volts).
A voltage of 220 Volts is often used by traditional models of incandescent lamps, mercury lamps and fluorescent energy-saving lamps. Their installation does not require additional elements for setting up the electrical network; the connection occurs directly to the wires of the main network.
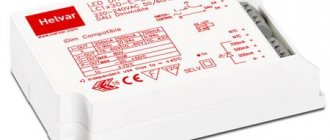
Light sources operating at low voltage levels include some models of halogen lamps and widely used LED lamps. Such luminaires require a reduction in the voltage of the main network, and for them it is necessary to install transformers and dimmers that provide the optimal current level.
How big holes are made
Typically, installing spotlights in drywall begins with measuring the basic dimensions of the housing. For each of them you need to cut a mounting hole. To do this, you can use one of two special drilling attachments for an electric drill. The first one is a set of circular saws. A slightly larger blade is selected from the set to suit the diameter of the body.
Another device is a milling cutter on the rocker arm. It allows you to cut holes whose diameter is larger than the saws in the set. If you need to install large recessed lights in drywall, a milling cutter is the most suitable tool. These two electric drill attachments make it possible to quickly make perfectly round holes.
But if you don’t have a drill, you can do without it by using a short saw with a narrow blade. Before cutting holes, you need to make markings according to the template. The template can be selected from used rolls of adhesive tape, as well as any lids or boxes of suitable sizes and round shape. A template is applied to those places where the lamps should be installed in the plasterboard ceiling and outlined with a pencil or marker. This creates a cutting line.
If there is already wallpaper on the ceiling, before using the saw, the surface inside the hole must be cleared of it so as not to accidentally tear it. This is done by cutting the mounting knife along the intended line. Inside the resulting circle there should be a hole large enough for the saw blade to fit into. Using it, you can easily get a round hole with fairly smooth edges. Once installed, the recessed lights will cover them. But still, working with a saw requires a certain skill and accuracy. You should not move it back and forth with a large amplitude.
Connecting luminaires to electrical wiring
Then the cable is removed from the resulting hole. It must be prepared for connection to the light source.
Next, you can begin installing the housing into the resulting hole. In this case, you need to thread wires through it.
After installing the housing, it’s time to install the wires. The best connection for the passage of electric current is made by soldering. Light source connectors are pre-prepared. Short wires are soldered to them, which will then be connected to the electrical wiring. Since this will also be soldering, the ends of the wires must be well coated with solder. Before connecting the wire to the electrical wiring, a piece of insulating tube made of heat-shrinkable material is put on it.
When installing the electrical cable cores, it is recommended not to cut them. First, the outer layer of insulation that covers both cable conductors is removed. The cuts are carefully made with a mounting knife on both sides of the middle of the loop. Then, from one incision towards the other, a longitudinal incision is made two to three centimeters in length. This allows you to grab the outer insulation and pull it off the wires, trimming as necessary. Then each of the two wires is folded in half. At the bend point, the insulation is carefully removed with a mounting knife to a length of 2–3 cm.
After this, the stripped core is folded in half so that it covers the end of the short wire that is soldered to the connector. After this, twisting is done. To make it more durable, it is recommended to use pliers.
The finished twist is prepared for soldering. To do this, it is moistened with an alcohol-based liquid flux to remove the grease film. After this, the twist is well soldered. A pre-prepared tube made of heat-shrinkable material is put on the finished twist. It is heated with a soldering iron until the required shrinkage occurs. A light source is then attached to the connector.
In our case, the installed device is a reflector with several built-in LEDs. The wires are laid in a niche between the drywall and the main ceiling. In this case, the installation of lamps in a plasterboard ceiling is completed by the final fastening of the reflector to the body with a special elastic bracket. This completes the installation.
Types of lamps
Various lamps are inserted into spotlights. They differ in power, color, size, and operating principle.
Incandescent lamps are a regular lamp. During operation, it gets very hot, so you cannot screw them into lamps on suspended ceilings; lamps with a mirror coating are used in overhead spots on wooden or plasterboard ceilings.
Luminescent - inside there is mercury and 2 electrodes. Used on stretch ceilings. They are durable, with low heat transfer. For such a lamp there should be a space of 12 cm.
Halogen – with low heat transfer, energy saving. When screwing in the lamp, you need to wear gloves.
LEDs are energy saving and do not heat up. A dimmer is required for installation. They are collected in bunches, ribbons and other groups. Shelf life is decades. The disadvantage is the cost.
Incandescent lamps
The lamp has a spiral inside the glass bulb. It has been used since ancient times. Advantages:
- low cost;
- There are different sizes;
- In some cases the heat from this lamp is needed.
Flaws:
- blind - bright;
- short shelf life;
- quickly burn out and explode during power surges;
- warming up.
The main disadvantage is low light output.
Luminescent
Lamp containing gas. They are used for the main lighting of the room. The shelf life is 20 times longer than that of an incandescent lamp. But if there are constant power surges, they quickly deteriorate. The most common is the mercury tube. Pros:
- has a large selection of colors;
- energy-saving with a large flux of light;
- does not heat up;
- life time.
Minuses:
- mercury content;
- At high temperatures, the luminous flux decreases.
- Do not work at low temperatures.
These lamps are common due to their energy savings and operating life.
LED
LEDs have many advantages. They are presented in a wide range of colors, are economical, do not heat up and provide good illumination.
Advantages:
- energy saving;
- long working life;
- environmentally friendly;
- high light output;
- there is a possibility of repair.
Flaws:
- lamps made in China are of poor quality;
- high price;
- over time they do not shine so brightly;
- use of stabilizer;
- cold colors lead to poor sleep.
Chinese lamp production has more disadvantages than advantages.
Halogen
Halogen lamps have a number of advantages:
- energy saving;
- high light output;
- long working life;
- small sizes;
- can be used in damp areas.
Flaws:
- heat;
- high price.
Halogen lamps are an alternative to fluorescent lamps.
Diameter of the hole for a spotlight in plasterboard
When the holes are ready, you need to remove the ends of the supply wire, strip the insulation and make the connection. Then check whether the light is on or not. If it is on, you can continue installation; if not, you need to understand the causes of the malfunction.
Hello dear readers of the postremont.ru portal. In this article we will look at how to correctly and quickly install a spotlight with your own hands in a plasterboard or slatted ceiling.
- For lighting, it is convenient to lay a flexible cable with three cores with a cross-section of 1.5 mm2.
- It is not recommended to install powerful light sources. Economical lamp models are selected that are equivalent in luminous intensity to incandescent lamps with a power of 35–40 W.
- The ability to quickly replace the lamp allows you to subsequently select the device that is most suitable in terms of power, color temperature and dispersion angle.
When inserting a lamp into a drilled hole, you need to compress a special spring in the form of antennae. Then it unclenches, and the device is well fixed. All actions should be carried out carefully, as there is always a possibility of damaging the hole in the drywall.
That's it, the installation is complete, you can flip the switch and admire the new, stylish lighting of the plasterboard ceiling. In addition, it is worth paying attention to the degree of protection of the device. It determines in what places the lamp can be installed.
The first digit of the IP marking is the size of particles that can get inside the device, and the second is the degree of moisture protection. Dust protection is:
Location on a suspended ceiling
For tension fabrics, there are a number of rules by which devices are installed. This is based on the fact that when heated, the canvas becomes deformed and deteriorates.
Requirements:
- Planting depth - the maximum temperature from the lamp should be 80 0C.
- The lamp should be no more than 60 W if the ceiling is fabric and no more than 40 W if it is PVC. If there is an incandescent lamp, it should be sprayed.
Diode lamps are most suitable for stretched fabrics.
- For tension fabric, only non-rotating lamps are used.
You can place devices above the level, at the same level and below the stretched fabric. The size of the mount is important: the diameters of the lamp for the canvas are 60, 65, 70, 75, 80, 85 mm. you need to carefully select the device mounts.
When choosing lighting fixtures for a ceiling with a frame base, you need to pay attention to the width, depth, length, diameter and compare it with the design of the ceiling.
Above the suspended ceiling level
The placement of lamps above the ceiling level creates harmony and comfort in the room. This is how lighting fixtures are placed in children’s rooms, where there is a pattern on the ceiling and fixtures are an addition, in bedrooms. An example is “starry sky”, recessed lamps. From them, only a light spot from the lamp is visible on the surface of the canvas.
On the same level
A common option. This is a suspended ceiling with round lamps, for example, in the kitchen, maybe in the corridor or on the balcony. The limitation is the power of the lamp used up to 35 W.
Below the suspended ceiling level
Overhead lamps. As a rule, they act not only as additional light, but also as main light. The variety of shapes, colors, and design options is great. Lamps are selected to match the interior.
Mortise hole diameter for recessed spotlights
When installing such products on a plasterboard ceiling or wall, cutting out space for the lamp is already done at the final stage of design (after finishing). If such lamps are provided in a suspended ceiling, then the holes must be made at the development stage. Depending on the style of the room, lamps are produced with different shapes of the lining: round, square, rectangular. When choosing spotlights, their number is taken into account.
And the number of holes made in drywall and other surfaces depends on this. As practice shows, the common diameter of the hole for a spotlight ranges from 60 mm to 75 mm. This size should not be confused with the outer diameter of the product.
For example, if the width of the lamp is 90 mm, then the diameter of the insert will be smaller - 60 mm. Therefore, the hole must be made with a size of 59-60 mm. To install a point light source in a ceiling or furniture, the diameter of the mortise hole is taken into account.
It is indicated in the main characteristics of the product. In rooms with suspended ceilings, it is preferable to install spotlights. This is the best lighting option, because such lamps evenly distribute light even in the largest room.
But before installing this type of lamps, you should understand the technology of their installation. Holes for lamps in drywall are very easy to make. Drywall is a flexible material for finishing and special equipment for its processing is usually not required. You can cut a hole in several ways, using professional drill attachments or improvised means: Holes for lamps on the ceiling in plasterboard. After this, knock out the perforated element with a sharp blow - the remaining teeth can be trimmed with a construction knife or sanded with sandpaper. A good option for wiring under drywall may be an RKGM cable of the appropriate cross-section. This flexible and easy-to-install wire has double heat-resistant insulation, can withstand high currents and can be laid without the use of corrugation.
Particular care should be taken when installing halogen light sources in drywall. The bulb of these lamps, even in open lamps, heats up to 250 degrees Celsius and higher. Recessed luminaires, the diameter of which mortise holes vary, are ideal for decorating and illuminating suspended ceilings. But when choosing them, you need to carefully study the characteristics in order to carry out installation correctly.
You can find out what the diameter of the hole for a recessed lamp should be below. Of course, we all want to choose not only effective, but also beautiful spotlights that will suit the interior of the room and no matter what room you want to install them in - the living room, bathroom or kitchen. You should always do everything with taste!
This is especially true in cases where the design of the house is made in a particular style. Today, spotlights are a very good option for ceilings. They have small dimensions, thanks to which they can be installed on any ceiling surface and at the same time efficiently illuminate the entire space of the room. To do this, such lamps are placed in a certain way throughout the ceiling. In addition, the dimensions of the device, as well as the depth of installation of different types (tension, suspended and plasterboard) will depend on the number of light sources.
Based on this criterion, two groups of spot lighting installations are distinguished: There is no need to talk much about the advantages. First of all, this is an opportunity to realize any designer’s idea and save space by hiding a light bulb and lamp in any cavity, of which there are many in a modern apartment. For example, suspended, suspended, plasterboard ceilings, hollow partitions. In order to install a spotlight in a plastic or plasterboard ceiling, you need to cut a hole of the appropriate diameter for it.
The diameter of the hole for a spotlight is usually written on the packaging of the lamp, but it wouldn’t hurt to measure it again. And as a last resort, LED lamps are presented, which are the most modern and currently the most widely used. They are economical and durable, have a high efficiency.
They create enormous opportunities for creating an expanded color spectrum and the full realization of creative ideas. During installation, their need to reduce the voltage with a transformer or other step-down device should be taken into account. Movable ones can either slightly shift the angle of the light direction (by about 45 degrees), or have an output hinge connection with wider possibilities for shifting the direction of illumination (up to 360 degrees).
Additional information on the topic:
- Drawing on the plasterboard ceiling in the living room photo
- Make your own garage shelves from drywall profiles
- How many hangers are needed for one profile on the wall for plasterboard?
- Comparison of plasterboard partitions and tongue-and-groove boards
- Plasterboard walls with niches and lighting photo in the hallway
How to treat the surface → Room decoration → How to choose the right paint → Surface treatment technologies → Leveling and finishing the walls → Selecting and applying a primer → Removal from the surface → Stretch ceilings and technologies → Reviews and testimonials
What lamps are used for tension and suspended ceilings
The main requirement for a lamp on suspended, suspended gypsum plasterboard structures is that it should not overheat the ceiling. The maximum permissible temperature is 70-80°C. Lamps that get too hot are a potential threat to a stretch ceiling. Yellow stains, fabric damage, unpleasant odors - this is an incomplete list of what this entails.
Overheating leads to such defects.
Therefore, it is better to take a lamp with low power. Preference is given to LED bulbs. Firstly, they do not overheat the surface, and secondly, they allow you to achieve any desired lighting option. A built-in or overhead model of a luminous lantern is a question of second importance. Briefly about the most used types of lamps:
- Built-in LEDs (light-emitting diode). The advantages of such a lamp are a long service life, do not cause harm to the eyes, and do not overheat the fabric or plastic cover even during long-term operation. But they also have an obvious drawback. For uninterrupted operation, it may be necessary to connect additional equipment (transformer).
- Built-in raster. Due to the reflective plates of the lighting device, they create scattering bright daylight. Long-term use may have a negative effect on vision.
- Diode point. One of the popular examples of use is “starry sky”.
Night sky effect on a suspended ceiling.
Diode lamps provide soft light, last a long time, and do not overheat the suspended ceiling.
- Spot energy saving. Compared to LED lamps, such lamps last longer, heat up less, are cheaper and do not require connection to additional equipment to supply current.
- LED strips. Thanks to them, you can create lighting in any area with power control. The color is selected in accordance with the shade of the suspended ceiling. Requires connection to a transformer.
Important! When placing several lamps on a suspended structure, there are 2 key points to remember:
- the distance between adjacent lanterns does not exceed 120 cm;
- the distance from the mounting point of the lamp to the wall does not exceed 60 cm.