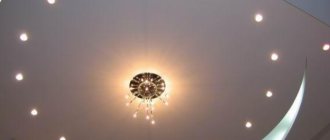
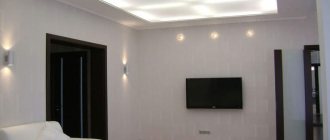
For a stretch ceiling, the best choice is built-in spotlights. They complement the chandelier or are used separately as main lighting. But due to the design and material features, not all light bulbs are suitable; in addition, installation will require additional components - mounting pads and thermal rings. In this article, we will look step by step at how to make spot lighting on a suspended ceiling yourself. We will also tell you how you can add lighting fixtures when the canvas is already stretched.
Types of lamps and recommended lamp power
According to the installation method, spotlights are divided into two types:
- Embedded . The main part of the device is hidden behind the canvas. The bottom edge is at the same height as the ceiling and does not protrude beyond it. Because of this, the overall level of the structure drops slightly. With this arrangement, the spots are less noticeable, but the flow of light is more narrowly focused. The lamp and the canvas around it heats up more and takes longer to cool down.
- Invoices . The lamp is fixed at ceiling level, and the body is located below. When placed outdoors, the device is more noticeable, but it cools faster and illuminates the space more evenly. This type is safer to use.
The body is made from different materials: glass, crystal, aluminum, plaster, plastic. The shape can be round, square or rectangular. To choose the appearance, take into account the overall style of the room. It is advisable to purchase lamps designed specifically for suspended ceilings. They are designed in such a way that the rays do not shine through the canvas around them. Drywall is a denser material, so suspended ceilings do not have such problems.
There are several types of light bulbs:
- Incandescent lamps. They are almost never used with suspended ceilings, as they get very hot.
- Halogen. A relatively expensive option and they also generate a lot of heat.
- Energy saving. They are convenient where constant lighting is required, and when turned on frequently they consume a lot of electricity.
- LED. Economical and durable, practically do not heat up.
Important! To prevent the PVC film around the body from melting and turning yellow, it is necessary to comply with the maximum power requirements: 60 W for incandescent lamps and 35 for halogen lamps.
The most common types of base:
- G5.3 (for halogen and LED lamps);
- GX53 (led and energy saving);
- G9 (halogen and LED for surface-mounted luminaires).
Previously, only light bulbs operating on 12V voltage were produced. A transformer was required to connect to the power supply. Now there are lamps on sale that operate directly from 220V.
Equipment Features
The main feature of spotlights is their compactness. In this case, lighting is carried out at a slight scattering angle. This does not allow one device to illuminate a large area of the room, but it does provide a concentrated beam of light in a single direction.
The most advanced modifications of lighting fixtures are equipped with rotating mechanisms. The external elements of the devices can be rotated along an axis. Thanks to this function, it is possible to change the direction of the light. Standard non-rotating products are also available for sale.
When choosing a model, it is recommended to proceed from the type of ceiling. For example, to install LED light bulbs, you will need to provide a base with a thickness of at least 6-7 cm. To install an incandescent lamp, the thickness of the base should not be less than 12 cm.
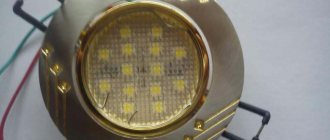
LED devices
LED lamps are a fairly expensive solution. However, LEDs allow you to achieve high-quality lighting in a variety of shades. Diodes fit into any interior, and installation work is not difficult. In addition, LEDs do not overheat, which allows them to be used in conjunction with materials that are adversely affected by high temperatures (for example, suspended ceilings).
Note! In the case of an LED, the lamp and luminaire are a single element. Therefore, if the diode fails, the entire device will have to be replaced.
Halogen lamps
Halogen light sources are the most popular lighting option when it comes to recessed ceiling lights. Their prevalence is primarily due to affordability, variety of types and forms. The bulbs are powered from a 220 or 12 V network. The voltage parameter should be taken into account before installing the equipment in a suspended ceiling. For example, to install a 12 V lamp you will need a low-voltage power supply.
Incandescent lamps
This lighting method is the least expensive. A significant disadvantage of incandescent lamps is their size, which will affect such an important parameter of the room as the height of the finished ceiling. For example, the thickness of the base for an incandescent light bulb should be at least 14 cm.
How to assemble a recessed ceiling light
Some models of spotlights, for example, Feron DL 11, are sold disassembled, that is, the clamps are not fixed to the body. Therefore, before proceeding with installation, you must first install the springs. Assembly occurs in this order:
- Without straightening, place the tail of the spring between the fastening antennae located on the lamp body.
- Place the spring on one of them, then wrap it and squeeze it into place.
- Repeat on the other side.
Connection
A two-core wire is laid from hole to hole. A noose is made near each one. Next, it is taken out of the hole where the location of the lamp is planned.
The loops are cut or the insulation is removed from the wires by about 3 cm. To install the lamp, you need a pair of 10-12 cm wire strands (3 cm of which must be exposed).
The next step is to connect one end of the wire to the terminal of the lighting fixture, and the other to the power supply conductor coming from the switch.
To properly connect the lamp, it is recommended to adhere to the following diagram:
Fixation of the structure
Spotlights are secured to the suspended ceiling using brackets (they are located on the sides of the devices). They need to be carefully bent upward, and then the device is inserted into the pre-prepared holes.
Note! Care should be taken with wires. They should not be caught, as this will result in a short circuit.
The installation work is completed by connecting the ends of the wires to the supply conductor through a switch. Now you can connect the electricity and use the lamps.
Methods of attaching lamps to a suspended ceiling
The ceiling covering is a thin elastic fabric made of fabric or PVC; even under a small load it sags, and under a significant load it can tear. Therefore, lamps are not directly attached to the suspended ceiling.
To build in a lantern, a mortgage is installed before installing the canvas. This is a special plastic platform that is attached to the subfloor and is located on the same level as the molding. After stretching the ceiling, the mortgages are located behind the canvas. Lighting fixtures are attached to them.
Plastic platforms come in different diameters, round or square shapes and are selected depending on the size and model of the lamp. There are two types of embedded platforms:
- Fixed size . Only produced in round shape. There are several models on sale with different internal diameters: 55, 60, 70, 75, 80, 85, 90 and 112 mm. On the reverse side of the rings there are holes for self-tapping screws for convenient mounting of hangers. This is a cheaper option, but such platforms are purchased only after purchasing the lamps, when the diameter of the body is known.
- Universal . They are platforms made of connected rings of different diameters, which can be easily adjusted to fit a lamp of any size. Such platforms are more convenient because they can be purchased in advance. When installing, the rings are cut according to the size of the lamp. Universal mortgages are produced in round and square shapes and are sold in several standard sizes with increments of 5 or 10 mm. Round: 50-100, 55-105, 60-110, 65-115, 125-155, 165-225, 235-305 mm. Square: 50-90, 90-140, 150-200 mm. On the back side of the platforms there are also holes for self-tapping screws.
For fastening, use punched tape or flexible metal hangers. These are galvanized steel strips with perforations. The tapes are bent to give the desired shape. Through the holes they are screwed to the mortgages and the rough ceiling. The hangers are attached to the platform with self-tapping screws (3.5x9.5 mm).
Sometimes adjustable stands are used to mount lamps. The design consists of two metal guides and a U-shaped bar with variable height, to which the platform is attached. The upper part of the rack is screwed to the ceiling. But such products are more expensive, and they are inconvenient to install due to the need to adjust the height with a wrench. It is much easier to bend the metal hangers a little, and this can be done even after the fabric has been stretched.
Technology for installing spotlights in a suspended ceiling
We will provide step-by-step instructions and consider in detail each stage of work from marking and preparing mortgages to laying electrical wiring and connecting devices.
What you will need
To install lamps in a suspended ceiling, you need to prepare the following tools:
- stepladder;
- laser level;
- tape measure and pencil;
- marking cord;
- hammer drill with a drill with a diameter of 6 mm (for concrete slabs, wooden floors are not needed);
- hammer;
- screwdriver or screwdriver;
- sharp knife.
Supplies you will need:
- plastic platforms;
- metal hangers;
- fasteners (screws “bugs” and dowel-nails);
- electrical cable;
- terminal blocks (usually a rating of 3-5 A is sufficient);
- thermal rings;
- glue (preferably Cosmofen).
Calculation of the number of lamps and ceiling markings
To correctly determine how many spots are needed, take into account the purpose of the room, the area of the room and the type of lighting fixtures. There are illumination standards calculated for incandescent lamps. In accordance with them, per square meter there should be:
- in the bedroom - 15 W;
- in the nursery - 60 W;
- in the living room or bathroom - 22 W;
- in the kitchen - 26 W.
Since incandescent lamps are not recommended to be installed with a suspended ceiling due to strong heating, when choosing another type of lighting, use the correspondence table:
| Incandescent lamp power, W | Energy saving, W | LED, W |
| 25 | 4 | 3 |
| 40 | 9 | 5 |
| 60 | 13 | 8 |
| 100 | 20 | 14 |
| 150 | 30 | 22 |
For a simpler calculation, take into account that one lamp is enough for 1.5-2 m² of area.
When you have decided on the number of devices, you need to think about their placement. Light bulbs can be embedded evenly or in groups in different zones. But in the latter case, it is necessary to ensure that there is enough lighting in the entire room. The optimal distance between lamps is about 60 cm, the minimum distance from the walls is 20 cm.
It is convenient to mark the location of the lamps not only on the ceiling, but also on the floor. This will make it easier to find places to attach the mounting platforms after stretching the fabric. A perpendicular is lowered from each point, for which a laser level or plumb line is used. In order not to spoil the floor covering, glue paper tape and put a mark on it.
Preparation of platforms
Universal mortgages are cut with a knife to the required diameter, and excess rings are thrown away. At this stage, it is better to insert the light and check if the hole fits. It will be difficult to correct the platforms after installation (and especially the installation of the canvas).
Then, to determine the length of the hanger, measure the distance from the base ceiling to the platform at the highest point. We recommend using flexible steel hangers with holes for self-tapping screws; they are more reliable than punched tape and more convenient than adjustable stands. The plate is bent in the shape of the letter “P” or cut into two halves, then attached to the platforms with “bug” screws. For this purpose, holes are provided on the back side of the platform. To securely attach the suspension, just screw in two screws on each side.
Installation of mortgages
The installation platform is applied to the ceiling and marks for drilling are made with a pencil. At the marked points, holes are drilled with a hammer drill into which dowels are driven. Self-tapping screws are screwed through the hangers; for reliable fixation, it is advisable to use long ones - 5x51 mm. Then a cord is pulled between the baguettes, along which the platforms are aligned. As a result, all platforms should be at the level of the suspended ceiling frame.
Electrical wiring
When installing less than 20 lamps, a two-core cable of the ShVVP 2x0.75 brand is suitable, otherwise a 1.5 mm² hard copper wire is used. You will also need terminal blocks rated 3-5 A. All lamps are connected in parallel. If one burns out, the rest will remain in working order.
The cable is pulled one by one through the platforms, lowering a loop about 10 cm long from each. To prevent the wire from falling onto the canvas in the future, it is attached to hangers or to the ceiling using plastic dowel clamps. The wire is cut in the center of the loop and the insulation is removed. The ends are connected (blue and brown - each with the same color) and terminal blocks are installed. The resulting structure is carefully laid on the platform so that it does not interfere with the installation of the ceiling. After this, the entire group is connected to the power wire.
Important! If the floors are wooden, be sure to install fire protection. The cable is laid in corrugation or a non-flammable grade (VVG) is selected.
Installation and connection of lamps
When the canvas is stretched, you need to find the location of the mortgages. Markings on the floor will help with this. To make a hole in the stretch ceiling, glue thermal rings. They protect PVC film from exposure to temperature and prevent the material from spreading. The size is selected for the lighting fixture. For fabric ceilings, tread rings are not necessary, since the material is more durable, can withstand high temperatures and does not break under tension.
The thermal ring is evenly lubricated with glue so that there are no empty spaces. Then pressed to the surface. There is no need to smooth or press, otherwise the protection may move and stick in the wrong place. Be sure to check how well the ring holds.
After this, the inner part of the material is cut out. There is no need to leave anything around the edges so as not to interfere with installation. Then check whether the platform is level relative to the canvas. The mortgage should not bulge or move away. If necessary, adjust the height of the suspension.
Next, to install the ceiling light, pull the cable out of the hole. Wires from the device are connected through the terminal blocks. Clamp the springs and carefully insert the spot into place so that the body is fixed in the platform. Screw in the light bulb if it has not been installed before or is not built-in. This completes the installation.
LED strip installation
If PVC film is used for a stretch ceiling, it is not recommended to use halogen lamps and incandescent appliances. The fact is that the material may be damaged due to heating of these products, which will require replacing the film. To prevent this from happening, it is recommended to use devices with a low degree of heat generation. It is best to choose LED strips.
Such devices are installed under the canvas at the same distance. When the device is turned on, only the place where they are fixed or the entire area of the material is illuminated.
Features of LED strips:
- By changing the installation distance, you can achieve different lighting effects - from light lighting to create a romantic mood to bright light to fully illuminate the room;
- various lighting effects can be created by changing the distance from tape to canvas, from tape to tape;
- The final lighting effect is influenced by additional layers and additional elements.
The LED strip is installed not only on the construction material, but also in the box. This method is especially relevant for multi-level ceilings. This allows you to emphasize this type of design. When installing an LED strip in a box, it is necessary to make the canvas in such a way that at any time you can open part of it and gain access to the power supply. The fact is that due to the large accumulation of LEDs, if there is not enough ventilation, overheating of the material may occur. As a result, devices may fail. For this reason, the power supplies must be accessible so that appropriate replacements can be made at any time.
If LED lamps are installed above the ceiling, then the devices are fixed to the ceiling. Manipulation is performed using glue or double-sided tape. Before manipulation, the material is treated with a degreasing compound and coated with a primer. This will ensure good adhesion of the surfaces. Connectors are used to connect the tapes. To fix the device under the canvas, special fasteners made of profiles are used. Such devices can be placed in any angle.
Is it possible to add lamps to an already stretched ceiling?
For various reasons, it may turn out that the installed light bulbs are not enough. For example, the calculation was done incorrectly, or an apartment was purchased that was ready for renovation. Then you can add more lamps to the suspended ceiling.
The first option is to remove the canvas, attach it to the base of the platform and pull the covering back. But dismantling and subsequent installation is possible only for a film ceiling with a harpoon fastening. If you invite specialists to do the work, it will be expensive, but doing it yourself will be difficult. In addition, tampering will void the installer's warranty.
But there is another way to embed light bulbs, without using mortgages. Only lamps with a GX53 socket are suitable for it, since they are large enough and can be mounted through a cutout for a light bulb. The hole should be large enough for the tool to fit through.
First, mark the ceiling so that the placement points of the lamps are symmetrical with respect to existing fixtures, as well as the walls. You will need a pencil and tape measure.
Then glue the protective ring and cut out the canvas inside. The stages are the same as during normal installation.
After this, you need to measure the distance from the base floor to the suspended ceiling (for each hole). In accordance with it, hangers are made and attached to the lamp body. Springs are not needed with this method. The hangers must be U-shaped, otherwise they will not be able to be attached to the ceiling.
A wire is inserted through the hole for the chandelier or previously installed lamp. The sharp ends are pre-wrapped with electrical tape so as not to damage the ceiling from the inside. Using terminal blocks, the wires of the lamp are connected. The device is inserted into the prepared place and the suspension is attached to the ceiling through the hole in the base. The spot is adjusted so that it is positioned exactly relative to the ceiling. The wires are connected to the connected cables from the chandelier.
Fixing the chandelier
The chandelier is mounted in different ways.
On the hook
This method of installing a chandelier is used most often. The work algorithm will be as follows:
- fix the hook on the building foundation, test its reliability by hanging a load;
- run the cable;
- after installing the wiring, you should fix the canvas on the frame;
- make markings to understand where the hook is located;
- Using glue on the canvas, fix the thermal ring in the center of the marking;
- cut a hole in the material.
After this, you can install the chandelier by hanging the device on a hook.
Using the bar
Another way to install the device on a structure is using a ceiling strip. To do this, you need to follow the following sequence of actions:
- determine the location of fixation of the chandelier;
- measure the length of the bar and the diameter of the device bowl;
- make a wooden beam of appropriate dimensions, so that the lighting fixture is always fixed in one position and does not swing, make the length of the beam slightly larger than the diameter of the chandelier bowl;
- secure the timber;
- lay electrical wires;
- install the construction material on the frame;
- place a mark on the film or fabric of the place where the chandelier will be installed;
- Using glue on the canvas, fix the thermal ring in the center of the marking;
- cut out the center of the thermal ring to fix the device;
- in the center of the installed beam, fix the mount on which the lighting device is mounted;
- install a chandelier.
Attention! If the chandelier has large dimensions, it is recommended to mount the device on a cross-shaped mount. This method is especially relevant if the device is placed close to the stretch ceiling material.
In this case, you should follow the same rules as when installing a chandelier using a strip, but plywood should be attached to the beam. Its diameter should be slightly larger than the dimensions of the chandelier bowl.
Another option for fixing a large-sized device is to fasten plywood to a suspension system.
Mounting the chandelier on the platform
Common installation mistakes
Incorrect installation creates a lot of problems during use. Errors occur already at the stage of selecting lamps. Let's look at the most important points to pay attention to:
- it is necessary to follow the recommendations for lamp power, especially for built-in models, otherwise the PVC film around will melt and turn yellow, this can also happen if the thermal ring is not glued;
- the wires should not be stretched too much or, conversely, sag, touching the canvas; they should be securely fixed to the concrete slab;
- the ends of the cable cannot be connected by twisting; it is better to use Wago quick-release terminal blocks;
- The lamps must be easily removable and not lose their presentation, otherwise they will not be able to be exchanged under warranty.
Installation of built-in lamps in a suspended ceiling is a process that requires preparation and careful execution of all stages. If there is not enough experience, it is better to entrust this matter to professionals.
Conclusions and useful video on the topic
Visual instructions for installing lamps are presented in the following video:
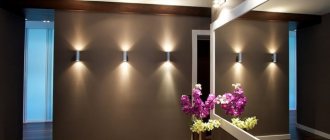
Thus, spotlights are an opportunity to make any room bright and cozy. With their help, you can illuminate even a dark corridor, which since its construction has only been illuminated by a dim chandelier. This type of lighting can be installed on any type of ceiling, and the entire scope of work can be done with your own hands.
How did you solve the problem of insufficient lighting? Have you used spotlights at home? If yes, then tell our readers what type of ceilings the lamps were installed on and whether there were any difficulties in installation. Share your experience in the comments.