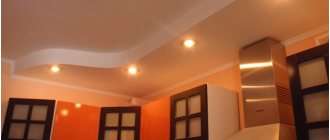
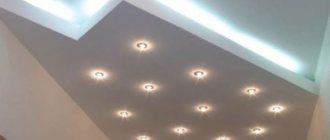
Life, unfortunately, is designed in such a way that an expensive, beautiful thing can be ruined by small details. Same with suspended ceilings. By adding together significant finances and good taste, you can end up with a very beautiful ceiling. However, ill-conceived lighting can ruin all your efforts. Previously, we have already considered the questions: what type of lighting is suitable for the interior of the room and the type of stretched fabric (the work “What lamps to choose for stretch ceilings?”) and how to calculate the number of lamps per room (the material “How to arrange lamps on a stretch ceiling?”). Below we will consider methods for attaching lighting fixtures when installing a stretch ceiling.
Features of proper installation of the lamp
Installing lamps is partly a creative process, so before starting work it is recommended to make a sketch of the future composition.
In this case, it is necessary to take into account several factors, including:
- Type of device (shades, chandeliers, mortise models);
- Number of lamps (one or several);
- The material from which the ceiling is made (wood, PVC film, fabric, plasterboard, reinforced concrete panel ceilings).
The list also includes such parameters as room area, type of lamps according to the method of emitting flux, and characteristics of the bases. Despite the complexity of installation, with a competent approach and strict adherence to all recommendations, lighting fixtures can be installed with your own hands, without involving specialists.
LED lightening
LED lamps are a complex device. They are divided into several types. For their uninterrupted operation, you should choose a model that will be suitable in terms of technical indicators. Such lighting is used for residential buildings, basements, floodlights or as backlights for architectural buildings.
Connecting LED lamps must be taken seriously. Such devices are not cheap and have a complex connection diagram.
Peculiarities:
- lamps of the same type highlight the outline well;
- devices with a power of more than 40 watts are dangerous for French ceilings;
- when connecting lighting to rubber ceilings, care should be taken to ensure the safety of the wiring;
- it is desirable to make the wire elastic and durable;
- It is advisable to check the reliability of fastening and tightening of the bolts every time.
Surface preparation
The procedure depends on the nuances listed above. For example, it is necessary to install lamps on a suspended ceiling. In any case, you can’t do without an estimate. Ignoring this stage risks improper distribution of finances and already purchased materials.
Costs are calculated based on a pre-designed layout of lighting fixtures. Their number depends on the area of the ceiling. The formula is simple: there should be one light source per 1-2 m2.
First they work with the base ceiling:
- Indicate places of fastenings.
- Mount the racks at the indicated points.
- Fix and check the wiring.
- Install brackets and fasteners for the canvas and the lamps themselves.
- Carry out installation of devices.
- Connect a cable to them.
- Connect the protection system.
Then they begin to stretch the ceilings. It must be carried out by specialists. In the stretched fabric, neat cuts are made at certain places, which are then framed with rings. This prevents the occurrence of additional breaks.
Safety precautions
Carefulness when working with electrical networks is the basis of safety precautions. To maintain health and life, you must follow the following rules:
- All work is carried out only with the power turned off. It can be turned off at the input switchboard.
- You need to make sure that there is no current on the wires. This can be done using an indicator. If residual voltage is detected, you need to wait until the residual current passes. If the voltage is detected during repeated checks, you should contact an electrician.
- To work, the technician will need personal protective equipment - dielectric gloves and goggles.
- When installing the lamp on the ceiling, you will need a stable ladder or stepladder.
- You need to prepare an autonomous light source in advance. This could be a battery-powered flashlight or an external light source.
- All tools must be in good working order and have insulated handles.
Compliance with the following simple rules will help the master to protect himself and not get damaged by electric shock.
Electrical wiring
To connect ceiling lights to electricity, you will need the following devices and tools:
- Scissors for cutting metal;
- Tape measure, pencil;
- Drill, hammer drill;
- Hydraulic level, screwdriver, indicator;
- Drills (brazed, crown).
The list of required materials includes corrugated pipes, a transformer, anchors, connection blocks, dimmers, branch boxes, wires and the lighting fixtures themselves.
The procedure is quite simple:
- We place the cable (from the main box to the lighting point);
- We connect the wires coming from the lamp and the switch in a box;
- We evaluate the performance of the system.
Important! When laying the wire, it should be “packed” if the ceiling is covered with plasterboard or wood slabs.
Pass-through switch
A pass-through switch differs from a regular switch in the number of contacts. If a regular single-key one has 2 of them, then a pass-through one has 3 contacts. The incoming wire is connected to one, the wire going to the light source is connected to the other, the third goes to another similar switch.
The diagram shows the operating principle of pass-through switches
The two-gang switch has 4 contacts. The pictures clearly show how to control the light source using pass-through switches from 3 different places. On the block, special symbols show which contact corresponds to what. It is important not to confuse the connection order during installation.
Diagram for connecting the switches to each other: in the middle - a cross with 4 contacts for connecting the remaining switches to each other
Connection diagram for two-key pass-through switches
Various circuit options for connecting 3 pass-through switches
Installation of lamps on suspended ceilings
In this case, you should pay attention to lighting fixtures that are lightweight. These can be point, cardan, fluorescent and halogen devices.
The list is supplemented with lamps with tungsten filament. By choosing one of these options, you can solve two problems at once: illuminate the room and give it originality.
To prevent deformation of the canvas, you need to install lamps whose power does not exceed the limit. For suspended ceilings, compact spotlights are considered the best option.
After the fixation rings are inserted, you can proceed with the following actions:
- Installation of the lamp. It should be noted that the diameter of the lamp must match that of the mounting holes. Otherwise, everything will have to be redone;
- Connecting wires.
- Checking level and height;
- Design of fixed edges with special profiles;
- Adjusting the position of the lamp if it is equipped with a rotating mechanism;
- Housing insulation. For this purpose, thermal insulating rings are used.
Important! Before connecting halogen lamps with your own hands, you should wear protective gloves.
Halogen lamps connected via transformer
To save and operate electricity safely, lighting circuits are used that use not 220 V, but much lower rated voltages. An example is halogen lamps of 6, 12 and 24 V. Low-voltage halogen lamps shine no brighter than conventional lamps, and consume an order of magnitude less energy. In addition, low voltage guarantees human safety.
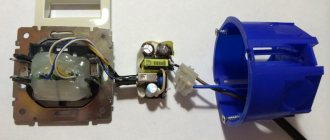
Step-down transformer for halogen lamps: 2 wires are designed for a mains voltage of 220 V, another 2 for an output voltage of 12 V
Typically, such lamps are installed in bathrooms for safety reasons. The only “but” when using halogen lamps is that they require the installation of a step-down transformer.
Halogen lamps of this voltage are installed in built-in lamps in suspended ceilings. Modern electronic transformers are small in size, which makes it easy to mount them directly on the ceiling frame. You need to choose a transformer for a lamp in this way.
Transformer connection diagram for halogen lamps
First, a lighting diagram is drawn, which indicates the number of lamps and their power, then the last value is summed up and 10–15% is added to the resulting number (just in case).
Installation of halogen lamps with a transformer in a suspended ceiling
For example, we can suggest the following scheme: the room is illuminated by 6 lamps of 12 V each. We multiply 12 x 16 = 196 W, round up to 200 W - this will be an indicator of the power of the required transformer. When installing and operating such a device, you must remember that during operation it can become very hot (up to +90 °C). You should not purchase a transformer with too much power. It's best when it's running at full load. For example, if there is a 300 W transformer, and you plan to connect light bulbs with a total power of 250 W to it, then it is better to add another pair of 24 V.
Installation of halogen lamps and transformer simultaneously with the ceiling
The ceiling behind which such a device is located must be equipped with special hatches so that in case of breakdown or adjustment it can be easily reached. If there are several lighting zones, then instead of one powerful transformer it is better to purchase several weaker ones - it will be cheaper and easier to install. For a lighting group powered by transformers, it is better to allocate a separate circuit breaker that does not allow overload. It is very dangerous for such devices.
Note. For low-voltage halogen lamps, you should not install a dimmer. It begins to work incorrectly and its service life is reduced.
These articles may also be of interest to you:
- Electrical connection diagrams
- Wire routing
- Lightning protection in a private home
- Replacing the siphon and sink drain
Installation of chandeliers and shades
Installation of lampshades is permissible on any type of ceilings, except suspended ones. To achieve a strong fastening, you will need self-tapping screws. They are screwed in using a hammer drill.
The terminals are connected to the wires only after the housing has been secured. The next step is to fix the light bulb. Then the master fixes the light bulb and covers it with a diffuser.
- The installation method is chosen based on the type of lamp. Chandeliers are most often hung on hooks.
- They are carefully screwed into the ceiling, and the latter can be made of PVC panels, plasterboard, OSB and wood.
- The terminal block is hidden under the cover of the lamp.
Instead of a hook, a fastening strip is often used. In this case, the procedure is similar to the algorithm for installing a lampshade.
Requirements
The lamps, fixed at the same level with the ceiling surface, according to their technological parameters, have a 30-degree lighting angle. Therefore, to create brightness, they must be installed at intervals of up to a maximum of 1 meter, and the distance from the last lamp should not exceed 60 cm to the wall. Provided that the ceiling height in the room is standard - 2.5 meters.
To create sufficient brightness for lighting the room, preliminary calculations are made so that the intersection of the corners of each spot is at a certain height, taking into account the height of the furniture and the configuration of the suspended ceiling.
Connecting wall-mounted lighting fixtures
Many types of lamps listed above are installed on walls. Local lighting is relevant if the room is divided into functional zones.
The light emanating from such sources makes the room more impressive and at the same time calm, helping to relax after a difficult day.
Installation of wall-mounted devices is carried out in the following order:
- Determine the location.
- The electrical cable is supplied.
- Make holes, having previously marked the attachment points.
- Fix the lamp;
- Check its functionality.
It should be noted! The cable must be de-energized during installation.
Comments:
Vector
The article is good, but one detail is missing. The wall lamp must be mounted at a minimum height convenient for its use. If it is installed near a chair and is intended for ease of reading on it, then it should be installed 5-10 cm above the level of the seated person’s head. If above the bed, then 50-70 cm above your head
Semen
The lamp near the chair works well in combination with a motion sensor. My dad likes to sleep in a chair, and when he falls asleep, the light turns off.
Zakhar
A wall lamp near the chair is an inconvenient and unjustified solution, in my opinion. What if you decide to move the chair to a different location? Isn't it better to use a floor lamp in this case?
Kilowatt
Zakhar, then you shouldn’t use a stationary lamp above the bed either. What if you decide to rearrange the bed? Kitchen? Move the bath to another room? Not all people move furniture, some leave it in its place
