When I decided to renovate the hallway, one of the first questions that arose was the question of choosing the type of ceiling finish and which ceiling lights to install. Having many years of experience in using PVC stretch ceilings in the bathroom and living room, it didn’t take long to choose the type of ceiling. I decided to install a PVC stretch ceiling due to its many advantages compared to other types of ceiling finishing.
The ceiling lights took some thought. On the one hand, I wanted to install modern LED spotlights, and on the other hand, in the hallway there was a homemade set of chandeliers and sconces, made with my own hands. I liked them, and I didn’t want to part with either the chandelier or the sconce.
Ultimately, a compromise solution was found: the chandelier and sconce at the entrance to the hallway should be left hanging in their original places, and in the hallway corridor, where a single-lamp lamp hung on the wall, spotlights built into the suspended ceiling should be installed.
Before installing a suspended ceiling, it is necessary to lay electrical wiring, and in order to lay the wires, it is necessary to develop an electrical circuit based on the type and number of lamps, the type of light bulbs and their power.
Selecting the type of light bulb for a recessed ceiling light
Before purchasing a lamp built into a suspended ceiling, you need to select the type of light bulbs and determine the required number of them to ensure sufficient illumination of the room. Currently, four types of lamps are used for installation in recessed ceiling lamps: incandescent, halogen, compact (they are also called energy-saving or fluorescent lamps) and LED. Each type of light bulb has its own advantages and disadvantages; in addition, it affects the minimum distance between the installation horizon of a suspended ceiling and a fixed one, which is a determining factor in rooms with low ceilings.
Using the table below, you can easily make the optimal choice of the type of light bulbs for a suspended ceiling, based on your requirements and boundary conditions.
| Table for selecting the type of light bulbs for recessed ceiling luminaires | ||||
| Technical specifications | Lamp type | |||
| Incandescent | Halogen | Energy saving | LED | |
| Minimum distance between main and suspended ceilings*, cm | 10-12 | 5-6 | 10-12 | 5-6 |
| Supply voltage, V | 220 | 12, 220 | 220 | 12, 220 |
| Luminous flux*, Lm/W | 10-15 | 15-20 | 50-70 | 80-120 |
| Maximum power*, W | 40 | 40 | 40 | 7 |
| Color temperature, °K | 2700 | 3000 | 2700, 3300, 4200, 5100, 6400 | 2700, 3300, 4200, 5100 |
| Service life*, hour | 1000 | 4000 | 8000 | 70000 |
| Price | Very low | Low | Average | High |
Technical parameters marked * may differ up or down depending on the design of the lamp and light bulb, the power of the light bulb, the manufacturer, and the type of suspended ceiling. For example, PVC stretch ceilings are afraid of heating above 60°C, and this limits the permissible power of light bulbs in recessed luminaires.
It should be noted that halogen lamps, designed for a supply voltage of 12 V and 220 V, are very sensitive to excess supply voltage and often burn out as a result. For 12 V halogen lamps, a step-down transformer or power supply (adapter) is required, for which you must remember, in case of installing a suspended ceiling without access to the interceiling space, to provide a special place on the wall.
You can obtain more detailed information about incandescent and halogen lamps, energy-saving lamps, and LED lamps by visiting the website pages specifically dedicated to them.
Instructions for installing the lighting fixture
The ceiling chandelier must be installed according to certain standards, otherwise you will not be able to achieve the desired result. An incorrectly installed chandelier to this type of ceiling can cause damage to it, which will lead to a loss of quality and attractiveness of the entire structure. It is these factors that should be considered before proceeding with the installation and selection of the lighting product itself.
Do-it-yourself work may not provide the level of quality required for this complex activity. This is due to the fact that installing a chandelier on a suspended ceiling is not as easy as it seems, so professional workers with the necessary experience are often necessary. Thanks to their work, all processes will go through as quickly as possible and the end result will satisfy even the most demanding clients. In any case, installing a chandelier on the ceiling requires compliance with certain rules.
As a result, it is possible to provide high-quality lighting in any room, and the organic use of all elements creates the most attractive interior that meets all the individual preferences of the customer.
Regardless of the type of lighting device purchased, its installation begins with the installation of a profile for fixing the suspended ceiling cover. Then two lines are stretched between the profiles, at the intersection of which the chandelier will be located. After this, the fastening element is installed in the concrete base. As noted earlier, the product can be suspended using different fasteners. Below are step-by-step instructions for installing the chandelier with each installation option.
Calculation of power and number of lamps
The power of the lamps depends on the size of the room (area, height and shape), the color of the walls and furniture, the purpose of the room and the preferences of the owner. Some people like bright light, while others prefer warm, diffused light of low brightness.
It is almost impossible to accurately calculate the power and number of luminaires, taking into account all factors. For an estimated calculation, you can use the illumination data presented in the table, thanks to which, taking into account the luminous flux depending on the type of light bulb, you can determine how many and what power lamps need to be installed in the room, depending on its type.
| Table for calculating the power and number of lamps depending on the type of room | ||||
| Type of room | Power required to illuminate 1m2 of room area, depending on the type of lamp | |||
| Incandescent | Halogen | Energy saving | LED | |
| Children's | 40 | 30 | 10 | 5 |
| Kitchen | 30 | 25 | 7 | 4 |
| Living room, bathroom, toilet | 25 | 20 | 6 | 3 |
| Bedroom, hallway, corridor | 20 | 15 | 5 | 2 |
| Utility rooms | 10 | 7 | 2 | 1 |
Let's look at an example of a calculation that I did for the hallway corridor. It was planned to install LED ceiling spotlights. The shape of the corridor is the letter T with areas of 2.8 m2 and 4.5 m2. The total area of the corridor was 7.3 m2. Let's calculate the required power of the lamps 7.3 × 2 = 15.6 W. Since the ceiling height was 2.75 m and the walls were planned to be painted in creme brulee color, taking into account the complex shape of the corridor, the optimal solution would be to install four ceiling spotlights with LED lamps installed in them with a small reserve, with a power of 5.5 W, supply voltage 220 V with pin socket GU5.3. The pin plinth for suspended ceilings is good because it has small dimensions, which is important when the inter-ceiling space is small in height.
Before the renovation, there were paintings by artists on the walls in the corridor, which were planned to be left in their original places after the renovation was completed. Therefore, for undistorted color rendition, white light LED lamps with a color temperature of 4000 K were chosen. If you need warm light, then you should choose a lamp with a color temperature of 2700 K.
It should be noted that it is not always advisable to use recessed ceiling lamps in rooms as the only source of lighting. A much better result can be obtained by using additional wall lamps or table lamps in the work or relaxation area. In this case, the power of the lamps in the ceiling lamps can be reduced.
If you have local lighting lamps, it is quite possible to completely abandon the lamps built into the suspended ceiling, replacing them with LED strip ceiling lighting. So, when solving the issue of lighting the premises of an apartment, there is room for creative imagination to unfold.
Possible errors and causes of failure during installation
If you know in advance what can cause unstable operation of LED devices, it is easier to avoid breakdowns.
LEDs don't work
If the device fails, black specks or spots appear on the elements. In this case, you should replace the element with a new one. Then check the serviceability of the device.
The most common problems that arise are:
- lack of glow;
- damaged part;
- the light turns on intermittently;
- the lamp flickers;
- The light turns off incorrectly.
Failure occurs under the influence of external or internal factors. The breakdown is usually eliminated by replacing one of the structural elements.
Diode bridge
Device failure may be caused by the following reasons:
- battery failure;
- external factors;
- misuse.
Selecting a wire for wiring spotlights
To lay the power supply wiring for four selected lamps with a total power of 22 W, any double-insulated electrical wire designed for wiring is suitable. A copper stranded double connecting wire, for example type PVA 2×0.75, is best suited. You don’t have to think about the cross-section of the wire cores, since the maximum current will not exceed 0.1 A.
When using 12 V halogen lamps in ceiling lamps, the wire cross-section must be calculated. One such 60 W light bulb consumes a current of 5 A. And if ten light bulbs are needed for lighting, then the current consumption will be 50 A.
Which tool to use
The type and specificity of the tools used during installation are largely determined by the design and purpose of the LED lamps. In normal everyday conditions, this is the following standard set:
- Electric drill.
- Screwdriver.
- Pliers.
- Wire cutters.
- Yardstick.
- Screwdriver.
- Soldering station with accessories.
In addition, in addition to the lighting devices themselves, you will need the following consumables:
- Wires.
- Mounting hangers, strips.
- Connector terminals.
- Dowels, self-tapping screws.
No less importance is attached to the choice of workwear for carrying out this kind of electrical work. The suit should be made of thick cotton fabric, shoes with a thick rubber base, and dielectric gloves.
Selection and installation of a recessed ceiling spotlight
The range of recessed ceiling lamps in any lighting store is huge, but they are all designed the same and differ only in the type of body finishing and additional decorations. Some models of recessed luminaires provide the ability to change the direction of the light flux within small limits.
Since I needed to illuminate the corridor, the choice fell on the simplest type of recessed lamp, which also included a base socket.
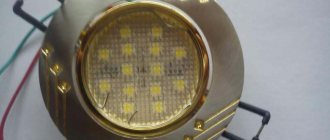
Any recessed ceiling lamp consists of a body, which is a shaped profile ring with areas for attaching two springs with ears. Depending on the type and power of the light bulbs, the lamp housings come in different diameters and may not have them, like the lamp in the photo above, or they may have an electric socket installed, usually E14.
A special place is occupied by LED ceiling spotlights, in which the LEDs are installed directly in the housing on a printed circuit board.
The light bulb in such a lamp cannot be replaced, and if it fails, you will have to replace the entire lamp or look for replacement LEDs. Such lamps are expensive.
For lamps without sockets, a spring in the form of a cut ring is used to secure the light bulb in the body.
The light bulb is inserted into the lamp body and is fixed due to the fact that the spring ring, unclenching, fits into a specially made groove in the body. This lamp is suitable for installing both halogen and LED bulbs. When replacing halogen bulbs with LED bulbs or vice versa, you must remember to check what supply voltage they are designed for.
To secure a ceiling spotlight in a suspended ceiling, regardless of its type, a hole is cut in a given location on the ceiling, slightly smaller than the outer diameter of the flange of the lamp body.
The ears of the springs are brought together by hand to such an extent that they pass into the hole in the ceiling. The ears are inserted into the ceiling hole and released. Leaning on the inner surface of the suspended ceiling, the lugs are pulled in until the flange stops against the lower surface of the suspended ceiling and thus fix the luminaire.
Such a simple design for mounting a ceiling lamp allows you to hide the elements of its fastening and easily remove the lamp if necessary. Simply grab the base of the lamp and pull it down.
After installing the lamp body on the suspended ceiling, a wire is threaded through it and connected to the socket using a terminal block. The socket is placed on the base of the light bulb, the light bulb is inserted into the lamp body and secured with an expansion spring.
Replacing the LED lamp
Despite the durability of LEDs, it is still not uncommon for even such reliable elements to fail. There may be several reasons for this - from random changes in the voltage characteristics of the network to improper operation or installation of LED lighting. In any case, if at least one of the lamps burns out, it must be replaced.
The lamp replacement technology is as follows:
- First of all, you need to turn off the voltage in the room or in the entire apartment, if it is not possible to turn off one room;
- Next, you need to carefully remove the locking ring that secures the protective glass of the lamp;
- The lamp is carefully removed from its place, and a new one is installed on it;
- All previous operations are repeated in reverse order.
It is best to perform these operations while wearing protective gloves. Their purpose is not to protect the technician, but to prevent damage or contamination of the LED lamp.
Electrical wiring diagram for spotlights
Before installing a suspended ceiling, after choosing the type of light bulbs, calculating their power, the number of lamps and their installation points, an electrical wiring diagram is developed. When developing an electrical circuit, it is necessary to take into account the points and methods of connecting the wires to each other and to the lamps.
Since wires were already coming out of the wall, to which the wall lamp had previously been connected, it was decided to connect the ceiling lamps to these wires. It was planned to install a suspended stretch ceiling made of PVC, and the wires came out above the level of the stretch ceiling, and, therefore, there would be no access to the connection points of the wires after installing the ceiling. Therefore, it was decided to make all wire connections in the most reliable way, twisting followed by soldering with tin-lead solder. The soldering points were marked on the electrical diagram.
When choosing a place to install lamps and chandeliers in rooms where there is a TV or computer, you must not forget that the angle of incidence of the light beam is equal to the angle of reflection. Taking into account this rule, lamps must be installed in places that exclude their reflection on the monitor screen, therefore, to select installation points for lamps, it is necessary to think about how the furniture will be arranged, in what place the TV or computer monitor will be installed.
When choosing light bulbs for a supply voltage of 220 V, installation of additional devices is not required. In the case of using light bulbs with a supply voltage of 12 V, it is necessary to provide a place for installing transformers or adapters, taking into account their overall dimensions and possible access to them for maintenance or repair.
Attention! Before connecting spotlights, to avoid electric shock, it is necessary to de-energize the electrical wiring. To do this, turn off the corresponding circuit breaker in the distribution panel and check the reliability of the shutdown using the phase indicator.
Installation instructions for the chandelier
The following accessories are provided for installing the chandelier:
- a hook fixed in the floor slab;
- linear or cross-shaped strip (linear products are used to fix track lamps).
The hook is a hardware with a rounded bracket, screwed with a screw end into a dowel hammered into the floor slab.
This method of fastening is suitable for light chandeliers, and for massive products it is preferable to use hooks with butterflies, to secure which you will need to drill the slab into the void, where the petals are straightened.
To tightly fix the chandelier cap, it is necessary to prepare a plywood base. A hole for wires and a hook is drilled in the middle of this base, and this structure is attached, following the example of a support platform for point light sources, to punched tape.
Installation of a chandelier is carried out according to the same scheme as the installation of spotlights:
- a plastic ring is glued to the place where the lighting fixture is attached;
- inside the ring, the fabric is removed with a stationery knife;
- pull the plywood base to the surface of the stretch ceiling;
- connection to the power supply is made;
- the chandelier is attached to a hook;
- the decorative plug rises until it comes into contact with the fabric, resting on the plywood base.
The technology for hanging a chandelier using a strip is more complex, but the general installation principles remain the same:
To attach the overhead strips, it is necessary to provide a base in the form of bars. If one plank is used as a suspension, a block 15-20 mm larger than the plank is attached to the floor slab on punched tape. If a cross suspension is provided, two sections are attached to the main beam at an angle of 90 degrees using corner fasteners. A hole for the mounting bolt is drilled in the middle part of the base;
- The bar is attached to the bars, and at the same time it is connected to the power supply;
- The chandelier body is mounted to the slats;
- The decorative trim rises to the attachment point, masking the wires and strip.
Installation of electrical wiring for connecting spotlights
After purchasing lamps, determining their installation locations, purchasing materials and equipment, you can begin installing electrical wiring.
Installation of electrical wiring for connecting lamps can be carried out at any stage of the renovation of the room, right up to the installation of suspended ceilings. But when repairing the walls in the corridor, it turned out that the light from the existing lamp was not enough. Therefore, the installation of electrical wiring had to be done first, and temporary sockets with energy-saving light bulbs were connected to the electrical wiring for lighting.
Before installing the wires, it is necessary to mark on the ceiling the installation locations of the lamps (circled in the photo) and the points where the wires are attached. To avoid sagging, the wires, depending on their rigidity, are fixed in increments of 40-50 cm.
To secure wires to the ceiling and walls, there are special dowel clamps (pictured on the left) and nail brackets (pictured on the right) of different sizes. To secure the wire with a dowel clamp on the wall, you need to drill a hole, put the dowel clamp on the wire and hammer the dowel into the hole. To secure a wire with a nail clip, you need to press the wire against the wall with it and hammer in the nail. Suitable for installation of wires and cables on wood, plastic, plaster.
Nail clips driven into a concrete plastered ceiling may fall out and remain on the PVC sheet. Therefore, this type of fastening was discarded. It turned out that I didn’t have dowel clamps at hand, so I used a simple and reliable method of securing the wires to the wall, using a clamp made from a vinyl chloride tube. A hole is drilled in the ceiling, a dowel is driven into it, and a self-tapping screw is screwed into the dowel through the hole made in the clamp. Since the weight of the wire is negligible, any self-tapping screw and dowel of the smallest standard size will do.
Making a harness for wiring ceiling spotlights
Since the electrical wiring for ceiling lamps after installing a stretch ceiling will be inaccessible for maintenance and repair, all wire connections in the inter-ceiling space must be made extremely reliably. Connections are usually made using terminal blocks, such as Wago. But the most reliable type of connecting wires is soldering, and this is the method I used.
To minimize the amount of work at heights near the ceiling, a harness was made in advance, which will only need to be fixed to the ceiling and connected to household electrical wiring.
To determine the length of the harness wires and soldering points, using previously made markings on the ceiling, the distances between the wires for connection and the installation locations of the lamps were measured. The measurement results were immediately applied to the electrical circuit, which was also an electrical circuit.
The harness was made of stranded copper wire with double insulation (the core is entwined with silk thread and covered with polyvinyl chloride). For convenience, the wires were twisted together into a pigtail.
After removing the insulation from the wires, they were tinned with solder. In the second section of the corridor, the wires had to branch out. Therefore, the wires were twisted in pairs and soldered with solder. Please note that to increase the reliability of the insulation, the connection points of the wires were made offset relative to each other.
Before the connection, insulating tubes were put on the wires, which, after soldering was completed, were moved to the connection points. To prevent displacement of the insulating tubes, they were fixed on both sides with cambrics tightly fitting on the wires. Together with the displacement of the connection points, this insulation method guaranteed the reliability of the electrical wiring. Insulating the wires could also be done using ordinary insulating tape. To avoid confusion, the cambrics were marked.
When bending the cross beam, a small section of the wire harness passed below the level of the suspended ceiling. This section of electrical wiring ran under the plaster. To ensure reliable insulation, it was additionally covered with a polyvinyl chloride tube.
After the harness was secured to the ceiling, it was time to connect it to the apartment electrical wiring. To do this, the length of the conductors of the double wire coming out of the wall was trimmed with a shift. Since the wire was old, its insulation became rough and, in order not to damage the wires, it was removed thermally using a soldering iron. The cores were stripped and tinned with solder, and insulating tubes were put on them.
All that remains is to wind the ends of the bundle onto the cores of the network wire, solder it with solder and put on the insulating tubes. Thanks to the technology of shifting the wire connections, tubes are needed practically for human safety and aesthetics. Electrical wires cannot accidentally connect to each other.
The connection point is suspended from the ceiling using a clamp with a self-tapping screw. The electrical wiring for the spotlights has been completed.
Temporary electric sockets in places where spotlights will be installed are connected using terminal blocks, the light bulbs are screwed in and the repair can continue.
Remote lighting control
You need to connect a remote lighting control system. What a great solution for dividing lighting into multiple zones without putting extra wires on the base switch. Such a controller does not require the console to be in line of sight. The radio signal encryption program reliably protects against interference from other consoles. Several controllers can be installed in one room. Each controller responds only to its own console. The maximum console coverage is 8 meters.
Switching modes are also carried out by a switch without using a remote control. Instantaneously turning off and on the circuit breaker leads to sequential switching of modes. Continuous shutdown resets the controller to its original state. Maximum load: 3×1 thousand watts. When connecting fluorescent or energy-saving lamps, the load power must be calculated based on the output power. The initial power of fluorescent lamps exceeds the nominal capacity by 2-3 times.
Let's say you need to install a new lamp somewhere, in a place where there are no special connections for it, and this happens quite often. In such cases, it is enough to connect this lamp to the nearest outlet and install a compact remote control included with the control panel. After this, you will be able to use the lamp, controlling its operation using this control panel.
In addition, with the help of an LED system, you can divide existing lighting groups into several, change the operating modes of lighting fixtures, and much more.
The difficulty in creating a remote control system for connecting a chandelier lies in where the controller should be installed. The controller is one of the most important elements of the remote control system. It receives signals sent from the remote control or fixed switch and executes the switching signal that is presented for the set lighting mode.
The parameters can be very different:
- turning on separate groups of lamps on a chandelier;
- adjusting the brightness of the lighting.
The stationary remote control has search functions on the remote control - the corresponding button is pressed and a signal is sent, including a melody or tone on the remote control, which greatly facilitates its search. As a rule, the controller is small in size and can be easily placed under the decorative cover of the chandelier, which covers the wiring on the ceiling.
You can install the controller in the wall using a fixed switch or in another place, for this you must run wires to it from the chandelier and the fixed control panel. Different controller models have differences in connection diagrams.
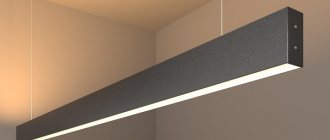
Plafoniers
Plafoniers differ from spotlights in their larger size. There can be one or several lamps here. All of them are covered with one lampshade. Plafoniers are especially effective in rooms with low ceilings, when it is impossible to hang a chandelier. This type of lamp is easy to install and has a wide variety of designs. Designers recommend installing devices with a metal body - they are durable, reliable and last a long time.
Marking
When using a level, you can first make all the marks below, and then use a laser to transfer these points directly to the ceiling.
When marking on the floor, it is convenient to work not with a tape measure, but with a pre-made template. For example, a piece of plinth or plastic cable channel, cut to a certain length corresponding to the distance between the light points.
To avoid damaging the floor covering, use paper tape.
After stretching the canvas, thanks to the marks on the floor surface, it will be very easy to transfer all these fastening points to the finished ceiling.
The main thing is to maintain a minimum distance from the edge of the hole in the PVC film and baguette.
It should be at least 2.5-3cm.
What is the driver for?
The peculiarity of LEDs is that as they warm up, the current passing through them increases. This can lead to failure soon after operation begins. A driver is required to monitor and regulate the voltage level during operation.
The choice of power depends on the minimum and maximum values of the LEDs. If you select a driver with too low minimum values to connect LED lamps, the dimmer will not be able to lower the voltage to the required values and the lamps will burn out. Conversely, when limiting the upper voltage, if more current power is required, the devices simply will not be able to ignite.
You can connect as many lamps as you like to the power source through one driver, since the current of the same strength will flow through them.