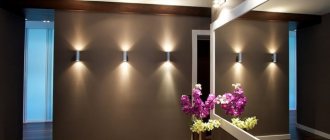
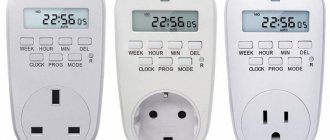
Wireless lighting for a room, kitchen or living room has moved from the category of exotic to the category of affordable and convenient devices available to everyone. Although it may seem unusual, wireless lighting control is organized very simply and reliably. Apart from the concept of a “smart home”, this technology saves a lot of time and money.
From a technical point of view, wireless control of light sources works like this: a receiver consisting of an antenna, a microcircuit, a signal amplifier and an actuator is mounted in a break in the electrical circuit of the device (preferably at the input). A transmitter with on and off functions is placed in a convenient place in the room. They come with a power supply (batteries) or a generator powered by hand.
When you press a key, an infrared beam, radio signal or, in recent models, Wi-Fi reaches the receiver antenna and signal amplifier. Next, the pulse excites the actuator, which gives a command to close the network and supply electric current to the lamps. At the same time, neither walls, nor partitions, nor distance from the electrical device itself are afraid of the impulse.
Advantages of wireless switches:
- installation of the device in any convenient place;
- safety for the elderly, children and animals;
- there is no need to trench walls and pull wiring;
- smooth switching on of the light (when equipped with a dimmer);
- long service life of the receiver and transmitter.
Range of uses
Manufacturers are now trying to place maximum emphasis on the absence of wires in almost any segment of technology. Lighting devices are no exception; supplying power to them is sometimes difficult or impossible.
Wireless wall lamps or mobile ones will be useful both as a night light and as lighting on the street or in the garage. This design will help illuminate hard-to-reach places, and will also save you in case of a sudden power outage.
Wireless lamps with a battery will help organize the decor of the room, and will also be very useful as emergency lighting.
Popular models
There is a wide variety of autonomous LED lamps on the modern market. Let's list a few popular models:
- OSCAR-10 – equipped with a metal housing and used in Downlight lighting systems. Economical, well protected from dust and moisture.
- YG-6820 – devices for emergency lighting of premises in residential, administrative and commercial buildings. Placed on horizontal and vertical surfaces using overhead or suspended mounting.
- SL788-B is a model characterized by high brightness and powered by SMD LEDs. The kit may include a motion sensor and remote control.
Characteristics
The main difference in such devices is the form factor and the type of flashlight itself. Various models are available from dim (as a night light) to the brightest.
It is important to pay attention to the duration of operation on a single charge. In this case, wireless battery-powered lamps are inferior to rechargeable lamps, which can be recharged without purchasing new consumables.Options designed for mounting to a vertical plane are usually lighter in weight; based on the type of fastener, they can be designed for a bracket, but wireless lamps with Velcro are no less popular.
There are garland-like lamps on the market, in which you can switch modes, set them to constant lighting or flickering.
Of course, in addition to functional differences, the devices are varied in design. They come in a variety of designs, from the most inconspicuous to the artsy or cartoonish.
Requirements for bath lighting
In bathhouses, especially in the steam room, high humidity constantly forms, and the wood from which the bathhouse is built is very fire hazardous and prone to rapid combustion. Therefore, strict requirements are put forward for lighting in such places.
- The wiring must be reliably protected from moisture. It must be covered with a special layer that prevents moisture from getting on the exposed wires. The integrity of this layer must be carefully monitored: even minor damage can result in serious consequences.
- Moisture insulation also applies to the lighting elements themselves; they must have serious protection so that liquid cannot get inside.
- In addition to humidity, devices are constantly exposed to high temperatures. Please note that lighting fixtures must be heat-resistant.
- High-quality insulation at all joints is an indispensable condition for safety.
Obviously, the list of requirements is quite long and requires serious investments, financial and physical. Many bathhouse owners therefore strive for simple and safe, spectacular and effective lighting methods.
Advantages and disadvantages
It’s not for nothing that the choice of many buyers falls on this type of lamps; let’s look at why they are so attractive:
- How to choose a night light for the bedroom: tips and tricks
- LED lamps - which are better? Review of the most popular and reliable models, with photos and videos!
How to choose a color temperature - see here! Table, instructions, overview of bright and optimal color temperature for the room
- Autonomy of work is a major plus. No wires, no dependence on voltage surges;
- The ease of installation is also attractive. There is no need to damage the walls and then repair them or load them with boxes for wires;
- Freedom to choose your location. The device will work equally well both in a room and in a gazebo in the yard;
- The motion sensor is a useful feature that allows the lights to appear where a person is present and turn off when they leave. Thus, this option is economical and convenient, because... no need to look for the switch in the dark.
Probably the only disadvantage of purchasing such a lamp is that the batteries will still have to be changed. It can fail at the most unfortunate moment if you do not control this issue by keeping a charged battery or a set of batteries in reserve.
What is needed to illuminate a cottage or house without electricity?
Types of solar power plants
- solar power plant 300 -600 W
- solar power plant 1 - 3 kW
- solar power plant 4 - 6 kW
- network solar power plants
The best solution is a hybrid solar power plant for lighting a house up to 50 square meters. m
The use of such a station will remove the issue of electricity costs for a long time.
This option will also be a good way out of the situation with frequent power outages.
The power plant operates by connecting to the city grid and autonomously through solar panels.
Electricity generation per month reaches 75 kW/h.
The installation area of the solar power plant is 4 sq.m.
The system operates silently, which promotes good rest.
It is possible to install the station on any terrain and degree of complexity of the house structure.
What is included in a hybrid power plant for a summer residence
| * deep discharge batteries |
| * hybrid UPS inventory * charge controller * connectors * solar panels |
The service life of the solar power plant is at least 25 years
How to choose
Choosing the best lamp for your needs from a large selection is not so difficult if you take into account some factors that the buyer often forgets about:
- The area of the room that the device should illuminate. It may turn out that several devices are required due to their low power or the presence of places where light simply cannot penetrate;
- Lamp function. Will it be enough to install it or will basic lighting be required;
- The need for a displacement sensor. It is important here whether there are small children or animals in the apartment, as well as how active you are in this room; no one will like it if the light goes out on its own;
- External or internal lighting;
- Required brightness and availability of mode changes;
- Battery life.
Having decided on the necessary parameters, you can go to the store.
However, having familiarized yourself with all the selection criteria, you will be able to choose your option in the online store, where you can set the selection filters according to the required parameters, and then simply choose from the suitable models purely externally, based on the photos of wireless lamps that the search offers.
Manufacturers
Several domestic and Belarusian brands also play in the affordable segment, with the bulk of components coming from China. The advantages of the circuits—their price is $20–40—are a guarantee, calculation for voltage drops in the network and high strength of components; the disadvantages are the origin of the “internals” from the same People’s Republic of China.
Finally, in large retail chains you can find wireless light switches produced in Europe and the USA. These devices are expensive (the cost can reach $100–200), but the quality is beyond doubt, and many of the devices are integrated into the smart home system thanks to the support of the infrared protocol and Wi-Fi signal.
What you need to know about wireless devices:
- price directly affects quality;
- there are switches on the market from China, the CIS, Europe and the USA;
- the cost ranges from $2 to $200;
- in Russia and Belarus the production of such products has been mastered;
- The presence of a dimmer saves energy and protects the lamps.
Photos of battery-powered wireless wall lights
- Vertical blinds: features of the mechanism, pros and cons, photos of beautiful design
LED duralight - device, types, options and connection diagrams (130 photos + video)
How to choose an energy-saving lamp for your home - types, characteristics and application features (105 photos)
Did you like the article? Share

0
Step-by-step instructions for organizing lighting in the garage
The process of organizing lighting in a garage requires following a certain sequence of actions. First, a calculation must be made of the required number of lighting fixtures and their power, taking into account the dimensions. After this, you need to accurately determine the location of light sources in the general and local systems.
A wiring diagram can then be drawn up. You need to double-check that the lighting fixtures are positioned correctly. Then you need to buy all the necessary tools and materials. After this, it is necessary to install electrical wiring and light sources. The last step is to diagnose the correctness of the installation.
Choosing a wiring diagram in the garage
When arranging lighting in a garage, the simplest schemes are most often chosen, which include the following elements:
- introductory machine;
- machine for common sockets;
- automatic power supply for the entire system;
- wiring and locations of consuming elements.
When installing LED lamps, a step-down transformer is also included in the circuit. For a welding machine, inspection pit and powerful devices, the installation of special automatic triggers is required.
Wiring can be either hidden or external. The hidden version must be installed before applying plaster. It is often located in the cracks between blocks. External wiring is installed in plastic flexible pipes or cable ducts. This is necessary to protect the wires from accidental damage, moisture and rodents.
Switches should not be located too close to gates, windows and jambs. In addition, they must be located at least 15 cm from heating devices. Wiring turns must be at right angles at a distance of at least 10-15 cm from the ceiling and floor. In this case, the sockets must be located at least 60 cm above the floor level.
Calculation of the number and power of lighting points
The garage illumination standard is 20 lux. This unit is a quotient of the luminous flux, denoted as Lm, divided by the number of m².
Thus, in order to calculate the required illumination, it is important to calculate the area of the garage. If its length is 6 m and its width is 4 m, it turns out that the area of the room is 24 m². To calculate the required level of illumination, 20 lux should be multiplied by 24 m². Thus, the illumination of the garage should be 4800 Lm
The result should then be divided by the luminous efficiency of the selected type of lamp. Additionally, you need to take into account the color of the walls, ceiling height and other parameters. It is often necessary to add up to 10-25% of illumination to the result obtained in the calculation.
Selecting the location of light sources
It is recommended to install general lighting in the garage. To ensure that the flow falls evenly onto the floor of the entire room, ceiling lights are installed around the perimeter or in the center of the garage. If the height of the walls is more than 2.5 m around the perimeter, you can install wall lighting fixtures.
In addition, it is recommended to provide spot lighting for the most frequently used areas of the garage. They are mounted above tables with tools, a workbench and areas where repairs of individual parts will be carried out. Spot lighting in other areas may be required.
Required tools and materials
When working on a lighting system installation, a number of tools and materials may be required. Required materials include:
- cable;
- switches;
- lamps;
- corrugated pipe;
- machine guns;
- lamps.
Tools that may be required when installing a lighting system include:
- multimeter;
- drill;
- wall chaser;
- perforator;
- drill;
- screwdriver;
- pliers;
- wire cutters;
- building level.
When installing the wiring, you will need a container for preparing the solution, a spatula, a construction knife, etc.
Sequence of work
Making your own garage lighting is easy. First you need to make markings taking into account the location of not only the wiring, but also switches, lamps and sockets. You need to put the car in the garage to determine the comfort of the lighting. After this, you should take the car out and use a crown to make all the necessary holes in the walls for wiring, sockets and lamps.
The cut must be cleaned with a hammer drill. After this, you need to secure the corrugation to the walls. Then the electrical wiring is installed. Afterwards the installation of the panel, machines, lamps and sockets is carried out. The last step is to diagnose the system's performance.


