Anyone can change lighting fixtures, but only if he knows the principle of fastening a light bulb or lamp body. If you don’t have such knowledge, you won’t be able to replace a lamp using trial and error, but it is quite possible to damage the ceiling fabric.
The enormous popularity of suspended ceilings is explained by two equivalent factors:
- practicality and beautiful design of the canvas;
- spectacular and at the same time efficient lighting systems.
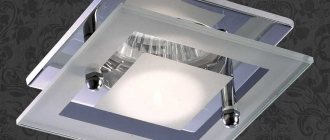
Stretch ceiling with spotlights.
Maintaining the functionality of such a ceiling is quite simple: wash the canvas occasionally, change the burnt-out spotlights in the lighting. And here ordinary people are faced with an unexpected situation - any family member can change lighting fixtures, but only if they know the principle of fastening a light bulb or lamp body.
If you don’t have such knowledge, you won’t be able to replace the lamp using trial and error, but it’s quite possible to damage the ceiling fabric. This work will help fill the gap in knowledge, where it will be explained in detail how to remove a recessed lamp from a suspended ceiling, as well as a chandelier and a surface-mounted lamp.
What problems might there be during dismantling?
During dismantling, some problems may arise if you deviate from the instructions. These include the following:
- Increased spring pressure. This leads to destruction of the groove contours.
- Electric shock. This happens in cases where a person forgets to turn off the power to the lighting fixtures on a suspended structure.
- Damage to fingers due to spring latch. This happens in cases where the element is just beginning to move out of its seat.
In general, the work is not difficult to complete, but you will have to act carefully and carefully. If you do not have the necessary skills, read the instructions more carefully or watch the video
Actions must be slow and correct. You shouldn't do anything unnecessary. If you are not confident in your abilities, entrust this work to professionals.
Features of installation and dismantling of a spotlight from a suspended ceiling
Useful tips
It is important to remember that before starting the dismantling process, it is necessary to de-energize the network by turning off the switching devices in the switchboard. When dismantling a chandelier from a suspended or suspended ceiling, you must do this very carefully so as not to damage the ceiling covering. Because restoration work will not be cheap. The tool at hand must be in good condition. Mandatory insulation of the wires after removing the chandelier to avoid short circuits or accidental exposure to current through touching bare wires. You shouldn’t try to change or remove for a while if you don’t have the skills
It is better to ask experienced electricians.
Previous ChandeliersHow to properly attach a chandelier to a suspended ceiling Next ChandeliersChoosing ceiling chandeliers with a fan
Thank you, it helped! It didn’t help
How to replace a lamp in a luminaire?
If desired, you can only replace the light bulb. This will allow you not to remove the device and guarantee efficiency of action. The first thing you have to do is turn off the power supply to the branch that is connected to the device itself. This will allow you to protect yourself when replacing the light bulb. The next step is to find the required stand. It will make sure that the installation of the new light bulb is quick and comfortable.
Attention! It should be remembered that the work must be carried out carefully and accurately. If you ignore these expert tips, there is a high chance of tissue damage
This should not be allowed, so you should use only screwdrivers and not other sharp objects.
The work algorithm is presented in the following stages:
- The light bulb is unlocked in the product body. For this purpose, a fixing ring made of calcined wire is provided.
- When unlocking, hold the ring, as it can spring and slip out of your hands.
- After this, begin to unscrew the light bulb.
- They look at the power on the unscrewed product and purchase a similar new version.
- It is mounted into the lighting fixture itself.
- Finally, the fixing ring is installed in place and fastened.
What should you do first?
First of all, it is necessary to de-energize the power circuit. This is to reduce the risk of electric shock. If it is not clear from the position of the switch whether it is on or not, then it is better to completely de-energize the apartment with a common switch on the apartment panel. From this advice it follows that this work is best done during daylight hours in good natural light.
For working at height, you need a sturdy stepladder whose legs are securely locked to prevent folding. You can use a table if its height allows you to reach the installation site.
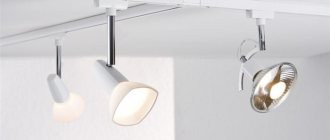
What kind of lighting do you prefer?
Built-in Chandelier
Sliding stepladder
Step-by-step instructions “for dummies”
The most important thing in replacing a lamp is not to rush.
Perform one action after another strictly according to the instructions:
Double-check that the circuit breaker is turned off. Remove the burnt out bulb from the housing. Using a straight screwdriver, lightly pry up the decorative bezel from the edge, leaving only a small gap. Then carefully insert another small screwdriver. Proceed carefully and slowly. Move two screwdrivers at the same time to widen the gap
Do not remove the headband completely, leave a gap large enough for your fingers to fit through it easily. Press the latches onto the light bulb body and carefully pull it out. At the last stage, unscrew all the screws holding the wires in the terminal and disconnect the contacts.
If you have a good understanding of what parts the structure consists of, slowly begin to put the lamp back together in the same order in which you removed all the elements.
PHOTO: strojdvor.ru Before installing a new lamp, make sure that it is the right size. It is best to purchase exactly the same light bulb that was there before and not experiment
Connection diagram
First of all, you need to turn off the electricity using the circuit breaker located in the electrical panel on the landing. The absence of voltage is checked with an indicator screwdriver.
There should be three wires on the ceiling: one is “zero”, the other two are “phase”. The insulation is removed from the wires; the length of the exposed tip should be approximately 3-4 cm. Separate the wires in different directions to avoid short circuits.
Then you need to turn on the electricity again to determine which of the wires are phase. To do this, touch each of the wires with an indicator screwdriver. If the wire is a “phase”, then the indicator will light up, if the indicator is not lit, then it is “zero”. It is advisable to mark “zero” with electrical tape. If you have a voltmeter, it is better to use it, because working under voltage is still dangerous.
In modern houses, wires are color-coded: the blue wire is “zero”, the brown wire is “phase”, and maybe yellow is also grounding. The chandelier should be accompanied by instructions with recommendations for its installation. If it states that the design of the lamp involves grounding, this must be taken into account.
The phase wires are led out to the switch, the “zero” goes into the installation box.
If the switch is single-key, you first need to connect the wiring in the chandelier itself. The blue ones from each light bulb are connected to other blue ones, brown ones to brown ones. The “zero” wire from the ceiling is connected to the “zero” wire from the chandelier. The phase wires from the ceiling and the chandelier are also connected to each other.
If there is no color marking, then you can arbitrarily connect one wire from each light bulb and similarly connect the remaining wires together. Lead one connection to the “neutral” wire on the ceiling, the other to the phase.
You should know that you cannot twist copper and aluminum wires together. An electron pair from these two metals causes destruction of the contact. A special block is used to connect such wires.
How to remove a lamp from a suspended ceiling: remove the chandelier
Removing a chandelier from a suspended ceiling is not difficult at all! If you are too afraid of getting an electric shock, then turn off the power to the entire apartment. This will completely protect you, and the entire procedure for removing the chandelier will go smoothly.
If you have a massive chandelier, then to change the bulb you will have to remove the entire structure
Step-by-step instructions for removing a chandelier from a suspended ceiling:
- If your chandelier is hung on a hook, then remove the protective cap, insert your hand into the gap formed, and feel for the hook on which your chandelier is held. Securely grasp the chandelier at the mounting location and remove it along with the wiring. Now let's work with the wire. Carefully remove the insulation and disconnect the wires. Ready!
- To dismantle a chandelier with a cross-shaped bar, you will have to perform a little more steps. First, remove all elements from the lamp: lamps, shades, decorations, etc. Next, unscrew the cap. Under the hood you will find the fastening system. Now disconnect the pendants by unscrewing the screws and pull out the chandelier along with the mounting structure. Next, remove the insulation and unwind the wires. Your chandelier is free!
Another way to clean a dirty crystal chandelier
You can clean crystal parts with an alcohol solution (100 grams of alcohol diluted in five liters of water). After rinsing the frame and pendants in running water, the chandelier is assembled and returned back to the hook.
Here are two more tips on “How to clean a crystal chandelier with pendants”:
- Half a glass of mustard powder, half a glass of vinegar and the same amount of alcohol are diluted in three liters of water. The chandelier, removed from the ceiling, is simply lowered along with the pendants into the resulting detergent. After allowing the water to drain, the pendants are wiped dry with a dry and soft cloth.
- Ten potatoes are boiled “in their jackets” in three liters of water. The chandelier, removed from the ceiling, is lowered into a chilled potato solution and, after standing for some time, is immersed in a rinse aid prepared with one’s own hands: two tablespoons of ammonia and a tablespoon of vinegar are dissolved in a container with two liters of cold water. As in the previous tip, allow the remaining product to drain from the pendants, and then wipe them dry with a dry cloth.
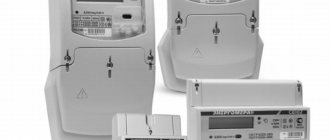
Types of socles
How to remove an LED lamp from a suspended ceiling depends on the type of base and the method of its fixation. There are 3 types used in lamps:
- Threaded. They are designated by the letter E. In Russia, sockets E14, E27, E40 are used. Removing such a lamp is simple - you need to hold the bulb with your fingers and twist it counterclockwise.
- Pin base G. The pins perform the function of fastening and supplying electricity to the lamp. Emitters with direct contacts are easy to remove - just pull the device towards you. Products with thickening at the ends must first be turned counterclockwise 20 degrees, then removed from the body.
- Bayonet V. Such sockets in Russia and Europe are used only in vehicles. Reached by turning counterclockwise.
Each type of base is divided by diameter and method of fixation. This must be taken into account when purchasing a new emitter.
Chuck selection
When choosing this product, first of all, you should give preference to a well-known and trusted brand.
To avoid difficulties with fastening, the design of the new socket must correspond to the type of product previously used in the chandelier. It is better to give preference to a ceramic product due to its reliability during operation.
Basic selection requirements:
the power of the lamp that is planned to be connected; diameter corresponding to the type of cartridge; marking; parameters: dimensions, power; the price should not be too low.
The cost depends on many factors, in particular the type of product and its manufacturer. Today the market provides consumers with a wide choice of both Russian and imported brands.
The price range is quite large:
- Type E27:
- domestic production – 25 rubles;
- China – 45 rubles;
- Italy – 130 rubles.
- Type E14:
- domestic production – 20 rubles;
- China – 20 rubles;
- Italy – 90 rubles.
- For halogen lamps:
- domestic production – 15 rubles;
- China – 30 rubles;
- Italy – 150 rubles.
How to remove a recessed ceiling light
A special feature of installing spots in a suspended ceiling is that the device is attached not to the film itself, but to a special structure - a mortgage. This part is located behind the canvas and serves as a load-bearing base. It is from this that you need to remove the lighting device. The lamp itself is attached to the mounting platform using two spring clips.
The dismantling process consists of several simple operations:
- Turn off the automatic switch responsible for the corresponding group of devices.
- Pull the lamp body slightly so that a small gap is formed.
- Slowly remove the lighting fixture, first from one side, then from the other, until your fingers can reach the fasteners.
- The latches are pressed and held firmly with your hands, and the lamp body is carefully removed from the ceiling.
All actions must be careful. Do not allow the latch holding the device inside the mortgage to hit the PVC film
Such carelessness can lead to damage to the finish.
There are other problems too. Often the spring latch hits your fingers. Therefore, it is necessary to hold the clamps securely while removing the device. If you do not de-energize the circuit on which dismantling is being carried out, when disconnecting the contacts, electric shock may occur.
Instead of the old device, insert a new one of the same size. Installation is carried out in reverse order. Sometimes dismantling is necessary to replace light bulbs.
Dismantling is carried out in exactly the same way, only even easier, because there is no risk of damaging the material, as is the case with a thin stretch fabric. To remove the built-in lamp from the suspended ceiling, you can use a screwdriver, this makes it easier to pry up the ring and reach the spring.
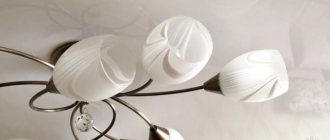
Installing and removing the lampshade
In the first picture, the lampshade is screwed into the body of the lighting fixture. Do not tighten the connections too much, then it will be difficult to unscrew them back. This design was popular in Soviet times, but is rare on modern models. Sometimes the lampshade is mounted by screwing in bolts or a latch
It is important here to calculate the forces and not squeeze the plastic or glass, which can crack
In models from 10-20 years ago you can find a lampshade with a fastening system in the form of two springy plastics mounted under a cartridge. They securely hold a plastic or glass lampshade, pressing it to the seat. In order to remove the lampshade, you need to unscrew the light bulb, press the plates against the socket and pull it towards you. Installation occurs in reverse order. You just need to hold the lampshade well so that the plates do not damage it with a sharp blow. Lampshades on a metal tripod are less common.
The most common method of attaching the lampshade is a plastic ring screwed into the cartridge thread. Sometimes when unscrewing the ring, the insulating part of the cartridge is unscrewed along with it, so you need to be extremely careful.
Tools you will need for the job
Spotlights are very convenient, compact, and most importantly, they shine brightly, but, like all other lamps, they burn out. Most often, you just need to replace the light bulb itself, but sometimes the lighting fixture itself burns out, and then you need to remove it completely to replace it with a new device.
To easily remove the lamp from the ceiling without damaging it, use the following tools:
- network voltage tester;
- screwdriver with indicator;
- two regular flat screwdrivers;
- pliers;
- terminal block;
- Phillips screwdriver;
- drill with a long drill bit suitable for working with concrete.
Experienced craftsmen do not recommend using electrical tape to connect wires; the result can be very disastrous. It is much better and more efficient to use a terminal, and you do not need to have any special skills or be good with electricians.
PHOTO: ellektrik-sochi.ru If you cannot determine the model of light bulbs, take them with you to the store and ask the sales assistant to select lamps of the same configuration. Never buy at random, you can easily make a mistake
Preliminary preparation
When removing lighting fixtures from the ceiling, you must comply with safety requirements. Initially, de-energize the wiring. To do this, in private houses, both plugs are turned out in the electrical panel, and in apartment buildings, the safety switch is turned off in the distribution panel on the staircase at the apartment meter.
Removing the protective casing and pulling out the lamp
How to remove a lamp from a stretch ceiling
For dismantling you will need a small set of tools.
What you need for work
- Tester
- Indicator screwdriver set
- Pliers
- Insulating tape
The procedure itself is simple, but you must strictly follow safety rules. Before starting work, the line leading to the device must be de-energized. It is advisable to make sure that this is indeed the case and check the presence of voltage with a tester or an indicator screwdriver. Then dismantling begins. We offer step-by-step instructions on how to remove a spotlight from a stretch ceiling.
Dismantling instructions
- We remove the decorative grille or lampshade glass, if there are such parts.
- Remove the light bulb from the socket. Depending on the type of base, this is done differently. It is taken out or unscrewed, helping yourself with a flat screwdriver.
- Take the second screwdriver and place it in the small gap that has formed.
- Carefully unscrew the housing. We try to do this evenly. Twist until you can freely place your fingers in the gap formed.
- Find the spring latches on the body and press them out with your fingers. We do this very carefully so as not to tear the ceiling film.
- We remove the device from its mounting socket.
- Unscrew the screws that are located on the terminal block. We release contacts.
The body is now removed from the tension structure. You can carry out all the necessary manipulations with it.
The video shows the process of removing the lighting fixture. It also shows how to insert it back, but we will return to this issue later.
Safety precautions
Regardless of what kind of chandelier you get, you must follow safety rules. They are quite simple:
- Before removing the lamp, turn off the power.
- Allow all parts to cool.
- If you cannot reach the lamp directly from the floor, use a stepladder; in extreme cases, a strong table will help you, but unreliable structures such as a stool placed on a table are dangerous.
- The work must be carried out with an assistant who will hold the stepladder and provide assistance in a timely manner if the wiring suddenly breaks somewhere and you receive an electric shock.
- Your hands should be dry.
- If you have washed the lampshade and want to hang it back, dry it thoroughly.
How to remove a shade from a ceiling light
and finally change the light bulb in it! vvv? OPEN!?vvv.
How to change light bulbs in a suspended ceiling
As practice shows, in order to emphasize the beauty of PVC canvas, spotlights are used, which are placed in a certain order. Replacing a light bulb in a regular chandelier is quite simple, while with PVC sheets things are much more complicated. To remove the light bulb, you have to remove the entire device. The step-by-step algorithm of actions completely depends on the type of lamp used.
It is important to take into account the fact that you can often find lighting devices with LEDs on sale that are one piece. In such cases, the entire device must be replaced
Attention! If there is a need to change a spotlight on a suspended ceiling or replace a light bulb, it is better to do this as soon as possible
How to change an LED lamp in a suspended ceiling
Today, LED lamps are especially popular. This demand is due to efficiency and fairly bright lighting.
To remove a lamp from a suspended ceiling, you should adhere to the following rules:
Despite the fact that LED lamps also have to be changed periodically, they are still more economical than other types.
How to change a halogen lamp in a suspended ceiling
As practice shows, halogen lamps installed in lighting structures on PVC fabric are much more difficult to replace than other types. Despite the presence of some difficulties that may be encountered during work, halogen lamps have some advantages, among which the following points can be highlighted:
- such light sources emit a rather soft and pleasant luminous flux, which is perceived quite well by humans;
- The service life is about 5 years, and if we compare the indicator with conventional lamps, then this period is impressive.
Before unscrewing the light bulb in the suspended ceiling, you will need to turn off the electricity. Once you have gained access to the halogen lamp, you will need to remove the fasteners and carefully remove the lamp from the socket.
How to unscrew a stuck light bulb from a stretch ceiling
Often you may encounter a problem when you need to remove a stuck light bulb from a stretch ceiling. Such problems occur very often. In such situations, some effort is required to remove the flask. If this doesn't help, you can try using pliers.
How to change a light bulb in a suspended ceiling: video
As practice shows, to carry out work on replacing lamps in a lamp, you need to adhere to a certain step-by-step work algorithm. If it is not possible to replace a light bulb in a suspended ceiling in this way, you can watch a video on this topic and clearly see all the stages of installation and dismantling of lighting fixtures on PVC canvas.
How to replace small lamps with large ones
Sometimes the lighting scheme is poorly thought out and there is not enough light in the room. Then there is a desire to install larger lighting fixtures. Let's look at how to do this.
The first step is to dismantle the spot. Then a thermal ring of the required diameter is glued onto the stretch ceiling fabric, so that the old tread ring is inside. After the part is firmly fixed, the film is cut out, creating a large hole.
Then the embedded platforms are adjusted to the diameter of the base of the new lamp. To do this, you need to carefully cut out the excess plastic rings with a knife so that the device body fits freely into the hole. When the site is ready, the lamp and light bulbs are installed.
You can replace lighting fixtures yourself, without the help of specialists. But if you have doubts about your own skills and knowledge, it is better to entrust this work to the specialists who installed the suspended ceiling. After all, careless actions lead to damage to the material, and improper handling of electrical appliances results in serious injuries.
no comments yet.
We will send the material to you:
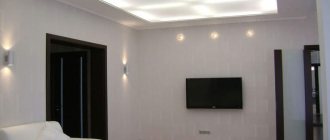
The ceiling can get its sophistication and attractive appearance not only thanks to various unique shapes and colors, but the multi-colored illumination on it will look no less impressive.
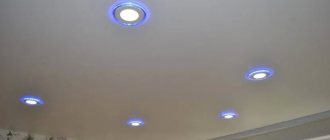
The most popular option is spotlights. They are installed in a certain number on the ceiling: usually more than a couple of pieces. To add beauty and install lamps, you need to know how to mount them correctly.
How to remove a light bulb from the ceiling
The lamps are not fixed in the suspended ceiling, but mainly. The frame of the spot is installed to the main ceiling; only the decorative part is located on the canvas. The socket is fixed to the frame or hangs on a wire, the light bulb itself is fixed in the lamp.
Replacing a light bulb in a suspended ceiling must comply with four basic rules:
- use a stable ladder to remove the lamp;
- work with gloves and use special tools;
- do not lose the stopper when replacing MR16 lamps;
- remove the lamp carefully without damaging the suspended ceiling.
To work you will need the following tools:
- stable stepladder;
- indicator screwdriver;
- pliers;
- flat and Phillips screwdrivers;
- stationery knife;
- terminals.
Before replacing, you need to understand the design of the spots and light bulbs. They consist of two parts - the platform and the lamp itself. A lighting device is held on the platform. A decorative ring is placed on the ceiling canvas, which also serves as a retainer for the film from tearing. Lamps for lamps are different. They can have the usual appearance - a bulb and a base, or be built into a housing that removes heat. If the light source is one piece with the body, everything changes together. If the lamp is inserted into the housing, only the bulb with the base is replaced.
How to remove an LED light bulb from a suspended ceiling:
- Carefully remove the support ring. It can be picked up using a special tendril.
- To get the lamp, you need to press the springs inward and pull it down.
- Remove the fastener from the damaged lamp and unscrew it.
- Strip the insulation and disconnect the wires.
- Carefully read the instructions for the new light source.
Afterwards, you can begin installing a new lamp and reassembling the chandelier.
Fastening elements - do not break!
The lampshade is attached to the frame of the lamp itself
using special fasteners. They can be made in various form factors: studs, latches, latches, etc.
The most convenient to use are valves. They are made in the manner of a pendulum. That is, just click on them and they open. They have an axis, which is often a fastening screw.
At the same time, let’s not forget that the removal of the lampshade is carried out at a height of several meters. To complete the process, you must follow basic safety rules - use a stable stepladder.
How to change an LED lamp in a suspended ceiling
LED lamps are very profitable and convenient. They consume a small amount of electricity, shine quite brightly and serve regularly for several years. One way or another, the work of an LED lamp sometimes comes to an end and with it the need to change such a lamp.
Although LED lamps are characterized by durability, they still need to be changed from time to time
Replacing the LED lamp is as follows:
- Take a new lamp and make sure it works properly using a tester (sometimes this procedure can be done in a store).
- When starting the replacement, turn off the electricity in the room.
- Provide yourself with autonomous lighting. It is unlikely that you will be able to complete the task blindly.
- Remove the holder from the damaged light bulb.
- Remove insulation from the wiring.
- Disconnect the wires.
- Carefully read the instructions for the new lamp.
- Install the lamp according to the instructions.
- Reconnect all wires and restore electrical insulation.
- Hide the wires and attach the LED light cover.
- Use screws to attach the frame to the box.
Possible mistakes
Before replacing the lamp, you need to turn off the electricity in the apartment.
The most common mistakes during installation and dismantling include:
- Replacement with power on. This mistake should not be made; it can lead to serious injury.
- Trying to change the lamp immediately after turning off the light. Even LED sources can get a little warm, so you need to wait until they cool down.
- Selecting a radiator with an unsuitable base.
- Touching a halogen lamp with bare hands. There will be traces of grease on the source, which may cause the flask to crack.
- Using higher wattage light bulbs. This problem is especially relevant for halogen lamps. The GU5.3 base does not make good contact with lamps above 40 W, so it is better to use fluorescent or LED sources. It is not recommended to install lamps with a power higher than 35 W on suspended ceilings.
It is important to pay attention to the choice of lamp. You should carefully inspect the device for defects and check the strength of its parts. It is not recommended to buy cheap LED sources from unknown manufacturers
Such products can quickly fail, do not meet the declared characteristics, and have flickering. It is better to purchase a lighting device from well-known companies
It is not recommended to buy cheap LED sources from unknown manufacturers. Such products can quickly fail, do not meet the declared characteristics, and have flickering. It is better to purchase a lighting device from well-known companies.
Detergents
Manufacturers offer a wide range of care products for lamps made from different materials. Washing them using home methods gives equally effective results. Can be used:
- Ammonia. Add 1-2 tbsp to a bowl of warm water. l. facilities. You can process not only simple glass, but also crystal.
- Vinegar and salt. The ingredients are taken in equal quantities (1 tablespoon each) for washing the removed pendants. After thorough treatment with the solution, all elements are wiped and dried.
- Laundry soap. You need to grate high quality soap and dissolve the shavings in warm water. You can clean any surfaces and even stubborn dirt. To ensure that no streaks are visible after drying, you need to add 1 tbsp. l. baking soda. It will prevent the formation of a film.
- Dishwashing detergents. This option is most suitable for washing kitchen lamps, on which not only dust, but also soot accumulates, and greasy fumes are also deposited. It is enough to dissolve a few drops in water, wipe all the elements and wipe dry with a soft cloth.
- Shampoo. Removable lampshades made of plastic or fabric just need to be washed in warm water, adding hair wash. First you need to remove the dust with a soft bristle brush. To prevent streaks, wipe them dry with a moisture-absorbing cloth.
They can scratch the glass, and it will be impossible to restore it.
Read more here
Types of socles
Regardless of what type of lighting device is used to illuminate the room: energy-saving, halogen, LED, incandescent, you need to decide on the type of mounting. When choosing, the design of the lamp is taken into account. In order to figure out how to change a light bulb in spotlights, you need to learn about the types of bases.
What is a base? This is the part of the light bulb that is used to mount the structure in the socket. In addition, it serves to conduct electricity. Without a base, the lamp will not work. Despite this, baseless devices are sometimes used. They are designed to conduct light in automotive applications.
The design of the base is simple: the body is made of metal or ceramics. Inside are the elements of the light bulb, outside are the contacts for connection.
Each type is marked with letters and numbers. The letter means type, the number means characteristic.
Screw
The most common type for apartments is a screw base. Marked with the letter "E". This is the oldest type of light source mounting. Invented by Edison. The original name is “Edison Screw Type”, or Edison screw type. Hence the letter "E". The number indicates the outer diameter.
Among all Edison sockets, the most common is E27. Lighting fixtures with a diameter of 27 are the most popular in Russian apartments because it is easy to find a light bulb for them. E27 is equipped with traditional incandescent lamps, but has recently been found in halogen, fluorescent and LED lamps.
E14 is also found on the market. They call him "minion". This type is most often found in sconces, table lamps, but sometimes also in suspended and suspended ceilings. Less commonly used are “E” with diameters of 5, 10, 12, 26, and so on.
The main advantages are the prevalence and ease of fastening. There are no shortcomings observed.
Shtyrevoy
This type of base does not use a screw, but a pin connection system. The numbers indicate the distance between the centers of the pins. Used in halogen and energy-saving lamps. Denoted by the letter "G".
The G4 connection is used in small halogen light bulbs. Most often used for decoration, in spotlights, as well as in built-in lamps. There is a G9 type. Used in 220 V AC power supply, suitable for decorative lamps.
For office lighting use tubular G5. For compact lighting fixtures, there are sockets with four pins (2G10, 2G11). There are many such lamps. In order not to get confused when buying a new light bulb, it is recommended to take with you an old, burnt-out light source.
In addition to the types described above, there is the “GU” type. This means that the lamp is energy saving. The most common for suspended ceilings is GU5.3. Their thickness is 2.7 centimeters.
Bayonet
This type of connection is also called bayonet or pin. The source is installed in the lighting fixture by inserting and scrolling. Widely used for various purposes, most often in suspended, stretch ceilings and cars. The device operates in the presence of strong vibration.
This type of connection between a lighting fixture and a light source is often used in transport and more. For example, in the UK this is a standard connector.
Bayonet fasteners are usually designated by the letter “B”, and the number that comes after the letter indicates the outer diameter of the connector.
There are bases with different numbers of contacts (from 1 to 5). They are also designated by the letter:
- “s” - single contact;
- "d" - double;
- “t” - three contacts;
- "q" - four;
- "p" - five.
In everyday life, as a rule, lamps with one and two contacts are used. The rest are in production.
How to remove a spotlight from a stretch ceiling
A lot has been written about installing lighting fixtures, including doing this procedure yourself. However, there is absolutely not enough information on how to remove a lamp from a suspended ceiling. Although this operation is not particularly difficult compared to installation, it nevertheless has its own characteristics, failure to comply with which can lead to damage to the ceiling structure.
It is quite possible to remove the spotlight yourself. The main condition is compliance with a certain sequence of actions. When solving the problem of how to change a spotlight on a suspended ceiling, first remove the lamp from the housing using a flat screwdriver. You need to insert another similar screwdriver into the resulting gap.
Next, the body is evenly stretched until the resulting gap allows you to insert your fingers into it to press the locking latches. All that remains is to pull the lamp out of its seat, then unscrew the screws on the terminal block and release the contacts. The task of how to remove a lamp from a stretch ceiling must be performed very carefully
Particular attention should be paid to the latches. If they are not held in place, they can suddenly fall back and damage the ceiling covering.
Instead of a dismantled spotlight, you need to install a new device that matches all the parameters of the previous element. During installation, you also need to follow a certain sequence of operations. A special thermal ring is put on the disassembled lamp, after which it is carefully inserted into the hole and secured with fixing springs.
Then the installed device is connected to the main network by connecting the wires in the junction box, observing the corresponding colors. The wires are crimped, covered with protective caps, carefully placed in a box and closed with a lid. After all connections are completed, a light bulb is installed in the lamp. Compliance with the rules of removal and installation is of great importance, since as a result of improper installation, spotlights often fall out of the stretch ceiling.
Quite often it is necessary to replace only one light bulb without completely removing the lamp. Before starting work, it is necessary to disconnect the electrical network. Regular light bulbs are unscrewed in the same way as when replacing a lamp. If LED or halogen lamps are used, they must first be unlocked.
To fix light bulbs of this type, a special fixing ring is used, which must be removed. It must be held firmly to prevent it from springing back and slipping out of your hands. Halogen lamps should not be removed with bare hands, as this will shorten their service life. It is recommended to use a cloth or gloves. The unlocked light bulb gently and carefully loosens in the housing, after which it can be removed.
Installation of a new light bulb is carried out in the same sequence as removal. All parts are installed in place, after which you can connect the power supply and check the operation of the lamp.