What additional tools will you need when working with a soldering iron?
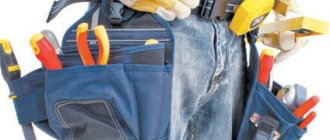
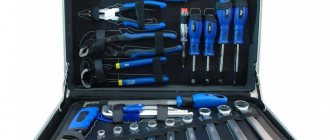
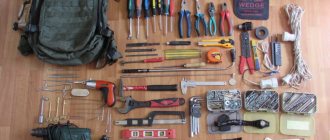
When working with the tool in question, you will need to have not only consumables, but also auxiliary tools.
A special stand is needed so as not to hold a heated soldering iron in your hand. The stand can be purchased, but its design is so primitive that it can be made independently. To do this, you will need a piece of wooden board on which supports made of steel wire are placed, curved to resemble horns. A file or rasp is needed to sharpen the tip. As the tool is used, the tip undergoes deformation and therefore needs to be aligned. In addition to the fact that a file cleans and aligns the tip, it can also be used to prepare the tool for working with materials of different thicknesses
It is very difficult to work with a dirty tip, so if you are just learning, pay attention to the issue of preparing the tool for soldering. Pliers or tweezers - when working with a soldering iron, these tools play an important role. After all, when a wire strand or part is heated, heat is transferred over the entire surface
It will be difficult to hold the wire without insulation with your hand, as you can get burned. For this purpose, pliers are used if thick wires are soldered, or tweezers (with a mandatory plastic base) when working with small semiconductor elements or thin wires. Sponge - used to clean the soldering iron tip during the soldering process from various substances - carbon deposits, foreign particles, etc. . To clean the tip, sponges made of different materials are used - viscose, cellulose, metal. How to use sponges to clean soldering irons is described in detail in the material below.
After combining parts by soldering, you may need alcohol if fluxes, insulating tape or heat-shrinkable tubing were used to isolate the area and protect it from external factors.
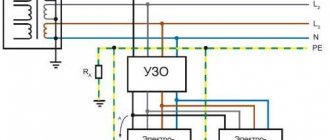
Induction soldering iron device
Any induction (pulse) soldering iron consists of a step-down transformer, a short-circuit button and a tip made of copper wire, 1-3 mm thick. In some designs, a power source and other elements are added to them.
This is what the circuit of a simple induction soldering iron looks like:
It should be noted that in this diagram the transformer has two secondary windings: one powers the lamp to illuminate the soldering area, and the other powers the tip. https://www.youtube.com/embed/z-a__qL-Fq4
A pulse and induction soldering iron are not the same thing. Pulse soldering irons are called induction soldering irons that incorporate a high-frequency voltage converter. The example device with a step-down transformer is not pulsed.
What is a soldering iron and how does the device work?
An electric soldering iron is a type of electric tool that is used to join two parts together using soft substances. Such a soft substance is solder, which melts and turns into a liquid state due to exposure to high temperatures. When the high temperatures stop, the solder hardens (which happens almost instantly), thereby providing a reliable connection. The device in question is the main weapon of electronics engineers, through which not only the connection of wires and semiconductor elements is carried out, but also their separation.
The device has a simple design externally, but inside it consists of various parts, the purpose of which should be understood. It is not at all necessary to know the structure of a soldering iron in order to learn how to use it correctly, but this information will help if it fails. The device consists of a number of the following elements, which have their own characteristics:
- It is based on a metal rod made of red copper. It is this rod that heats up and melts the solder when connecting parts. Red copper is used as the basis of the rod, since this material has a high degree of thermal conductivity (transfers heat well). The end of the rod has a wedge shape, which is necessary for working with small semiconductor elements. The end of the rod is called the tip, as on screwdrivers
- The heating element is a steel tube into which a red copper rod is inserted. The tube is wrapped in mica or fiberglass, over which nichrome wire is wound. When current passes through the wire, it heats up and transfers heat to the metal tube. As a result, the rod heats up and goes into working condition. There is a protective layer of mica on top of the nichrome wire. It protects the spiral from contact with the metal body of the soldering iron, thereby increasing the safety of the electrical device. Its second protective function is to retain heat and not transfer it to the steel body of the device
- Handle - made of heat-resistant plastic or wood, and allows the master to comfortably work with the tool
- Wires and plug for connecting to a socket. The wires are connected to the terminals of nichrome wire. To ensure reliable connection, aluminum clamps are used, which are soldered to ensure reliable contact. Clamps at the connection point are used on powerful soldering irons, and on low-power devices, the connection is carried out without additional fixation, but with the obligatory application of solder. Aluminum plates for connecting copper wire with nichrome thread are used to increase the reliability of the connection, as well as to dissipate heat. The more powerful the soldering iron, the more the copper wires heat up, so aluminum clamps dissipate heat. This information will be useful if, when repairing a powerful soldering iron, a decision is made to remove aluminum plates. The thickness of the copper cable core is selected depending on the power of the device
- The steel body is the part of the tool that contains the heating element. The body may have (depending on the model) a threaded screw through which the rod is secured. The housing design may contain holes closer to the handle, the purpose of which is to remove heat
How the soldering iron works inside is shown in the photo below.
It is useful to understand the structure of a soldering iron for anyone who plans to repair it in the event of a breakdown.
Best models
There is a large selection on the market for the production of soldering irons. This indicates high demand for this electrical device. Many varieties, types, and distributions by price categories have been invented. But which models occupy leading positions in this difficult area? Which soldering iron should I choose for soldering wires? Which manufacturer makes the most efficient, reliable and safe device? It is necessary to study the seven best models and compare their characteristics.
The forty-watt model perfectly combines price-quality ratio
Union PS2005-40
One of the most profitable and low-power, yet very effective spiral soldering irons. He has collected the best qualities and practicality. The shape of the tip of this tool is cone, which makes it universal. The tip material (nickel) has a protective layer. This will prevent solder from sticking to the surface. Soldering iron power 40 watts. The handle of the electric soldering iron is made of wood, which is good news. This modification copes well with thermal loads and is not a conductor of electric current.
The wooden handle in this model does not heat up, and the design is lightweight
The soldering iron is suitable for both domestic and industrial purposes, which confirms its versatility.
You may be interested in this Checking the microcircuit for serviceability
The downside of this device is the lack of a power regulator, which can interfere with working with small objects.
Price per soldering iron: approximately 100 rubles.*
The domestically produced model has not earned decent popularity
Bison Professional 40W 55413-40
A good soldering iron that doesn't justify its price. The shape of the tip is cone, which makes it universal in use. The material from which it is made is copper, which is very good for heating and maintaining temperature. It is also possible to change the tip, which is also a pretty good indicator. Tool power 40 watts.
The plastic handle is one of the main disadvantages of this model.
The disadvantages of the device are:
- Plastic handle without rubberized surface. This may cause the handle to become deformed, overheat and cause electrical shock.
- No power regulator. The absence of one may interfere with working with small objects.
Price per soldering iron: approximately 400 rubles.*
The battery-powered model is not suitable for soldering large parts.
Stayer professional 55409
It is mobile, but not a universal tool for soldering. Operates on three AA batteries. Supports two power modes: 4 Watt and 8 Watt, which allows you to work only with small parts. The shape of the sting is cone-shaped. The material from which it is made is composite. This tool heats up to 380 degrees. Sold complete with a protective cap, solder (!) and a stand, which is extremely convenient.
A bonus for buyers will be the lightweight design and factory equipment
Among the disadvantages of this device:
- Plastic handle. This is inconvenient if the instrument overheats.
- There is no protective coating on the sting. Because of this, solder may stick to the tip, making it difficult to clean the tip.
Additional Information! Batteries for the soldering iron are not included.
Price for an electric soldering iron: approximately 1000 rubles.*
A powerful model from a domestic manufacturer at a considerable price
Bison Professional 200W 55301-200
This soldering iron is suitable for industrial work. Works great on metal parts. The shape of the sting is wedge-shaped. This is perfect for tinning on an industrial scale. The tip itself is made of copper and has a protective coating. The tool has a power of 200 watts, which proves its ability to work with large objects. Heats up to a temperature of 480 degrees. The heating element is made of ceramic, which allows the soldering iron to heat up quickly and maintain the required temperature.
The modification is very powerful, so it will take a long time to heat up to operating temperature.
The disadvantages of this model are:
- A plastic handle that may become deformed when exposed to high temperatures.
- It takes a long time to heat up (12 minutes).
Price per soldering iron: approximately 1000 rubles.*
Low power affects the heating rate
Rexant 220V 25W 12-0121-1
This soldering iron model is suitable for both home and industrial work. The shape of the sting is cone. This makes the tool universal. The material from which the tip is made is copper. There is a protective coating. Part of the tip is protected by tin, the second part is chrome plated. Soldering iron power 25 watts. Heats up in 5 minutes, which is a very good indicator. The developers achieved such a good result thanks to a ceramic heating element.
The use of ceramics in the design allows for excellent short heating times
Disadvantages of the tool:
- There is no power regulator, which can be harmful when working with soft metals or small parts.
- A plastic handle that can easily heat up or become deformed (this particular model has a rubberized handle, which allows it to be stable in the hand and not conduct electric current, but if it gets too hot, the rubber can also bend and cause injury).
Price per soldering iron: approximately 500 rubles.*
Medium power model for a reasonable price
Rexant 220V 30-70W 12-0161
This soldering iron is a pulse type. Works great with electrical appliances. It has a pistol shape, which helps to increase the temperature at the point of contact. It has two operating modes - 30 Watt and 70 Watt. The shape of the tool tip is cone-shaped. This makes it very convenient to use. The material from which the tip is made is copper. There is a protective coating. This model is energy saving.
Pistol shape with a copper tip - a good composition for everyday work
Cons of this device:
- It takes a long time to warm up (10 minutes).
- The handle is made of plastic. This is extremely inconvenient (the handle is rubberized, which on the one hand is a plus (it will not slip out of your hand when working), but on the other hand it is a minus, because when exposed to high temperatures, the rubber can melt and cause burns).
Price per soldering iron: approximately 400 rubles.*
Vacuum suction of molten solder is not found in every model
Flaws
Despite the convincing advantages of soldering irons from Kandan, there are also some disadvantages:
- The cost of soldering irons is quite high and those who rarely use such tools often have to look for something cheaper.
- The brand has fakes. Other, very similar devices may be produced under the guise of Turkish soldering irons, but they will not have anything to do with the original company. These products will be of lower quality.
Features of Candan soldering irons
Many models of soldering irons come standard with additional tools for work. It all depends on the specific variety, since the equipment may vary, but you can often find a stand, scissors, a tape measure, levels and a set of attachments. In most cases, soldering irons are equipped with a two-position switch that increases or decreases the power of the tool by connecting additional heating elements.
Burning indicators can also be considered brand features. If the heating coil is turned on, the red lights come on. The Candan CM 06 soldering iron model has a thermostat regulator that helps regulate the temperature from 50 to 320 degrees Celsius. Other models may have different adjustment values. The adjustment step is about 10 degrees. For ease of use, the tool handles are rubberized.
Original tools are stamped with the company logo, which is located on the box and the soldering iron itself. On Chinese copies, the production date is printed on a sticker, but on the original it is stamped on the side plate. The fastening of the plate in the original is made using rivets, while on the fake everything is bolted there.
Models
The range of tools has several quite popular models, among which the following are worth noting:
Soldering iron for pipes Candan CM-01. There are two levels of power control here. The maximum power is 1500 W. The set includes a stand and a pipe cutter. Temperature adjustment from 50 to 350 degrees Celsius. The set includes 4 nozzles.
Soldering iron for pipes Candan CM-01
Soldering iron for pipes Candan CM-3.
Soldering iron for pipes Candan CM-3
Soldering iron for pipes Candan CM-06 1500 W. The heater has a Teflon coating. The weight of the soldering iron with packaging is 5 kg. The maximum pipe size is 63 mm, and the minimum is 16 mm. Possibility of temperature adjustment from 50 to 350 degrees Celsius.
Soldering iron for pipes Candan CM-06
How to use a Candan soldering iron
The appearance of a soldering iron for polypropylene is noticeably different from an ordinary tool familiar to everyone. This applies not only to models of this brand, but to the entire type as a whole. The operating principle will also be somewhat different, so you need to know the instructions for using a soldering iron for Candan polypropylene pipes.
The operating principle of this device is very similar to that used in home irons. Before turning it on directly, you need to prepare the soldering iron for work. A special stand is screwed to the tool and a nozzle is installed, which becomes the main part for soldering pipes. If you have to work with different pipe diameters, then you need to install two nozzles with suitable sizes in the soldering iron.
After the preparatory procedures, you can begin to connect to the network. To warm up, you need to set the appropriate temperature, and then turn on both heating elements. Warming up can last from 10 to 30 minutes. The indicator should indicate warming up. After this, you can begin direct soldering.
Next you need to prepare the pieces of pipe and fitting to be soldered. Using a soldering iron, you need to heat the fitting and a piece of pipe at the same time. When the parts reach the desired condition and their ends melt, the parts need to be quickly connected to each other. Everything must be done the first time, otherwise the re-melted polypropylene will lose its properties.
Conclusion
It is not for nothing that the Candan brand occupies a high place in the market of soldering irons for polypropylene. This is a sought-after field that is mostly of interest to professionals. It is for such specialists that this tool is created. For work needs it is quite affordable, although for private use it may seem expensive. The quality and reliability of the products fully pays for it all.
Operating principle of an electric soldering iron
When you turn on the soldering iron to the electrical network, current passes through the nichrome spiral and heats it. The heat released during this process is transferred to the copper rod. The rod can be heated to a temperature of 300 - 350 C. The heated copper rod (the “tip” of the soldering iron) melts the solder and heats the parts being soldered.
Electric soldering irons vary in power and type of heating element. For soldering and tinning large parts, metal sheets and wires with a large cross-section, soldering irons with a thick tip and a power of at least 80 - 100 W are required. Electric soldering irons with a heating element power of 40 to 80 W are used in radio electronics and are well suited for minor repairs of electrical equipment. Low-power soldering irons (20 - 40 W) with a thin tip are used for soldering very small parts that are sensitive to static voltage (for example, electronic components).
clicker for adsense
Today, the most common electric soldering irons are those with a spiral heater - EPSN. The heater (heating element) consists of a ceramic or mica tube on which a nichrome spiral is wound. These soldering irons are the most reliable and durable in operation. They are great for situations where you don't have to solder as often.
Electric soldering irons with ceramic heaters are also now available. As practice shows in their use, they are very capricious. The heating element consists of a thin narrow ceramic plate, inside of which there is a spiral of very thin nichrome wire. If liquid gets on such a soldering iron (or rather, on the heating element), if it falls unsuccessfully or is severely deformed, the thin wire of the spiral breaks and the soldering iron can no longer even be repaired.
If you do soldering quite often, then simple electric soldering irons are not enough. You will simply need to acquire either a set of soldering irons of varying power and with replaceable tips, or buy an electric soldering station. The soldering station is equipped with a temperature regulator for the heating tip, automatic maintenance of the set temperature, a convenient stand for the soldering iron, a bath for a cleaning sponge, antistatic protection and some other additional features.
When soldering and working with an electric soldering iron, you must remember the rules for operating soldering equipment and safety precautions. With proper use and careful handling, any soldering equipment will serve for a long time, and the work performed will be of high quality.
You can discuss questions you are interested in on this topic on our Forum.
Which soldering iron to choose for soldering wires, microcircuits and radio components
Soldering iron for microcircuits: which one should beginners and experts in the field of radio electronics choose? First of all, it is worth considering that high temperatures can cause the board to burn out.
Experts recommend giving preference to models whose power does not exceed 10 W. With them it will be easy and convenient to solder wires, microcircuits and radio components. The device must be equipped with a built-in thermostat.
The nichrome device is not sensitive to mechanical damage
Types of soldering irons according to different characteristics
In addition to the fact that soldering irons for wires and circuit boards are classified into types according to power and voltage, there are other criteria for dividing them. Knowing what types of soldering irons there are, and by what characteristics they are divided, is necessary in order to choose a suitable device depending on the tasks assigned to it.
According to their design features, soldering irons come in the following types:
- Rod-type soldering tools are the most common options for soldering tools. Their structure and operating principle are described in the material above. This type is best suited for soldering work around the house - when it is necessary to repair household appliances or connect two electrical wires without reducing the resistance at the junction
- Pistol - they are so called because of their similarity in appearance to a firearm. The working part of the tool is located directly at an angle of 90 degrees from the handle, which increases the convenience of carrying out the relevant work. Such soldering irons are used when carrying out repair work.
- Soldering stations - they are also called stationary soldering irons. The devices received this name because they are equipped with control units, through which voltage, power, current, temperature are regulated.
Rod appliances are also called household appliances, as they have found their use among home craftsmen. However, they are used not only by home craftsmen, but also by professionals. When carrying out more complex soldering manipulations, soldering stations are used, which are divided into three main types:
- Infrared - the soldering process is carried out using infrared radiation. The wavelength of infrared radiation is from 2 to 10 microns, and the heating zone ranges from 10 to 60 mm
- Hot air - melting of solder is carried out by exposing it to a stream of hot air (similar to a hair dryer). The temperature of the heated air leaving the tool nozzle ranges from 100 to 500 degrees. The air flow is focused by means of a nozzle. Flow creation is realized through the use of a compressor or turbine. Turbine models have a built-in electric motor inside the device, which is connected to the impeller. The rotation of the motor drives the impeller, which ultimately creates air flow. Compressor models of soldering irons create air pressure using diaphragm compressors located in the station design
- Digital are modern professional soldering irons, the principle of operation of which is identical to that of rod-type devices. Their distinctive feature is that the specialist, depending on the soldering of the relevant parts, sets the appropriate parameters for voltage, current and power
Another important feature by which soldering irons are classified is the principle of their heating.
Materials for making a soldering iron
After first glance at the photo depicting the materials, it may seem that the contents of a trash can have been emptied and neatly laid out in front of the camera. Yes, the soldering iron described in this article is made from such “garbage”.
There was no need to think too hard about the choice of material for the handle. Soldering iron handle
made of wood. This is a readily available material, which is easy to process, quite durable, and has good thermal insulation properties.
Tin from a tin can is used to make a soldering iron body
.
This is a soft sheet of steel that is easy to cut and bend, and at the same time, rolled into a tube, it is strong enough for a miniature soldering iron
. I strongly recommend the condensed milk tin - it does not have polymer coatings, which is important for our case. Tin plate coated on the outside with varnish, like canned fish, or on the inside with something white, like various peas and corn, is not suitable because of this very coating. At high temperatures it will begin to release combustion products that we do not need. I especially want to emphasize that in the store you need to buy not “condensed milk”, but rather whole condensed milk with sugar. I will not describe the difference here - this is not related to the topic, but there is a difference between these products, and the quality of the tin can also be different.
Next on the list is silicate glue.
.
This is a very interesting substance. It does not contain organic matter, is not poisonous, and is not harmful to the skin - you can work without gloves. After drying, it turns into glass - a substance that can easily withstand high temperatures (more than enough for a soldering iron) and at the same time does not conduct electric current. When adding heat-resistant fiber, it forms a composite that also has high mechanical strength. This is what we need as insulation when making a heater
.
In Soviet times, silicate glue could be bought at any bookstore. It was the most popular adhesive for paper and cardboard. But, I must admit, it is not very good for paper. Apparently that’s why it’s not so easy to find it on sale now. Silicate glue has almost completely been replaced by more modern paper adhesives. It’s a pity, because it is indispensable when making a soldering iron
.
But it is still on sale today. The bottle of glue shown in the photo, among other materials, was purchased in 2016 for a symbolic price. Fifteen rubles. I admit, when I saw it at a newsstand located on the territory of a grocery store, I immediately thought about a new homemade soldering iron
, which would bring together all the accumulated best technological solutions.
The seller looked at me strangely, clearly not approving of my choice. I wanted to suggest a higher quality glue. But I assured her that silicate glue
is simply irreplaceable in some cases. She had nothing to object to such a powerful argument, and a profitable deal took place.
I will add that there is a lot of Chinese paper glue on sale now, and, it seems, also silicate. But I haven’t tried to use it, because I really doubt its composition. Most likely, it contains a large percentage of impurities that make the glue more suitable for paper, but absolutely unsuitable for the manufacture of high-temperature composites
.
When heated, these possible impurities can begin to chemically break down, releasing toxic substances. A significant reduction in the strength of the product is also possible. Therefore, when purchasing, it was important for me that this was a domestically produced glue, and very cheap, which means it was just liquid glass
without any additives.
Thin steel wire is used to tie the tin body, which allows you to secure the heater in it, as well as create a “thread” for the handle - a simple but very effective solution. In addition, two pieces of steel wire are required to make the heater leads.
You will need mild steel sheet about 0.5 mm thick. A small rectangle is rolled into a cylinder, which is then inserted into the body from the handle attachment side and provides the necessary strength in this place. Sheet galvanized iron is sold in building materials stores. It's mild steel, like the kind used in tin cans. It is also easy to cut and bend, but it is much thicker than canned material, and therefore parts made from it are stronger. There is no shortage, but stores only sell large sheets. One such sheet is enough for a thousand soldering irons. However, the material is good for many applications. In any case, you need to have it in the household.
For making a heater
a high resistivity alloy wire
will also be required .
You can obtain such wire in different ways. In the described case, the wire was taken from a wire-wound tuning resistor, which was once soldered from a domestically produced color TV. To level it, the wire can be pulled along the edge of the table. It is necessary to evaluate the thickness of the wire, its length and resistance. High accuracy is not required in this case. Just keep in mind that very thin wire reduces the reliability of the soldering iron due to the risk of burnout. Thick wire will be more difficult to wind, and the thickness of the product will be increased. with the wire resistance (and, consequently, with the supply voltage of the soldering iron
) - it is unknown how much of it will go to the heater. It’s easier to make an approximate version, and when the soldering iron is ready, select the voltage to achieve the required power. But too large errors with the heater resistance will lead to the fact that either a very large current will have to be supplied to the heater, which increases the requirements for wires and electrical connections, or to make a power source with a very “specific” voltage, for example, 50 volts. However, the power supply is from 50 When the resistance of the heater is too high, it is much better and more reliable than when the current is unreasonably high - when it is too low.
For making a sting
Thick winding wire with a diameter of 1 to 2 mm is ideal.
You can set aside a whole coil of such wire as a consumable, and in the future, as it wears out, make new tips. The design of the soldering iron
provides for the possibility
of replacing the tip
. It is inserted into the steel base of the heater and is held in place by friction. So you don’t have to worry about the tip burning out.
Asbestos is a naturally occurring fibrous mineral. Resistance to high temperatures is one of its most valuable qualities. In combination with silicate glue
makes it possible to obtain an excellent composite for
heater insulation
.
As you can see, the materials are mostly readily available. Difficulties may arise with the search for asbestos
. If you can’t find the cord, you can try crushing asbestos cardboard and mixing it with silicate glue to get a paste. It can be used to insulate the heater. But I haven't tried this method. I used a cord, separating more or less even sections from it and winding it around the insulated surface. Then it was impregnated with silicate glue. You could try using fiberglass. There is more about this at the end of the article. There was an idea about using gypsum or even clay, but I haven’t tried using these materials either, so I can’t guarantee anything. One way or another, you can find something suitable.
How to use a soldering iron sponge
To clean the soldering iron tip, special sponges are used, as mentioned above. Beginners often wonder why these elements are needed and how to use them correctly. There are several important rules that you need to know in order to properly use sponges to clean the tip of the device.
- Ceramic soldering iron tips must not be cleaned with metal sponges, as this will damage the top layer of the surface.
- It is not at all necessary to buy a special sponge, since a regular piece of fabric can play its role. However, this method is suitable for cases when you need to solder something quickly. If you plan to solder for a long time, then for such cases it is better to purchase a special sponge
- Viscose sponges should be soaked in water before use. However, you don't need to make the sponge very wet, as keeping it damp is enough. The tip is wiped on the sponge during operation. For dry cleaning of the tip, viscose sponges are not suitable
- Copper shavings - designed for dry cleaning of the tip, but the disadvantage of such a sponge is that it is quite expensive, and sometimes even more expensive than the soldering iron itself (depending on the model)
- Metal sponge - it is not specifically designed for working with a soldering iron, but this does not prevent it from being used to clean the tip of this tool. The advantage of such a sponge is that it costs 10 times less than copper shavings, but copes with the task of dry cleaning the tip no worse
Now that the technology of soldering with a soldering iron is known, you can start training. You can start finishing soldering only after you have had enough practice.
To summarize, it should be noted that an electric soldering iron can be replaced with a regular lighter. If you need to solder wires without a soldering iron, then this is done very simply - the wires are heated using an open flame (with a lighter), after which you need to place solder at the junction and continue exposure to the open flame. When the solder melts, this will entail the connection of the conductors.
You need to treat the tool with all responsibility, and remember the most important thing is that a soldering iron is an electrical appliance that cannot be disassembled if it is connected to the network. It is also prohibited to leave the tool connected to the outlet for a long time, as a fire may occur. And one more important point - do not check the heating temperature of the tip with your hand, because in this way you can get a very severe burn.
Publications on the topic
The operating principle of a pistol-type hammer drill with a photo description
How a screwdriver works and the design of the tool - what you need to know when using it
Learning to use a glue gun with sticks - main points
We repair an angle grinder with our own hands quickly and easily
Advantages and disadvantages.
Advantages of a pulse soldering iron:
- The main advantage of pulse soldering irons is the fast heating of the tip
(5-7 seconds);
- Convenient pistol-shaped shape, which increases the comfort of working with the device;
- Electricity is only consumed during soldering.
Disadvantages of a pulse soldering iron:
- High weight of the device;
- Overheating may occur during soldering for a long time. This may cause the soldering iron parts to melt.
How to solder copper wires - all the secrets of the process
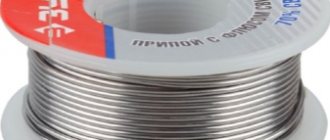
It will be useful for novice electricians and electronics engineers to learn how the process of soldering wires is carried out. Before you start using a new soldering iron, you must perform the tip tinning procedure. To do this, the tip is heated to operating temperature and the entire surface is dipped into rosin. Next, you need to melt the solder over the entire surface of the tip, thereby protecting it from corrosion and accelerated wear. Next, we move on to the actual procedure for soldering the wires.
The entire technology can be divided into three main stages:
- Preparing the wire for soldering. To do this, part of the core must be freed from insulation. The core should be cleaned of contaminants, and if this fails mechanically, resort to the use of rosin or flux. Before treating the surface of the core with rosin or flux, it can be sanded with sandpaper or a file.
- Tinning - the soldering iron must be heated to the appropriate temperature. If rosin is used, then you need to bring the stripped part of the wire to it and warm the core. In this case, the core is immersed in molten rosin, thereby the process of cleaning it occurs. After this, you need to take solder and heat it with a soldering iron. The melted solder is applied to the core, thereby carrying out the tinning process. As a result, we get a copper wire, on the surface of the core of which there is a thin layer of solder. This process is carried out in order to make a reliable and high-quality connection of copper wires. A similar procedure is carried out with the second end of the wire
- Connection - now you need to connect the wires together in the same way they will remain after soldering. After this, solder is applied to the connected cores and melted with a soldering iron. As a result, the molten solder spreads and hardens, providing a connection between the parts.
If the connected wires are subsequently planned to be insulated with a heat-shrinkable tube, then it must be placed on the cable first. This completes the process of soldering wires with a soldering iron with rosin and tin. There is nothing difficult about this if you follow all the steps according to the instructions.
The soldering process will be slightly different if the wires being soldered are pre-twisted. In this case, there is no need to tin each strand of the wire, but after twisting them, treat them with rosin or flux, and melt the solder over the entire outer surface.
This is interesting!
If flux is used instead of rosin, then the soldering technology will be slightly different.
The difference is that part of the core is dipped in flux, after which it is heated with a soldering iron with the addition of solder. Further actions are the same as described in the instructions above. And now the most important thing when learning to work with a soldering iron is practice.
. It is almost impossible to learn how to solder wires or microcircuits the first time, since this will initially require training. The success of mastering the technology of soldering wires and semiconductor elements lies in the training.
Types of soldering irons for soldering wires by power
The types of devices in question are classified according to such a parameter as power. In terms of power, they are available in the following ratings - 12, 20, 40, 60, 100 W and more
This parameter is important to consider when choosing a tool. Few people know what power is best to buy a soldering iron, so very often beginners purchase a device that does not cope with the assigned tasks.
The greater the power, the higher the capabilities of the tool, but when work is carried out with semiconductor elements soldered to the board, then high-power devices are not needed here. To ensure the connection of parts by soldering, it is necessary to preheat them. The heating temperature of the parts must be higher than the melting temperature of the solder to ensure a quality connection. If the power of the device is insufficient to warm up the parts being soldered, then it will be extremely difficult to implement the procedure.
From this we get the following:
- Tools with a power of 12 and 20 W are used exclusively for working with semiconductor elements - capacitors, resistors, diodes, transistors, etc. It will be very difficult to solder the connection of two electrical wires of large cross-section with such devices.
- Devices with power from 40 to 100 W are the most popular, as they are suitable for working with semiconductor elements and copper wires
- Powerful soldering irons from 100 W and above are designed for soldering heat exchangers of geysers and other large parts
The size of the rod depends on the power of the tool, and it has a direct impact on the ability to work with small or large parts. The higher the power of the device, the faster the tip warms up, which means that the tool can be used for soldering within a short period of time after being connected to the outlet.
This is interesting!
The greater the power of the device, the faster the tip heats up, however, most radio components do not allow exposure to temperatures exceeding 70 degrees. Hence it turns out that when using high-power soldering irons, exposure to semiconductor elements for more than 3 seconds is not allowed.
What criteria should you pay attention to when choosing a soldering iron?
A soldering iron is a relatively small tool designed for soldering small parts and wires. The scope of its application is quite extensive. If, for example, a person is a car enthusiast, then it will be useful for soldering twists. An electric soldering iron can also be useful for repairing pots. But how to choose a soldering iron?
You must approach the purchase of a device responsibly, having studied the relevant characteristics
When it comes to a tool, you need to have a clear idea of what it is and what it consists of.
The average finger tip consists of a handle, an apron, special holes, a body, a heater, a connecting screw and a tip. Each of these details plays a special role and you need to pay attention to them. Therefore, when it comes time to choose a soldering iron, you need to pay attention to all these details (what it is made of, what functionality, company or country, manufacturer, etc.).
For soldering different materials and their sizes, the corresponding modification of the device is used
In addition, when choosing a soldering iron, you should take into account the purpose for which it is purchased and build on this. But there are a couple of general criteria that you should pay attention to when choosing this tool.
One of the main parameters that plays the most important role during operation is the power and size of the equipment.
For your information. You should not start from the assumption that the larger the soldering iron, the better it is.
If an electric soldering iron is intended for use at home, then it is not advisable to choose its power more than 40 watts. A parameter that is too large will only be reflected on the electric meter, but in fact will heat the air, and not those small parts that are found in home repairs.
People often pay attention to the range of attachments included. It is recommended to purchase a soldering iron with a large number of attachments. This will increase its versatility in operation and improve the functionality of the products being repaired.
The tip size adjustment function will be useful if you often have to “climb” into hard-to-reach places. Over time, the sting becomes smaller. This is due to the fact that when soldering, the working cylinder becomes jagged or becomes smaller. Therefore, the size adjustment function will come in handy. At any time, the ground tip can be made a little larger or, if necessary, reduced to the desired size.
The material with which the nozzles are covered plays an important role. If the steel nozzle is not coated, the solder will stick to it. After the work done, it is very difficult to get rid of it. Therefore, it is simply necessary to pay attention when purchasing to the presence of a protective non-stick coating. Most often, Teflon is used as a coating. It has a shine, so it will immediately catch your eye when you buy it.
Note! The ideal option (however, the most expensive) is an all-copper tip. Although it is softer and wears off faster, it transfers more heat, heats up faster and interacts well with solder materials.
The type of soldering iron should be determined in advance, before purchasing. The result of the work depends on the type of soldering equipment. If you choose incorrectly, you can damage the product. The most popular and effective is the electric soldering iron. It is popular for its versatility and combines the criteria necessary for work.
The most famous option is electric
The material from which the handle is made affects not only the design of the device, but also ease of use. This is one of the most important criteria. It is recommended to purchase soldering irons with a handle that can withstand high temperatures. The most popular material is wood. The wooden model is light and does not deform when the instrument is heated.
Additional Information. It is not recommended to buy an electric soldering iron with plastic handles; they cannot withstand high temperatures and overheat.
The ideal option would be a ceramic look. A handle made of this material is dielectric, does not get wet and will not melt from high temperature, which is typical for other types.
Soldering iron power
The intensity of heating of the surface on which the work occurs depends on the power of the soldering iron. Here, too, a lot depends on the goal. For example, when soldering microcircuits, an electric soldering iron with a power of up to 25 watts is ideal. A parameter exceeding this threshold may harm the electrical microcircuit.
If a soldering iron is needed when soldering thick wires, then it is recommended to purchase a tool with a power of 40 watts or more.
Important! It is not recommended to use a soldering iron with a power less than recommended (for example, when soldering thick wires, you should not use a 25 Watt electric soldering iron when 40 Watt is recommended). The material will not heat up to the required temperature. At best, the soldering will be weak, and at worst, it will not exist at all. Also, if the power exceeds the permissible one, the material will heat up faster than required, and soldering time will take no more than three seconds.
If possible, it is recommended to buy a soldering iron with adjustable power.
You might be interested in this Features of devices for measuring battery capacity
The power regulator, located on the device or nearby, will be a good help in working with different thicknesses of metal.
Temperature control methods
When working with a soldering iron, it is important to monitor the temperature of the tip. If overheated, the soldering may be faulty (internal cavities, not melting, but sticking of solder). There are three ways to regulate the temperature of an electric soldering iron:
- Using a switch is the simplest and most accessible option for adjusting the power of heating equipment. This method involves cyclically switching the current supply, which will lead to a change in temperature from the maximum to the minimum value.
- A simple and practical way is to use a dimmer. There are a number of soldering irons with built-in adjustment. These elements are called dimmers. The device is a device that limits the flow of electricity into the soldering iron. Temperature regulation in the tip occurs due to a voltage drop in the dimmer.
- Using control units is an expensive, but most accurate method of adjusting the heating power of a soldering iron. More complex devices have control systems. We are talking about soldering irons with a power supply. The current source contains a control system. The block does not take up much space; it is located in the handle of the electric soldering iron itself.
The tip is one of the important parts of the entire apparatus
Tip material
One of the important parts of a soldering iron is the tip. This simple metal cylinder is where all the work happens. There are many materials from which tips for an electric soldering iron are made. But it’s better to purchase proven ones, based on reviews from experts and other users.
The most popular one is a copper tip. The most popular material for making soldering iron tips. It is one of the most optimal due to its thermal conductivity and heat capacity. This is a huge plus for those who work with large objects, since the copper tip remains warm for a long time. The tip is also universal. You can solder almost anything with it. But you should work with microcircuits carefully. The main disadvantage is that when exposed to high temperatures, the tip oxidizes. When cleaning it, the size of the tip can decrease quite significantly.
For your information. One of the cheapest options is a rod with tinning of nickel and silver
The tip is made of copper, but is plated with either nickel or silver. This is done in order to protect the tip from rust and burning. The main disadvantage of this version of the tip with nickel is that the solder is very poorly retained on the surface.
Ceramic models are expensive. The tip itself is made of metal, but the body is ceramic. Ceramics conduct and retain heat well. In addition, the heating rod is not afraid of rust, but is prone to cracks when dropped or hit.
There are also composite stings. This option consists of several materials. For example, the tip has a steel core, itself is made of copper, and the coating is made of silver.
Additional Information. For home use, it is best to purchase a soldering iron with replaceable tips.
The correct shape of the tip of the device has the greatest influence during operation
Shape of the tip
Everyone would like to have one universal remedy for everything, but, unfortunately, this does not happen. Each type of soldering must have its own tip. Of course, there is a universal modification called a cone, but when working with it it will not be as convenient and effective as we would like. This is why it is worth buying soldering irons with replaceable tips.
The sting-cone is a universal attachment, which is why it is included with almost all types of equipment. Due to its size, it retains heat perfectly, which cannot but please those who deal with large objects. But for the same reason it can completely ruin fragile work. It has a cone-shaped shape, hence the name of the same name.
For your information. The sting-needle is the most unfortunate and ineffective option, according to experts.
It has a cone-shaped shape, but is slightly smaller and pointed towards the end, resembling a needle tip. Due to its size, it does not retain heat. This leads to the fact that even a small amount of solder will not melt.
Tapered and beveled shapes are most popular due to versatility and practicality.
The wedge tip, due to its design, holds solder perfectly. Just like the cone-shaped version, the size is a huge plus. Due to its shape it has excellent thermal conductivity. Many experts claim that this type of tip is more versatile than is commonly thought.
The bevel sting is rare. This tip has a cylindrical shape with a bevel of 45 degrees. The effectiveness of the sting directly depends on its size. For example, when working with microcircuits, it is recommended to use a smaller tip than the standard one. It copes well with the tasks due to its heat capacity, which is ensured by the shape and flatness on the bevel side.
Microwave sting is rare. In simple terms, it is a more advanced version of the beveled model. The difference is in the cut on the side of the sting. In the case of a microwave tip, there is a depression in the bevel. When using this tip, you won't have to remove excess solder, which is a huge advantage. This advantage is very necessary for professional soldering. It is not necessary to purchase such a tip for home use.
The knife-shaped sting has the shape of a knife. It accumulates and retains heat better than other types, which makes it a favorite. Due to its shape, it accommodates a larger amount of solder compared to other nozzles. Ideal for through-hole installation. Otherwise, problems may arise. Not suitable for soldering small parts.
Equally important is the ease of holding the device.
Soldering iron handle material
The soldering iron handle is also an important component. On the shelves you can most often see electric soldering irons with wooden models. Wood material does not transmit electricity, does not heat up, does not deform under the influence of high temperatures, and does not deteriorate due to pressure changes. The same cannot be said about other materials.
You may be interested in this Features of Phillips screwdrivers
Plastic is quite popular because it is cheap. This handle becomes deformed after prolonged use. When exposed to high temperatures, the material may melt. This will lead to the replacement of the handle, since it is inconvenient to work on a damaged instrument.
But in the case of glass, everything is simpler. When exposed to high temperatures, glass surfaces release sodium ions, resulting in sufficient conductivity of electricity. In addition, with sudden temperature changes, the glass handle may burst.
For your information. Based on all these facts, we can conclude that wooden handles are the safest.
Gun shaped models are ideal for soldering work
Features of soldering copper cable to aluminum
As you know, the conductive cores of wires and cables are made of copper and aluminum. The most efficient conductors are made of copper, but there are often cases when two wires with different core materials need to be connected to each other. It should be noted right away that a very important point is that you cannot solder copper and aluminum.
This is due to their physical properties:
- Copper expands less when heated (when current passes), which is associated with high conductivity rates
- Aluminum expands more when heated
With the constant expansion and contraction of the cable cores, microcracks form at the junction through solder. Over time, they increase, and in this area the resistance increases and the current increases. The higher the current, the higher the load, which ultimately leads to a break in the connection. This is why it is impossible to solder aluminum and copper, since such a connection will be considered unreliable.
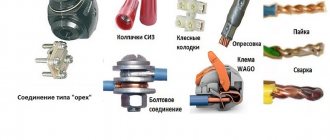
If you need to connect two conductors made of different materials, you should use the following methods:
- Connect them using twist. The connection point should be carefully insulated. However, this method is also not considered reliable, because the resistance will increase at the junction
- Use a bolted connection. To do this, you can use a bolt with a nut and three washers. Wind the wire strands between the washers around the bolt shaft and compress them using a nut. However, this method is considered obsolete, and today terminal blocks are used instead of bolts
You can always find a way out of any situation, but the most important thing is to do it correctly.
Types of soldering irons based on supply voltage
The instruments under consideration are available in different types, and the first criterion by which the instruments differ from each other is their supply voltage. According to this parameter, soldering irons are classified according to the following supply voltage values - 12, 24, 36, 42, 220 and 380V. Why are devices produced in different voltages? A perfectly valid question that can be answered as follows:
- To ensure human safety. If work is carried out with a tool in a damp room, then it is allowed to use only devices that operate from a voltage of up to 36V, but no more. In this case, the device body must be grounded, which will prevent electric shock to people.
- Scope of application of the device. The device is used for soldering not only at home, but also in production, where it is used to connect various large parts. For such purposes, high-power tools operating from a 220V network are used. When performing soldering work on cars, trucks, and motorcycles, devices operating on DC voltage of 6, 12 and 24 V are used.
- Power - the more powerful the device is needed, the higher the supply voltage parameter should be. For example, it makes no sense to manufacture a low-power 12W soldering iron for 220V voltage. After all, for this you will need to make a large number of turns from a very thin nichrome thread. The result is a large tool with very little power. The situation is similar with high-power devices, which are difficult to make if their supply voltage is designed for 12 or 24 V
This is interesting!
The use of nichrome wire as a heating element makes it possible to produce soldering irons that operate not only from alternating voltage, but also from direct voltage. The difference lies in the thickness of the wire, as well as the number of turns.
Power supply for soldering irons
All soldering irons require power and are divided into high-voltage, low-voltage, DC and AC.
The most common methods of powering soldering irons are summarized in the table.
Direct current Alternating current
12 V 230 V
24 V 36 V
A ~230 Volt soldering iron is a household electrical appliance for repairing electrical wiring and simple household radio equipment. Suitable for infrequent repairs, non-critical applications. AC voltage ~230 Volts - industrial mains voltage.
A ~36 Volt soldering iron is an industrial electrical appliance for installing electrical and radio household equipment, soldering wires, and repairing industrial equipment. AC voltage ~36 Volts - industry standard, electrical shops. Reduced to ensure personnel safety.
A 12 Volt soldering iron is used mainly for installation in auto repair shops, due to its simplicity and the presence of a 12 Volt on-board network. Good for wiring, terminals and other repairs.
A 24 Volt soldering iron is used mainly in soldering stations, for mounting SMD components and other installations of radio elements.
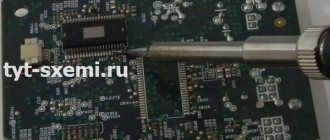
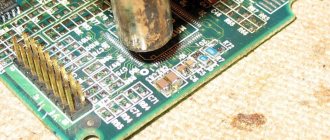
How to solder microcircuits with a soldering iron
Separately, it is necessary to consider the process of soldering microcircuits, which today are found in modern TVs, computers, phones and other equipment
Before soldering microcircuits, you need to understand that it is important not just to solder or unsolder the element, but also to understand their purpose
If conventional rod soldering irons are used for soldering wires and printed circuit boards with semiconductor elements, then when working with microcircuits, you should use hot-air devices or, as they are also called, hair dryers. Their main advantage is that soldering or desoldering of parts is carried out very quickly. To work with microcircuits, you will also need to prepare materials and tools. LTI flux is used as an antioxidant, and tweezers are used as an auxiliary tool.
The process of soldering microcircuits with a hot-air hair dryer is as follows:
- The soldered element can be a microprocessor, controller or microelements - resistors, diodes or capacitors. Before soldering or desoldering, it is necessary to flux the legs of the parts and places on the printed circuit board
- If it is necessary to desolder a microelement that is filled with special substances on top, then before desoldering, they must be removed. For this, acetone or special solvents are used.
- Once the part is cleaned, you can begin desoldering it. To do this, bring a soldering iron, which must be preheated. Places it at a distance of 2-3 cm from the part
- Using tweezers, pry up the part using little effort. As soon as the legs of the part melt, it will be disconnected from the board
- A similar method is used to attach the part to the board.
If necessary, solder is used when parts are soldered onto a new board. Solder should be applied first, and then begin soldering microelements. A detailed process of working with microcircuits with a soldering iron is presented in the video below.