Home » Lighting » LED lighting » How to choose an LED corn lamp
In our reviews we touched on various LED lamps, but somehow the so-called corn lamps always slipped through. Finally, we decided to dwell on them in more detail, and tell some of the features, and most importantly, answer the question of how to choose an LED corn lamp and what to pay special attention to.
How to choose an LED corn lamp
Until recently, there were no serious questions about this, because let’s be honest, there was nothing to choose from. The stores sold one or two types, and no more. Even Chinese stores could not really please us. There was only one criterion for selection - the manufacturer, the more famous the name, the better (supposedly). 2015 made some changes, now there is plenty to choose from and what to strive for, so let’s take a closer look at how to choose an LED corn lamp. Find out about the best LED lamp manufacturers.
It’s worth pointing out right away that corn can only be grown indoors; they are not suitable for the street at all.
Design features, device diagram
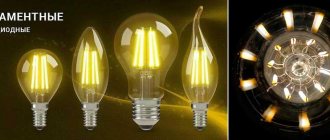
“Corn” is the name given to an LED lamp, which in appearance resembles the cereal inflorescence (cob) of the plant of the same name. The light bulb consists of a small oblong socket up to 9 cm high, on the side faces of which there are rows of yellow LEDs.
Design Features:
- due to the random arrangement of LEDs, light is scattered in all directions;
- LEDs are located on plates, metal or textolite;
- There is a driver inside the lamp that supplies the LEDs with current;
- There is no diffuser in the lamp.
The lamp circuit involves three main elements:
- C1 – quenching capacitor;
- C2 – filter capacitor;
- diode bridge (voltage rectifier).
The “corn” design allows it to be used not only indoors, but also on the streets.
In children's rooms, it is recommended to use corn lamps with an incandescent temperature of no more than 3,000 K.
Main types
In total, three main types can be distinguished; I would like to note that if you want to find European analogues, enter the query “corn led bulb”, so you can find “Corn” from real manufacturers. But, pay attention to the fact that they often come with a voltage of 110; before purchasing, check with the sellers for such nuances; we are only suitable for 220V. If you compare it with Tomich’s lamp, there are specific differences.
Main types of corn:
- Classic (large) ones come with diodes, each 0.15 W.
- Small ones. Usually there are bad diodes, every 0.08 W.
- OWL They are considered modern and have an interesting appearance.
All these types have one big drawback - poor color rendering. This can be corrected by soldering in an additional capacitor; by the way, the flickering also disappears.
Classic corn
It is considered the most reliable, it is optimal to use it in apartments and other residential premises.
The number of diodes ranges from 24 to 165.
The base is standard E14 and E27.
For all the time they showed themselves only on the good side, there were some copies that flickered too much, an additional capacitor completely corrected this problem.
Comparison table of classic LED lamps Corn
Small ones with a flask
If we speak for this option, then our resource does not recommend them at all. Just look at the cons:
- They heat up quickly.
- Heat is not dissipated due to the design.
- All diodes are stopped too close to each other. After a month, 30% of them burn out, after a year, 50%.
- They rarely last more than two years.
- Quite a high cost, considering that they are absolutely terrible in terms of assembly and other qualities.
The approximate luminous flux per 1 W is only 80 lumens, from here you can take the following bad results:
The size of the case also depends on the power; this can be used as a trick. If you see a bulb that is too small, you should know that it quickly overheats and the light is weak. If we return to the question: how to choose an LED corn lamp, we repeat again, we do not recommend this option, we left it for you only as an introduction.
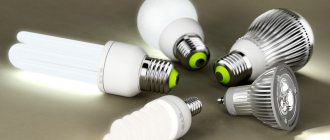
Application
“Corns” are used for lighting residential and office premises, shops, salons, and public places. The most widely used models are those with E14, E27 and E40 sockets with 40-70 LEDs.
The scope of application of corn lamps largely depends on the base. There are three options:
- E14. Today, many lamps and chandeliers are designed for light bulbs with a base diameter of 14 m. E14 “corn” lamps are suitable for them. It is recommended to use 9 W models. Among ordinary LED lamp bulbs, it is extremely difficult to find an analogue of E14. Lamps with a power of 5-6 W give a brightness of 500 lumens and cannot adequately illuminate the room.
- E27. Lamps with a standard base, they can be screwed in instead of incandescent lamps. Luminous flux decreases by about 30% over 2 years.
- E40. Lamps with a base diameter of 40 mm are used for street lighting. They last four times longer than their sodium counterparts and do not require additional equipment other than the driver, which is already built into the lamp.
Modern corn with COB LEDs
Such corn showed only the good side, but if we talk about repairs, it is almost impossible.
And let’s be honest, in terms of cost they cannot be called optimal. If you are a fanatic, then this option is suitable for you. The characteristics say that they have a power of 7 to 20 W, here are the real data, try to build on them only.
“Corn light bulb” E27 78 LED 5630SMD 20W! (Does anyone believe?)
And I believed it when I measured it. They don’t send me smartphones and tablets for review, so this will be another review of a light bulb, which this time I really liked. If anyone is interested, let's go. I went to the kitchen to replace it with a brighter one. At the time of ordering, this light bulb cost $15.55. During this time the price did not change. Let's first see in what form it was sent. The packaging is standard for this store.
Nothing was wrinkled. The light bulb is quite large (just over 160mm in length).
Weighed it. Almost 250g.
The light bulb is very beautiful. But the main thing here is that the internal content is (at least) no worse.
There are ventilation holes at the bottom of the light bulb and through slots at the sides. There is somewhere for the heated air to enter and exit. And a small photo for a visual comparison of sizes. I will periodically refer to these bulbs in my review.
1. Corn from a recent review (48 4.3W LEDs). 2. Incandescent lamp (100W). 3. Energy saving (26W 2700K). 4. Heroine of the review (20W). I chose the light bulb using the same criteria as before. The first condition was the presence of an electronic driver. It has a number of significant advantages over capacitor ballast. This includes the absence of light pulsations with a frequency of 100 Hz (harmful to the eyes) and electrical safety. The second condition was the form factor of the light bulb itself. Everyone understands perfectly well that the higher the power of a light bulb, the greater the amount of heat it must dissipate, the larger its dimensions. Otherwise, the LEDs will simply degrade due to overheating. The appearance was also not the least important. Plus, the price must satisfy the condition: no more than a dollar per 1W of power. We'll see what came of this a little later. Now let's look at the store page.
It seems that all the conditions of my choice are clear. SMD5630 LEDs have a rated power of 0.5W. Only 78 pieces. 0.5W*78=39W. On the store page 20W. Double power reserve. Only one thing confused me: AC220-240V. Let's see how it shines. I usually took pictures with an incandescent lamp for comparison. But I don’t have an incandescent lamp to compare such powers. Therefore, there will be no standard pictures against the background of wallpaper :) But there is a light meter, you can’t fool it. I checked in the kitchen. I screw the light bulbs into the socket in their regular place (at a distance of 50 cm from the ceiling, 2.2 m from the floor). The lampshade was removed for the purity of the experiment. The device was placed on the edge of the table.
1. 57.0 Lux - incandescent lamp (100W). 2. 118.7 Lux - Heroine of the review (20W). 3. 71.4 Lux - Energy saving (26W 2700K). 4. 42.9 Lux – Standard corn (60 LEDs 13W). Her photo is at the end of the review. I purchased it as a replacement. I didn’t measure the illumination on the wall, I don’t see much point. And it’s so clear that it shines brightest. If compared with an incandescent lamp, it turns out twice. It's time to switch to thermal mode (it greatly affects reliability). Using a pyrometer, I measured the temperature of the light bulb. Measured through a plastic cap.
10 min. +46.7°С 20 min. +49.3°С 30 min. +50.2°С 60 min. +51.4°C But he didn’t stop there. I decided to check the temperature of the radiator using a multimeter that I recently “reviewed”. I personally don’t have a multimeter with a thermocouple; I had to use my friend’s device. Fortunately, my friend is sitting at the next table. The thermocouple was attached directly to the radiator.
As you can see, it is very different from what the pyrometer shows. The plastic shell is an insurmountable obstacle to non-contact measurements. Formally, temperature doesn't mean anything. But if we compare with other light bulbs that have been in the chandelier since February 2014, their temperature after an hour is +78°C (measured with a pyrometer, their real temperature is even higher). So far none have burned down. The bulb has enough holes, the air exchange is good. But if anyone has a desire, you can drill holes in the plastic cap.
As you understand, I personally drilled it. It remains in practice to check the real power of the light bulb using well-known instruments. Let's look at AC consumption.
The store did not deceive (20W) 20.8W of consumption from the network (236V). Let's see how much DC it consumes. To do this, you need to disassemble the light bulb. The plastic cap is secured with latches (4 pcs.). The latches are very tight. The cap is very difficult to remove. It is also difficult to put on in place. The top aluminum LED plate is attached to the heatsink using eight self-tapping screws, connecting the light bulb into a single structure.
The LEDs are soldered neatly. The radiator amazed me with its power.
The lower base part is attached using four self-tapping screws.
The driver is hidden there.
The driver is assembled on a textolite board, which is the base of the entire light bulb.
The driver is unusual - transformerless. At the input there is a fuse and a varistor 07D471K (interpretation - diameter 7 mm, voltage 470 Volts).
Must protect the light bulb during voltage surges. It will work without it (in case something happens).
All side LED aluminum plates are inserted into radiators.
Only 4 pieces (radiators). Three plates are inserted into each. A plastic protective strip is placed on top of each plate. The driver chip is located on the back of the board.
Circuit-wise, the LEDs are assembled into 3 parallels, 26 pieces each (78 in total). And at the same time, they are divided into two parts: 60 pieces on the side plates and 18 on the top board. This is reflected in the diagram.
This is my first time encountering such circuitry. I drew the circuit from the board myself. If there are mistakes somewhere, don't kick too hard. The scheme has disadvantages and undoubted advantages. It has no galvanic isolation from the electrical network. But all elements of the light bulb are not available. Electric shock is almost impossible. Its electrical safety is significantly higher than that of the same energy-saving lamp and incandescent lamp. And no RF interference or ripple! I'm just checking. I plug the light bulb into the same socket as the TV. If the driver is noisy, then the digital channels disappear. But knowing (from experience) what kind of ladders and humps there are on LEDs, I decided to check the ripples. I connected the oscilloscope according to the diagram from GOST.
And I didn’t find anything. No ripple, no RF interference. I have never seen such a perfect picture! I clicked through all possible and impossible frequency ranges, but found nothing.
Two pictures: the light bulb is off and the light bulb is on. It turns out that this also happens. I almost forgot to measure the DC power of the light bulb. I connected a voltmeter to the driver output. The ammeter is connected in series to the top plate.
DC power of the light bulb P=80.4V*0.25A=20.1W. It turns out that the driver consumes practically nothing. P=20.8-20.1=0.7W or something like that. Doubts crept in. After all, I measured the power at work, and measured the constant at home. I decided to double-check the power consumption of this light bulb (the network voltage at work may differ from the home network voltage).
Nothing like that, and the Chinese device showed everything the same. The light bulb driver really has fantastic efficiency. He screwed the light bulb into the kitchen lamp.
There is a lot of space there, and the light bulb is not very big, it doesn’t spoil the picture. It stood there almost exactly the same. Only the light was a little warmer.
It seems that he looked at everything and measured everything. It's time to finish. But no. I put it in the kitchen. My wife said it was too bright. I had to turn on the soldering iron and reduce the power a little.
These are current-setting resistors. Their total resistance is 0.9 ohms. Don't believe what is written on them. I set our (from the times of the USSR) resistance to 1 Ohm 0.25 W. I didn't find another one. And you don’t need anything else. The power dropped by 4W, which absolutely solved the problem.
Now that's ALL! I received this light bulb free of charge for review purposes, but the choice was mine. Everyone decides for themselves how to properly use the information from my review. I can only guarantee the veracity of my measurements. If something is unclear, ask questions. For the rest, send me a PM, I’ll definitely answer. Good luck everyone!
The product was provided for writing a review by the store. The review was published in accordance with clause 18 of the Site Rules.
Advantages and disadvantages of corn
Advantages:
- You can count the number of LEDs and calculate the actual power. The type of LED is also visible.
- No need to use a flask. Although there is a peculiarity here, fire regulations prohibit the use of any LED lamps that do not have a bulb. So in office buildings it is best to avoid such installation.
- They shine equally in all directions, no need to buy additional diffusers.
- Easy to repair and disassemble.
- There are no radiators for cooling, which is why they have such a low cost.
Cons of corn
There is only one:
- All contacts are open and they are under constant voltage. Even if we take into account that it is not large, safety precautions are violated.
Soldering LEDs during repairs
Despite the impressive warranty periods given by manufacturers, some LED “corns” burn out not after 25 years, but during the first months of operation, and for no apparent reason. However, this is not a reason to get rid of a failed device, because about 90 percent of light bulbs of this type can be repaired independently. Naturally, for this you need to know the design features of the lamp and the principles of its operation, as well as be able to work with a soldering iron.
Progress:
- Let's disassemble the lamp.
- We check the diodes with a multimeter and identify the burnt element.
- We solder off the non-working diodes and, turning the board over, solder new working elements to the remaining tracks.
From all of the above, we can conclude that the ideal place for use of LED “corns” are small non-residential premises that do not have to be visited frequently. This means that such expenses do not make much sense, and yet it is worth taking a closer look at a more efficient and reliable lighting device.