Preparatory work
In order to correctly lay wires under the ceiling, you should know some points:
- Where is the main distribution board located?
- What brand and what cross section is the cable?
- Where is the equipment located?
- Which wiring method to use, based on the specifics of the room?
Having completed the first step, you can begin selecting the necessary cable and tools. Guided by the recommended standards, you should opt for the VVGng cable, which can be used as both a recessed and external electrical wiring system.
The possibility of laying electrical wires depends on where the electrical equipment is located. So, if it is not possible to lay hidden electrical wiring, then it is worth planning the route along which the external cables will pass.
Selection of material and calculation of wire cross-section
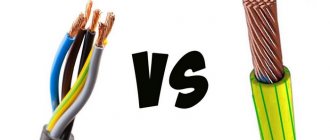
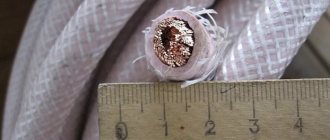
Before selecting material for future electrical wiring, you should decide on the scope of work. When planning a full replacement, it is recommended to use copper conductors. The best choice would be PVA. It is a vinyl insulated connecting wire, one strand of which consists of many thin wires. This fact is accompanied by an increase in electrical conductivity.
When partially replacing or laying, use identical material to the existing electrical wiring. Direct formation of twists between aluminum and copper conductors is not allowed. This can lead to overheating and damage to the electrical circuit.
Table for determining cable cross-section
To select the required conductor cross-section, you should sum up the power of all planned energy consumers in the room. Divide the resulting value by the voltage level, which will allow you to calculate the current value. In the future, use the tables from clause 1.3.10 of the PUE.
Attaching the cable to the ceiling from the outside
Currently, there are several types of external wire fastening:
- Carrying them out in a special metallized or corrugated sleeve
- Gasket in steel pipe
- Use of electrical pipes made of plastic
- Application of cable channels
- Fastening the cable to the ceiling with insulators and brackets
Any of the above options for external mounting of an electrical cable can be suitable for a home, but it all depends on the situation. Some types are best mounted on one type of surface, while others are undesirable for the same surface.
Advantages and disadvantages of using SIP
These wires allow:
- ensure the required electrical safety class;
- increase network reliability during operation;
- reduce the cost of maintaining the electrical network (up to 80%);
- reduce installation time and reduce labor costs;
- place electrical lines on the walls of buildings;
- reduce losses during electricity transmission (due to low resistance);
- connect objects without disconnecting the main supply line;
- lay and connect lines on your own.
Disadvantages of SIP:
- cost 20-25% more than conventional wires without insulation;
- many energy suppliers are not ready to use SIP (outdated equipment and no tools for installation);
- Only overhead power lines can be laid.
Wood type ceiling
It is best to equip a wooden ceiling with steel tubes. Their transverse size greatly depends on the diameter of the electrical wires. In addition, several cables can be placed in one tube at once.
As a branch to the electrical consumer, it is better to use IP65 boxes, which must be mounted from fire-resistant material. Inside the box, the possibility of the cable cores touching its walls should be prevented by applying insulation. This technique is important when installing both recessed and exposed wiring.
The process of installing the cable to the tree:
- First, the minibus is marked for laying the wiring.
- Next, you should mark the location and install distribution and passage boxes.
- Then the tubes are shortened to the required length and attached to the ceiling. Next, the pipes are connected to each other by welding.
- All wobbling of the wiring must be done at an angle of ninety degrees.
- Using pulling, the cable is stretched from box to box, leaving leads at the ends, the length of which will be adequate for wiring in boxes (about 20-25 cm).
- Next, the wiring strands in the boxes are connected using welding or soldering. Next comes the cable insulation.
- Then you need to ground.
- Finally, the last step is to check the integrity of the resulting wiring.
Nuances
Wiring along a ceiling or wall has its own nuances:
- Screws, screws and dowels must fit tightly to the required surface. If this condition is not met, damage to the insulation system may occur;
- The distance between the holes when fastening does not exceed 50 cm. If there are turns, then it is possible to reduce this distance by 5-10 cm;
- The cable is pulled vertically or horizontally on a flat surface. Laying over uneven surfaces is prohibited;
- A supply of wires is possible, but it should be as inconspicuous as possible during installation;
- Hidden installation of wires in the groove implies the presence of excess space, which will allow it not to interfere with the repair of walls;
- A container in the surface is not made for wires if the ceiling covering is made using a modern method (stretch and suspended ceilings);
- You should have special tools available for wiring installation (drill, hammer drill, screwdriver and hammer).
How to attach a cable to a ceiling made of metal
The metal surface of the ceiling is a good conductor of current, so it is necessary to approach cable installation as responsibly as possible in order to avoid unpleasant incidents. Thus, it is best to lay the cable in plastic electrical conduits.
This material is perfect for a distribution box. However, if the room is not conducive to installing this material, you can run the cables in steel tubes.
Installation features:
- The route along which the cable will pass is marked.
- It is necessary to determine the location of the passage and distribution boxes.
- Excess pipes should be cut off, then fixed to the ceiling, and then glued together, connecting the structure.
- It is necessary to use a corrugated tube when turning the cable route, which must be made at right angles.
- Use a pull when laying the cable from box to box, leaving leads at the ends, the length of which will be 20-25 cm.
- The cable cores are interconnected in the boxes by welding or soldering. Then they need to be insulated.
- After these steps, the structure should be checked for integrity.
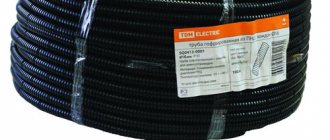
Cases of justified use of corrugation
In places where the wiring may be subject to mechanical damage, the cable is installed in a corrugated pipe.
It is used practically without restrictions in low-current systems:
- in signaling,
- in cable television,
- in telephone lines,
- on the Internet.
You should not do without corrugation when laying cables in a floor screed.
If the supply lines are placed under plasterboard or suspended ceilings, then it is more convenient to use a corrugated pipe. Then the wiring changeability requirement given in Chapter 7.1 will be met. clause 7.1.37. PUE, and additional mechanical protection of the power line will be provided.
Laying cables on a reinforced concrete slab
These slabs are found in old houses, so their design is somewhat different from that used in the construction of modern buildings.
Currently, the floors are being prepared during construction. Electrical plastic pipes are laid in advance, installation and passage boxes are placed in the future ceiling. Next comes the pouring of the floors. However, this is typical for modern designs, but not for old houses.
The use of reinforced concrete slabs forces the cable to be laid through channels, but often at the edges of the slabs or inside there are concrete piles that make wiring difficult.
An open cable can be laid on a reinforced concrete slab in the following ways:
- Fastening the wiring to the ceiling with brackets.
- Fastening the corrugated pipe with cable with clips.
- Fastening the metallized tube with the cable using clips or staples.
- Fastening in a steel tube, fixed with staples or clamps.
- Fastening an electrical tube made of plastic with a cable using clips.
Having understood the installation methods, you can consider the features of external cable installation: - First, the wiring route is marked.
- The places where the distribution and passage boxes will be located are marked.
- The existing tubes are cut to bring them to the required length. Next, they are attached to the ceiling and connected.
- Before attaching the tubes to the ceiling, they are tightened using a broach, leaving leads at the ends with a length of 20 to 25 cm (
Is corrugation necessary?
In order to understand whether it is dangerous or not to install electrical wiring without corrugation and which cable is most suitable for this purpose, consider GOST R 53315-2009 (GOST 31565 - 2012).
The document states that wiring in residential premises can be carried out using a cable with copper conductors and a flame retardant sheath with low gas and smoke emissions.
Such a conductor is VVG-ng-LS, or its analogues with an even higher degree of protection.
To figure out whether it is possible to do without corrugation when laying the VVGng-LS cable, let’s turn to the standards prescribed in PUE 7 (Rules for the Construction of Electrical Installations).
The table shows that wiring of the VVGng-LS cable, which belongs to protected wires and cables with a sheath made of fire-resistant materials, can be carried out:
- openly – directly on structures made of any materials,
- hidden - on fire-resistant substrates.
In other words, in these cases, additional protection is not required; you can do without corrugation.
The exception is hidden wiring on combustible bases. In this case, a lining made of “non-combustible materials” is required.
To understand whether the use of electrical corrugated pipes can enhance the fire safety of wiring, let’s consider their characteristics.
From the technical information offered by the manufacturer, it is clear that in terms of fire resistance, PVC corrugation “does not support combustion” in the same way as VVGng-LS. From which we can conclude that wiring with this cable can be carried out without corrugation, which will reduce the cost of work and materials used, as well as reduce installation time.
In other words, in the case of laying a cable with a flame retardant sheath, the use of corrugated pipes is not financially justified, since it is enough to lay a cable marked “ng-LS”. If the wiring must pass through combustible structures, installation must be carried out in a metal pipe.
Features of cable routing in plasterboard construction
A distinctive feature of such a false ceiling is limited access to electrical wires, so it is necessary to plan in advance where the wiring will be serviced. The cable will be attached to the ceiling using a method that is suitable for the existing ceiling base, be it metal, concrete or wood. Similar techniques are mentioned above in the article.
Drywall makes it easy to hide wires, so there is no need for hidden cables. However, it will be necessary to move the distribution and passage boxes outside the ceiling to make them easier to access.
For fastening the cable under a plasterboard structure, watch the video:
Wall deformation
Many walls tend to crack over time. This is especially noticeable in secondary housing.
If you have seen walls cleared of wallpaper, be it a panel house or a brick one, then you have probably noticed various kinds of cracks. They may be no thicker than a hair, or vice versa, a thumb can easily fit there.
In addition, cracks are also found in new buildings, even in those that have not yet been occupied by residents. Now think about what happens to the cable tightly sealed in the wall when it moves apart.
Most likely, nothing good. Will you be able and will you want, 15-20 years after such cracks appear, to tear off the wallpaper and change all the supply wiring?
Features of wiring installation in a slatted ceiling
This ceiling is suspended, like the previous one, so many of the features of the plasterboard construction are also suitable for slats. Therefore, distribution boxes should be moved beyond the ceiling to allow easy access.
Slatted ceilings are often installed in bathrooms, so wiring under the ceiling must be done:
- In electrical pipes made of plastic or corrugated analogues, provided that the ceiling is made of reinforced concrete.
- In steel tubes, provided that the base of the ceiling is wood.
Cable installation in electrically conductive panel conditions
These ceilings are modules filled with polyurethane foam. Conductive plates are built into these plates. Modules can be connected up to 5 pieces to one connector. The wiring is laid based on the characteristics of the room, whether the ceiling is made of reinforced concrete, wood or metal. In addition, wire distribution boxes should be moved beyond the ceiling.
Conductive panels look great at night when all the lights are off except the ceiling lights. By taking a photo of this ceiling at night, you can enjoy the unusual contrast of light and darkness.
The proposed options for placing wiring on the ceiling and under it are basic and relatively easy to reproduce on your own. If you carefully follow the installation instructions and comply with all safety standards, then there should be no problems with electrical wires, and installing lighting fixtures will turn into a real pleasure.
False ceiling
Various types of false ceilings have become widespread. Thanks to their installation, it is possible to carry out high-quality and safe electrical wiring along the ceiling space, which will be hidden behind a false partition.
At the installation stage, it is not recommended to hide distribution boxes under the casing. They must be easily accessible, so they should be moved outside the ceiling space. If this is not possible, you should completely abandon their use.
Laying cables over a false ceiling
Next, the most popular types of false ceilings will be presented, as well as the nuances of laying electrical wiring for each of them.
Drywall
Plasterboard ceilings are in wide demand due to their low price and the possibility of do-it-yourself installation. They are of the hanging type. For installation, a metal corset is pre-formed, which serves as the base for attaching the electrical wiring. It is allowed to lay cables in plastic or metal corrugations. The disadvantage is that access to the installed electrical wiring is limited, which leads to the need to take additional measures.
Wiring in a plasterboard ceiling
Reiki
This type of ceiling covering is accompanied by the use of a hemmed type of installation, which also limits further access to the wiring. The slats are fastened to a wooden frame, which is pre-formed on the base. The method of laying conductors depends on the material of the ceiling. In this case, it may be necessary to make additional holes in the sheathing to allow cable lines to pass through.
Lighting fixtures in the slatted ceiling
Cassette
They belong to the category of suspended false ceilings. They are assembled from individual rectangular or square elements made of compressed paper and fiberglass. They are installed in pre-prepared places made of plastic or metal sheathing.
This type of false partition allows you not only to easily install the wiring, but also to gain access to its elements at any required time. The conductors can be attached both to the base base of the ceiling and to the elements of the suspended sheathing.
Installation of suspended ceiling Armstrong
Tensioner
The use of decorative framing of the ceiling space using a tension ceiling allows you to apply any color scheme. For this, thermal rubber of a certain structure is used. Installation is carried out to the walls, which helps to create space between the facing partition and the main ceiling.
It can be used to route electrical wiring by attaching it to the base coat. In this case, it is recommended to maintain a height that will prevent the wiring from being close to the tension covering. The type of false ceiling in question also limits further access to the electrical circuit.
Electrical wiring above a suspended ceiling
Electrically conductive panel
Conductive panels made of polyurethane foam (acting as an insulator) and two layers of foil isolated from each other (conductors of electric current) allow you to beautifully and unusually design the ceiling. Their installation can be carried out using suspended technology or by gluing directly to the ceiling. When laying wiring you will need to use an open or hidden method. Both options will not provide access to hassle-free electrical wiring maintenance.
LED lighting using conductive panels