Signs of a cable break
Damage to electrical networks can be suspected if the electrical current supply partially disappears. A broken wire may be indicated by a lack of voltage in outlets located in a certain area, or by lighting not working in a separate room.
Sometimes wiring problems can also be accompanied by smoke or sparking in the cable. The cause of sparking can be not only a break, but also melting of the insulation as a result of illiterate selection of wires and cables.
Wire defects include breaks and breaks in the cord cores, as well as damage to the cable insulating sheath
Damage occurs on various sections of the network: the power supply may be disrupted at the point where the cable connects to the socket or switch; in the area between these devices and the box or lighting fixture.
Methods
Testing methods depend on the purpose for which it is performed. To check the integrity of the cable for a break or electrical connection between its wires (short circuit), the continuity test can be done with a tester based on a battery and a light bulb, or you can use a multimeter for this purpose. The latter is preferable.
Despite the fact that the price of a multimeter is higher than a primitive device, we recommend buying it; this device will always be useful in the household.
The simplest device for testing an electrical cable
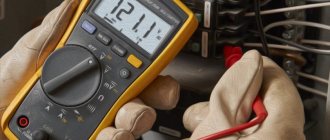
To check the cable, the multimeter must be turned on in the appropriate mode (diode or buzzer image).
Multimeter set to dialing mode
The testing methodology is as follows:
When checking a wire for a break, the tester is connected to its ends as shown in the figure. If the cable is intact, the light will glow (when testing with a multimeter, a characteristic sound signal will be heard).
Checking for a break
Explanations for the picture:
- A – electrical cable;
- B – cable cores;
- C – power source (battery);
- D – light bulb.
If the cable has already been laid, then on one side it is necessary to connect the wires together and ring the wires at the other end;
Second option for checking the power cable
when checking the presence of an electrical connection between the cable cores, the tester probes are connected to different wires. Unlike the previous example, there is no need to twist the wires on the other side. If there is no short circuit between the wires, the light will not light (when testing with a multimeter, no beep will sound).
Causes of malfunctions
If the operating rules for electrical communications are observed, they can serve regularly for decades. But in practice, damage to electrical networks is quite common, which can be caused by various reasons.
These factors include:
- Long-term operation of the cable . Wiring can function flawlessly for many years, but after a certain time limit it begins to deteriorate. In this case, twists scatter in the network and leaks appear, which regularly knock out the RCD (its absence affects the increase in leaks). Sooner or later, such violations lead to interruptions, and then to a complete cessation of the power supply.
- Mechanical damage . Without knowing the layout of electrical networks, when drilling holes and driving nails into the wall, you can easily touch a wire, causing it to break and sometimes short circuit. Sometimes minor mechanical damage has a delayed effect: in this case, the integrity of the core may not be damaged immediately, but after several months or even a year.
- Defective wire or poorly executed electrical installation . Damaged cables tend to become constantly hot, which can have fatal consequences. After a sudden power surge, such wires may break.
- Incorrect use of adapters . Electrical wiring malfunctions can be caused by improper use of extension cords or tees. This can happen if several high-power household appliances are connected to the device, for example, a washing machine and dishwasher.
If the adapter is used incorrectly, the cables that come from it are subject to overheating and increased stress, which can lead to melting of the insulation.
In all cases, it is necessary to identify the location of the cable damage in order to immediately repair the damage.
Video
From all of the above, we can conclude that having a multimeter with a dialing function in the house is an objective necessity for any home craftsman. With such a device, in most cases it will be possible to quickly eliminate minor faults without turning to specialists for help.
Due to a violation of the integrity of the wiring, walled up under a layer of finishing materials, apartment residents may be left without the usual amenities. To restore the current supply, you need to know how to find a broken wire in the wall and correct the situation.
We will tell you how and with what tools damage to electrical wiring is detected. We will show you how to eliminate the detected faults. You will learn what needs to be done to prevent such problems.
Instructions for finding the break point
If a malfunction is detected, it is necessary to immediately take measures to determine the cause of the damage and search for the approximate location of the electrical network defect.
First of all, you need to check which rooms have problems with the supply of electrical current.
Melted switches or sockets indicate that damage to the wiring occurred in the adjacent sections of the electrical network
Then you should find out whether the cable break affected lighting fixtures or sockets by checking them with a tester. Depending on the answers to the last question, you should follow the instructions below.
In this case, the malfunction may be caused by a faulty phase or neutral cable.
Broken phase wire
First of all, you need to determine which machine the damaged socket is connected to. Having identified the power source to which the faulty cable is connected, it is necessary to turn off the electricity and disconnect all wires from the panel: “zero”, “phase”, “ground” (if any).
In order to find the power source of the outlet, you need to switch the machine, while simultaneously checking with the indicator the presence or absence of a phase
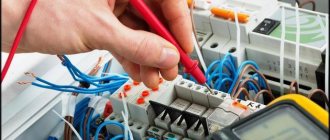
Then you need to arm yourself with a multimeter, with which you should sequentially check all connections adjacent to the damaged object, starting from the cable in the panel.
In this way, you can identify the affected area: usually between two sockets there are two, and in the presence of “ground”, three wires. If in this area it is possible to identify only one vein (for example, a zero), we can safely assume that the break is located here.
Distribution boxes are often inaccessible because they are hidden under a layer of finishing materials. If you have access to such devices, it is advisable to open them, since damage to the cores often occurs in them.
If no malfunctions are found, you should check the non-functioning wires with an indicator, starting with the twists, and also inspect the terminal block and disassembled twists.
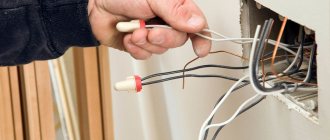
A wiring option is possible that does not require installation of a junction box. In this case, the cables run unhindered from one outlet to another, with two wires entering each outlet box, making up 4 cores. In this case, to identify the defect, it is necessary to remove the devices located at the beginning and end of the faulty section, and then examine all the wires with a multimeter.
Damage to the neutral wire
The search for a broken neutral wire is practically no different from the work on detecting a broken “phase”, but it has certain features.
You can find out about a break in the neutral wire at the contacts of the socket by bringing an indicator screwdriver to this place: it will glow in the “phase”, but will show the absence of a “zero”. In this case, it is useless to use a multimeter to check the voltage, since this device will show an arbitrary value from 0 to 220 V.
It is important to observe strict safety precautions: due to the existing phase, there is still a danger of electric shock even if the socket is not working.
It is quite difficult to understand the intricacy of wires placed inside the wall. To identify a faulty cable, it is often necessary to check the integrity of each network element
If a three-core cable is used to distribute electricity, a “grounding” conductor can be used as a last resort to transmit “zero”. However, in this case, the “ground” function will be absent from the socket: this is generally undesirable and unacceptable if we are talking about high-power household appliances, for example, a washing machine.
What you need to know about the wire testing device
To check the integrity of the electrical wiring, use a digital or analog multimeter with a separate operating mode. The built-in buzzer is activated when current passes, but the device does not allow you to determine the state of the wires. For example, a cable may have damage on the surface of the core, and testing will not show a problem.
But when connecting the rated load, the wire will burn out. You can check the integrity of power lines by resistance: if the line is broken, the screen will display a value equal to 1 (infinite resistance).
Principle of operation
A 9 V battery and a microprocessor control unit are installed inside the test device. When the probe is connected, current flows through the wires, the value is recorded by the controller. The built-in buzzer indicates that the circuit is working; the absence of sound indicates damage to the electrical wiring. If the device is switched to ohmmeter mode, the microprocessor calculates the resistance of the circuit section and displays information on the display.
Troubleshooting lighting wiring
If damage occurs between the box and the switch or an artificial light source, you should use an indicator (single-pole voltage indicator) to use it to identify the presence or absence of a “phase”.
If there is no light in one of the rooms, you must first check the condition of the lamps and sockets. If their condition does not cause concern, most likely it is a cable break.
To do this, open the switch from the lighting device; in the off position, the presence of “phase” on the contacts is checked. If it is absent, the break point is between the box and the switch.
If there is a “phase”, its presence is also checked on the lamp (in this case the switch is turned on). If there is no “phase” on all conductors, the place of damage should be looked for between the lamp and the box.
There is an option when, when the lighting is not working and there is no “phase” on the switch, the indicator shows its presence on the lamp. This situation means that the neutral and phase wires have swapped places.
To solve the problem, you need to trace the passage of the “phase” wire along the entire distance of the laid cable, starting from the box to the lamp and then to the switch. It is necessary to find the point where the wires were changed, disconnect them and make new fasteners, positioning the wiring correctly.
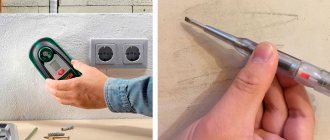
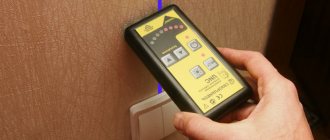
If a hidden wiring scanner is used to search for an open circuit, all actions to detect damage will take a couple of minutes:
Image gallery
Photo from
Convenient mobile device
Selecting a program for searching wiring
Sound signal and display
Repair of hidden wiring
When searching for damage, you should turn off the power supply to the cable, which can come from any source. In some cases, it may be necessary to burn through the wiring insulation to reduce the resistance level.
Checking the heating element
Before testing, it is necessary to calculate the resistance of the heating element as the ratio of rated power to voltage.
For example, if the heating element develops 2200 W at 220 V, then the current in the circuit will be 2200 ÷ 220 = 10 A. To determine the calculated resistance, it is necessary to divide the power by the current in accordance with Ohm’s law. The parameter will be 22 Ohms. To check with a test device, it is necessary to de-energize the equipment and connect the probes to the connectors of the heating element. If the display shows 1, it means there is a break in the spiral, 0 indicates a short circuit.
Searching for electrical wiring for preventive purposes
Usually, electricians or residents start looking for cables running through the apartment when there are problems with the light.
Meanwhile, you should take care of this in other situations:
- Before the planned redevelopment of the apartment. For any manipulations that even affect non-load-bearing structures (for example, when dismantling a partition or moving a doorway), it is important to take into account the location of electrical communications.
- Before installing sconces, hanging pictures or other wall accessories. To carry out such work, it is important to know where the cable is located so as not to stumble upon it when drilling holes or driving nails.
- When purchasing a home. Immediately after purchasing an apartment, it is advisable to draw up a plan for the electrical networks located along the walls and ceiling. On the diagram it is also worth noting the locations of sockets, switches, and junction boxes. Such markings will help when performing major/cosmetic repairs of the apartment, as well as when arranging furniture.
To search for an electrical route, you can use homemade or professional devices, which were described above.
Elimination of broken phase and neutral wires
Having found out the exact location of the cable break and determined its peculiarity (damage to the “phase”, “zero”), you can begin to repair it.
To eliminate a damaged phase wire, follow these steps:
- First of all, you need to disconnect the phase wire.
- Using a hammer or other tool, remove plaster or other finishing from the wall surface. It is necessary to clear the area along the route by approximately 10-15 cm, covering the area to the right and left of the expected center of damage.
- It is necessary to separate the damaged core from the network, being careful not to touch the insulation on other cables.
- It is better to connect copper wiring by soldering. To do this, you need to take an additional piece of a similar product from which the repair jumper is made.
- It is also advisable to first place a polyvinyl chloride or heat-shrink tube on the core of the damaged cable. The ends of the jumper are twisted with the ends of the broken wire, after which the connections are soldered.
- Insulating tape is applied tightly (in several layers) to the repaired area, after which the tube covered with the wire is carefully pushed onto it. This ensures the tightness of the fastener.
Aluminum wires are less amenable to soldering, which also requires special solder and flux. In this case, the most reliable connection method will be the WAGO terminal, and the place of its attachment must be wrapped with electrical tape and additionally covered with sealant.
The wires can also be connected using a junction box. To do this, the insulation is removed from the broken wire, after which its ends are separated in different directions. Using a hammer drill equipped with a special crown, a hole is punched in the wall, the dimensions of which coincide with the parameters of the branch box.
The device is inserted into the opening, after which it is secured with alabaster. The wires are placed in the box, while the damaged wires are connected by color and wrapped with insulating tape. Finally, the box with the restored wires is closed with a lid.
If the cables are placed in special tubes, the damaged wires should be carefully pulled out, and new wires should be inserted in their place using a pulling device.
If the neutral cable is damaged at the beginning of work, it must be disconnected from the bus by attaching the phase conductor. The rest of the process coincides with the regulations described above.
After any type of repair, the grooves are covered with plaster. It is possible to apply voltage to the repaired wiring only after the coating has completely dried.
Laying open electrical networks
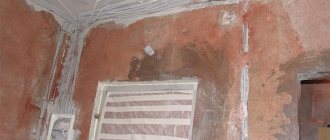
Repair work associated with a break in a hidden wiring usually requires complex construction and repair work: dismantling the finish, gating the walls, followed by sealing and covering a section of the wall with decorative materials.
Eliminating a broken hidden wire often requires dismantling the finishing, so it is advisable to combine such work with a major renovation of the premises
Since immediate implementation of such manipulations is not always possible, in some cases it can be recommended to lay a new wire along the surface of the wall, covering it in a special box or tube.
You will become familiar with a detailed description of the rules and technology for laying an open electrical network by reading our recommended article.
