Modern houses are literally crammed with electrical appliances, communication and control equipment, and they all require power from the network. A huge number of wires have to be pulled in all directions, trying to somehow organize and hide them. In this case, it is necessary to decide how to attach the cable to the wall and other structures, ensuring its reliable and safe operation. This can be done using a large assortment of special fasteners, a description of which with installation technology you will find in this publication.
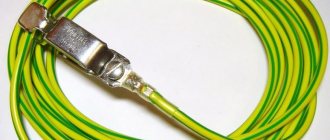
Special fasteners will help distribute and organize such a number of wires Source nag.ru
Fastening exposed wiring
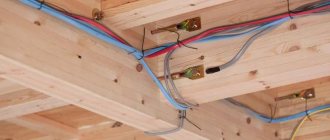
In wooden buildings without additional interior finishing, wires are laid openly. You have to do the same in cases where no repairs are expected, but you need to install an additional socket or lamp. If it is not possible to run the cable through the baseboard, use cable ducts, insulators or plastic staples with nails.
- Cable channels are 2-meter plastic boxes of different sections with snap-on lids. The box is attached to the surface with self-tapping screws screwed into the inner surface of the rear wall; conductors are placed in it and closed with a lid.
Products come in different colors, including wood patterns, which allows you not to disturb the aesthetics of the premises. Source cable.ru
Porcelain insulators allow you to attach the wire to the wall or ceiling, imitating the retro style in the interior. They are made in the form of small barrels with a through hole, through which they are fixed with nails or screws, and wires twisted into a twisted bundle are pulled between them.
Against the background of wooden walls, insulators look more organic than cable channels
Plastic brackets with a hole for a nail, which is usually included, are fixed to surfaces made of wood, plastic and other non-solid materials. With their help, single cables can also be attached to furniture, for example, to organize computer wires under the desktop. They are often used to run telephone or internet cables above baseboards.
Nail clips for exposed mounting Source www.elektrikaup.ee
The only tools you need for electrical installation on wooden and similar surfaces are a hammer or a screwdriver, which can easily be replaced with a regular screwdriver.
General rules
When installing cables hidden or open, indoors or outdoors, there are several general rules:
- The optimal distance between fasteners is 40-50 cm.
- If self-tapping screws, screws, or dowels are used, they are tightened all the way so that the protruding cap does not damage the insulation.
- The cable is laid evenly, without humps. If a reserve is needed, it is placed in the least visible place.
It is advisable to lay the cable in a straight line - vertically or horizontally
Basically, that's all the recommendations. They are versatile and uncomplicated. The distance can be reduced if necessary. For example, at turns of the route, the fasteners are installed at a short distance from the bend point - 5-10 cm. The task is to ensure reliable fixation and prevent sagging.
Fastening hidden wiring
The cable fasteners described below can also be used for installing open wiring in rooms with increased fire safety requirements. For example, in a garage or in a bathhouse. But more often it is used for fixing wires on surfaces that are subsequently planned to be covered with a layer of plaster or decorative finishing - suspended or stretch ceilings, plasterboard, wall panels on a frame, etc.
For plaster, grooves are cut out for wires, but for suspended structures they are not needed Source avatars.mds.yandex.net
For reference! When laying the cable in a groove, you can secure it with gypsum or alabaster mortar. But for large-scale work this method is inconvenient, since such solutions harden very quickly and have to be mixed often in small portions.
Most often, during electrical installation work, you have to deal with surfaces made of various types of concrete and brick, into which nails and screws cannot be driven. Therefore, they select a different fastening for the wires, and as a tool they use a hammer drill for installing dowels or a mounting gun with special nails and fixing elements.
Using a hammer drill
Almost all fasteners for wires and cables are designed for fastening with dowels with a diameter of 6 mm. Therefore, you need to have a corresponding drill for the hammer drill for making holes in brick or concrete.
It is better to drill walls made of foam and aerated concrete with a conventional drill Source bitu.ru
See also: Catalog of low-cost house projects
Installation is carried out using the following elements:
- dowel-clamp - a plastic loop with legs that have spikes on the sides. Depending on the size and shape of the loop, a round or flat cable can be placed in it. To do this, it is pulled through the head of the loop, and the legs folded together are hammered into a hole drilled with a hammer drill. The angled spikes rest against the walls of the hole and securely hold the fastener in it;
Dowel clamp for round cable Source keltos.ru
- nylon cable ties with a dowel hole are a simple and cheap fastening for wires. After drilling a hole in the wall or ceiling, hammer a dowel into it and secure the screed with a self-tapping screw. Or, if the base is wooden, install it immediately with a self-tapping screw. Then the wire or bundle of wires is tied to the base, tightening the tie. The big disadvantage of this method is the impossibility of altering or dismantling the wiring without breaking the tie, since it can only be tightened once;
Cable tie for a screw Source www.officemag.ru
A dowel for a nylon tie is a plastic product with a thread or spikes on the leg and a large head with a flat through slot into which a regular tie is threaded after driving the dowel into the hole;
Dowel holder for screed Source kilovolt.by
See also: Catalog of companies that specialize in electrical work
- The dowel tie is a whole device assembled from a tie clamp, a plastic dowel consisting of two halves, and a fixing peg. Therefore, you won’t have to buy additional clamps for this fastener, they are already there. During installation, the two halves of the dowel are folded together and locked with a latch located at the ends, forming a leg with spikes. It is inserted into the hole and secured by driving a spacer peg into the dowel. Only the tie itself remains on the surface, which is used to tie up the cables;
Universal dowel-screed Source avatars.mds.yandex.net
- Square or rectangular mounting pads are flat plastic products with a mounting hole and “ears” or slots into which the tie is threaded. As in previous examples, first a 6 mm hole is drilled in the base into which a plastic dowel is inserted. Then the platform is secured to it with a self-tapping screw. There are pads without a mounting hole, but with a sticky layer on the back side, covered with a protective film. They stick to any smooth surface - furniture walls, plastic, tiles. After installing the platform, a nylon tie is threaded through the slot and the cable is secured to the wall or other surface. Moreover, several wires can be fixed simultaneously on one site.
Note! Nylon zip ties are an indispensable consumable for electrical installation work. They are used not only together with the listed fasteners, but also separately, for fastening cables to pipes or already laid electric mains.
Differences in fasteners
Fasteners for mounting wires differ in type from each other in their design purpose, different sizes in relation to the wires being fixed, and base materials. So, in order to prevent sagging of the route, plastic brackets for single cables should be selected according to its shape and diameter. The same is required when using dowel clamps.
The ties differ in the width and length of the strip. To save money, you should decide on the standard size in advance. For significant loads, metal brackets with one or two fastening points are used instead of plastic brackets. Particular attention must be paid to the strength of the dowels in the wall.
How to secure a cable channel - the main 4 ways
- self-tapping screws for soft materials (wood, chipboard, MDF);
- nails in soft materials;
- screws and dowels for hard materials (stone, concrete, metal, plastic);
- gluing platforms with clips and ties to panels that allow such installation;
- cable channels corrugated with plastic tubes.
Useful tips Connection diagrams Principles of operation of devices Main concepts Meters from Energomer Precautions Incandescent lamps Video instructions for the master Testing with a multimeter
Cable installation in electrically conductive panel conditions
These ceilings are modules filled with polyurethane foam. Conductive plates are built into these plates. Modules can be connected up to 5 pieces to one connector. The wiring is laid based on the characteristics of the room, whether the ceiling is made of reinforced concrete, wood or metal. In addition, wire distribution boxes should be moved beyond the ceiling.
Conductive panels look great at night when all the lights are off except the ceiling lights. By taking a photo of this ceiling at night, you can enjoy the unusual contrast of light and darkness.
The proposed options for placing wiring on the ceiling and under it are basic and relatively easy to reproduce on your own. If you carefully follow the installation instructions and comply with all safety standards, then there should be no problems with electrical wires, and installing lighting fixtures will turn into a real pleasure.
What is needed for gating
Strobe attachment
After completing the marking, you will need to decide what to use for the strobe. There are quite a lot of options.
The most commonly used tool is a hammer drill with a special attachment, which has a simple name - a strober. It is a curved blade with a groove.
Its end is sharp enough to cope with punching a groove. It is necessary to work with such a nozzle in shock mode. As a result, you will get an even and deep coating.
The other attachment is a regular flat spatula. The processing procedure is almost the same as the previous device, but the productivity will not be as high.
The grinder will become an auxiliary tool for gating
It is quite difficult to achieve a great effect when punching with a hammer drill, especially if the processing is carried out on a concrete wall.
Many professionals recommend using a special disc cutting tool for this type of work.
A grinder with a diamond blade is used as such a device.
It will help to make cuts to the required depth, and then knock out the central section using a hammer drill.
Although the number of procedures looks quite impressive, the effect from an angle grinder can be achieved much more than from a hammer drill. The speed of the grinder is quite high, so construction work will not take up much of your time.
Wall chaser
Well, the most effective tool for chasing is a wall chaser. This device is somewhat reminiscent of a grinder in design. You have the opportunity to adjust the distance between the disks, therefore, you can set the required width of the groove.
Such procedures generate quite a lot of dust and contaminants, so it is imperative to use a respirator and earplugs during work. This will help maintain your health and prevent dust from entering your respiratory tract.
Features of ordering bundles of wires
Very often, several wires are laid, which requires their marking to prevent errors during maintenance and connection. There are two main solutions for this:
- color marking, when, for example, for single-phase networks, the ground wire has yellow-green insulation, the neutral wire has blue insulation, the phase wire has brown or black insulation;
- the use of special number tags that are installed at the ends of the wires.
Another option is to use special combs made from clamps or clips. Such solutions are quite sufficient to identify a specific wire, provided that uniform rules are maintained during installation work.
Plastic and metal staples
Products made of plastic and metal are common means for openly fixing wires.
Visually, the mount looks like an arc with a recess for a round cord and an additional hole for a self-tapping screw. In plastic varieties, the nails are placed at the manufacturing stage. Fastening components come in different sizes.
Plastic is used for work in residential premises; metal ones are more suitable for firmly securing cables. The latest products have 1 or 2 legs.
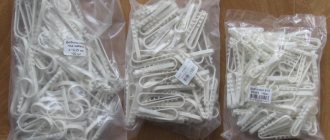
Plastic staples
Tips for choosing
It is necessary to select types of wire fastening based on the load created by the weight of the cable bundle. It is important to prevent possible breakdowns or ruptures of elements over time, that is, it is better to play it safe and use a more powerful and reliable type of fastening than a weak and cheap one.
The dowels and screws for fastening must match each other and the diameter of the hole, otherwise the fastening may fall out and the self-tapping screw may not be screwed into the dowel.
Despite the apparent simplicity of attaching cables, before purchasing parts, it is worth thoroughly deciding on their choice and, if necessary, conducting a test test. This will save you money and ensure high quality work.
Preparatory work
In order to correctly lay wires under the ceiling, you should know some points:
- Where is the main distribution board located?
- What brand and what cross section is the cable?
- Where is the equipment located?
- Which wiring method to use, based on the specifics of the room?
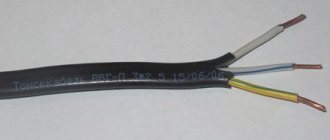
Having completed the first step, you can begin selecting the necessary cable and tools. Guided by the recommended standards, you should opt for the VVGng cable, which can be used as both a recessed and external electrical wiring system.
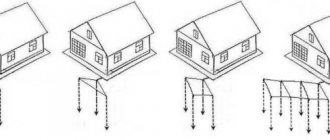
The possibility of laying electrical wires depends on where the electrical equipment is located. So, if it is not possible to lay hidden electrical wiring, then it is worth planning the route along which the external cables will pass.