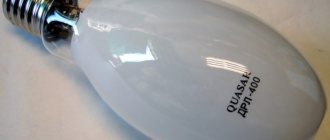
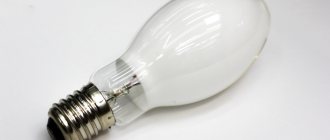
Based on its power and illuminated area, it is still considered one of the most cost-effective energy-saving lamps. Some “plant” lovers actively use it for grow boxes.
Do not confuse low and high pressure sodium lamps. They have different designs and operating principles.
The emission spectrum of both is dominated by orange light. For low-pressure products, the radiation is almost monochrome; they shine with a bright golden light.
If they are used for lighting in rooms, the colors will be practically indistinguishable.
In high-pressure lamps the spectrum is more diverse.
In those models that are used in greenhouses for growing plants, a little blue light is specially added to the light spectrum.
The kit for connecting a high-pressure lamp includes several components, without which you simply cannot start it. That is, simply by applying 220 volts to it, it will not light up.
Connection diagram and what is needed to start DNAT
To do this, you need a special device - a choke or ballast, which in turn is connected according to a certain circuit.
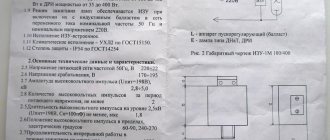
This diagram is often depicted directly on the body.
Here is a more detailed drawing of it.
Painted on it:
- the inductor itself (ballast), to which the phase is supplied
- then this phase is supplied to the pulse ignition device - IZU
Through it you can connect instances of different power, from 70 to 400W.
The IZU creates a starting impulse for the breakdown of the burner contents in the flask and the formation of an arc. The voltage reaches several thousand volts!
And the burner itself heats up to 1300 degrees during operation.
Only after the IZU is the gas-discharge lamp itself connected.
The same connection diagram can be depicted on the walls of the ignition device.
1 of 2
What lamps are needed to use NL outdoors and how to choose them
NL requires a mains voltage of 220 V and alternating current with a frequency of 50 Hz with appropriate control gear.
For highways, street lamps with high-power NL (from 250 to 400 W) are used; on secondary roads, lamps of 70-250 W are used; for pedestrian sidewalks and park areas, the NL power can be 40-125 W.
The lamp shades used can be cylindrical or spherical (for parks); directional spotlights are common for illuminating wide streets.
The working position of the lamps can be either horizontal or vertical.
The lamp must have protective glass due to the high heating of the lamp elements and to avoid damage.
Other necessary elements for the correct operation of the NL are a block with ballast and ballast equipment (to reduce the likelihood of damage due to power surges).
The choice of a lamp for street lighting depends on the tasks it must perform.
For example, HPS lamps are widely used in gardening and floriculture.
When choosing lamps for streets, underground passages, indoor sports complexes, preference is given to 70 or 150 W HPS lamps. The level of protection against dust and moisture is also taken into account here. For outdoor lighting in this case, IP 65 lamps are suitable.
Important! IP is a system for classifying the degree of protection of the enclosure of electrical equipment from the penetration of water and the impact of solid objects in accordance with international standards IEC 60529. The IP mark is the degree of protection, the two-digit code after is the level of protection from solid objects (the first digit), and from water - second digit. Number 6 is protection from dust and from the penetration of various objects. Number 5 is protection against jets of water.
Why do you need a capacitor?
In addition, it is recommended to use a capacitor in the connection kit. Although it is not present in all schemes.
Why is it needed? As is known, circuits using power chokes consume both active and reactive power. From the second, you will not get any beneficial effect.
This will not make the lamp shine brighter, but the losses will increase. It is in order to remove this reactive component that a phase-compensating capacitor is used.
For lamps of different power, you need to select the appropriate capacity. Here are the recommended capacitor capacitance parameters, depending on the power of the chokes:
A visual comparison of the current consumption of a HPS lamp with and without a capacitor:
As you can see, more than double the difference. In the first case, the compensated current (active) is shown, and in the second case, the full current (without a capacitor in the circuit).
Some people think that by doing so they also reduce energy consumption, but this is not entirely true.
Your meter is not designed to count reactive or apparent energy, and the actual cost savings can be a maximum of 3-4%.
But you will eliminate unnecessary losses due to heating of wires and iron.
How to connect a HPS lamp
Here is a compact shield assembled with your own hands, according to the connection diagram.
You can, of course, assemble all this in the overall body of the lamp, if the dimensions allow.
It is very important, before assembling such a circuit yourself and using any components, using a conventional multimeter in the maximum resistance measurement mode, check the insulation of the inductor and capacitor.
Is there a hole in the body?
To supply and disconnect 220V power, use a two-pole input circuit breaker.
For one lamp with a power of up to 400W, a machine with a nominal value of 5-6A is quite suitable. In addition to on-off switching operations, it will also play the role of a protective device.
A circuit breaker is mounted at the very beginning of the circuit. Do not forget to also ground the entire panel body.
Two neutral wires come out of the machine. According to the diagram, one of them is connected directly to the lamp, and the second one is connected to the corresponding terminal labeled “N” on the starter.
Keep in mind that the choke must be installed only in the open phase wire going to the lamp, and not in the neutral wire.
Otherwise, you can accidentally burn the product if during operation the neutral wire after the ballast choke accidentally shorts out.
Next, turn off the phase. Mount one wire from the machine to the incoming contact of the throttle.
And connect the wire from the output contact to terminal “B” (Balast) of the ballast.
After that, connect the middle terminal Lp (Lampa) to the light bulb socket.
The difference between connecting 2 and 3-pin IZU
Please note that there are two-pin and three-pin IZUs. The first ones are connected in parallel with the lamp itself.
That is, strictly after the ballast, you must enter a phase into the IZU, and apply zero to its other terminal. It doesn’t matter where you get it from, even directly from the cartridge itself.
By the way, two-pin ones have not been recommended for use for a long time and here’s why.
The ignition process is associated with a high voltage pulse (from 2 to 5 kV). And this pulse is supplied in parallel not only to the lamp, but also to the inductor.
And this can easily break through the insulation of the ballast if it is not designed for this.
Therefore, such a parallel connection is more often found in low-voltage sodium lamps, or in those where an ignition pulse of no more than 2 kV is sufficient.
The capacitor is connected in parallel to the entire circuit. Just connect one wire to the machine phase, the other to zero.
All that remains is to stretch the cable and disconnect the cartridge.
From the starting device to the lamp itself, the recommended cable length is no more than 1.5 m.
Design Features
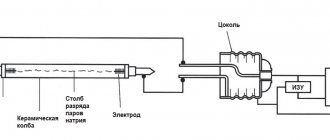
All sodium lamps consist of a high-strength aluminum oxide bulb connected to two electrodes. The element material can withstand high temperatures and is resistant to sodium vapor. The flask is filled with a mixture of inert gases, mercury, sodium and xenon. The presence of argon in the gas mixture facilitates the formation of a charge, and mercury and xenon serve to improve light output.
The design looks like a flask within a flask. The burner is installed in a smaller flask, and a vacuum is created in it. Connects to the network via a socket. The external element performs the function of a thermos, protecting the internal parts from the negative effects of low ambient temperatures and reducing heat loss.
What causes DNA explosion?
If you touch the surface of the lamp with your hands, be sure to wipe it with a clean, dry cloth before turning it on.
This is due to the high heating temperature during operation - up to 350 degrees.
Any greasy stains from your fingers will turn into blackened blots at such temperatures.
This will eventually cause the lamp to burst or crack sooner or later.
By the way, many people are afraid when using it in greenhouses that if a drop of water gets on the heated body, the HPS may explode. Actually this is not true.
The product is made of heat-resistant glass and small splashes are not particularly scary.
Unless you start hosing it down, as shown in this popular video:
Ignition and launch
When voltage is first applied, the lamp starts to ignite. This starting stage and reaching maximum brightness can take from 5 to 10 minutes.
The glow color should be bright yellow up to 150 lm per watt.
If street lighting made by such models has an irritating, dirty orange tint, this means only one thing - no one has washed the lampshades for a long time, and there is dust and dirt on them.
High-quality, good lamps always produce a pleasant orange spectrum.
HPS lamps are very stable and are not afraid of various types of vibrations and shocks.
Summary
HPS lamps are a reliable, time-tested type of lamp that is used throughout the world to illuminate streets, highways and greenhouses. Its main advantage is high energy efficiency and low price. Thanks to this, this type of lamp will compete with all innovative light sources, including LEDs, for a long time.
HPS lamps
Flaws
There are certainly disadvantages to such lamps.
- luminous flux drops slightly after 15,000 hours of continuous operation
- cumbersome control circuit
- at the end of its service life, the color of the glow begins to change
The change goes from yellow towards orange with redness or even completely red.
- many are also not satisfied with the long startup process - up to 10 minutes
- the throttle itself emits a constant hum after prolonged operation
Specifications
The main ones include luminous flux, luminous efficiency and operating time. There is a direct relationship between the power of the element and the resource - high-power models last longer.
Below are the technical characteristics of popular HPS sources with a power of 150, 250 and 400 W. All of them are connected to the lamp using an E40 type socket at a voltage of 120 V.
DNAT 150
Technical characteristics of the lamp DNaT 150
| Power, W | Flow, Lm | Light output, lm/W | Length, mm | Diameter, mm | Resource, h |
| 150 | 14 500 | 100 | 211 | 48 | 6 000 |
DNAT 250
Technical characteristics of the lamp DNaT 250
| Power, W | Flow, Lm | Light output, lm/W | Length, mm | Diameter, mm | Resource, h |
| 250 | 25 000 | 100 | 250 | 48 | 10 000 |
DNAT 400
Technical characteristics of the lamp DNaT 400
| Power, W | Flow, Lm | Light output, lm/W | Length, mm | Diameter, mm | Resource, h |
| 400 | 47 000 | 125 | 278 | 48 | 15 000 |
Throttle
Regarding the quality of chokes and why they fail in new lamps.
Modern compact ballast chokes are mostly made by winding one coil in bulk, without interlayer insulating spacers. Plus, they are somehow impregnated with varnish, without protecting the winding with a protective compound.
If moisture gets into the case with the circuit, you'll be in trouble. Soviet large chokes were wound only with a two-rod, two-spool design, each of which had interlayer cardboard insulation.
Hence their practically eternity. But modern marketers and manufacturers, unfortunately, are not interested in this.
Connecting a HPS lamp from the DRL choke
Many people wonder whether it is possible to connect such a light bulb from a choke of the same power, designed for a DRL lamp? Theoretically, this is possible, the main thing is to exclude the IZU from the circuit.
However, although the powers may be the same, due to different operating voltages on the lamps, the HPS and DRL ballast will produce different operating output currents.
1 of 2
And this will directly reduce the service life of the lamp (if the current is exceeded), or, on the contrary, will not allow it to reach the calculated luminous flux (at lower current).
There are sodium lamps with built-in ignitors. Some people mistakenly consider them universal and use them directly as a replacement, for example, in lamps with 250W DRL.
On the one hand, it’s a complete benefit. It turns out that with a lower power of 220W instead of 250W, you can easily get a much larger luminous flux.
- DRL luminous flux 250W – 13000Lm
- luminous flux such as DNAT 220W – 18000Lm
No circuit modifications, just change the bulbs and get several thousand lumens more light. However, such models must also be used with ballasts designed specifically for sodium lamps.
Otherwise, this will affect the service life of the lamp.
Main Applications
Sodium lamps are not intended for use in domestic conditions (except for their use in greenhouses), but their scope of application is very wide.
- Road lighting. Doctors have found that the human eye, when exposed to yellow shades of light, is most sensitive to the sharpness of color discrimination. Consequently, NLVDs ensure the safety of drivers and pedestrians on the roads better than other lamps.
- Lighting of tunnels, sports facilities and container sites; airports, train stations; workshops, production and storage facilities, if there are no special requirements for the quality of color rendering; greenhouses
- The use of DNAS has proven itself in medicine, research laboratories, the chemical industry, etc.
- Decorative lighting, artistic lighting of buildings.
