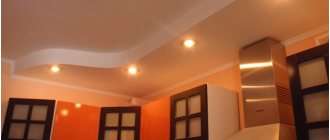
Artificial lighting on the balcony allows you to expand its functional purpose. Thanks to lamps and lamps, it will be comfortable to be here at any time of the day.
Unfortunately, during the construction of the house it is not planned to lay electrical wiring into this room, so the solution to this issue falls entirely on the owner of the home.
Balcony lighting requirements
Due to the presence of a combination of unfavorable factors (differences in temperature conditions and high humidity), special requirements are imposed on installation work and the electrical wiring itself on the balcony:
- Only electrical appliances with a high degree of dust and moisture protection are allowed for use. This parameter is indicated by the letters IP and numbers after them. Completely sealed electrical appliances are marked IP68. The lower the number, the less resistance to external influences.
- Before installing electrical wiring, care must be taken to maintain a stable level of humidity in the room and good ventilation. If the level of these parameters is elevated, this may cause a short circuit.
- For an unglazed balcony, it is better to use lamps without wiring. In exceptional cases, it is possible to lay the wire in a protective box, and use only waterproof lamps.
- The type of lamps used directly depends on the temperature in the room. For example, at low temperatures it is not recommended to use fluorescent lamps.
- On unheated balconies and loggias there must be a minimum number of wiring cable connection points. Therefore, the best location for the distribution box is in a heated room.
- A small balcony requires lighting fixtures that are compact in size. Large lamps and floor lamps will “eat up” valuable centimeters of space.
- All installed electrical appliances should not interfere with free movement on the balcony. Accidentally touching a lamp or plug in an outlet can result in electrical injury.
- Each area on the balcony requires its own lighting scheme. This point must be taken into account at the wiring stage.
Important preparation points
Before making light on the balcony, pay attention to preparing for work. Purchasing high-quality consumables will reduce the risks of negative consequences when installing light.
Before installing electrical wiring, it is better to first inform the HOA representative or management company about this so that there are no problems in the future with the use of lighting fixtures on the balcony.
Selecting wires
To install additional lighting fixtures, it is recommended to first pay attention to the selection of wires so that the design is safe and easy to use. A 2x2.5 wire will fit perfectly.
There are only two options for selecting this element, but pay attention to it first:
- Aluminum cable. Usually used when you need to save money. It is inexpensive, but not the best in performance and durability. If you do not plan to use light constantly, but only, for example, in certain seasons, you can choose this option.
- Copper cable. Wear resistance and flexibility are better, and an additional plus is that it can withstand greater loads than the previous version. It is better to choose it for installing bulky structures for which you need to organize a lot of cables.
Before installing sockets on the balcony, it is recommended to select the wire material. This way they will last longer, and the risk of their interruption and increased fire danger is reduced. Don't skimp on the item, especially if you will be using the light frequently.
Selection of sockets and switches
Before installation, you should additionally pay attention to the selection of other elements - sockets and switches. You should choose closed sockets - they have a plastic cover on top that closes automatically. But it is not convenient if you leave the device constantly plugged in.
For a closed balcony, you can also choose open sockets; they can be connected or separate - these parameters do not particularly affect the result of attaching the wiring.
The choice of switches is more interesting. Before installing light on the balcony with your own hands, you should choose one brand from which you will buy sockets and switches. This way the themes will match, which will look more appropriate and neat.
There are not many options for choosing a switch, but there are two types that are chosen for different reasons for installing the light:
- Standard switches. They may have one key for a classic lamp, or several – two, three or four. No longer commonly used for security.
Multi-level lighting looks impressive and is often useful for adjusting mood lighting or background lighting.
- Dimmer. You can choose an unusual alternative to classic keys, which, in addition to two modes (turning the light on and off), you can set shades.
However, be careful - not all lamps can be installed with it, so pay attention to the lamp power and its indicators in order to combine these parameters.
Be careful when choosing these parameters to get a safe design that will be safe for daily use and convenient when adjusting the light on the balcony with your own hands.
Tool selection
You don’t need any special tools for the job, so you often have electrical wiring supplies at home or can buy them at a hardware store. To ensure that the wiring on the balcony lasts for a long time and is safe to use, you need the following tools:
.
- Hammer. To prepare a wall or ceiling for work, you need to use a hammer drill; you can replace it with a standard electric drill.
- Bulgarian. The device is needed so that the electrical wiring looks neat and securely fixed to the ceiling.
- Screwdriver. You can replace it with a screwdriver, but it will take longer.
- Stationery knife for cutting cables. Additionally, you can take electrical tape to secure the cables for permanent or temporary fastening.
- Hammer.
Have available materials that may be needed during electrical installation on the balcony. This way you will create lighting that is safe to use.
Types of lamps for an enclosed balcony
When choosing lighting fixtures, you should pay attention not only to the design and design, but also to the category of light sources.
Wall lights
It is used exclusively for illuminating individual areas, for example, a work area. These could be sconces and floor lamps.
Ceiling lamp
It looks like a lamp in a lampshade under the ceiling or a chandelier on a wire. Used for local, accent or general lighting.
You can use spot light. It is a whole system of lighting sources, consisting of lamps, wiring and transformers.
Mounted in a suspended or suspended ceiling. Used for general or local lighting.
Desk lamp
Gives soft but targeted light. Used for zoning a room.
Fluorescent lamps
Such lighting is mounted in the ceiling space or on the walls.
The power of daylight lamps can be selected depending on the volume of the balcony room.
LEDs
Cannot serve as general lighting due to low power. Used for decorative lighting and creating compositions.
Open balcony lighting
The main difference between an open balcony and a glazed one is the presence of an aggressive environment and regular exposure to weather factors.
All this must be taken into account when choosing lighting fixtures and wiring elements.
On an open balcony, it is permissible to install only light devices in a sealed housing.
If it is expected that raindrops or snow will fall on it, then the degree of protection should be maximum.
When lighting on loggias and balconies with a canopy, the use of devices with a degree of protection not lower than IP44 is allowed.
Stylish design of a French balcony
There is enough space on such a balcony to place a small folding table. When you wake up in the morning, you can sit in a chair in the room and put freshly brewed coffee and buns on the table. In summer, the free space will be occupied by flowers in pots and hanging boxes. Climbing plants will look great and will turn the balcony area into a blooming garden.
When developing the design of a 3-meter balcony, all the possibilities of the room are used.
And a small-sized room has no less such opportunities than a spacious loggia. In a small area you can use built-in furniture, transformable chairs, compact sofas and shelving. No tags for this post.
Lighting on the balcony in accordance with its zoning
When zoning a room, first of all, large elements of furniture are selected, and then lighting fixtures.
Some rules for lighting individual functional areas:
- A good option for a work area is a ceiling spotlight with diffused flux. For individual lighting, a table lamp with a movable (rotating) leg is suitable. An option if there is no outlet is a USB lamp.
- When organizing a greenhouse, primary attention should be paid to the needs of the plants. Regular lamps are not suitable for this, only phyto lamps with rays of a certain spectrum. For basic lighting, you can use a ceiling fluorescent lamp.
- The lounge area offers a relaxed atmosphere and dim lighting. This effect can be achieved using a floor lamp, several wall sconces, table lamps and electric candles.
- For a pantry, dressing room or mini-gym, good lighting is important. Spotlights with maximum power and complemented with LED strip are suitable.
Artificial light sources are used not only to maintain the style of the room, but also to visualize the boundaries of several zones.
Directional light lamps cope best with this task.
Design project: Int2Architecture
Tips for lighting
When organizing lighting in a loggia or on a balcony, it is recommended to adhere to a number of rules:
- On an open balcony, it is best to install wall lighting. It is advisable to place the switch inside the apartment. There should only be a wire outside.
- For open balconies, you should purchase only lamps that are protected from moisture.
- For balconies that are used as resting places, spotlights or sconces are suitable.
- If they will read on the balcony or use it as an office, it is advisable to install turn signals so that the function of regulating the flow of light appears. It is also possible to install additional lamps in places where light is especially needed.
- It is recommended to organize local lighting in cabinets. This approach will allow you to quickly find the items you need. The best illumination is achieved using LED strip.
- It is not advisable to install light diodes opposite glass, since in this case glare on a computer monitor or television screen cannot be avoided.
- If the balcony after renovation is actually a single whole with the neighboring room, any type of lamps will do. However, in this case it is recommended to maintain the general style of lighting fixtures.
It is not difficult to install lighting on a balcony if you strictly adhere to technical standards and safety rules. If you don’t want to deal with wiring or disturb the finish, it is recommended to opt for autonomous LED lighting.
What to look for when choosing lighting
Device type
It must be protected from dust and moisture. It is better to place the switch inside the apartment.
If the balcony is dry and heated, then the choice of device is made based on its purpose: for a desktop, for general lighting, for decor and accents.
Balcony style
The main requirement is compliance with the general style. For minimalism, spotlights, laconic chandeliers and sconces decorated with chrome and matte elements are suitable.
For the loft - any metal lampshades. For a balcony in neoclassical and modern style - extraordinary models made of transparent glass.
The retro-style room will be complemented by floor lamps with fabric lampshades and lanterns, stylized as street options.
Design project: MARION STUDIO
Room size
On a small balcony, every centimeter is important, so the size of the lamps should be modest.
With low ceilings, hanging chandeliers, voluminous floor lamps and sconces with rich finishes and decor are unacceptable.
And vice versa, the larger the area, the more massive the light sources should be.
Design project in the Fili Grad residential complex
Original DIY lamp
It’s easy to buy a ready-made lamp - hundreds of manufacturers annually produce collections in a wide variety of styles. But making a beautiful, practical thing with your own hands is much more difficult. But the result will be a wonderful reason for pride and a great accessory for decoration.
Model to execute
Table lamp with a stand made of old books and a false lampshade made of a metal frame. A hand-made lamp for a balcony looks a little unusual, but it is ideal for a room in a loft, Provence, or country style.
An original option for paper lovers
For work you will need the following items, materials, tools:
- a stack of old, but not disheveled books;
- a metal frame from a lampshade with a base (you can make it yourself);
- electrical power cord with plug;
- spray paint for metal;
- measuring instrument – ruler, tape measure, marker;
- drill;
- construction knife.
Task
Secure a stack of books with a pin inserted through it; pass the power cable through the entire stack to the base attached to the top.
- We start by painting the metal parts. Without exception, we coat all elements with corrosion protection and then paint them in the desired color.
“Metallic” colors are suitable for painting: gold, silver, bronze, copper
- We collect books in a stack so that it looks natural. The height should be the same as the holder pin through which the power cable will pass.
Unneeded books can be purchased at a thrift store
- Approximately in the center of each book we place a dot - there will be a hole for the central pin.
To drill holes, use a drill with a drill whose diameter matches the diameter of the pin
- In the book lying below, in addition to the hole for the pin, you will need a groove to lay the wire.
A construction or stationery knife is suitable for cutting a groove.
- The bottom book is the base; it is necessary to attach a pin – a holder – to it.
We use union nuts as fasteners (to increase the connection density)
- We insert an electrical wire with a plug into the pin, and remove the bare ends from the upper hole.
We fix the metal part on the bottom book-base
- Then we drill holes in the remaining books. We try to drill in the center.
Hold the book with your hand or with special clamps
- We string the books into a stack, turning them slightly around the circumference so that the stack turns out natural, slightly careless.
For stability, we fasten the books together with long self-tapping screws.
- We connect the wires to the base. Screw in the light bulb. A beautiful antique table lamp is ready.
If desired, you can put a lampshade made of fabric, beads, lace or thick paper on the frame, but even in this form it looks very stylish.
Types of lamps
Incandescent lamps
Cheap, accessible, but outdated and short-lived option (up to 1000 hours of operation). They consume a lot of electricity.
Halogen
With the same power as incandescent lamps, these consume half as much electricity.
A variety of shapes and shades of light allows you to choose a halogen lamp to suit any interior.
LED
Modern, economical and durable option. Service life – up to 50,000 hours.
Organization of power supply
As a rule, there are no electrical outlet points on the balcony, so you will have to organize them yourself.
Design project: studio Simple Interiors by Lesya Pechenkina
Three implementation options are available:
- From the shield on the landing. This method allows you to make the power supply to the balcony completely autonomous (with its own automatic machine). Devices of any power can be connected to the network. But it is possible to install such wiring only at the stage of major repairs.
- From the distribution box in the room adjacent to the balcony. Convenient and easy to implement method. The only negative is that you need precise control of the permissible load.
- From the nearest outlet. A simple method that allows you to connect one or two low-power lamps.
Design project: Irina Ezhova and Olesya Zlobina
It is necessary to agree in advance with the electrician on all the desired electrical appliances so that the technician can correctly calculate the wire cross-section based on the maximum load.
How to provide lighting without electricity
Many people are interested in saving energy and using the planet's resources wisely. Let's consider two ways to make lighting without connecting the device to the electrical network. The first way is to use solar-powered balcony lights.
A small solar panel positioned at the right angle to the sun
The technology of the device is simple: instead of some glass, solar panels are installed - flat panels that convert solar energy into electrical energy. During the day, the accumulated heat serves as a reserve for evening lighting of a small area. Sometimes there is enough energy to recharge a mobile phone or laptop.
The second option is stationary battery-powered LED flashlights. They are hung from the wall or ceiling, and when leaving, they are removed or simply turned off. Such flashlights are intended for use in rooms where there is no electrical wiring - in caissons, outdoor toilets, in summer gazebos, on terraces.
Wiring
Several recommendations for installing wiring on a balcony or loggia:
- In the absence of experience and knowledge, all work with electricity must be entrusted to professionals. Including preliminary calculations and selection of materials.
- Installation of lighting elements on the balcony does not require approval. However, if redevelopment is needed for zoning the premises, then it must be legalized.
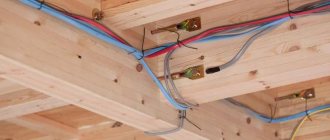
- For wiring, only double insulated cables are used. In an open or unheated room, it must be placed in a corrugated tube.
- Wiring is the first stage of balcony repair. Only after its completion can you begin insulation and cladding.
- To accurately calculate the number of sockets and lamps, it is necessary to determine in advance the functional purpose of the room and draw on the walls a diagram of the future wiring with all the elements.
- Open wiring is easier to install than hidden wiring, but it is unsafe and looks less aesthetically pleasing. One way to hide it is to cover the walls with clapboard or panels.
Design project: Azari Architects
Chandelier or spotlights: how to choose
Since a loggia or balcony usually has a small area, when creating a lighting system you have to carefully save space. Therefore, preference is often given to spotlights of the spotlight type. But each of these solutions has its pros and cons.
dimensions
A chandelier usually hangs from the ceiling. This option is suitable only for owners of spacious loggias, where you can walk calmly without fear of hitting the lamp with your head or even shoulder. If you don’t have a lot of space, it is better to prefer a flat chandelier “pressed” to the ceiling - or install spotlights.
Lighting area
It is clear that the larger the area of the balcony or loggia, the higher the illumination should be. Unfortunately, the lighting standards for balconies are not regulated by any standards. Therefore, you can only approximately determine how many light bulbs you will need.
If there is a chandelier, then most likely there is one, in the center of the ceiling. It may have three or four light bulbs.
Spotlights should be distributed over the entire surface of the ceiling. For a standard balcony, three or four pieces are enough, the power of each of them depends on which lamps you choose. If, for example, halogen, then 20- or 30-watt lamps are suitable.
Style
Spotlights are hidden in a false ceiling and are therefore well suited for balconies decorated in the spirit of functionalism or hi-tech or in the Scandinavian style.
The chandelier is another matter. It’s hard not to notice, so if you want your balcony to look especially interesting, you need to think about how it will fit into the interior.
A small balcony or loggia can be decorated in a classic style. Provence, oriental aesthetics or modern are also suitable for them. For a spacious loggia, you can choose an interior and, accordingly, a chandelier even in the Baroque style.
Installation of lamps
When the wiring is installed and all the outlet points for electrical appliances are created by professionals, installing a suitable lamp yourself will not be difficult.
To do this you need:
- Turn off the power to the wire you will be working with.
- Prepare a place to mount a lampshade, chandelier or spotlight. This will require drilling holes into the concrete or clearing space on the sheathing.
- Place the lighting fixture and secure it according to its instructions.
- Insert the power wires into the inlet hole and secure them to the socket.
- Screw the lamp into the socket and check its functionality.
- Reinstall the lampshade.
Installation: main stages
It is better to entrust installation to a professional electrician who has extensive experience in this type of work. But if you think you can do it yourself, prepare in advance the tool you will need, depending on whether you will be placing the cable in a closed or open way. You will need:
- hammer drill or wall chaser;
- electric drill;
- pliers;
- screwdriver;
- cable;
- cable ducts or corrugated pipe;
- sockets, switches and lighting fixtures.
If you decide to install the wiring in a closed way, you first need to make grooves and niches for sockets and switches. After that:
- install switches and sockets in pre-prepared niches;
- place the cable in a box or corrugated pipe;
- secure boxes or corrugated pipes in grooves;
- make wire leads in the places where you plan to install the lamps;
- connect the cable to sockets and switches;
- cement the grooves.
If you choose an open method for placing wiring, there is no need to make grooves - the wires are attached to the wall using special nail brackets or dowel clamps and hidden in cable channels.
The last stage of work is connecting lighting fixtures. If you did everything correctly, all you have to do is flip the switch and enjoy the lighting.
Choosing a location for an outlet
The location of the outlet should be convenient and accessible. It is important to organize it so that the plug of the electrical appliance can be connected to it without difficulty.
The external wall under the window is not used to place the outlet. It is durable and making a hole in it is difficult.
Best places for installation:
- From the ends of the balcony.
- In the outer skin.
Design project: Aiya Design
To ensure that the placement of the socket is as inconspicuous as possible, you should not use a balcony door to bring out the power wire.
Balcony lighting without wiring
If for a number of reasons wiring installation is impossible, you will be able to do without it. When using battery-powered light sources, there is no need to drill into walls or pull wires.
In high-quality lamps, three batteries are enough for continuous operation for 100 hours.
All you need:
- Sources of light.
- Batteries for them.
- Charger.
- Motion sensors (optional).
When choosing, you should give preference to those lamps in which access to the battery compartment always remains free, since the batteries will have to be changed.
For this reason, lamps on double-sided tape with a compartment on the back are not suitable.
Lighting on the loggia and balcony are integral companions of a cozy and comfortable room.
Chandeliers, floor lamps, spotlights and sconces will help you create it.
Installation work
There are different wiring options. The choice of a specific method depends on the existing circumstances and the task at hand.
Tools and materials
To organize the wiring you will need the following materials:
- Cable. It is advisable to use a cable with three copper cores. The cross-section should be from 1.5 to 2.5 millimeters. It is recommended to choose wires made of soft insulating material that can be easily bent. Soft insulation will facilitate the installation process and reduce the risk of cable damage during installation.
- Cable channel. This is the name for parts installed on walls for laying cables. The channel is a kind of pencil case with a hinged lid.
- Fasteners Cable channels and other components of the system should be securely fixed. To do this, use fasteners such as screws or dowels.
- Junction box. Installed directly in a residential area or nearby. A cable leading to the balcony is taken from the distribution box.
- Mounting boxes. Sockets and light switches are installed in them. There are a variety of boxes, including for plaster, for drywall, etc.
- Terminals. Using these parts, the wires are connected to each other. It is recommended to avoid twists and tape, as they do not fully provide reliable and safe connections.
You will also need a certain tool:
- Hammer. Using this tool, walls are tapped under a channel for laying cables. They also use a hammer drill to drill a hole in the wall to bring the cable out to the balcony.
- Roulette. It is used to take measurements.
- Pliers, screwdrivers, side cutters.
- Multimeter. A special device for determining the voltage level.
Open wiring
This method is used if the finishing work has been completed and it is problematic to hide the wires without carrying out expensive repairs. In rare cases (for example, with high-tech design), exposed wiring acts as an integral element of the interior.
Work plan:
- We calculate the voltage taking into account all consumers that will be connected to the network on the balcony. It is better to have too much tension than not enough.
- When making calculations, you may need a wiring diagram in the apartment to find out where and how the wires are laid in the wall.
- We turn off the electricity in the entire apartment.
- We take the required amount of cable.
- We mark on the walls the places where there will be grooves for cables, sockets, switches, and lamps.
- We're hitting the wall. If we are talking about a standard wall (and not a pre-revolutionary house), you will need a regular drill to make the grooves. It is recommended to use a 12mm drill bit (or larger). The drill must have the correct geometry, that is, be perfectly even.
- We place the cable in the created channel. Every 20 centimeters we secure the cable using an alabaster mixture. This material sets quickly. We fix it to concrete with dowels, and to plasterboard also with dowels, but with special ones. In the case of wood, we use self-tapping screws. We bring the cable channel to the areas where sockets and switches are located.
- For open wiring, overhead fittings are better suited. It's easier to install.
- We combine all the elements into a single chain.
- We check the voltage level in the network with a multimeter.
- We cover the grooves with the solution.
- We connect to the circuit breaker at the input site.
Hidden wiring
This option, although similar to the one described above, has some differences. If you decide to carry out the work yourself, rather than entrust it to specialists, we select everything you need. The list of materials and tools is approximately the same, but instead of a cable duct you will need corrugated pipes. They will prevent the cable from getting wet or catching fire due to a short circuit.
Work indoors is carried out in exactly the same way as in the case of open wiring. Here we will provide only a description of the actions from the moment the wiring is brought out to the balcony:
- We lay the cable in a corrugated pipe and place the corrugated pipe under the finishing material. In the case of a frame made of a bar or profile, the corrugated pipe is pulled through the holes made in the racks. Excessive bending of the pipe should be avoided.
- Fastening the pipe to the wall or ceiling should be done using special clamps.
- Upon completion of work, it is necessary to test the functionality of the system. Only after this they begin to restore the finish.
Lighting without wiring
If you wish, you can do without wires at all. In this case, there is no need to drill walls and pull wires. The system does not operate from a stationary power source, but runs on batteries. Three batteries are enough to supply light to the balcony for 100 hours. To complete the task, it is recommended to purchase rechargeable batteries and a charger.
The work is carried out as follows:
- We choose the appropriate type of lamp and think about its placement.
- We install the lighting device on the wall, ceiling or any other convenient place. We fix the lamp in the usual way and connect it to the power source.
- If necessary, we install additional elements, for example, a motion sensor. The device will allow you to save on electricity, since the light will only turn on while people are present on the balcony.