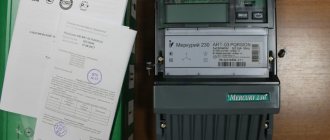
The Energomer CE-102 electricity meter is a single-phase multi-tariff electricity meter that allows you to take readings at day/night tariffs. All information is displayed on the meter's electronic display.
There are several varieties of Energy Meters CE-102 and they differ in the types of housings, if you look through the eyes of an ordinary ordinary user who has this meter installed in his house or apartment. The housing options are: S6, S7, R5 and R8. Numerical variations of counter models 145, 245, 148, 248.
Viewing display modes can be done either automatically or manually.
- In automatic mode, the data on the display is displayed sequentially and cyclically with a short interval.
- In manual mode, you need to use the control button to select the necessary information. Depending on the model, there are FRAME buttons or an optical view button [PRSM] to switch modes between indicators. For convenience and quick search, all information on the Energomer CE-102 meter was divided into groups. Each group has its own indicators.
Counter readings are recorded to the decimal point.
Indication modes for CE 102 meters in S6 and R5 housings
To take readings on these models, press the mechanical or optical button with long presses (hold for more than 3 seconds) and view the information.
The first branch of values shows auxiliary parameters such as time, date, etc.
Group 2 - general readings for all tariffs To go to the next (2nd) navigation branch, press the [PRSM] button; the first value is the amount of current expenses (indicated by the letter T) according to the current tariffs (without the clock and hammer and screwdriver icons). By briefly pressing the button, you can also view the amount at the end of last month (1T), the day before last (2T) and finally 13 months ago (13T).
If we pay according to a single tariff plan: To take readings, we need the first value with the T icon write it down , if you pay according to one tariff, then the mission is completed, the readings are recorded, in order to calculate the amount for payment, we multiply the recorded number by the rate for 1 kilowatt/hour.
If we pay according to a two-tariff plan: Group 3 - information on tariff 1 (day) If we pay according to day/night tariffs, then from the second group with a long press on the [PRSM] or [FRAME] button we go to the next (3) branch of indicators - this is indicators for 1 tariff.
We see the first indicator with the T1 and kWh - this is the current total value of electricity consumption at tariff 1. We write down this value . Then, with short presses of the button, just like in the previous group, we can view the following values at tariff 1:
- Expenses at the end of last month (1T1 icon)
- Consumption at the end of the month before last (2T1 icon)
- Consumption at the end of 13 months ago (icon 13T1).
Group 4 - information on tariff 2 (night) Let's move on to group of indicators (4) - these are consumption indicators for tariff 2.
The first value is the amount of total consumption at tariff 2 (T2 icon). Write down the value . As in the previous group, by short pressing the [PRSM] or [FRAME] button we can view the expenses for tariff 2
- at the end of last month (1T2)
- at the end of the month before last (2T2 icon)
- at the end of 13 months ago (icon 13T2).
Functionality
- Energy accounting: Energy cumulatively: A+, A-, R+, R-.
- Differential active energy consumed separately in the neutral and phase circuits.
- A+, A- (8 tariffs);
- According to the tariff schedule. Two tariff schedules: active and background. Schedule format: daily tariff programs, seasonal weekly schedules, exceptional days (cyclic and absolute);
- Recording metering data (in total and by tariff) for active and reactive energy when changing days.
- Power control schedules.
- Voltage limit (min, max);
- Duration and depth of the last voltage dip;
- Two measuring elements for the phase and neutral circuits.
We calculate the amount to be paid
If you have a two-tariff payment system, you pay according to T1 values - expenses during the daytime. and the value T2 is expenses at night. To calculate the total amount of payment for electricity (light) 1) take the number T1 and multiply it by the rate for 1 kilowatt/hour during the daytime. 2) Take the number T2 and multiply it by the cost of 1 kilowatt/hour at night. 3) Add the resulting numbers.
If you have more than 2 tariffs such as day, peak, half-peak, go to the next group of T3 indicators and write down the first number with the T3 icon. And we calculate by multiplying by the rate per kilowatt at tariff 3.
We hope that we have explained in detail the process of taking readings from the Energomer CE-102 meter and our article will greatly facilitate this process. But if you want to study this model in more depth, then we attach to the article the instructions for the Energomer CE-102.pdf
Varieties of this counter
This model is available in 6 modifications, which have some differences.
236 ART-01 PQRS
Differs in accuracy class 1 and 2, respectively, for active and reactive types of electricity. Normal and maximum electric current – 5 and 60 A, transmission ratio for the main and testing outputs – 500 imp/kW and 32000 pulse/kVar. The letter P indicates the power profile, Q – the log of electric current indicators, R – the presence of an RS-485 interface, S – its internal power supply.
236 ART-02 PQRS
The equipment and the magnitude of the error are similar. The value of the limiting current (100 A) and gear ratios (250 and 16000) differ.
236 ART-01 PQL, 236 ART-02 PQL 236, ART-03 PQL
The technical characteristics are identical to the above modifications, the difference is in the configuration - instead of the RS-485 interface, a PLC-I modem is installed.
Video review of the Energomer SE-102 electric meter
According to accepted world practice, electricity consumers must install devices that take into account its consumption and pay according to their readings. In the Russian Federation, this requirement is enshrined at the legislative level. Taking readings and calculating payment based on them is the responsibility of the consumer (owner of the device). But if, as a rule, there were no problems with induction electricity meters, then with the advent of electronic devices, many consumers have questions about taking readings. The answers to them can be found in this publication.
Life time
The manufacturer guarantees that the TsE6803V meter will be guaranteed to operate for 30 years.
But there are a number of conditions:
- The device must be installed correctly;
- Recommended safety regulations have been followed;
- There should be no emergency overloads.
Important! The manufacturer initially provided a guarantee for the operation of the meter for four years of continuous operation. The warranty period begins from the date of manufacture of the electric meter.
Induction meters
This process for old-style devices is quite simple; it is enough to rewrite the information from the mechanical indicator, where the numbers display the total amount of electricity consumption over the entire period of operation of the device. After this, the readings for the previous period are subtracted from the resulting number. The result is multiplied by the current tariff.
The information is included in the payment receipt. Once every six months, energy companies have the right to monitor the metering device, which obliges the consumer to provide access to it.
Induction meter readings with drum
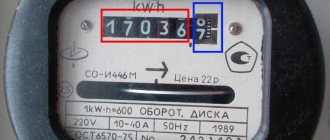
In the figure above, the segments of the mechanical indicator that display an integer are marked in red, and tenths of kilowatt-hours are marked in blue. There are models without displaying the fractional part. The meter's rated current, voltage, and frequency parameters are shown below. By the rotation speed of the drum, you can visually assess the current load power.
Important! Tenths are not included in the receipt.
Induction devices are gradually being replaced by electronic ones due to their undoubted advantages. Let's tell you what they are.
Design features
High accuracy of energy consumption metering is ensured by a built-in microprocessor. It is he who is responsible for processing incoming data.
This device also has the following features:
- Extremely good measurement reliability;
- Pulse output;
- LED light indicators for device status;
- Measurement error is minimized;
- The device itself consumes almost no electricity;
- Antimagnetic protection
- Possibility of several types of device mounting.
Advantages of new electronic metering devices
The first glance at the front panel of an electronic device can cause some confusion. Instead of the usual mechanical indicator, there is a digital display and some strange buttons.
Electronic meter front panel
In fact, there is nothing complicated; below we will describe in detail how to take readings from various electronic models. As for their advantages, these include:
- Indication of the current date and time.
- Saving readings for the previous month in the device memory.
- Transferring data with readings to the control center of the energy company providing the services.
- Possibilities of multi-mode tariffing.
- The current sensor can be a shunt, a current transformer, or both.
It makes sense to consider the last point in more detail.
Meter installation
The device is mounted using a DIN rail or screws, depending on the design of the case.
Reliability and adaptability for operation in a wide range of electrical network characteristics and environmental temperature parameters, reasonable pricing policy indicate the advantages of choosing this electric meter model
What is multi-tariff mode and its purpose?
As you know, the load on the energy system is uneven. During the day, electricity consumption is several times higher than at night (to be precise, the peak occurs in the morning and evening). In order to motivate the population, multi-tariff systems have been introduced in many countries, including Russia, taking into account the characteristics of a particular city (settlement).
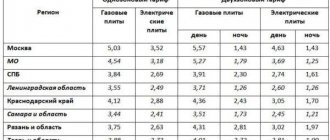
The most common is the two-tariff system (day-night), and its three-tariff modification (peak-half-peak-night) is also found. The transition to such metering schemes can significantly reduce electricity costs. As an example, we give the prices for various time zones for the city of St. Petersburg (for an apartment with a gas stove).
Example: tariff table for St. Petersburg.
| Tariff name | Cost, rub) | |
| Single | 4,32 | |
| Dual zone | day – T1 (7:00-23:00) | 4,55 |
| night – T2 (23:00-7:00) | 2,62 | |
| Three-zone | peak – T1 (7:00-10:00 and 17:00-21:00) | 4,58 |
| half peak - T2 (10:00-17:00 and 21:00-23:00) | 4,32 | |
| night – T3 (23:00-7:00) | 2,62 | |
As you can see, the difference in price between night and day rates is slightly less than twofold. Even if you only turn on the washing machine when the nightly tariff is in effect, you can save a lot.
To switch to a two or three tariff system, it is necessary to install an electronic electricity meter, the design of which allows for such a count. As for induction modifications, they do not have such functionality.
How to take electricity meter readings day-night?
Due to the large assortment of electronic models, it is not possible to give a single algorithm of actions. Detailed instructions are given in the technical documentation that comes with each device. Later in the article we will describe in detail the process for the most common models, but for now we will talk about the general principle of calculations using a two-tariff system.
All electronic meters have a built-in clock, which allows you to record electricity consumption for different time zones. In two-tariff models there are two of them - T1 (day) and T2 (night), their validity periods were given in the table above. A separate count is kept for each period. At the same time, the device stores the readings of the previous reporting period in memory, which is quite convenient for calculations. The easiest way to explain the process is with an example.
Let’s say we need to take readings on October 20, for the current date they are as follows:
- For tariff T1 – 2052.95 kWh.
- T2 – 1024.16.
- Total – 3077.11.
We rewrite this data into a receipt and call up information for the previous reporting period (September 20), let’s say we display:
We calculate the difference and then write down the result:
We enter this information on the receipt. Next, we calculate the payment by multiplying by their cost in accordance with current tariffs. For example, according to the information in the table above, for St. Petersburg these calculations will be as follows:
T1 - 160.14 x 4.55 = 728.67 rubles.
T2 – 98.06 x 2.62 = 256.92 rubles.
Total – 728.67 + 256.92 = 985.59 rubles.
How to take readings from electricity meters Mercury 200, 206, 233, 230, 231, 234
The listed models have a similar interface. Control is carried out using two buttons (see Fig. 3). One, with the inscription “ENTER”, is used to select indications of various tariffs, the second, which shows a ring with an arrow pointer, is used to select a mode.
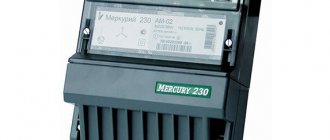
Front panel of three-phase meter Mercury 230
The procedure for taking readings is as follows:
- It is necessary to set the appropriate mode, in this case “A”. To switch modes, you need to briefly press the button with the ring until a dash appears under the corresponding letter on the display (marked in red in Fig. 3).
- After setting the “A” mode, the display will show the readings for the T1 tariff; to view the data for other tariffs (T2 and T3), you must briefly press the “ENTER” button. The number of tariffs is determined by the meter settings; they are made by employees of the energy company.
- Information is displayed in the following format:
- Tariff name (T1-T3).
- Actually, the readings (a number with two decimal places).
Please note that these devices have special software. Thanks to it, you can get more detailed information when connecting the meter to a PC.
Universal configurator for the Mercury line of meters
Explanation of markings
The user can independently select the device he needs, based on its passport data or from its markings on the central panel.
The applied markings contain all the necessary information. The main thing is to know what it means.
R31, R32 - if there is such a marking, then you need to understand that the device is screwed on with screws, or it has hooks for attaching to a DIN rail.
On such a grooved strip you can install TsE6803V electric meters and circuit breakers at the same time.
Ш33 - this designation marks devices intended for installation in panels. They are fastened with special bolt anchors.
How to take readings from the electricity meter Energomer CE 101, CE 102, TsE6803V?
For electronic devices of Energomer models, the procedure for obtaining readings is quite simple and does not require any pressing of control keys; in fact, on some modifications they are absent altogether.
Front panel of meter CE 102
Every 10-15 seconds, the display cyclically displays the data of time zones from T1-T2 or T1-T3 (depending on the modification of the device) and their total value. In this case, the name of the tariff (T1-T3 and T - the total amount) and, in fact, the readings in the form of a number with two decimal places are displayed at the top of the screen.
Front panel of meter TsE6803V housing type P32 (for DIN rail)
Metrological characteristics
| Characteristic | Meaning |
| Accuracy class for active energy according to GOST R 52322-2005 | 1 |
| Accuracy class for reactive energy according to GOST R 52425-2005 | 1 or 2 |
| Input range: current voltage active power factor reactive power factor | (0.05Ib...Imax); (0.55…1.15) Unom; 0.8(capacitance)…1.0…0.5(ind); 0.25(capacitance)…1.0…0.25(ind) |
| Base current, A | 5 or 10 |
| Maximum current, A | 60, 80 or 100 |
| Rated voltage, V | 230 |
| Ambient operating temperature range for the meter, °C | from minus 45 to 70 |
| Ambient operating temperature range for the indicator device, °C | from minus 20 to 70 |
| Meter constant, imp./(kW*h) (imp./(kvar*h)) | from 800 to 4800 |
| Operating range of frequency changes of the meter's measuring network, Hz | (50 ± 2.5) or (60 ± 3) |
| Starting current | 0.002 Ib |
| Total power consumed by each current circuit, at base current, no more than, VA | 0.5 for meters version Q (with control relay); 0.05 for other counters |
| Total (active) power consumed by the meter voltage circuit (without taking into account the consumption of communication modules) at the rated voltage value, no more | 4 VA (1.5 W) for meters in housing C1, C2; 3 V.A (0.8 W) for other meters |
| Active power consumed by built-in communication modules at rated voltage, no more, W | 3 |
| Limits of the basic absolute error of hours, s/day | ± 0,5 |
| Limits of absolute clock error at normal temperature and with power off, s/day | ±1 |
| Limits of additional temperature error of the clock, s/°C.day | ± 0.15 in the range from minus 10 to 45 ° C; ±0.2 in the range from minus 45 to 70 °C |
| Duration of information storage when the power is turned off, not less than years | 30 |
| Duration of time and calendar recording when power is off, not less than years | 5 - for versions with the ability to replace the battery (for S7 and R8 cases); 16 - for other versions |
| Battery life, years | 16 |
| Intervals of power averaging (calculation) or energy sampling, min | from 1 to 60 for Z versions; 30 or 60 for other versions |
| Depth of storage of power values averaged over an interval, or energy accumulations over an interval, not less than, values | 6144 - for version Z; 4464 - for other versions |
| Number of tariffs | 8 - for active energy version Z; 4 - for other versions and reactive energy of version Z |
| Number of electrical test outputs with parameters according to GOST R 52322-2005 | 1 - for versions in housing R5, S7 and R8 Absent - for versions in housing C1, C2 |
| Number of optical test outputs with parameters according to GOST R 52320-2005 | 1- for active energy meters; 2 - for active/reactive energy meters |
| Interface exchange rate, bit/s | from 300 to 57600 depending on version |
| Exchange rate via optical port, bit/s | from 300 to 19200 depending on version |
| Weight of the meter (measuring unit), no more, kg | 1,5 |
| Weight of the indicator device, no more, kg | 0,5 |
| Overall dimensions of the case (length; width; height), no more, mm - for R5 - for R8 - for S7 - for C1 - for C2 | 110; 89; 72,5; 110; 143; 72,5; 200; 122; 73; 70; 160; 75; 200; 130; 51. |
| Overall dimensions of the indicator device (length; width; height), no more than, mm | 155; 95; 50 |
| Average meter operating time before failure, h | 220000 |
| Average service life before first major overhaul | at least 30 years |
How to take readings from a Micron electricity meter?
This procedure is also not difficult. Using the button (marked in red in Fig. 7), the appropriate information display mode is selected.
Micron Counter
On the case, below the information board, the names of the modes are printed; a “bird” is depicted on the screen above the current one. To take readings correctly, you need to use the button to set the T1-T3 mode. For example, if the mark is above T2, then the displayed data will correspond to the indicators of the selected tariff.
We hope that the information provided will help those who do not know how to take meter readings.
To pay monthly for consumed electricity, you need to transfer data to the subscriber service or carry out calculations without the help of others. In any case, you need to take readings from the electricity meter, and then carry out the appropriate actions. We'll look at how to do this later.
Taking readings from induction meters
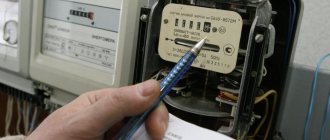
Induction meters can be distinguished by a rotating wheel, which is located just below the frame with numbers.
These numbers are the meter readings. The number of digits depends on the model.
How to take readings from an inductive and electronic electricity meter
How many numbers to write off
Usually the induction meter display has 5, 6 or 7 digits. In most cases, the outermost number, rarely two, are separated by a comma, color, or differ in size. We do not take into account all numbers after the decimal point when taking readings .
They indicate tenths and hundredths of a kilowatt and should not be taken into account. That is, we do not take into account all the numbers after the decimal point.
There are models with 3 digits and 2 after the decimal point
There are electricity meters that do not have numbers after the decimal point. Then, when taking readings, write down all the numbers
But it’s worth keeping in mind that there are counter models that don’t have a comma. In this case, when taking readings, you need to write off all the numbers. If you don’t do this, sooner or later you will have to pay the difference, and it traditionally turns out to be very large.
So be careful.
If you are unsure whether your meter has a comma, write down the model, title and call the customer service of the organization that supplies electricity. Let them clarify how many numbers in your case need to be written off when taking readings. You can also call an inspector to your home or check this data with the electrician of the management company.
How to shoot
Immediately after installing the meter, you were given a document containing the initial numbers.
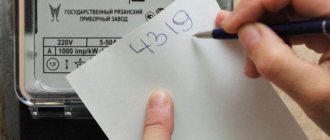
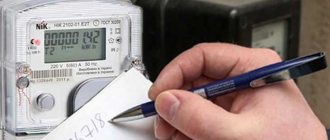
When you come to take readings from the light meter, take a piece of paper and copy down the current readings there (without taking into account the numbers separated by a comma). You can also not rewrite the zeros that come first before the first number (see photo).
Example of induction meter readings
For further calculations, data for the previous month is needed. In the first month of use, you take them from the installation certificate, and in the future you need to either keep receipts or keep a logbook.
Where and how they will be stored is your choice.
Some subscriber services work in such a way that you don’t even need to count anything, you just need to transfer data at a certain time. Their automated system will write it to your personal account (or the operator will do it), later make the charges without the help of others and generate a receipt. All you have to do is pay the invoice. But even in this case, for control, you can calculate how much you should pay for electricity without the help of others.
Naturally, it is unlikely that computers will make a mistake (they think), but isn’t it enough
How to count
To calculate the electricity on the meter yourself, subtract the one that was previously from the number you just wrote. You get the number of kilowatts consumed during the last period.
For example, let's look at the readings in the photo above. Let there be past ones, current ones (we ignore the numbers after the decimal point). We calculate the electricity consumption: = kW.
To find out how much you need to pay, you need to multiply the purchased number of kilowatts (in this case kW) by the plan. Get the amount you have to pay for the light.
If the counter stands for a long time, sooner or later it will reset to zero and zeros will appear in the first positions.
How to calculate electrical energy consumption in this case? Everything is extremely simple. This time you will have to rewrite the readings with all zeros, and put 1 before the first one. For example, you asked to take readings from the meter, but only the extreme numbers are different from zero.
Or, as in the photo below, it costs only one.
After zeroing, there may be such a picture, or there may be two numbers different from zero, or three
You rewrite the value as it is, with all zeros (but we don’t write numbers after the decimal point), put one before the first zero, and then count it as before. Let's count the readings in the photo. We write off the reading, putting 1 in front: Let the extreme readings be Subtract = kW.
Total consumption for the reporting period was kW. In the future, you write off the electric meter readings as before, without leading zeros and without substituting a unit.
Readings of electronic electricity meters
Electronic electricity meters do not have a mechanical display with jumping numbers, but an electronic one. It can display not only numbers indicating how many kilowatts were spent, but also the date, operating time of the meter, and some other data. In most electronic light meters, these data replace each other after a few seconds.
If the meter is multi-zone, readings for each zone are shown in turn (T1, T2, T3, T4).
To take readings from an electronic electricity meter, you can wait until suitable information appears and write it off. Option 2: Press the Enter key. You may have to click more than once until suitable information appears. It can be distinguished by the icons displayed on the screen. Traditionally this is T1, T2, T3, T4 or the word TOTAL.
For example, in the photo below, on the screen in the upper left corner we see the T1 icon and a little further on the larger numbers 72. If you look closely, behind them there are kWh units.
This is the consumed electricity in the first zone T1 (daily tariff).
Basic connection types
For a specialist, connecting the TsE6803V energy meter does not present any particular difficulties. As a matter of fact, already on the terminal cover on the back side there is a diagram for connecting a meter of a specific modification. To see it, the cover must be removed.
Energomera devices can be connected according to three schemes.
The most popular option is to connect the meter directly:
In other schemes, a three-phase meter is connected using transformers.
The figure below shows a diagram with the connection of three transformers:
How to take readings from three-phase meters
There are two types of three-phase electric meters, the old type, which require transformers and electronic direct connection (without transformers).
If an electronic one is installed, you need to take the electricity meter readings as described above. Simply write down the values, wait until the appropriate information is displayed on the screen, or scroll through the data to the desired page.
Connecting an electric meter in a three-phase network via current transformers
If large power is allocated or there is a metering device for an old standard, a transformer is installed on each of the phases. To take readings in this case, you need to know the transformation ratio.
The readings taken must be multiplied by this coefficient. The purchased figure will be the actual expense.
But in general, you need to read the contract. There must be a prescribed calculation procedure; in some organizations they write out readings, put down the transformer data or transformation ratio, but in fact the calculations are made by the operator himself. So, if you have a 3-phase meter, check the form and procedure for calculations when installing and sealing the metering device and putting it into operation.
Possible malfunctions and their elimination
Of course, like any high-precision equipment, the TsE6803V meter can fail. The main causes of the malfunction are lack of indication or stoppage of the counting mechanism.
The “Network” indicator does not light up
The most common cause of such a malfunction lies in poor contact of the supply wires.
The device must be turned off from the power supply and all clamps must be tightened additionally. After this, you can turn on the counter again and check its operation.
If after this the “Network” indicator does not light up, the device must be dismantled and sent to a service center.
The “Network” indicator is on, but the device does not count
In this case, the only correct solution is that the device needs repair.
Since this is clearly an internal fault, there is no point in trying to repair the device yourself. If you open the meter yourself, the consumer will face considerable trouble. Sanctions for unauthorized violation of sealing are usually a fine and quite high.
Hence the conclusion - there is no need to try to repair the device with your own hands. It's better to call a specialist. He will remove the device, pack it and send it to a specialized service center.

