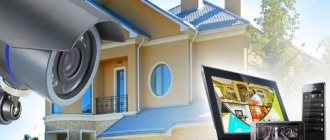
I read a relatively recent publication about video surveillance and decided to write about my experience.
I consider my solution to be optimal in terms of price/functionality ratio, but I will be happy to listen to criticism from more experienced people. So, the task is to use minimal material and time resources to make video surveillance in the entrance to the entrance (to the apartment) door. It is advisable not to record “empty” pictures around the clock, i.e. motion detection is required. It would also be nice to have remote access to records.
Main tasks and methods of organizing video surveillance in an apartment building
Of course, the main objectives of the system are the safety of residents and the safety of property, which are achieved by constantly recording everything that happens in the entrances (who enters and exits), on landings, attics and basements, nearby parking lots, on playgrounds and even in the local area territories.
In an apartment building, you can organize the operation of a video surveillance system in several ways:
- Equipping a security room and hiring appropriate personnel. All information from video cameras is received on the monitor screen and stored on hard drives to which only security personnel have access.
- There is no security room or concierge in the house, and video surveillance is organized in such a way that access to cameras and video archives is provided to all residents of the house online. At the same time, restrictions are introduced on access to viewing certain cameras. Some cameras can be viewed by all residents, for example, a playground or a parking lot, while others can only be viewed by certain persons (residents only of a certain entrance or on their own landing). To view the video filmed during the day and monitor the general situation in the house, one or more activists are assigned, who, in turn, devoting up to 30 minutes of time, will monitor what suspicious events occurred in the house during the day. To simplify the work, you will need to activate video recording using motion sensors.
The first method is not very common and in most cases is suitable for luxury high-rise buildings, where residents can afford specialized security or a concierge.
The second method involves online video surveillance, which means you can watch the video from anywhere in the world, just have a laptop, smartphone, tablet or other mobile device nearby, or just a computer, and of course Internet access. Although in the first method this possibility can also be organized.
We will dwell on the second method in more detail later, since it is more convenient and advanced and has several implementation methods.
But before you talk about IP video surveillance in an apartment building, you need to figure out how legal it is, so as not to get into trouble.
Attitude and disagreement of others
There are diametrically opposed opinions regarding the introduction of recording technology: some consider it a method of protection, while others consider it an invasion of personal space protected by law. Any owner who wants to install a video camera can put forward the following arguments:
- each person can protect their own interests in accessible ways, not directly prohibited by legal documents (Article 45 of the Constitution of the Russian Federation);
- common areas are common areas, not personal space, so each co-owner can choose individual methods of protection that do not cause damage to neighbors (Article 36 of the Housing Code of the Russian Federation);
- Every person can claim respect for privacy and security of property assets by any legal method (Article 8 of the Human Rights Convention).
If neighbors have different opinions about methods of protection, then in the absence of a consensus reached independently, the issue is referred to the district court at the actual location of the house.
Alternatives if neighbors object
In everyday life, situations arise that do not require judicial intervention, when neighbors are ardent opponents of video surveillance. In order to ensure maximum security, any tenant has the right to install a video intercom, video peephole and doorbell on the wall or door of his apartment without the consent of other owners. From the point of view of housing legislation, a camera in these places does not equate to the use of the common property of the owners, and, therefore, does not provide for their expressed consent.
However, the owner of the camera should, as an argument, present to the judicial body an expert opinion and technical documentation denying the fact that it was possible to record what was happening in the neighbor’s apartment at the moment the door was opened.
An alternative if you do not want to involve experts is to install a dummy that has a terrifying effect on the brain of the attacker and does not cause trouble for the intractable neighbor.
How legal is this?
Organizing video surveillance in an apartment building is not prohibited by law, but even before equipping your home with a system, you need to know that:
- Video cameras should not be hidden by disguising them under any objects, building structures, or mounted in walls for inconspicuousness. They should be clearly visible from a fairly large distance. Accordingly, special signs must be installed indicating video surveillance is being conducted.
- Before installing a system to monitor the situation in the local area and other areas of an apartment building, it is necessary to gather not only residents, but also all owners of non-residential premises. The goal is to hold a general meeting with an agenda about installing a video surveillance system and determining locations for installing cameras. Also at the meeting, important technical issues are discussed, such as the availability of screens and ways to view recordings, camera operating hours, online access procedures, etc.
- The minutes of the meeting must include: the owner’s consent to install a video surveillance system, its technical capabilities and the location of the cameras, the procedure and terms for storing recordings, as well as access to them, and the cost of the work.
When holding a meeting, it is important to remember that it is considered legitimate when at least ½ of the total number of residents and owners of premises in the house take part in it.
But according to Article 46 of the Housing Code of the Russian Federation and its first part, video surveillance cameras are common property in an apartment building, and at least 2/3 of the total number of residents and other owners in the building must vote for the ownership and commissioning of such objects.
For example, 150 families live in an apartment building. 75 representatives came to the meeting, which means it is considered legal, but it will not be possible to make a decision to install CCTV cameras in the house; it is necessary that there be at least 100 owners at the meeting who would not be against installing such a system in the house.
If these rules are not followed, problems may arise in court in the future, which will lead to the dismantling of the system.
As for townhouses (multi-level apartments in a building with separate passages, another name is “Blocked Houses”), at the legislative level the legal status of such houses in the Russian Federation has not yet been determined, so before installing video surveillance in them and in the surrounding area, follow the recommendations indicated higher.
In general, you should definitely read the housing code; below is an excerpt from it.
What if I am against my neighbor installing a camera?
A mirror situation, in which you don't want your neighbor to be able to peek at you, can also happen. Here the law, and in particular the civil code and the constitution, may be on your side. What you can refer to:
- Article 23 part 1 of the Constitution of the Russian Federation : Everyone has the right to privacy, personal and family secrets, protection of their honor and good name.
- Article 24 part 1 of the Constitution of the Russian Federation : Collection, storage, use and dissemination of information about the private life of a person without his consent is not allowed.
- Article 247 part 1 of the Civil Code of the Russian Federation : Possession and use of property in shared ownership is carried out by agreement of all its participants, and if agreement is not reached, in the manner established by the court.
- Article 304 of the Civil Code of the Russian Federation: The owner may demand the elimination of any violations of his rights, even if these violations were not associated with deprivation of possession.
[adace-ad id=”5228"]
Rules for installing video surveillance in an apartment building
Video surveillance in an apartment building should be organized in such a way as to minimize, and ideally eliminate, the presence of dead zones in the local area.
Where should the cameras be located?
Cameras should be installed where cars can drive or stop, or people pass by.
The main areas that cameras should always be looking at are:
- Entrance to the entrance;
- Elevator hall on all floors (staircase, no view of entrances to apartments);
- Tambour in front of the apartment (if there is one);
- Front door (if there is one);
- Playground;
- Parking;
- Vehicle traffic zone;
- Pedestrian area, especially a gate (if available);
- Entrance gates for cars (if equipped).
Video surveillance and privacy do not mix
To avoid a negative reaction from residents and guests of the house, you should not install public video cameras:
- To view the entrance to the apartment on the staircase;
- Inside the elevator cabins (although now you can find cameras in these places, but how legal this is is a big question).
Emergency exits
Many people make the mistake of not installing cameras in these places, because an experienced criminal first studies the area of his future crimes and calculates escape routes or, conversely, entry into the premises.
Emergency entrances and exits are usually closed, but this is not an obstacle for a burglar. Therefore, it is in these places that it is important to install video cameras. Or at least dummies that will play the role of a delaying factor.
Mounting height
Cameras should not be installed at eye level. Although this will make it possible to photograph a person’s face well and in detail, as practice shows, after two to three weeks, such cameras are removed, since such a device being at eye level attracts unnecessary attention and, as a result, arouses interest, especially among young people.
The camera needs to be mounted in a place that is minimally accessible to people, so that it is not immediately noticeable, and dismantling it is very problematic. But it is not recommended to install it too high, since the face of the criminal will not be visible.
The wires must be hidden to prevent them from being damaged.
Camera angle
The purpose of any CCTV camera is limited to its functions.
For example, a device used to monitor the situation in the local area cannot be used in an elevator hall or a narrow corridor.
Each camera has its own purpose and this is important to remember. According to their fictions they are divided:
- Preventive – a dummy camera is installed, which does not record events occurring nearby, but limits illegal actions of people and is a deterrent.
- The identification function is a clear recording of car license plates and people’s faces.
They are installed in narrow corridors, on landings opposite the elevator doors, in vestibules and front doors. Here you need a camera with a focal length of 20 - 100 mm, which provides a small viewing angle. You can also use inexpensive 1 megapixel devices, which will also provide good facial capture from a short distance. - The function of monitoring the general situation, the movement of people, cars, and other objects. You need a camera with a focal length of 2.8 - 20 mm, which provides a wide viewing angle. Do not purchase cheap devices; they will not provide a detailed view of an object from a great distance. Here you need at least 3 mega pixel video cameras.
Timely response to the situation
A security post with a monitoring system for quickly responding to an offense is not a panacea, but its presence is preferable.
After all, it is desirable for someone to constantly monitor the situation in the house and quickly respond to illegal actions.
But modern technologies allow the use of other solutions, which we will talk about later.
How to choose the right video camera
The image quality largely depends on the technical characteristics of a given model.
When choosing video cameras, you should pay attention to the following parameters:
- Permission. It must be high enough, otherwise video surveillance at the entrance makes no sense. A blurry image is impossible to see, especially in a recording, and it cannot serve as any evidence of illegal actions.
- Location. You should choose the most optimal options, otherwise the object will be only partially visible or even end up in the dead zone.
- The viewing angle and focal length. Due to the small area of the protected area, the viewing angle should be as wide as possible. The most normal focal length is 2.8 mm.
Options for installing a video surveillance system on the landing and in the entrances
Today, three options for installing video surveillance systems are widespread:
- Individual installation - the homeowner independently orders the installation of a video peephole, a camera above the front door, or does it himself;
- Video systems whose operation is limited to entrances - intercoms, cameras above the entrance to the entrance, opposite the front and elevator shafts;
- Outdoor devices for monitoring the situation in the local area;
- All three of the above types are combined into one system with video output to one monitor and recording to one recorder, or uploading it to one cloud on a remote server.
Modern video intercoms in the above-average price range have the ability to connect several more cameras to them to monitor the situation in the staircases and in the entrance. How it is connected is shown below.
Many systems include the use of motion sensors, which significantly reduces the size of the occupied space on the HDD.
Files with motion can be marked with a special marker and this greatly saves time in searching for the necessary information.
To install video surveillance the following can be used:
- Digital IP video cameras;
- Wireless web cameras;
- Registrar or cloud service;
- Power unit;
- HDD;
- Cables;
- Monitor;
- Switch (switch);
- RJ-45 connectors;
- Installation kit.
Software:
- IVideon;
- Axxon Next;
- ISpy;
- Other programs.
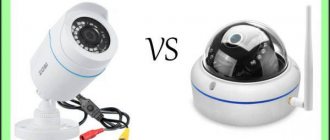
What type of cameras are best for entrances?
To organize a video surveillance system, the following types of cameras are most widespread:
1. Door peephole. A significant advantage of the device is its location at the level of the visitor’s face. The limitation in placement is reflected in the small coverage of the surrounding space. Wide-format models distort the image beyond recognition. When connecting the camera to the reading device via a cable, the latter is constantly subject to bending and friction at the junction of the door and the jamb, which leads to accelerated wear. Wireless systems do not solve the problem. Transmitting information via Wi-Fi does not deprive them of the need for power, the wires of which are also subject to constant bending and unbending.
2. Dome. According to technical and economic indicators, it is the best option for an access location. Ceiling mounting is designed, since two-axis positioning makes it difficult to obtain the optimal viewing angle in a wall-mounted version. Being located at a height, the camera limits access, which is attractive in terms of security. The dome shape and smooth surface prevent it from falling off from below. The only drawback of the device appears in rooms with ceilings higher than 3 meters. The camera records people in an almost vertical position, which prevents identification of the visitor if he is wearing a headdress or hood. The problem is solved with the help of a bracket mounted on the wall at the required height.
3. Turret. Unlike the previous type, it lacks a protective dome. It features three-axis positioning, which allows it to be mounted in any plane.
You can also use a fisheye camera in your entryway. The device provides a viewing angle exceeding 180⁰. Disadvantage: with removal, the image is noticeably distorted.
Features of anti-vandal video cameras for housing and communal services
Being part of a security system and located in public places, an anti-vandal camera at the entrance needs powerful protection. Fragile optics and electronics are protected from attacks by unscrupulous citizens using a one-piece housing (casing) made of 3 mm sheet steel. Acrylic plastic, resistant to mechanical stress, or sheet polycarbonate, with a thickness of 8 to 12 mm, is also used as a protective material.
The body of the anti-vandal camera maintains its integrity when struck by blunt or sharp objects. Some models can withstand shots from light firearms.
When manufacturing vandal-resistant tracking device housings, special attention is paid to the shape, reliable and hidden fastening.
Anti-vandal protection of the optical part is carried out due to thick tempered glass and a reduction in the size of the window, which makes a direct hit difficult.
If it is impossible to conceal the supply cables, they are protected using metal corrugation.
With motion sensors
Equipping a surveillance camera with a motion sensor expands the functionality of the device. Reacting to movement, the device turns on the recording equipment and sends a signal to the operator. Thanks to the motion detector, the camera can be in standby mode and activated under certain conditions, resulting in saving energy and megabytes of stored information.
WiFi
Cameras equipped with Wi-Fi do not require a DVR or wired connection. To obtain information, a smartphone or other device with a similar system is used. When connecting a WiFi camera to the entrance to the cloud service, the user gets the opportunity to see the situation in the surveillance area, regardless of the distance to the object.
The autonomy of the Wi-Fi camera is relative. By eliminating twisted pair wiring from the system, the device remains dependent on external power.
IP
The advantages of IP cameras include the ability to obtain high resolution images. The devices are equipped with a network interface. Some models require the installation of a memory card, which creates a video surveillance system without the need for a computer and a DVR. Ethernet is used to transmit data in ordinary or compressed form.
Having your own lighting
Modern digital surveillance cameras do not require their own lighting. Problems of insufficient visibility are solved using a built-in or external IR illuminator. Thanks to infrared illumination, the devices continue to provide an informative picture even in complete darkness.
Wired
The difference between wired video surveillance systems is a high degree of noise immunity and the elimination of interruptions. An undeniable advantage remains the ability to power the cable through which the signal is transmitted. Unlike wireless analogues, wired cameras are available in a wide range. At the same time, wired systems create difficulties when routing cables.
Methods of technical implementation
Technically, the idea of video surveillance in an apartment building can be implemented in several ways using:
- IP systems;
- Cloud service;
- Turbo—HD systems;
- Other solutions that are offered to clients by different companies.
Companies that install video surveillance systems may have different names for the methods listed above, but their technical implementation is practically no different.
Cloud service
This solution involves recording video to a special cloud service, for example, Ivideon.com or Ezvizlife.com. Local recording to the recorder is not provided.
The beginning and end of recording is controlled by a motion sensor. Records are stored on a remote server, usually in archived form for up to 7 days.
For video surveillance, Hikvision DS-2CD2120F-I 1080p and DS-2CD2110F-I 720p cameras are usually used, as they are supported by the ivideon.com cloud service. But other models may be offered to customers.
At night, infrared illumination of objects is possible at a distance of up to 30 meters.
Access to live video directly from the apartment is possible from the following devices:
- on Mac OS web client Safari;
- Windows Phone, iOS, Android smartphones;
- from MS Windows devices web client IE, Opera, Mozilla Firefox Chrome, etc.;
- devices running on MS Windows OS (integrated software).
Camera placement diagram.
Advantages of cloud video storage:
- Inexpensive system compared to others;
- Storing video on a remote server eliminates theft of recordings, which in other solutions are stored in the apartment on recorders. Finding such a recorder will not be difficult for experienced thieves; it is enough to track which apartment the cable is laid into;
- Night mode;
- Enable motion sensor video recording.
Installation kit included.
Flaws:
- If there is no electricity in the house, the routers installed by the provider will stop working, which will prevent online video transmission;
- Internet failures will also negatively affect the operation of the system, so the provider must be trusted and reliable;
- Possible malfunctions in the server on which the video is recorded (rarely happens).
IP system
This video surveillance system provides for video recording both on a remote server and locally on a DVR recorder.
This solution can also use Hikvision cameras with both day and night modes with infrared illumination.
Video signal transmission is possible both via cables and via WI-FI.
The IP system is included.
Video recording is carried out:
- On a 4-channel recorder, which is installed in one of the apartments. The amount of allocated disk space for video recordings is recommended to be at least 1 TB, the data storage period is at least 1 month;
- In parallel, recording is carried out in the cloud on a remote server.
Access to video recordings is possible from the same devices that we mentioned above; we will not repeat them.
Advantages of an IP system:
- Parallel video recording both to the recorder and to the cloud on a remote server, where the data can be stored for a long time;
- Two data storage locations, which will protect against loss of video files;
- Possibility of video signal transmission via WI-FI;
- Night mode;
- Work with a motion sensor.
Flaws:
- The need to use one of the apartments to install the recorder, and, consequently, lay cables through the apartment;
- More expensive than the regular cloud service described above. As a rule, the cost of installing such a video surveillance system will cost 2 or more times more.
Turbo HD system
This system provides for video recording only locally on the recorder, while remote access to video files via the Internet is available.
The video is recorded without sound, but optionally this service can be ordered separately.
The system kit includes:
Video recording is carried out only through a 4-channel Hikvision recorder on a 1 TB HDD, which is installed in one of the apartments.
Files can be accessed online from any of the devices described above (see “Cloud service”).
Advantages of Turbo HD system:
- Moderate installation cost, cheaper than an IP system, but more expensive than a Cloud service;
- Constant online access to the registrar of house residents from many devices (tablets, smartphones, etc.);
- Night IR illumination up to 20 meters;
- Enable motion sensor recording.
Flaws:
- Only one data storage location;
- The Internet, to which the cameras must be constantly connected, must have good speed;
- One of the neighbors will have to give access to their router by specifying the details for setting it up;
- Since recording takes place around the clock, the recorder must be turned on constantly, which can cause inconvenience for people living in this apartment.
More about CCTV cameras with remote access, popular models, connection methods, selection criteria.
Motion
I'll talk about the shortcomings and problems of this solution below, but it's still free and simple.
Motion allows you to solve the problem of detecting motion and recording video in mjpeg format when something happens in the entrance. My publication is not an instruction manual for Motion. I'm only describing the essentials, although the full configuration file is below.
By the way, the camera itself can detect movement. In this case, it uploads a set of pictures to the FTP server. I also use this mode in case motion for some reason misses the motion and doesn't record the video, essentially duplicating it.
For those who are not familiar with Motion, let me tell you that this is a program whose purpose is to record video in cases where it (the program) determines that the picture from the camera has changed (something is moving in front of the camera). To do this, it constantly compares pictures and determines that the new picture is not equal to the previous one by a certain percentage (the percentage of discrepancy is set in the configuration file). Recording stops after the picture has stopped changing for a specified period of time (also set in the configuration).
At the entrance, the Management Company installed a lamp with motion sensors. The lamp constantly turns on/off even without movement. Motion in this case starts recording video, so I use its setting LIGHTSWITCH = 1
. In this case, Motion skips 5 frames to adjust the camera sensitivity. Unfortunately, this does not always work, but I’m sure this is my special case. Sometimes I plan to turn off the motion sensors on the lamps in the entrance, but still save overall electricity.
The most important parameter is the number of frames per second that Motion accepts for analysis and records (the FRAMERATE
) Let's say, if the parameter is 5, as in the example, Motion “takes” 5 frames per second - the video turns out to be intermittent, but quite enough to understand what is happening. Increasing this parameter smoothes the recorded video, reduces the reaction time to movements, but increases the load on the processor. 5 frames per second seemed to me to be the most optimal.
Motion records video itself, but if you want to record with your own parameters (for example, with a different FRAMERATE
) you can configure a simple entry:
on_event_start = vlc rtsp://admin: [email protected] :554/Streaming/Channels/101 —sout=file/ps:/home/vova/Files/Camera/$(date +%m% d%H%M%S).mp4 on_event_end = pkill -f vlc The architecture used allows you to use Motion version 3.2.12+git20140228, specially compiled for it.
The version is old, not updated, but works properly. Its main problem is that when working with WiFI (and my Odroid is connected via WiFi to a local network), sometimes Motion loses connection with the camera and this connection does not restore itself. I have to restart Motion. The loss of connection manifests itself in the fact that Motion “freezes” on one picture. In order to restart Motion, I wrote a special script: it writes several pictures from the Motion Web server (Motion makes it possible to watch a video from the built-in Web server), compares them by size, and if the size is the same, then Motion is stuck on one picture. Why size? I could compare them by content using the Python Pillow package, but this is an extra load on the processor - Pillow is very resource intensive, you need to compare all the pixels with each other. The second solution is to connect odroid via Ethernet. In this case there are no problems.
I wanted the photo to be sent to the Telegram bot if there was movement in front of my door. To do this, I specified the execution of a simple bash script in the parameter. But first you need to set the detection area: area_detect = 89. This means that Motion detects movement in squares 8 and 9.
1 2 3 4 5 6 7 8 9
Next, we create a script for sending photos to Telegram
send_pix
#!/bin/sh # Token for Telegram TOKEN=1234567890abcdg # Get snapshot from Camera wget —user admin —password vova -O /home/vova/Files/output.jpg https:// 192.168.0.100/Streaming/channels/1/picture #Send snapshot to Telegram curl -s “https://api.telegram.org/bot${TOKEN}/sendPhoto” -F chat_id=12345678 -F photo=”@/ home/vova/Files/output.jpg" -F caption=$1 For it to work when detected, we write the parameter on_area_detected = /home/vova/Core/scrypts/send_pix in the configuration file. It turns out that this is what it looks like in Telegram
Here is my entire config file
motion.cfg
# /home/vova/Core/scrypts/motion/motion.conf # # This config file was generated by motion 3.2.12+git20140228 ##################### ######################################## # Daemon ######### ################################################## # # Start in daemon (background) mode and release terminal (default: off) daemon on #File to store the process ID, also called pid file.
(default: not defined) process_id_file /home/vova/Core/scrypts/pid/motion.pid ################################ ############################### # Basic Setup Mode ################ ############################################## # Start in Setup- Mode, daemon disabled. (default: off) setup_mode off # Use a file to save logs messages, if not defined stderr and syslog is used. (default: not defined) logfile /home/vova/Files/Logs/motion/motion.log # Level of log messages [1[1..9]EMR, ALR, CRT, ERR, WRN, NTC, ERR, DBG, ALL). (default: 6 / NTC) log_level 6 # Filter to log messages by type (COR, STR, ENC, NET, DBL, EVT, TRK, VID, ALL). (default: ALL) log_type all ########################################### ################ # Capture device options ############################### ############################### # Videodevice to be used for capturing (default /dev/video0) # for FreeBSD default is / dev/bktr0 videodevice /dev/video0 # v4l2_palette allows to choose preferable palette to be used by motion # to capture from those supported by your videodevice. (default: 17) # Eg if your videodevice supports both V4L2_PIX_FMT_SBGGR8 and # V4L2_PIX_FMT_MJPEG then motion will by default use V4L2_PIX_FMT_MJPEG. # Setting v4l2_palette to 2 forces motion to use V4L2_PIX_FMT_SBGGR8 # instead. # # Values : # V4L2_PIX_FMT_SN9C10X : 0 'S910' # V4L2_PIX_FMT_SBGGR16 : 1 'BYR2' # V4L2_PIX_FMT_SBGGR8 : 2 'BA81' # V4L2_PIX_FMT_SPCA561 : 3 'S561' # V4L2_PIX_FMT _SGBRG8 : 4 'GBRG' # V4L2_PIX_FMT_SGRBG8 : 5 'GRBG' # V4L2_PIX_FMT_PAC207 : 6 'P207' # V4L2_PIX_FMT_PJPG : 7 'PJPG' # V4L2_PIX_FMT_MJPEG : 8 'MJPEG' # V4L2_PIX_FMT_JPEG : 9 'JPEG' # V4L2_PIX_FMT_RGB24 : 10 'RGB3' # V4L2_PIX_FMT_SPCA501 : 11 'S501' # V4L2_PIX_FMT_SPCA505 : 12 'S505' # V4L2_PIX_FMT_SPCA508 : 13 ' S508' # V4L2_PIX_FMT_UYVY : 14 'UYVY' # V4L2_PIX_FMT_YUYV : 15 'YUYV' # V4L2_PIX_FMT_YUV422P : 16 '422P' # V4L2_PIX_FMT_YUV420 : 17 'YU12' # v4l2_ palette 17 # The video input to be used (default: -1) # Should normally be set to 0 or 1 for video/TV cards, and -1 for USB cameras input -1 # The video norm to use (only for video capture and TV tuner cards) # Values: 0 (PAL), 1 (NTSC), 2 (SECAM), 3 (PAL NC no color). Default: 0 (PAL) norm 0 # The frequency to set the tuner to (kHz) (only for TV tuner cards) (default: 0) frequency 0 # Rotate image this number of degrees. The rotation affects all saved images as # well as movies. Valid values: 0 (default = no rotation), 90, 180 and 270. rotate 0 # Image width (pixels). Valid range: Camera dependent, default: 352 width 1280 # Image height (pixels). Valid range: Camera dependent, default: 288 height 960 # Maximum number of frames to be captured per second. # Valid range: 2-100. Default: 100 (almost no limit). framerate 5 # Minimum time in seconds between capturing picture frames from the camera. # Default: 0 = disabled — the capture rate is given by the camera framerate. # This option is used when you want to capture images at a rate lower than 2 per second. minimum_frame_time 0 # URL to use if you are using a network camera, size will be autodetected (incl https:// ftp:// mjpg:// or file:///) # Must be a URL that returns single jpeg pictures or a raw mjpeg stream. Default: Not defined netcam_url rtsp://192.168.0.100:554 # Username and password for network camera (only if required). Default: not defined # Syntax is user:password netcam_userpass admin:vova # The setting for keep-alive of network socket, should improve performance on compatible net cameras. # off: The historical implementation using HTTP/1.0, closing the socket after each http request. # force: Use HTTP/1.0 requests with keep alive header to reuse the same connection. # on: Use HTTP/1.1 requests that support keep alive as default. # Default: off netcam_keepalive force # URL to use for a netcam proxy server, if required, eg “https://myproxy”. # If a port number other than 80 is needed, use “https://myproxy:1234”. # Default: not defined ; netcam_proxy value # Set less strict jpeg checks for network cameras with a poor/buggy firmware. # Default: off netcam_tolerant_check on # Let motion regulate the brightness of a video device (default: off). # The auto_brightness feature uses the brightness option as its target value. # If brightness is zero auto_brightness will adjust to average brightness value 128. # Only recommended for cameras without auto brightness auto_brightness off # Set the initial brightness of a video device. # If auto_brightness is enabled, this value defines the average brightness level # which Motion will try and adjust to. # Valid range 0-255, default 0 = disabled brightness 0 # Set the contrast of a video device. # Valid range 0-255, default 0 = disabled contrast 0 # Set the saturation of a video device. # Valid range 0-255, default 0 = disabled saturation 0 # Set the hue of a video device (NTSC feature). # Valid range 0-255, default 0 = disabled hue 0 ######################################## ####################### # Round Robin (multiple inputs on same video device name) ############### ############################################## # Number of frames to capture in each roundrobin step (default: 1) roundrobin_frames 1 # Number of frames to skip before each roundrobin step (default: 1) roundrobin_skip 1 # Try to filter out noise generated by roundrobin (default: off) switchfilter off ##### ################################################## ##### # Motion Detection Settings: ######################################## #################### # Threshold for number of changed pixels in an image that # triggers motion detection (default: 1500) threshold 400 # Automatically tune the threshold down if possible (default: off) threshold_tune off # Noise threshold for the motion detection (default: 32) noise_level 32 # Automatically tune the noise threshold (default: on) noise_tune on # Despeckle motion image using (e)rode or (d)ilate or ( l)abel (Default: not defined) # Recommended value is EedDl. Any combination (and number of) of E, e, d, and D is valid. # (l)abeling must only be used once and the 'l' must be the last letter. # Comment out to disable despeckle_filter EedDl # Detect motion in predefined areas (1 - 9). Areas are numbered like that: 1 2 3 # A script (on_area_detected) is started immediately when motion is 4 5 6 # detected in one of the given areas, but only once during an event. 7 8 9 # One or more areas can be specified with this option. Take care: This option # does NOT restrict detection to these areas! (Default: not defined) area_detect 589 # PGM file to use as a sensitivity mask. # Full path name to. (Default: not defined) ; mask_file value # Dynamically create a mask file during operation (default: 0) # Adjust speed of mask changes from 0 (off) to 10 (fast) smart_mask_speed 0 # Ignore sudden massive light intensity changes given as a percentage of the picture # area that changed intensity. If set to 1, motion will do some kind of # auto-lightswitch. Valid range: 0 — 100 , default: 0 = disabled lightswitch 1 # Picture frames must contain motion at least the specified number of frames # in a row before they are detected as true motion. At the default of 1, all # motion is detected. Valid range: 1 to thousands, recommended 1-5 minimum_motion_frames 6 # Specifies the number of pre-captured (buffered) pictures from before motion # was detected that will be output at motion detection. # Recommended range: 0 to 5 (default: 0) # Do not use large values! Large values will cause Motion to skip video frames and # cause unsmooth movies. To smooth movies use larger values of post_capture instead. pre_capture 2 # Number of frames to capture after motion is no longer detected (default: 0) post_capture 0 # Event Gap is the seconds of no motion detection that triggers the end of an event. # An event is defined as a series of motion images taken within a short timeframe. # Recommended value is 60 seconds (Default). The value -1 is allowed and disables # events causing all Motion to be written to one single movie file and no pre_capture. # If set to 0, motion is running in gapless mode. Movies don't have gaps anymore. An # event ends right after no more motion is detected and post_capture is over. event_gap 20 # Maximum length in seconds of a movie # When value is exceeded a new movie file is created. (Default: 0 = infinite) max_movie_time 0 # Always save images even if there was no motion (default: off) emulate_motion off ######################### ################################### # Image File Output ########## ################################################## # Output 'normal' pictures when motion is detected (default: on) # Valid values: on, off, first, best, center # When set to 'first', only the first picture of an event is saved. # Picture with most motion of an event is saved when set to 'best'. # Picture with motion nearest center of picture is saved when set to 'center'. # Can be used as preview shot for the corresponding movie. output_pictures off # Output pictures with only the pixels moving object (ghost images) (default: off) output_debug_pictures off # The quality (in percent) to be used by the jpeg compression (default: 75) quality 100 # Type of output images # Valid values: jpeg, ppm (default: jpeg) picture_type jpeg ######################################### ###################### # FFMPEG related options # Film (movie) file output, and deinterlacing of the video input # The options movie_filename and timelapse_filename are also used # by the ffmpeg feature ############################################## ############## # Use ffmpeg to encode movies in realtime (default: off) ffmpeg_output_movies on # Use ffmpeg to make movies with only the pixels moving # object (ghost images) (default: off ) ffmpeg_output_debug_movies off # Use ffmpeg to encode a timelapse movie # Default value 0 = off — else save frame every Nth second ffmpeg_timelapse 0 # The file rollover mode of the timelapse video # Valid values: hourly, daily (default), weekly-sunday, weekly-monday, monthly, manual ffmpeg_timelapse_mode daily # Bitrate to be used by the ffmpeg encoder (default: 400000) # This option is ignored if ffmpeg_variable_bitrate is not 0 (disabled) ffmpeg_bps 8100000 # Enables and defines variable bitrate for the ffmpeg encoder. # ffmpeg_bps is ignored if variable bitrate is enabled. # Valid values: 0 (default) = fixed bitrate defined by ffmpeg_bps, # or the range 2 — 31 where 2 means best quality and 31 is worst. ffmpeg_variable_bitrate 0 # Codec to used by ffmpeg for the video compression. # Timelapse movies are always made in mpeg1 format independent from this option. # Supported formats are: mpeg1 (ffmpeg-0.4.8 only), mpeg4 (default), and msmpeg4. # mpeg1 — gives you files with extension .mpg # mpeg4 or msmpeg4 — gives you files with extension .avi # msmpeg4 is recommended for use with Windows Media Player because # it requires no installation of codec on the Windows client. # swf — gives you a flash film with extension .swf # flv — gives you a flash video with extension .flv # ffv1 — FF video codec 1 for Lossless Encoding ( experimental ) # mov — QuickTime ( testing ) # ogg — Ogg/Theora ( testing ) ffmpeg_video_codec mpeg4 # Use ffmpeg to deinterlace video. Necessary if you use an analog camera # and see horizontal combining on moving objects in video or pictures. # (default: off) ffmpeg_deinterlace off ########################################### ################### # SDL Window ############################# ############################### # Number of motion thread to show in SDL Window (default: 0 = disabled) sdl_threadnr 0 ################################################## ########## # External pipe to video encoder # Replacement for FFMPEG builtin encoder for ffmpeg_output_movies only. # The options movie_filename and timelapse_filename are also used # by the ffmpeg feature ##################################### ########################## Bool to enable or disable extpipe (default: off) use_extpipe off # External program (full path and opts) to pipe raw video to # Generally, use '-' for STDIN… ; extpipe value ################################################# ############ # Snapshots (Traditional Periodic Webcam File Output) ############################# ############################### # Make automated snapshot every N seconds (default: 0 = disabled) snapshot_interval 0 ### ################################################## ####### # Text Display # %Y = year, %m = month, %d = date, # %H = hour, %M = minute, %S = second, %T = HH:MM:SS , # %v = event, %q = frame number, %t = thread (camera) number, # %D = changed pixels, %N = noise level, \n = new line, # %i and %J = width and height of motion area, # %K and %L = X and Y coordinates of motion center # %C = value defined by text_event — do not use with text_event! # You can put quotation marks around the text to allow # leading spaces ##################################### ######################### # Locate and draw a box around the moving object. # Valid values: on, off, preview (default: off) # Set to 'preview' will only draw a box in preview_shot pictures. locate_motion_mode off # Set the look and style of the locate box if enabled. # Valid values: box, redbox, cross, redcross (default: box) # Set to 'box' will draw the traditional box. # Set to 'redbox' will draw a red box. # Set to 'cross' will draw a little cross to mark center. # Set to 'redcross' will draw a little red cross to mark center. locate_motion_style box # Draws the timestamp using same options as C function strftime(3) # Default: %Y-%m-%d\n%T = date in ISO format and time in 24 hour clock # Text is placed in lower right corner text_right — # Draw a user defined text on the images using same options as C function strftime(3) # Default: Not defined = no text # Text is placed in lower left corner ; text_left value # Draw the number of changed pixed on the images (default: off) # Will normally be set to off except when you setup and adjust the motion settings # Text is placed in upper right corner text_changes off # This option defines the value of the special event conversion specifier %C # You can use any conversion specifier in this option except %C. Date and time # values are from the timestamp of the first image in the current event. # Default: %Y%m%d%H%M%S # The idea is that %C can be used filenames and text_left/right for creating # a unique identifier for each event. text_event — # Draw characters at twice normal size on images. (default: off) text_double off # Text to include in a JPEG EXIF comment # May be any text, including conversion specifiers. # The EXIF timestamp is included independent of this text. ; exif_text value ################################################# ############ # Target Directories and filenames For Images And Films # For the options snapshot_, picture_, movie_ and timelapse_filename # you can use conversion specifiers # %Y = year, %m = month, % d = date, # %H = hour, %M = minute, %S = second, # %v = event, %q = frame number, %t = thread (camera) number, # %D = changed pixels, %N = noise level, # %i and %J = width and height of motion area, # %K and %L = X and Y coordinates of motion center # %C = value defined by text_event # Quotation marks round string are allowed. ################################################## ########## # Target base directory for pictures and films # Recommended to use absolute path. (Default: current working directory) target_dir /home/vova/Files/Camera/ # File path for snapshots (jpeg or ppm) relative to target_dir # Default: %v-%Y%m%d%H%M%S-snapshot # Default value is equivalent to legacy oldlayout option # For Motion 3.0 compatible mode choose: %Y/%m/%d/%H/%M/%S-snapshot # File extension .jpg or .ppm is automatically added so do not include this. # Note: A symbolic link called lastsnap.jpg created in the target_dir will always # point to the latest snapshot, unless snapshot_filename is exactly 'lastsnap' snapshot_filename %Y%m%d%H%M%S-snapshot # File path for motion triggered images (jpeg or ppm) relative to target_dir # Default: %v-%Y%m%d%H%M%S-%q # Default value is equivalent to legacy oldlayout option # For Motion 3.0 compatible mode choose: %Y /%m/%d/%H/%M/%S-%q # File extension .jpg or .ppm is automatically added so do not include this # Set to 'preview' together with best-preview feature enables special naming # convention for preview shots. See motion guide for details picture_filename %Y%m%d%H%M%S-%q # File path for motion triggered ffmpeg films (movies) relative to target_dir # Default: %v-%Y%m%d%H% M%S # Default value is equivalent to legacy oldlayout option # For Motion 3.0 compatible mode choose: %Y/%m/%d/%H%M%S # File extension .mpg or .avi is automatically added so do not include this # This option was previously called ffmpeg_filename movie_filename %m%d_%H-%M-%S # File path for timelapse movies relative to target_dir # Default: %Y%m%d-timelapse # Default value is near equivalent to legacy oldlayout option # For Motion 3.0 compatible mode choose: %Y/%m/%d-timelapse # File extension .mpg is automatically added so do not include this timelapse_filename %Y%m%d-timelapse ######### ################################################## # # Global Network Options ############################################## ############### # Enable or disable IPV6 for http control and stream (default: off) ipv6_enabled off ################## ########################################### # Live Stream Server #### ################################################## ###### # The mini-http server listens to this port for requests (default: 0 = disabled) stream_port 8082 # Quality of the jpeg (in percent) images produced (default: 50) stream_quality 50 # Output frames at 1 fps when no motion is detected and increase to the # rate given by stream_maxrate when motion is detected (default: off) stream_motion off # Maximum framerate for streams (default: 1) stream_maxrate 1 # Restrict stream connections to localhost only (default: on) stream_localhost off # Limits the number of images per connection (default: 0 = unlimited) # Number can be defined by multiplying actual stream rate by desired number of seconds # Actual stream rate is the smallest of the numbers framerate and stream_maxrate stream_limit 0 # Set the authentication method (default: 0) # 0 = disabled # 1 = Basic authentication # 2 = MD5 digest (the safer authentication) stream_auth_method 0 # Authentication for the stream. Syntax username:password # Default: not defined (Disabled) ; stream_authentication value ################################################# ############# # HTTP Based Control ################################## ############################ # TCP/IP port for the http server to listen on (default: 0 = disabled) webcontrol_port 8081 # Restrict control connections to localhost only (default: on) webcontrol_localhost off # Output for http server, select off to choose raw text plain (default: on) webcontrol_html_output on # Authentication for the http based control. Syntax username:password # Default: not defined (Disabled) ; webcontrol_authentication value ################################################# ############# # Tracking (Pan/Tilt) ############################### ############################# # Type of tracker (0=none (default), 1=stepper, 2=iomojo, 3 =pwc, 4=generic, 5=uvcvideo, 6=servo) # The generic type enables the definition of motion center and motion size to # be used with the conversion specifiers for options like on_motion_detected track_type 0 # Enable auto tracking (default: off ) track_auto off # Serial port of motor (default: none) ; track_port value # Motor number for x-axis (default: 0) track_motorx 0 # Set motorx reverse (default: off) track_motorx_reverse off # Motor number for y-axis (default: 0) track_motory 0 # Set motory reverse (default: off) track_motory_reverse off # Maximum value on x-axis (default: 0) track_maxx 0 # Minimum value on x-axis (default: 0) track_minx 0 # Maximum value on y-axis (default: 0) track_maxy 0 # Minimum value on y- axis (default: 0) track_miny 0 # Center value on x-axis (default: 0) track_homex 128 # Center value on y-axis (default: 0) track_homey 128 # ID of an iomojo camera if used (default: 0) track_iomojo_id 0 # Angle in degrees the camera moves per step on the X-axis # with auto-track (default: 10) # Currently only used with pwc type cameras track_step_angle_x 10 # Angle in degrees the camera moves per step on the Y-axis # with auto-track (default: 10) # Currently only used with pwc type cameras track_step_angle_y 10 # Delay to wait for after tracking movement as number # of picture frames (default: 10) track_move_wait 10 # Speed to set the motor to (stepper motor option) (default: 255) track_speed 255 # Number of steps to make (stepper motor option) (default: 40) track_stepsize 40 ####################### ##################################### # External Commands, Warnings and Logging: # You can use conversion specifiers for the on_xxxx commands # %Y = year, %m = month, %d = date, # %H = hour, %M = minute, %S = second, # %v = event, %q = frame number, % t = thread (camera) number, # %D = changed pixels, %N = noise level, # %i and %J = width and height of motion area, # %K and %L = X and Y coordinates of motion center # %C = value defined by text_event # %f = filename with full path # %n = number indicating filetype # Both %f and %n are only defined for on_picture_save, # on_movie_start and on_movie_end # Quotation marks round string are allowed. ################################################## ########## # Do not sound beeps when detecting motion (default: on) # Note: Motion never beeps when running in daemon mode. quiet on # Command to be executed when an event starts. (default: none) # An event starts at first motion detected after a period of no motion defined by event_gap ; on_event_start value # Command to be executed when an event ends after a period of no motion # (default: none). The period of no motion is defined by option event_gap. on_event_end pkill -f vlc # Command to be executed when a picture (.ppm|.jpg) is saved (default: none) # To give the filename as an argument to a command append it with %f ; on_picture_save value # Command to be executed when a motion frame is detected (default: none) ; on_motion_detected value # Command to be executed when motion in a predefined area is detected # Check option 'area_detect'. (default: none) on_area_detected /home/vova/Core/scrypts/send_pix > /home/vova/Files/Logs/motion/motion_area.log 2>&1 # Command to be executed when a movie file (.mpg|.avi) is created. (default: none) # To give the filename as an argument to a command append it with %f on_movie_start echo "1" > /home/vova/Core/scrypts/motion/motion_label # Command to be executed when a movie file (. mpg|.avi) is closed. (default: none) # To give the filename as an argument to a command append it with %f on_movie_end echo "0" > /home/vova/Core/scrypts/motion/motion_label # Command to be executed when a camera can't be opened or if it is lost # NOTE: There are situations when motion don't detect a lost camera! # It depends on the driver, some drivers don't detect a lost camera at all # Some hangs the motion thread. Some even hangs the PC! (default: none) on_camera_lost wget https://192.168.0.205:8000/message/camera_lost ############################### ################################ Common Options for database features. # Options require the database options to be active also. ################################################## ########## # Log to the database when creating motion triggered image file (default: on) sql_log_picture on # Log to the database when creating a snapshot image file (default: on) sql_log_snapshot on # Log to the database when creating motion triggered movie file (default: off) sql_log_movie off # Log to the database when creating timelapse movie file (default: off) sql_log_timelapse off # SQL query string that is sent to the database # Use same conversion specifiers has for text features # Additional special conversion specifiers are # %n = the number representing the file_type # %f = filename with full path # Create tables : ## # Mysql # CREATE TABLE security (camera int, filename char(80) not NULL, frame int, file_type int, time_stamp timestamp(14), event_time_stamp timestamp(14)); # # Postgresql # CREATE TABLE security (camera int, filename char(80) not NULL, frame int, file_type int, time_stamp timestamp without time zone, event_time_stamp timestamp without time zone); # # Default value: # insert into security(camera, filename, frame, file_type, time_stamp, text_event) values('%t', '%f', '%q', '%n', '%Y-%m -%d %T', '%C') sql_query sql_query insert into security(camera, filename, frame, file_type, time_stamp, event_time_stamp) values('%t', '%f', '%q', '%n ', '%Y-%m-%d %T', '%C') ############################### ############################### # Database Options ################# ############################################ # database type : mysql, postgresql , sqlite3 (default : not defined) ; database_type value # database to log to (default: not defined) ; database_dbname value # The host on which the database is located (default: not defined) database_host localhost # User account name for database (default: not defined) ; database_user value # User password for database (default: not defined) ; database_password value # Port on which the database is located (default: not defined) # mysql 3306 , postgresql 5432 (default: not defined) database_port 0 #################### ######################################## # Database Options For SQLite3 ##### ################################################## ##### # SQLite3 database to log to (default: not defined) ; sqlite3_db value ################################################# ############# # Video Loopback Device (vloopback project) ############################### ############################### # Output images to a video4linux loopback device # The value '-' means next available (default: not defined) ; video_pipe value # Output motion images to a video4linux loopback device # The value '-' means next available (default: not defined) ; motion_video_pipe value ################################################# ############## # Thread config files — One for each camera. # Except if only one camera — You only need this config file. # If you have more than one camera you MUST define one thread # config file for each camera in addition to this config file. ################################################## ############# ; thread /etc/motion/thread1.conf Motion can also be configured via the web interface. Default port is 8081
How to make video surveillance yourself
You can install video cameras on your own, without resorting to the services of companies, in the entrance and stairwells, on the balcony for video surveillance of the parking lot, but this requires certain knowledge and training.
You can install both analog and IP cameras. The latter will be preferable, since they convey the picture better and have better characteristics.
IP cameras are also easier to install and configure. The overall price of an IP system will be cheaper than an analogue one.
If you install analog video surveillance, then to get good picture quality day and night you need expensive cameras, since cheap analogue ones will only have foggy pictures.
To further reduce the cost of installing IP video surveillance, you can use Chinese Hikvision cameras and DVRs, which can be ordered directly on aliexpress.com or other similar Internet sites. They have proven themselves well.
A hard drive for storing video recordings should be selected in size from 640 GB to 1 TB or more.
But it all depends on the number of cameras. If you have one, then a 640 GB disk is enough for two weeks of continuous recording.
You can use external HDDs, which must be connected to an external power source, or regular ones, which are used in computers with a 2.5 or 3.5 inch form factor.
The second type of device, as a rule, is mounted inside the recorders and connected via a SATA connector, where the 12V power supply is also connected.
Decide what you will shoot and in what quality. For example, to view the area in front of the house you need to select a 3 Mpx camera, but for shooting in the entrance and on the landing, 1 Mpx is enough.
The first camera is considered a street camera, which means it must record events around the clock. To connect the wires in this case, you must use a sealed box.
The second camera should start recording based on an event, i.e. when a motion sensor is triggered.
The next thing you need to pay attention to is the network video recorder. It can be 4, 5, 8, 9, 16 and 32 channels.
For home use, a 4-channel (for four cameras) Hikvision Line MicroNVR or Super MiniNVR recorder is quite suitable.
You can also use a computer or laptop as a medium-power recorder, but since in recording mode they must work around the clock, the electricity consumption per month will vary from 100 to 150 kW, which is not suitable for us.
To initially set up the system, you will need a monitor. The setup consists of assigning IP addresses to cameras, setting the correct time and other settings.
For ease of maintenance and management of the system, as well as connecting more than one camera with Internet access to the system, you will need a router or network switch.
This will also allow you to view online videos remotely from any device.
To power the camera, you need to use a high-quality power supply of 12V and at least 1A.
If you plan to install several devices, and they will be located at a distance from each other, then use one power supply of 12V and 5A.
Power can be supplied to the cameras via the same cable as the signal (POE support). To do this you need a splitter, injector and power splitter.
⚡ Judicial practice
Judicial practice on the issue of installing video cameras is quite diverse and heterogeneous. Since the legislation does not clearly regulate the installation of video cameras in the entrances of residential buildings, the courts often take a contradictory position on similar claims.
For example, in case No. 2-223/2016 ~ M-142/2016 of the Rylsky District Court of the Kursk Region, the court came to the conclusion that the neighbors’ claim on the issue of dismantling the camera did not have any support. The court supported its position as follows: cameras installed in common areas do not record the internal layout of apartments. They are aimed at public areas and do not violate privacy in any way. The residents' assumptions that the owner was collecting information about the private lives of other citizens through the installed camera were not supported by anything .
In case No. 2-1257/2015 ~ M-1361/2015 of the Predgorny District Court of the Stavropol Territory, the court came to the opposite conclusion that the cameras installed in the entrance violated privacy and ordered the owner to dismantle them.
Connecting an IP DVR, algorithm of actions
The first thing you need to do is connect a hard drive to the recorder.
A common case is when the HDD is inserted inside the recorder and connected there.
Next, to carry out the settings, we connect a monitor to the recorder. To do this, you can use HDMI or VGA cables. It all depends on what type of interface is supported.
Next, we connect the IP camera to the RG-45 connector and through the power supply to the network.
If you want to connect several cameras at once, you will have to use a switch with several RG-45 connectors or purchase a recorder with several LAN ports already built-in.
Apply power to the recorder and start it, the monitor screen should light up.
As a rule, the first time you turn on the recorder, it will format the hard drive.
The setup wizard will then launch. The default login is “admin”, the password field is empty.
We set real time, date and language.
Click NEXT where we are asked to restart the recorder for the changes to take effect.
Next we will be asked to configure the network.
If you have only one camera, then we set up the network settings for it manually; they are indicated in the operating manual of the recorder.
We enable DHCP only if we use several cameras connected via a router.
Click OK. If the message “Test gateway ERR (error)” appears in the next window, simply ignore it by clicking “Skip”.
Next, a window for installing a mobile application may appear for viewing videos remotely via the Internet.
You can skip these settings for now, the application can be installed later.
If you register IP cameras manually, select manual mode in the next window and click NEXT.
In the next window, add a device (video camera) and its IP address.
Enter the default login (admin) and password (admin).
Click next and DONE.
Reboot the recorder. Subsequently, the image from the camera will appear on the monitor in the window.
To start recording, click the record all channels button. And to go to the video recording settings, you need to click the corresponding menu.
Record storage
When using a local storage source (regardless of whether it is a server or a DVR), you should think about preventing unauthorized access to it: the possibility of theft or damage to storage media with video recordings reduces the effectiveness of the entire system to zero. In addition, it makes sense to think about emergency power supply - a UPS of appropriate power is suitable for this purpose.
The volume of media used to store video recordings should be calculated based on the number of cameras, the quality of the video recording and the time of storage. For a house or apartment, the storage period for a record rarely exceeds 2–3 days: usually, the need for viewing is discovered during this period.
Connecting two IP cameras to the recorder via a router
Our goal is to create a small IP video surveillance network of two cameras - one outdoor, the other indoors.
You can connect to this network via a computer or laptop (netbook).
You can also set up remote online viewing of images from cameras via a smartphone.
A 2.5-inch HDD from a 500 GB laptop will already be used here.
Install the HDD into the recorder.
Connecting cameras can be done in several ways. The simplest is to connect them directly to a switch that supports POE; in this case, we do not need a separate power supply for each camera.
If you use a power supply, then you will have to run a separate 12V cable from it to each device.
But to avoid this, you can supply power to the camera directly over twisted pair cable. To do this, use brown and blue wires.
The orange and green wires are used for the signal.
The fact is that not all cores are used in a twisted pair cable. Only the orange pair (orange and white-orange) and the green pair (green and white-green) are involved.
But the brown pair and the blue one are not used, so we can supply 12V power through them.
Select the blue and brown pairs, and tuck the rest back into the cable.
Crimping occurs according to the same principle as a regular twisted pair, but the blue, white-blue and brown, white-brown wires are excluded from the connector.
Since the connection will be made directly to the computer, it is better to crimp using the “Cross” scheme.
We connect the blue pair to “+”, and the brown pair to “-”.
We connect the connector and power connector.
To prevent the wires from dangling and to protect them from moisture, you can use a junction box.
We connect the second camera in the same way.
Next you need to supply power to the cameras. It should be 12V with a current of 1A.
If we have two devices, then we can use a 12V and 2A adapter, and to connect them, we can purchase or make a splitter ourselves.
We connect it to the adapter.
And we already connect video cameras to it.
Plug the adapter into a power outlet.
Next, we connect the cameras to the router.
Next we connect the DVR itself. First the power adapter and then using the network cable to the router.
We connect a monitor to the recorder.
After you have connected everything, turn on the power. As soon as the software loads, a message will appear indicating that the hard drive has been formatted.
Then, as in the first case, the setup wizard will appear and one of the cameras will immediately be picked up.
Then he sets the language and time, everything is done as in the first case.
Testing the gateway with a positive result indicates that there is direct access to the Internet through the router.
Next, we repeat the steps indicated in the previous section.
We configure the second camera manually. Click “Settings” and then “Add”.
Click OK and go to digital channels. There we see the second camera.
On another channel we activate the second camera, it should pick up.
Types of liability
For illegal intrusion into the “territory of inviolable personal space,” the culprit may be subject to administrative, civil and criminal liability, consisting of the following sanctions:
- Administrative – for illegal processing of personal data. In the absence of an expressed goal and developed policy, the violator faces a fine in the amount (Article 13.11 of the Code of Administrative Offenses of the Russian Federation):
- 1-3 thousand rubles. – for citizens without entrepreneurial status;
- 5-10 thousand rubles. – for officials of enterprises;
- 30-50 thousand rubles. – for companies.
Processing biometric data without the written consent of the citizens captured in the frame entails a fine in the amount (Article 13.14 of the Code of Administrative Offenses of the Russian Federation):
- 3-5 thousand rubles. – for individuals;
- 10-20 thousand rubles. – for representatives of organizations;
- 15-75 thousand rubles. - for legal entities.
- Civil law – in the amount of damages caused. For example, if filming a riotous party resulted in a neighbor’s dismissal from work, then the culprit is obliged to compensate:
- lost earnings due to termination of an employment contract;
- moral damage caused to reputation.
- Criminal - for finding out information related to private life with subsequent illegal publication (Article 137 of the Criminal Code of the Russian Federation) in the form of:
- financial sanction within 200 thousand rubles. or income for 1.5 years;
- imprisonment for a period of up to two years.
The culprit may be subject to several types of liability at the same time. Thus, the imposed penalty does not relieve the injured party from the obligation to compensate for moral damage.
Video surveillance via smartphone application
When you reach the “Install a mobile application” section in the settings wizard, the system prompts you to install the application on your smartphone via a QR code.
Install the QR Scanner application on your smartphone and launch it.
For Android, scan the right QR code.
You will be taken to the application page and then click on the download button.
After the XMEye application loads, install it.
Subsequently, you need to create an account by registering in the system.
Go to the application and click "+" to add a device.
Create and enter a device name in Latin.
Next we move on to the settings on the monitor. Proceed to the next QR code by clicking the “Next” button.
In the application on your smartphone, activate the QR code scanner and scan it on the monitor.
This barcode will add the device to the application.
The third line is optional.
Click search. The application will find the device.
Close the setup wizard on your monitor and log into the device on your smartphone.
Select the camera you need and get the image.
Similarly, remote online video viewing can be configured on a tablet or computer running Windows OS.
To do this, just download and install a similar application Xmeye APK developed for this operating system.
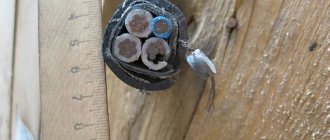
Cable installation
The connections between the cameras and the recorder are made using a specialized cable KVK, KKSV or their analogues. This cable is characterized by high noise immunity, implemented by shielding signal cables, and the presence of an additional core for powering video cameras. Over short distances, cabling can be done using Category 5E twisted pair cables.