5 / 5 ( 1 voice )
metering panel . What kind of shield is this and what is it for? Actually, as the name suggests, this is a switchboard for electricity metering , i.e. panel where the electric meter is installed.
You can order the assembly of an electrical metering panel from me. The price of a metering board starts from 9,000 rubles. Assembly time from 1 week.
In the article we will look at what elements (devices) the metering board diagram consists of and examples of how the boards are assembled.
Depending on the number of connected phases from the overhead line, the voltage metering board is divided into 380V and 220V metering boards , i.e. three-phase or single-phase. In accordance with the number of phases, either a three-phase or single-phase electricity meter is installed in the metering panel.
The metering board is usually installed for private houses. For apartments, meters are installed either in floor panels on the landing or in apartments in a common panel. It is assembled according to technical specifications (specifications) issued by the network company to whose electrical networks you are connected. Usually these are familiar to many: Mosenergo, Lenenergo, Kurskenergo and other “energos” by region.
In recent years, the network company has required the installation of metering panels (MCB) behind the fence in an accessible place so that the metering panel is visible and there is no opportunity for theft of electricity.
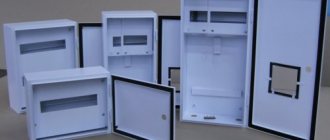
Therefore, it is correct to install a metal metering board so that it is not broken on occasion, although this does not always help. It is also important that the metering board has a high degree of protection from dust and moisture (at least IP54) , and, ideally, climatic version U1 (for installation outdoors at temperatures from -40 to +40 degrees ).
The body of the metal switchboard must be connected to a grounding device, and if there are electrical devices on the switchboard door, for example, signal lamps, then the switchboard door must also be grounded.
The metering board is usually installed on a power line pole (support), a separate pipe stand, on a fence, or on the facade of a house.
The installation location must be agreed upon with the network organization, the chairman of SNT and other societies, otherwise they may not be accepted.
The height metering board is usually mounted at eye level 1.6-1.8 m above the ground, but sometimes, as in one of the photos, it has to be installed quite high. This is due to ordinary vandalism or the demands of the network organization (chairmen of SNT). In SNT, by the way, they have their own rules, and the chairman usually decides everything, who to connect, who not to connect, to whom to allocate “a lot” of power, and to whom the minimum.
The network organization often requires that the metering panel have a viewing window for taking readings from the electric meter. Unfortunately, this makes serious adjustments when choosing such a metering board, because... There are no high-quality metal metering panels with a viewing window (I have never seen them). Manufacturers like ABB, Legrand and Schneider Electric simply don't make them. And shields from IEK, EKF and other Chinese-Russian manufacturers lose their appearance and rust after a couple of years of operation.
The metering board circuit can be divided into two components: the grounding system and the electrical circuit.
Grounding system. Whether it will be TN-CS or TT depends on a number of conditions (the condition of the line, the distance of the transformer, the presence of repeated groundings on the line, what wire the line is mounted from). Other grounding systems (TN-S, TN-C, IT).
The most common grounding system for a private home is TT, because a large number of power lines of electrical networks are still in poor condition, and are made with “bare” aluminum wire, and it is simply impossible to make TN-CS.
Assembly order
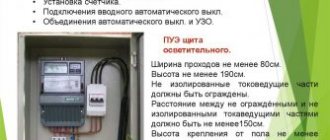
After receiving permission to connect to three phases and technical conditions, we will begin to independently assemble the shield. The input will be mounted in a sealed box, which must be assembled on the outer wall of a private house or pole. It contains a three-phase meter and a circuit breaker, as shown in the photo below:
Near the input we organize a grounding device, according to the rules. The input electricity metering panel will be sealed and there will be no free access to it. Therefore, the first thing you need to do is assemble a three-phase distribution panel yourself, distributing consumers as you wish.
A 5-core cable L1 is connected from the input box to the electrical distribution panel; L2; L3; N; PE, or 4-wire L1; L2; L3; N provided that the TN-CS grounding scheme is used or another grounding device is organized near the panel.
To connect three-phase home equipment, you will need to assemble a shield according to the following diagram:
The assembly of a 380-volt metering board is carried out with a stranded wire, with a cross-section of at least 4 mm and colored insulation. Recommended colors - L1 red, L2 white, L3 black, N blue, PE yellow-green. To correctly assemble a three-phase panel, you need to carefully look at the protective devices on which phase marks are marked for connecting the wires. This diagram shows four-pole RCD protective devices with an additional N terminal; in conventional machines this terminal may not be present. One by one, we begin to connect the devices installed in the panel on the DIN rail, measure the wire from terminal L1 to terminal L1 of the next device, with a margin of 30%, for ease of installation and operation.
We carry out this operation with all terminals, but keep in mind that it is not recommended to cut the sections in advance, because during the assembly process you will notice that the length of section L1 is much shorter than the mounting section L3. It’s even better to assemble the shield using a three-phase mounting bus, which will save space and minimize the chances of getting something mixed up. We separately install the zero bus and the PE bus, which we must connect to the housing of the electricity metering panel.
If you don’t have powerful equipment in your apartment or house, you need to assemble a 380V panel in such a way that each phase is evenly loaded with single-phase consumers. You can see an example of such an assembly of a three-phase electrical panel in a private house below:
In this electrical panel diagram, the phases are distributed to a separate load, through single-pole circuit breakers and differential switches. L1, L2 and L3 are evenly loaded by consumers, according to the previously calculated expected load.
It is not recommended to do this - one phase for sockets, another for lighting, a third for any other needs, because
it is important to distribute the load between L1, L2, L3. If one of the phases is overloaded, the voltage drops on it, while at the same time the voltage rises on the free ones
This phenomenon can often be observed in the winter, in the residential sector. If your neighbor in the phase turned on a powerful consumer, the lighting lamps in your house began to glow dimly, and the refrigerator began to hum strainedly. Know this is a drawdown in your phase. And at the same time, other neighbors’ lamps, powered from other phases, begin to glow brightly and explode, equipment burns out, and a fire may even break out.
As for the three-phase load, such a distortion will be fatal for it. To prevent this from happening, when you decide to assemble a shield, additionally install a phase and voltage control relay for a three-phase network. For a single-phase network, connect a voltage relay. You can check the load distribution using a multimeter with a current clamp, which is shown in the photo below.
Well, the last option for assembling a 380-volt electricity metering panel is mixed, when the home electrical network contains both three-phase and single-phase electricity consumers. In this case, you need to assemble the electrical panel as follows:
Selecting the number of circuit breakers
Single-pole circuit breaker
But first of all, you need the box itself (panel) in which you will install everything. It is selected based on the number of circuit breakers (“Automatic Switches”), and how many of them to install is up to you. You can at least install a separate circuit breaker for each socket and switch. But of course this will be unnecessary. It is best to separate outlets and lighting. That is, one machine for lighting and another for sockets. If the consumption is too high, then you can, for example, connect 2 rooms to one pair of machines , and the remaining rooms to another pair. By the word pair, I mean two machines, one for “light” and the other for sockets. If any device in the house consumes more than 5 kilowatts, then it must be connected with a separate line (and, accordingly, a separate machine). These are devices such as an electric stove, electric boiler, etc. It is also recommended to connect the washing machine to a separate line. And, of course, you need to keep a couple of spare machines in case a new consumer appears in the house. At the input, it is also advisable to install a two-pole circuit breaker (double) as well as an RCD and OPS, but more on that later.
Selecting the power of circuit breakers
Various circuit breakers
In the previous article about replacing wiring, I already told you about the choice of wire cross-section and that a 2.5mm² cross-section goes to sockets, and 1.5mm² to lighting. So, the machines are selected based on the wiring cross-section , so that it can turn off before your wire starts to melt from overload. It turns out that a machine with a power rating of 25A (ampere) is installed on a 2.5mm² wire, and with a power rating of 16A on a 1.5mm² wire. Below is a table showing which section it is recommended to install which machine and what is the maximum load of such a wire:
| Section of copper conductors of wires, sq. mm | Permissible continuous load current for wires, A | Rated current of the circuit breaker, A | Maximum current of the circuit breaker, A | Maximum power of single-phase (220V) load KW | Characteristics of household load (220V) |
| 1.5 | 19 | 10 | 16 | 4,1 | Lighting and alarm |
| 2.5 | 27 | 16 | 20 | 5,9 | Socket groups and electric floors |
| 4 | 38 | 25 | 32 | 8,3 | Water heaters and air conditioners |
| 6 | 46 | 32 | 40 | 10,1 | Electric stoves and ovens |
| 10 | 70 | 50 | 63 | 15,4 | Opening lines |
Instructions for assembling a three-phase electrical panel
First you need to get permission to connect to three phases. The installation of the input will be carried out in a hermetically sealed box on the external wall of a private house. It will have a three-phase meter and a circuit breaker installed.
Near the input you must organize a grounding device. The entrance panel will be sealed and free access will be limited. That is why you first need to assemble the three-phase distribution panel yourself.
A 5-core cable L1, L2, L3, N, and PE must be connected to the distribution board. You can also install a 4-core cable L1, L2, L3 and N. This cable can be used if you have a TN-CS circuit. To connect three-phase home equipment, use the following diagram:
The assembly of a 380-volt metering board is carried out with a stranded wire, which has a cross-section of at least 4 mm. Recommended colors are L1 red, L2 white, L3 black N blue and PE yellow-green. To correctly assemble a three-phase shield, you should carefully look at the protective devices. The diagram that we posted above shows four-pole RCD protective devices with an additional terminal N. In conventional machines, this terminal may simply be missing. In the panel, the devices must be mounted on a DIN rail. Before installing wiring, be sure to learn how to mark wiring.
This operation must be performed on all terminals. During installation, please note that it is not recommended to cut the sections in advance. This is because during the installation process you will notice that the length of L1 will be much shorter than the length of L3. It’s even better to assemble the shield using a three-phase mounting bus, which can save space and minimize the chance of getting something mixed up. The neutral and PE bus must be connected to the body of the electrical panel.
If your apartment or house does not have powerful equipment, then you need to assemble a 380V panel. Thanks to this, the phase will be evenly loaded with single-phase consumers. You can see an example of assembling a three-phase electrical panel in a private house below:
In this electrical panel diagram, the phases will be distributed to a separate load through single-pole circuit breakers and differential switches. You should not have one phase go to sockets, the second to switches, and the third to other needs. You need to try to evenly distribute all the loads. If one of the phases is overloaded, then you may notice a voltage drop. This phenomenon can be observed quite often in the private sector. If you are interested, then you can also read about cable wiring.
If your neighbor turns on too much power, then you may see that your incandescent lamps have dimmed. Remember that this process is called phase drawdown. Neighbors who are powered from other phases may experience that the lamps shine too brightly. For a three-phase load, the imbalance will be fatal. To avoid this process, you need to try to install a phase and voltage control relay. For a single-phase network, you can connect a voltage relay. You can easily check the correct load distribution using a multimeter that has a current clamp.
For the last version of the panel assembly, electricity metering at 380 volts is mixed. When there will be three-phase and single-phase electricity consumers in the home network. In this case, you can assemble the shield as follows:
Why do you need OPS?
We continue to disassemble the assembly of a 220 Volt electricity metering panel and now it’s time to consider another device, which is called OPS. This is a surge suppressor. To ensure correct operation, this device must be grounded. The alarm system should be installed in the switchboard parallel to the input machine. The principle of operation of this device is quite simple, and it is to create a short circuit inside itself.
Surge suppressor
Experts say that this is a disposable device, and after operation it needs to be replaced. The appearance of the alarm system resembles a circuit breaker. However, instead of a flag, there is an indicator on its design. If you are connecting a summer cottage to the power grid, then installing an alarm system is mandatory. In specialized stores you can find OPS of the following categories:
- "B". This type should be mounted on the input. It provides protection against lightning and overvoltage.
- "C". The device must be mounted in a distribution board. This option is intended to protect internal wiring as well as circuit breakers. Category “C” is by far the most common.
- "D". It must be installed on the consumer. Category “D” fire protection system allows you to provide reliable protection against high-frequency interference and overvoltage.
Now it’s time to consider the main element of the control room - the counter.
Electrical 380V electricity metering panel for a private house with a 220V socket
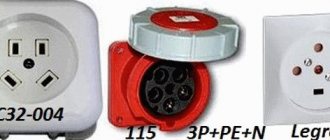
In this electrical panel diagram, there is additionally a modular 220V socket (number 7) with an individual protection device - difavtomat (number 8), which combines a circuit breaker and a residual current device. The rating of the RCD must be higher than that of the circuit breaker, for example 40A, leakage current 100 or 300 mA.
Electrical metering panel 380V, with modular socket and automatic circuit breaker, TT grounding
Following this example, where the outlet is protected by a residual current circuit breaker, you can install any other modular equipment, contactors, transformers, etc. to the electricity metering panel, if necessary.
Let me note again that under each diagram there are links, by clicking on which you can read the details, find out the equipment used, and ask questions.
Otherwise, here are the main options that are used when connecting private houses and garden houses to the power grid. And most importantly, such electrical panels are successfully accepted by regulatory authorities and put into operation.
Counter selection
To assemble a 220V electricity metering board, you cannot do without a meter. Meters are electromechanical and electronic. Electromechanical meters have a mechanical counting mechanism; of course, they differ from their predecessors with a disk. Now the disk has replaced the LED indicator. When this device is disconnected from the network, all readings remain on the display.
Mechanical counter
The electronic meter has a liquid crystal display on which readings are displayed. The error, like that of a mechanical analogue, is within 1%. This meter differs from a mechanical meter in that if it is disconnected from the network or the device breaks down, you will not be able to see the readings. Although electronic meters have more advanced functionality. In addition to the consumed energy, it can show the amount of active and reactive energy and much more (depending on the model). Many models are also equipped with a function for remote transmission of readings.
Meters are also divided into single-tariff and double-tariff. Single-tariff meters count electricity at one tariff, that is, at a daily rate, and you pay a certain amount for each kilowatt. In most cases, such meters are equipped with a mechanical counting system, but there are exceptions (that is, there may be an electronic one).
A two-tariff meter counts electricity at 2 tariffs. Day and night. The day rate is considered the same as for a single tariff, but the daily rate runs from 8:00 to 23:00. The night rate starts from 23:00 to 8:00, but you will pay almost half as much for it. But such a device costs twice as much.
Electronic counter
The accuracy class is an indicator of the error of the electric meter. Now new models come with accuracy class 2 and higher, which is allowed in any electrical network. So you shouldn’t focus on this parameter.
Counter sizes
The size of the counters can also be different. There are big and small ones. Quality has nothing to do with size. Large counters require a separate space in the drawer (there are special places in the drawer reserved for this). Small ones are installed in the same way as automatic machines and do not require a specially designated space for themselves.
Some useful tips for assembling a shield
When assembling an electrical panel, it is necessary to use only high-quality and reliable electrical products
You should not pay attention to cheaper Chinese analogues; personal safety is much more important
To connect wires to machines, it is best to use special lugs for crimping. Of course, then you will have to purchase pliers with which crimping is performed, but their cost is not too high.
The use of insulating tape is no longer relevant; many electricians use exclusively heat-shrinkable tubing. This consumable is convenient and reliable, and it is not necessary to purchase a hair dryer; you can use an ordinary lighter.
For ease of use, all elements of the electrical cabinet must be marked. Only then will it be possible to quickly and easily turn off the voltage in a certain room. You can make notes on the body of the device or make small signs and attach them to the product with tape.
Electricity metering board diagram 380V for a private house 15 kW
When connecting a private house to the power grid, you will definitely need to obtain technical specifications for connection from the electricity supply company (Mosenergo, Lenenergo, Sverdlovenergo, etc., depending on the region). It is this document that contains the main characteristics of the electrical network available to you, including the requirements for the electricity metering panel.
In this article we will examine in detail the diagram of a typical metering panel, as well as its modifications, which require collecting the requirements of technical specifications.
In such cases, the standard network parameters for connecting a private home are:
— 3 phases
— Voltage: 380V
— Power allocated: 15 kW
— Input cable: SIP 4-core (3 phase conductors and PEN)
I would like to note that one of the main tasks of technical specifications is not only to ensure the safety of the electrical installation, but also to prevent the possibility of theft of electricity by consumers.
That is why all protection or switching devices in the electrical panel located before the electric meter must be protected from the possibility of illegal connection. Usually they are hidden in separate boxes, which are sealed when connected.
In addition, the technical specifications require that the metering board be placed in a place accessible for inspection - on the border of the site, on a lighting pole or fence.
Most often, such external panels are used exclusively for accounting, without additional capabilities, and provide only basic functions. The main distribution board (PDB), in this case, is installed inside the house, where all consumers are divided into groups, the load is distributed, the appropriate automatic protective equipment is installed, etc.
All the diagrams presented below will be designed for the two most popular grounding systems in private homes, TT and TN-CS. Under each connection option there will be links to step-by-step assembly instructions, with detailed comments.
If you have not decided which grounding system to choose, the following information will help you:
TN-CS is the grounding system recommended by the rules. It has a number of disadvantages; it is worth using it if you are confident in the condition of the electrical networks suitable for the house, if they are new enough and regularly maintained.
TT is a relatively safer system. The main disadvantages include only the high costs of installing protective equipment and installing a ground loop, as well as regular maintenance. Which, for safe operation, must always be maintained by you in working condition.
You will learn more about the differences in the design of grounding systems in one of the following articles. Subscribe to our VKontakte group and stay tuned for new materials.
DIY installation and installation
First you need to select an electrical panel. To do this, you need to decide on the type of shield. It is recommended to install hidden panels with hidden wiring; with open wiring, it is better to install a hinged panel.
If the apartment does not have a special niche for installing a built-in shield, then you will have to do it yourself, which creates additional difficulties, but such a shield will be well camouflaged. It is much easier to install a wall-mounted distribution panel in an apartment; all you need to do is secure it with several screws, but it does not always look good in the interior.
The next stage depends on how many groups all electricity consumers were divided into at the stage of developing the panel diagram. The number of machines used, as well as the size of the housing where they will be installed, depends on the number of zones.
The case should be selected with a reserve for the number of installed machines, this will save money if you have to upgrade the power supply system. Before installing the shield, you must select its location in the apartment.
The shield should be located in an easily accessible place at a height of 1.5-1.7 meters from the floor level, so that it is not blocked by furniture or doors. The location for placing the shield is selected only once, so it is worth choosing it responsibly.
You should also consider how other pieces of furniture and interior will be placed. If a hidden type switchboard is installed, then it is necessary to select a place where a niche can be built for it.
The following actions must only be carried out when the power supply is turned off. After turning off the electricity, you should insert the cable into the housing through the cable entries, after removing the plugs.
At this point, the installation of the electrical panel is completed; the next task is to install and connect the machines.
We invite you to watch the video - recommendations for installing a built-in cabinet for an electrical panel and how to properly assemble an electrical panel in an apartment with your own hands from a generalist:
Installing an electrical panel is not difficult; it can be done independently. You just need to understand its structure, comply with all the requirements of GOST and PUE, as well as electrical safety rules. And after installation, check whether all elements work correctly.
Grounding the device
Step by step process:
- work with electrodes. The first step is to sharpen them using a grinder;
- deepening of pins. They need to be hammered in not to the very end; about 15 centimeters remain on the ground. At the end they are connected to the circuit;
- connection. Basically, the pins are held together with a wide tape. If it is made of ferrous metal, then it is advisable to use welding fastening, because this will help to avoid expansion and unnecessary resistance;
Input panel assembly
- filling up a ditch. It is recommended to use homogeneous soil, loose in composition. Purchased packs usually include a plastic well for inspection;
- connecting cables. Install the shield itself on a pole or wall of the room; it is important that the humidity does not exceed 70%.
Note! When working, you must follow all safety rules.
In conclusion, it should be noted that without a shield it is impossible to connect and conduct the electrical network. But it is not recommended to carry out installation on your own without experience.
Some useful tips for assembling a shield
When assembling an electrical panel, it is necessary to use only high-quality and reliable electrical products
You should not pay attention to cheaper Chinese analogues; personal safety is much more important
To connect wires to machines, it is best to use special lugs for crimping. Of course, then you will have to purchase pliers with which crimping is performed, but their cost is not too high.
The use of insulating tape is no longer relevant; many electricians use exclusively heat-shrinkable tubing. This consumable is convenient and reliable, and it is not necessary to purchase a hair dryer; you can use an ordinary lighter.
For ease of use, all elements of the electrical cabinet must be marked. Only then will it be possible to quickly and easily turn off the voltage in a certain room. You can make notes on the body of the device or make small signs and attach them to the product with tape.
Common installation mistakes
Errors during installation of the electrical panel can lead to fire or incorrect operation. To assemble an electrical panel yourself, you need to familiarize yourself with the basic requirements for installing such equipment.
- Flexible stranded wires are clamped into terminals through lugs (sleeves). This is especially true for screw connectors. When the terminal block bolt is tightly tightened, it crushes the thin wires of the wire. Therefore, they break, but outwardly the problem remains invisible.
- Before connecting the wire to the terminal block, the insulation is removed from it. The length of the stripped layer depends on the depth of the terminal block. It is necessary to check that only the bare current-carrying core without insulation gets into the clamping mechanism.
- You cannot connect wires of different cross-sections to one contact of the machine. As the screw is tightened, the thick wire will be clamped first, while the thin wire will remain unfixed. If this rule is violated with powerful consumers, sparking and heating contact is guaranteed.
- It is undesirable to use monolithic wiring in panels where mechanical vibrations are possible. Constant shaking will eventually break the current-carrying conductor. The problem is especially typical for aluminum wiring.
- The ends of wires, machines, meters and any other devices in the switchboard must be marked. It’s not a fact that in 10 years it will be you who will be servicing the shield. Therefore, it is important to sign everything so that the installers who come for repairs understand what goes where and how it works. It is also worth remembering the color coding of the wires and the diagram on the door.
Excerpt from PUE. “Combined neutral protective and neutral working conductors must have the letter designation PEN and a color designation: blue along the entire length and yellow-green stripes at the ends” (PUE-7 clause 1.1.29).
Outdoor panel 15 kW
Street switchboard for connecting a house or plot to a 380 to 15 KW network
Comprises:
- Housing ShchuRN 3-2 IEK IP 54 (2 doors) - 1 piece
- Automatic switch ABB sh202l C25 3P – 2 pcs.
- Automatic switch ABB sh201l 1p C16 – 1 piece
- Automatic switch ABB sh201l 1p C10 – 1 piece
- Din rail socket – 1 piece
- Meter Mercury 231 AM 01 2022 (single tariff) - 1 piece
Everything is collected and connected.
You can add a wire for connection; punctures and anchor hangers are not included in the price.
Price of the assembled cabinet: 9850 rubles.
We offer a 15 kW switchboard with a metering device Matrix NP73E.2-12-1, which is a multifunctional system with a multi-tariff electricity metering function (up to 6 time tariffs are available with the ability to set workdays, weekends and special days). When using this metering device, the standard delivery set of the switchboard also changes, where 25 ampere circuit breakers are NOT used, but AB or HV C50, C63 are installed, because there is no need to limit the consumer on how exactly he should receive 15 kW, in 3 phases, in each specific phase, etc., but not exceeding this value.
Shield selection
Once you have decided on all of the above (automatic machines, RCD, OPS, counter), it’s time to choose a box for all this. Namely, based on the number of machines, the size of the counter, etc. Shields come in plastic and metal versions, hidden and open mounting. Here again, it all depends on the conditions in which you will carry out the installation. There are markings on the boxes indicating how many circuit breakers they are designed for, so everything is selected individually. But you should not choose a box that is too small, as it will be inconvenient to install.
Types of shields
Well, the last thing I can advise is to take into account the degree of “dust and moisture protection”. It is marked, for example: IP65. Below is a table of the degree of protection.
Table of degree of moisture protection.
Sequence of correct installation of an electrical panel
To ensure that the electrical panel in your home is installed correctly, you should use only high-quality electrical products, as well as consumables. Only after installation is completed, operating voltage is supplied to the panel.
The correct assembly of a three-phase electrical panel has the following sequence:
Installation of an introductory machine. The device rating must cover the maximum power consumption. Since 3 phases will be brought into the house, the voltage between them will be 380 V, it is necessary to install a three-pole circuit breaker. To save money, it is not recommended to install 3 single-pole circuit breakers and connect them with a special strip. The input machine is installed in the upper left corner of the shield and is marked accordingly. After the introductory machine, it is necessary to install an RCD. The rating of the device must correspond to the rating of the input switch
You should also pay attention to the cut-off current - the lower this indicator, the faster the RCD will turn off the network. There are differential circuit breakers that include protective functions against short circuits and shutdown of the network when a leakage current occurs (RCD and standard switch)
It is easier to use such a product, but its cost is quite high. To the right of the RCD, at a short distance, a zero bus is mounted. Modern busbars provide a plastic dielectric between the copper strip and the shield body. This is done so that if the zero burns out and a phase gets on it, the electrical panel does not end up under life-threatening voltage. Measuring instruments and voltage relays can also be placed on the strip with the input circuit breaker, RCD and zero bus. If you install a voltmeter and an ammeter in a three-phase network, then you must select products that display both linear and phase loads. And also capable of showing data on each phase separately. The lower DIN rail contains automatic switches for power and lighting lines. In order not to get confused and not constantly look at the rating of the machines, lighting line products should be located at a short distance from the power switches.
After assembling the shield, you can mount it to the wall and connect the wires from consumers to the machines. An example of an electrical panel diagram, the number of machines can vary depending on the wishes of the owner.
If the electricity metering panel with a voltage of 380 V is not located on the street, then it is first installed in front of the input machine.
But installing a device to monitor electricity consumption in the house is inconvenient, so inspectors (to save time and the absence of owners) must take readings on the street. No tags for this post.
Shield elements
A standard 3-phase 15 kW electrical panel includes the following components:
- Counter. The optimal solution is an electronic model. The device is characterized by high measurement accuracy, durability and ease of use. Basic information is displayed on a digital display. In this case, programming for specified tariffs is possible.
Electronic meter gives more accurate readings of electricity consumption Source discount-electro.com
- Electrical cabinet Selected according to size and expected number of elements placed in it. Mandatory requirements are minimum dimensions 450 x 400 x 150 mm, metal wall thickness from 1 mm, dust and moisture protection level from IP 54. Additionally, a DIN rail may be present for ease of installation, a lock and a viewing window for viewing information from the meter display.
- Introductory machine. In the input distribution device (IDU) or switchboard of a private house with a network of 380 V and 15 kW, it is necessary to install an input circuit breaker with three poles - due to the connection of 3 phases.
- RCD. To protect against electric current breakdown, a residual current device is installed on the body of the electrical appliance.
- Circuit breakers. They are selected based on the power and number of consumers combined into one branch.
- Voltage relay. It is not mandatory, but if necessary, it reliably protects household electrical appliances from power surges in the network. There are different modifications of the device - UZM for overvoltage protection, SPD against lightning discharges.
The voltage relay protects electrical appliances from voltage surges in the network Source 220-volt.ru
- Network electrical characteristics meters. Also refers to additional elements of the shield. Designed to measure voltage and current.
Selection of circuit breakers is carried out in accordance with the load of the consumer or their groups. For the case under consideration, when the power of electrical appliances in a private house should not exceed 15 kW, the total current will be no more than 68 A, and for each individual 220 V branch the rating of the input panel should be no more than 23 A, or rounded 25 A.
Often, a separate circuit breaker is installed for a separate group of consumers, for example, lamps. In this case, its amperage is 6-10 A. For branches with a power load, its value should be at least 16 A, and in some cases 25 A. Switching on one or more powerful electrical appliances (such as a hob with a power of 6-8 kW ) can easily turn off a machine with a lower nominal value, since it will perceive this event as a short circuit.
The machines are selected according to the number of connected phases and load limit Source 220pro.ru
