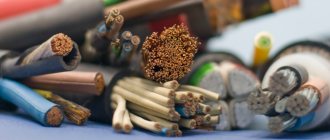
When installing electrical wiring, you often have to lengthen the wires and make a lot of strong connections that do not increase the resistance of the copper wires. A copper wire welder will help you quickly connect the ends. The technical characteristics of the cables do not change.
Amateurs do little welding of copper contacts. They can remake the welding inverter by replacing the electrode. Electricians connect copper wires all the time. It is beneficial for them to purchase a welding machine. Those who love tinkering will make a device from available materials. The created equipment will help you quickly weld wire.
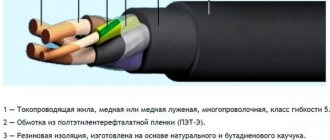
Welding copper wires
Welding method
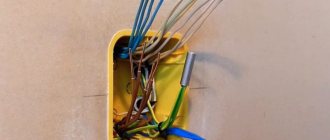
For more reliable contact, the connecting wires are welded in the junction box. With this option, the ends of the cores are fused and form a single whole, which is a guarantee of safety and reliability. Solid contacts do not oxidize and welded joints do not weaken over time.
The disadvantage of welding is that you must be able to handle special equipment, or you will have to invite a professional.
Required Tools
In addition to being able to cook, you will need:
- knife (to remove the insulating layer from the cores);
- sandpaper (to clean the surfaces to be joined);
- welding inverter;
- gloves (protect hands during welding);
- goggles or mask (protect eyes during welding work);
- graphite (carbon) electrode;
- flux to protect the melt from air.
Welding joint algorithm
- Remove 70-80 mm of insulation from the cores with a knife.
- Use sandpaper to clean the wires until they are shiny.
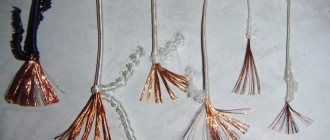
- Using the method described above, twist the wires; its length should be at least 50 mm.
- Carefully hook the grounding clamp to the top of the twist.
- Place the electrode at the bottom of the twist, lightly touch it to ignite the arc, and remove it. Welding of wires occurs literally in a few fractions of a second.
- After this, let the welding area cool down and insulate the connection.
Another important question is how many amperes to set on the welding machine? For conductors with a cross section of 1.5 mm2, 30 A of welding current will be sufficient, for 2.5 mm2 - 50 A.
Welding twists in a junction box is clearly shown in this video:
Design features and operating principles of wire welding machines
When choosing equipment for cold welding, it is necessary to take into account the characteristics of copper wire. When heated to 300°C, copper becomes brittle. It melts at 1100°C,
It is cooked with direct and alternating current, the operating voltage is given in the range from 12 to 36 volts, the current strength is 150 A. The power and operating current depend on the number of conductors in the twist and the thickness of the cores.
Welding machines for copper wires must have a smooth adjustment of the welding current to eliminate the risk of burnouts or lack of penetration of the conductors; at the optimal current, the electrode does not stick - it does not stick to the copper conductors. An inverter or a transformer-based device is suitable for working with copper.
Protecting the soldering area from oxidation. Flux
Flux serves to protect the soldering area from oxidation by atmospheric oxygen and the dissolution of thin films of oxides on the surface of the material. The most commonly used fluxes for soldering copper are:
Table of characteristics of the most common fluxes for soldering copper and its alloys
| Flux brand | Compound |
| Rosin | Pine rosin |
| Alcohol rosin | Rosin 30-40%, ethyl alcohol 60-70% |
| LTI-120 | Rosin 20-25%, ethyl alcohol 66-73%, aniline hydrochloride 3-7%, triethanolamine 1-2% |
The simplest, cheapest and win-win option is ordinary rosin. The only difficulty in using it is that it is in a solid state and requires skill when applied to parts to be soldered.
Alcohol rosin is much more convenient to use. It is a solution of rosin in ethyl alcohol. And it looks like a thick yellowish liquid with a peculiar odor. The ease of use lies in the fact that it can be applied to the soldering site with a brush or the twisted conductors can be dipped into a jar of flux.
Activated flux LTI-120 has wider capabilities. When using it, there is no need to strip new conductors. Only those that have a dark color due to surface oxidation need to be cleaned. Since there are certain difficulties in stripping multi-core wires, the use of activated flux is encouraged.
All of the listed fluxes do not require rinsing after soldering, since they are absolutely neutral with respect to the conductor material.
Preparing the connection
Unlike traditional methods of welding workpieces, which involve the formation of a seam joint, welding of conductors inside a junction box is possible only after they are twisted.
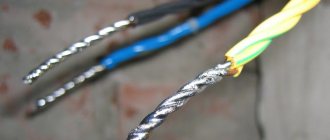
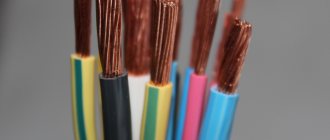
Before welding the twist, the ends of each wire must be thoroughly stripped. The outer insulation from the wires should be removed by 7-10 cm, which ensures a convenient length for the twist being formed.
The length of the bare parts obtained after stripping, according to the requirements of the PUE, should be about 5 cm, which eliminates excessive heating and melting of the wires during the welding process.
To better understand the features of welding wires with your own hands, it is advisable to familiarize yourself with the rules for choosing the equipment used. To do this, two important questions need to be considered: what types of welding equipment are applicable in the given conditions, as well as which welding electrodes are optimally suited for the stated purposes.
Welding technology
There is a technology for welding strands of wires made of copper. We will talk about it further. First, remove the top sheath from the wire. If you have never done this, then simply take scissors or a knife, visually measure 3-4 centimeters from the end of the wire and trim the sheath. Then, with a slight movement, pull it up. The wires should be exposed.
Exposed wires need to be twisted. The total length of twisted wires must be at least 2.5 centimeters. Then connect the clamp and ground to make soldering of copper wires with the inverter possible. Next, set up your welding machine to weld strands. Set the current and power. Leave the electrode to warm up.
Further actions are no different from conventional welding. The only difference is the duration of the work. The electrode must be pointed at the wire for a few seconds and then removed. This is enough to form a compound. If you overexpose it, the copper will simply melt and you won’t succeed. And if you hold the electrode for a fraction of a second, the connection will be porous and fragile. In a word, skill is important here.
That's all. Welding copper wires with your own hands is not as difficult as it might seem to a beginner. The most important thing is to set up the machine correctly and select the welding time. The more you practice, the better the result will be.
Selecting the power of the soldering iron
For high-quality soldering you need a fairly powerful soldering iron, at least 65 W. Copper is a very good conductor of heat, so it effectively transfers heat away from the soldering area. A low-power soldering iron will not have time to heat the twisted area before the wire insulation begins to melt, and insufficient heating can lead to so-called “cold soldering.” Weakly heated solder has low fluidity and is not able to evenly cover the entire soldered area. When hardened, it will have a matte, grainy surface and low strength. Conductors soldered in this way will have a high contact resistance and, over time, will lose contact with each other. The soldering iron should warm up the soldering area in no more than 1 minute. The surface of the solder after hardening should be smooth and have a uniform shine.
Bolted connections
This connection is quite reliable, but cumbersome. It is not suitable for modern distribution boxes due to its dimensions, but for large old-style boxes it is just right. This method can be used to connect both homogeneous and dissimilar metals. The work is carried out as follows:
- A steel washer is placed on the bolt.
- The insulation is removed from the conductors and they are formed into a ring.
- The first ring is put on the bolt.
- Then comes another steel washer, which is placed on the bolt after the first.
- The second connecting wire is put on top.
- This entire “sandwich” is clamped with a nut.
- In the end, everything needs to be insulated.
It is this design that makes the contact bulky. If you need to connect several pairs of wires, then this option will not be the best.
What tools and materials will be needed?
The choice of tools and materials we need will be determined by our specific goals, as well as the soldering methods used. The main tool used is either an electric soldering iron or a gas torch. Well, then there will be, in general, a standard soldering kit. We will need:
- Knife for cutting wire insulation - do not forget to sharpen it or use a stationery knife. You can also make an electrician's knife with your own hands.
- Pliers for twisting conductors.
- Solder and flux. Flux is a substance with which we remove oxidation from the surface we solder. Solder is what is used to directly solder the wires.
- File – a fine file will do.
When soldering wires with a soldering iron or gas torch, different solders and fluxes can be used. So, for copper conductors you need solder based on a mixture of tin and lead - these are solders of the POS-40, POS-50, POS-60 brands. The following grades are suitable for soldering aluminum wires: P-250A (zinc and tin), TsO-12 (zinc and tin), TsA-15 (zinc and aluminum), A (zinc, tin, copper). Rosin is used as a flux - an organic material containing a mixture of resin acids from coniferous trees. Rosin is the most common and inexpensive option. There are also methods of soldering with acid as a flux, but it is not recommended to use them because they are harmful. In addition, acid causes corrosion on the twist over time.
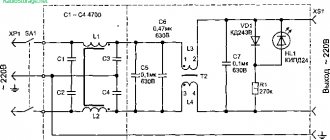
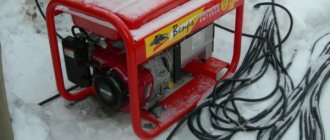
How to assemble a machine for welding twists with your own hands
We recommend reading our other articles
- High-quality building materials in Ufa from
- Sliding street gates
- Tricolor television: advantages over others
- The main advantages of professional adjustment of metal-plastic doors
So, how was the wire welding machine assembled?
I disassembled the transformer from the microwave, sawing it with a grinder at the welding points. I will not describe this process in detail, because... this has been done many, many times, and you can at least find a video on YouTube.
BUT, please note that a microwave transformer is dangerous to life! Those. it should not be connected to the network for testing until the secondary winding is removed, because The voltage on it is about 2000V and it can kill a person from a distance!
In general, the trans was cut, the secondary winding was thrown out, my own winding was wound with 6 mm square copper wire, I only got about 16 turns, either the trans was too small, or I’m not a very experienced winder, but oh well, after turning it on trans into the network, I received a voltage of 14 volts, which is normal for such welding (12-24v is needed). I then glued the trance core together with epoxy. At this point, work with the microwave transformer was completed.
I installed it in the case, I also installed 2 16A circuit breakers there (after the first welding experience, in order to know the maximum current consumption, it turned out to be 11A).
Why didn’t you install a two-terminal device?
And I assembled the welding wires from what was at hand. My motto: Use whatever is lying around first, unless of course it ruins the design.