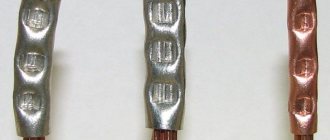
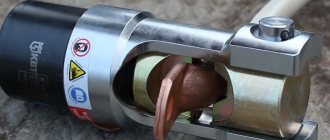
There are many ways to connect wires - from the old-fashioned twisting to the most modern self-clamping terminal blocks. But none of them is ideal; each method has its own advantages and disadvantages. In some cases, it is enough to connect the wires in the terminal block; sometimes welding or soldering will be necessary. But there are times when crimping the wires is the best option; we’ll talk about it in more detail.
Crimping technology
There are two methods by which crimping is carried out:
- local indentation;
- complete compression.
The wire for crimping is copper or aluminum. Therefore, the sleeve can be either copper or aluminum. There is also copper-aluminium. Since an aluminum cable is prone to the formation of an oxidizing film, the aluminum sleeve must be cleanable and treated with a special lubricant. To protect aluminum from oxides, quartz vaseline paste is used. Copper wire is also subject to lubricant treatment. With its help, the likelihood of damage to the core during crimping is reduced and friction is reduced.
If the cores are multi-wire, they are aligned and folded so that they easily fit into the sleeve; you can twist the wires a little. Then the cable is inserted into the cartridge until it stops. The connection can be made not end-to-end, but, for example, with a factory. Then the total cross-section of all wires should not exceed the cross-section of the bushing.
In any case, sleeves are used that are designed for the total cross-section of the cores being crimped. If a press with point (local) indentation is used, make 2-3 pressings evenly distributed along the length of the sleeve to ensure mechanical strength of the connection and good electrical contact. For continuous crimping using hexagonal or square dies, the recommendations are essentially the same
In both cases, it is important that the sleeve does not crack during crimping (if it is too small) and that there are no uncompressed areas or cavities (if it is too large)
After the crimping has been carried out, it is necessary to create an outer insulating layer at the junction using electrical tape or elbow cloth. After insulation, you should carefully fold the wires and the cable itself in the junction box.
The video below clearly shows how to crimp wires with press pliers:
The procedure for crimping tips and sleeves
For crimping thick-walled tips and sleeves, it is best to use a hydraulic press. The press set initially includes universal dies for any tips and wires. Under no circumstances use a tool not intended for crimping (hammer, chisel, etc.). A contact pressed in this way will not last long, especially if it constantly experiences heavy loads.
The next question that arises for an ignorant user is how many times should I press the tip with a press? Once, twice or three times? This depends on 2 parameters:
- ⚡
from tip length - ⚡
and matrix width
In the operating instructions for the press that comes with the tool, there is a plate indicating the required number of crimps. Please note one thing: this table is intended for tips and sleeves made in accordance with GOST. How they differ from other brands can be found in the article Cable lugs, markings and types.
Insert the tip into the press so that the matrix cross-section markings (35-50-70, etc.) are imprinted on the front side of the tip, and not on the side or bottom.
- ⚡
The first crimping of the tip should be done closer to the blade (where the bolt is inserted) - ⚡
Perform the following crimps in order, moving from the blade to the tail of the tip - ⚡
the same rules apply for sleeves
This must be done in this sequence, because with each press the tip tends to lengthen (sometimes up to ten percent!). And if you start pressing from the end (not from the blade), during the last crimp, there is a high probability that you will have a void at the end of the sleeve. And you will not achieve the contact that was necessary.
First of all, this applies to all aluminum products. For copper this is not yet so critical.
When crimping from the side of the blade, the tip will seem to fit onto the core, tightening the connection more and more. The insulated tips even have special digital markings indicating the pressing order.
The crimping ends at the moment when the matrices close together. If you need to perform two or three crimps, step back 2-3mm from the previous crimping point and continue crimping.
When crimping, the formation of a small flash is acceptable. It can be removed or filed off. A very common mistake is the formation of large “ears” on the tip. This results from an incorrect choice of matrix.
If such “ears” do appear, you should not cut them down to the base of the sleeve . Otherwise, a gap may form in the tip and the crimp contact will become loose.
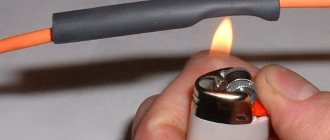
After the tip is crimped, it is advisable to insulate the area between where the shank ends and the remaining uninsulated part of the core. It is best to use heat-shrinkable tubing for this.
How to connect electrical wires with lugs
Another way is to use tips. The tip looks like a piece of tube, cut and turned flat on one side. A hole for a bolt is drilled in the flat part. The lugs allow you to connect cables of any diameter in any combination. If it is necessary to connect a copper cable to an aluminum cable, special lugs are used, in which one part is copper and the other is aluminum. It is also possible to place a washer, brass or tinned copper, between the tips.
The ferrule is pressed onto the cable using a crimper, similar to how wires are connected using crimping.
The easiest way to build up. Old-fashioned method
The simplest of the listed methods of extension is the classic twisting of cores. The wires must be made of the same metal and preferably of equal cross-section. The procedure for building up is as follows:
- Using a knife, remove 30-50 mm of insulation from the ends of the connected wires.
- Twist the stripped wires together along the entire length of the exposed areas. The connection is made as tight as possible.
- Wrap the resulting twist with insulating tape.
Additional Information. If the cable length for a TV, computer and various office equipment is not enough, then it is not necessary to extend them. Typically, these wires are standard and available at a consumer electronics store. And the length that suits you.
How to brew twist
For good contact, the twist can be welded with a graphite electrode or a gas torch. Torch welding has not become widespread due to the complexity and the need to use gas and oxygen cylinders, so this article only talks about electric welding.
Electric welding is performed using a graphite or carbon electrode. Graphite electrode is preferable. It is cheaper and provides better welding quality. Instead of a purchased electrode, you can use a rod from a battery or a brush from an electric motor. It is better not to use copper electrodes. They often get stuck.
For welding, you first need to make a twist 100 mm long, so that the finished one turns out to be about 50. The protruding wires need to be trimmed. For welding, it is best to use an inverter welding machine with adjustable current. If this is not the case, then you can take a regular transformer with a power of at least 600 W and a voltage of 12–24 V.
Near the insulation, “ground” or “minus” is connected using a thick copper clamp. If you simply wrap a wire around a twist, the twist will overheat and melt the insulation.
Before starting welding, it is necessary to select the current. The required current varies depending on the number and thickness of the wire that makes up the twist. The welding duration should be no more than 2 seconds. If necessary, welding can be repeated. If everything was done correctly, then a neat ball will appear at the end of the twist, soldered to all the wires.
Basic methods of cable extension
There are many ways to extend wiring. They differ in the reliability of contact and complexity of implementation. Most electricians practice the following methods:
- extension using WAGO terminals;
- terminal blocks with screws for tightening;
- classic twisting of cores;
- soldering with tin solders (for copper wiring);
- welding of cores with a graphite electrode;
- connecting sleeves;
- electrical nut;
- extensions using Scotchlocks.
Scotch tape for connecting wires
Additional Information. The connection method is determined by the material of the wire and the current that flows through it. For high powers, soldering and welding of cores is ideal. Low-current circuits can also be connected in other ways. But if this is a high-frequency signal from a TV or Internet cable, then the connection point is made as compact as possible and without kinks.
Tip sizes, design features
The minimum available sections for GML are 1.5 mm 2. Further sizes increase - 2, 4, 6, 10 mm 2 and higher. Based on these values, we can say that the cross-sections of the sleeves are equal to those of wires and cables. It is quite easy to decipher the tip designations. For example, GML-6 is a copper tip, tinned. The cross-section is 6 mm 2. In the case of combined sleeves, the marking indicates two sizes - for aluminum wire and for copper. For example, GAM 16/10 - 16 for aluminum, and 10 for copper.
By design, the sleeves can be end-to-end in the form of a hollow tube or with a partition. The latter are used when crimping wires with end-to-end lugs is performed. These partitions are located in the middle of the sleeve. With their help you can adjust the depth of the cable entry. If it is necessary to extend it, then both ends will go into the tip to the same length.
What you need to know about the sizes and design features of tubes
Sleeves for connecting wires are divided not only by the type of material from which they are made, but also by size and range of sections. The minimum cross-section is 1.5 m. This applies to GML type tubes. Further indicators are growing. It is worth remembering that the tubes are produced with a cross-section similar to the cross-section of the wires.
A separate point is the design of the products. The tubes can be through and with a partition located in the center. Partitions are needed to control the depth of the wire entry when extending from two sides, joint to joint.
Principle of wire crimping
You can perform crimping of wires using sleeves in several ways. It will not be possible to single out the best of them, since comparison is inappropriate here. The choice of crimping method directly depends on the conditions for electrical installation work, cross-sectional parameters and other important points. Let's consider the features of the main method of crimping using sleeves.
Work begins by introducing the previously stripped ends of the wires into the cavity of the sleeve. The next step is crimping - squeezing using a special tool. The metal surface of the cores and sleeve is compressed, resulting in a reliable adhesion of the parts. It is necessary to connect at several points, followed by insulation of the connection points. An exception is working with insulated sleeves for crimping, which do not require additional insulation.
When choosing this method of connecting wires, you need to remember that the contact will not be disconnected in the future. Taking this into account, work will need to be carried out carefully and prudently.
Connecting wires using crimping sleeves - what and how to crimp
To ensure an uninterrupted supply of electricity, it is important to take care of the reliable connection of the wires with sleeves. A common phenomenon is twisted connections in electrical wiring sections. At both ends, the twist points oxidize over time and become very hot under heavy loads, which can lead to short circuits and spontaneous combustion. It is also important to consider that due to the electrochemical properties of aluminum and copper, they cannot be connected directly. Special crimp sleeves for connecting wires can provide the most reliable crimping.
The main points of the process of crimping wires and twists
To do this, you will need to strip the wire from the outer insulation, and then use a mounting knife to remove the inner protective sheath. To make it convenient to twist the wires, I personally collect the bare wires into a bundle and bend the ends.
Then, first twisting the wires by hand, I achieve greater contact through the work of the pliers with which I tighten the twist.
Having bitten off the excess wires with the same tool, I get a good connection 3-5 cm long.
Next, the only thing left to do is put copper sleeves of suitable sizes on the twists and crimp them. Moreover, crimps come in different diameters (6 mm, 8 mm, 10 mm and more). Usually, I use 6 mm products to connect strands of light groups, where the cross-section of the wires is not so large (1.5 sq. mm). For socket groups, sleeves with a diameter of 8 mm or more are taken, since here the wires have a cross-section from 2.5 to 4 sq. mm.
After that, I insulate the connections, put them in the junction box and close the lid so that everything is “feng shui”.
Junction box
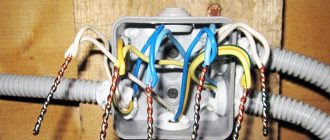
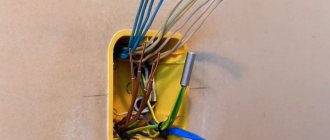
Wires from the electrical panel are distributed to individual rooms of the apartment or house. Moreover, each room usually has not one, but several connection points (sockets and switches). To standardize the connection of conductors and concentrate them in one place, distribution boxes are used (their other names are “junction boxes” or “branch boxes”). The boxes contain cables from all consuming devices.
The wires in the box are not laid chaotically, but in accordance with clear rules prescribed in the Electrical Installation Rules (PUE). According to the requirements of the PUE, all connections of wires in the box, as well as branches, are made only inside the junction box. The conductors are directed along the top of the wall, but no closer than 15 centimeters from the ceiling. When the cable reaches the branch section, it descends strictly vertically. At the branch site there is a distribution box. The connections in it are made according to the existing diagram.
Junction boxes are classified by installation type. There are internal and external junction boxes. There is a niche in the wall for hidden-mounted boxes. Only the cover remains on the surface, which is installed flush with the finishing material. It is allowed to cover the lid with decorative panels. If the thickness of the walls or other circumstances do not allow the installation of an internal junction box, it is mounted directly on the wall.
The distribution box can be rectangular or round. The number of pins is usually four, but in some cases there are additional pins. Each outlet is equipped with a fitting or thread for securing a corrugated hose. The presence of such a hose or plastic pipe greatly simplifies the process of laying and replacing wires. To replace the wires, it will be enough to disconnect the hose or pipe from the junction box and the consumer, and then pull it out. After replacing the conductors, the hose is returned to its place. If the wires are located in a groove, you will need to break up the layer of plaster, which is much more labor-intensive.
The use of junction boxes leads to the following positive results:
- The maintainability of the electricity supply system increases. Since all connections are easily accessible, it is much easier to find the damaged area.
- The overwhelming majority of faults are found at joints. Since all connections are concentrated in one place, it is easier to carry out preventive inspections.
- Thanks to junction boxes, the degree of fire safety increases.
- The use of junction boxes allows you to save money and reduce labor costs when laying cables.
Common mistakes when crimping
Cutting shells
At first glance, they are long. People who do not have the necessary knowledge and experience believe that using the entire cartridge case is wasteful, and cut it into pieces. This leads to a reduction in the length of the section where the conductors are bonded. The result is that the mechanical strength of the contact suffers, since working with pliers becomes inconvenient, and the number of pressure points decreases.
Wrong choice of sleeve diameter
If it is larger than required, then it is unlikely that it will be possible to produce high-quality crimping. The only way out is to bend the tip of the wire and then insert it into the sleeve. But such crimping is only suitable for “copper”, but the strength of the connection becomes lower. Aluminum wire breaks easily, so it is not an option.
With a smaller sleeve diameter, people without experience try to “plant” the ends of the wires into it by sharpening them a little. This is absolutely forbidden to do! Reducing the cross-section in a particular area leads to overheating and destruction of the metal. By the way, this often causes inflammation. It remains to add that the contact strength also decreases.
Crimping with pliers
Press jaws are specially designed for this specific job. Crimping with pliers is fraught with the fact that the conductor is deformed, and quite significant. After all, with this connection method it is impossible to control the clamping force. The consequences of reducing the cross-section of the core are indicated above.
Some craftsmen do crimping exactly this way, while assuring that everything is “acceptable.” But this does not mean that this technique is correct. The author came across such a situation and asked the unfortunate master a question: if he needs to do crimping at home, will he also work with pliers? As expected, there was no clear answer.
Useful tips
- It is not always possible to select a sleeve so that after placing the ends of the conductors in it, there are no voids left. The more free space, the higher the risk of poor contact after crimping it. How to proceed? The easiest way out of the situation is to cut pieces of wire (bare) with a length slightly shorter than that of the sleeve, and “hammer” them into it. Such artificial compaction will significantly improve the quality of crimping.
- If the connection of wires is made to extend the line, then their joint should be located in the center of the sleeve.
- When insulating the joint, the tape (tube) must extend beyond the sleeve cuts by at least 10 mm.
- In the case when at least one of the wires is multi-core, or different numbers of them are spliced on both sides, not metal sleeves are used for crimping, but insulated lugs (NSHVI).
It turns out that there is nothing complicated about crimping with sleeves. The main thing is to choose the right size. If the reader takes into account the recommendations given, then it is quite possible to cope with such work on your own. Good luck!
The main mistakes in the core crimping process
Independent installation of sleeves on wires, even with repeated operations, can become unsuccessful due to mistakes made. The most common ones are below:
- Cutting connecting tubes. During the crimping process, it may seem that the length of the sleeve is too long and that cutting will not spoil the result. Wanting to get four or even six cartridges out of two, inexperienced craftsmen do not notice how they are worsening the result. Reducing the length of the section for fastening the cores leads to a decrease in the contact strength.
- Selecting a tube of the wrong diameter. A sleeve that is too large will complicate the electrical installation process and will only be appropriate when working with copper conductors that can be bent at the end and inserted in this form into the hole. Aluminum wires cannot be bent, they will simply break. A sleeve that is too narrow may lead to the idea of grinding the wires to fit into the cavity. It is highly not recommended to do this, since it is precisely such manipulations that, as a result of reducing the cross-section in the area, can subsequently cause ignition.
Any unintended manipulations with the sleeves during the crimping process will compromise the integrity and reliability of the contact - this must be remembered.
Connection Features
The technology involves two options for crimping. This is a method of local indentation and continuous compression. Copper or aluminum wires are used for work. The sleeve must also be made of these materials. There are also elements made of copper-aluminum alloy.
Since aluminum cables are prone to the appearance of oxidative films on them, the sleeve must first be cleaned and treated with special lubricants. Copper wires are also pre-treated. The use of lubricants in the process reduces the risk of possible damage to the cores. The friction force is also noticeably reduced. Pressure testing is carried out using manual or hydraulic tools. In the latter case - with a figure press. It is usually used in large industries.
How it works? The two ends of the cable are crimped until they take a round shape. Next, the core is inserted into the sleeve until it stops. It is possible to connect not exactly end-to-end. But in this case, the cross-section of all cores does not exceed the bushing. In the case of local compression, contact directly depends on the depth of the pits. The latter can be measured with a caliper. If continuous compression is used, then check the cross-sectional area. Then, when the crimping of the wires is completed successfully, it is necessary to treat the outer layer with electrical tape or elbow cloth. Next, the wire and cable are carefully laid in the junction box.
Connecting wires with PPE caps
Connecting wires with PPE caps (Connection Insulating Clamps). PPE are plastic caps with a conical spring inside, which, when twisted, compresses and fixes the wires, and the plastic PPE cap itself insulates the connection of the wires and is fire and mechanical protection.
This wire connection is quick and simple; to perform it correctly you need:
- strip the insulation from wires and cables to a length slightly shorter than the length of the PPE cap itself;
- fold them into a bundle, precisely into a bundle, and not twist them;
- use your hands to twist the PPE clockwise onto the bundle of wires;
- tighten the PPE using pliers.
The advantages of such a connection of wires and cables are obvious (no special tools required, no need for additional insulation, speed and simplicity), but there are also disadvantages:
- Do not connect multi-wire wires;
- the quality of such a connection will be worse than those listed above, so I would recommend using these clamps for small loads, for example, in lighting circuits.
PPE caps are divided according to the total cross-section of the wires to be twisted and are designated by numbers from 1 to 5, which indicate the number of wires to be twisted and their cross-section.
Types of connecting tubes
Crimping of wires can be carried out using connecting sleeves in several designs. The choice of connecting tube will depend on the electrochemical properties of the metal from which it is made and its interaction with the material of the wire.
There are several options for materials for the manufacture of sleeves:
- copper;
- tinned;
- combined universal;
- isolated.
Copper tubes (CM) are used for copper wires, the crimping of which cannot damage the protective layer due to its absence. The tubes cannot be used in aggressive environments.
Tinned sleeves (GML) are suitable for copper type cables used in aggressive conditions. The white protective layer covering the surface of the product fully copes with the main functions. The tubes are not suitable for working with aluminum wires due to possible contact of the protective layer, which is partially destroyed during compression, with aluminum.
Combined wire sleeves have a distinctive feature - their shape. The aluminum part is larger than the copper part. This is due to the resistance of aluminum, which exceeds the resistance of copper. During the crimping process using such tubes, wires are inserted on each side, taking into account the type of metal.
The last option for sleeves is insulated (GSI). They replace additional insulation with PVC tapes due to the presence of heat-shrinkable tubing. Their structure is similar to the structure of GML tubes, with the exception of a PVC layer that does not transmit electricity. The protective layer is quite plastic and reliable, indestructible even during the crimping process, taking the shape of a metal.
Types of sleeves
It is very important to choose the right sleeves for crimping wires.
According to the material of execution
A copper cable or wire should be crimped with copper sleeves accordingly. They come in two types and have the following abbreviation:
- GM - copper sleeves. They are made purely of copper, do not have any coating or processing, and in appearance they look like ordinary pieces of copper pipes.
- GML – tinned copper sleeves. They undergo a tinning procedure, that is, their surface is treated with a special tin-bismuth layer. This is done in order to prevent oxidation and corrosion processes. It is also known from school physics lessons that copper, like any other metal, oxidizes. Tinning prevents this process; the crimped wires will not enter into a chemical reaction with the tinned sleeve.
I would like to give one useful piece of advice. Do not listen if suddenly one of the experienced electricians tries to prove to you that using GML sleeves it is possible to crimp aluminum wires, since the tin layer will not allow direct contact of aluminum with copper. This is incorrect, because during crimping the surface layer of the tube is deformed and the corrosion process is still inevitable.
To connect aluminum wires, they use products made of the same metal; they are designated GA (aluminum sleeve).
There are also combined sleeves, they are designated GAM (aluminum-copper sleeve), in everyday life many call them aluminum-copper. This option is used when you need to connect wires made of different metals end to end. The sleeve is a tube of two parts; at the junction of dissimilar metals, the connection is made by friction welding. Here everything is extremely simple and clear - you need to insert copper wires into the part of the tube made of copper, and an aluminum conductor into the aluminum part.
And the most modern version with the designation GSI (insulated connecting sleeves). They are based on ordinary tinned tubes, only they are covered with polyvinyl chloride insulation on top. They crimp copper wires. During crimping, the insulating layer is not removed, pliers are put on top of it, and compression is performed. Such sleeves greatly simplify the work of an electrician, since the crimped electrical assembly no longer requires any additional measures to insulate it.
What is the essence of the method?
Crimping is a method of connecting wires using special sleeves. Outwardly, they look like ordinary tubes and serve as a connecting mechanism.
The wire strands that are to be connected are inserted into the tube from two opposite ends, crimped with press pliers, and as a result, a strong and reliable electrical unit is obtained. The tube is compressed in two or three places, depending on its length and the cross-section of the switched conductors. The connected cores and the sleeve are jointly subjected to deformation. At this moment, the tube compresses and squeezes the conductive surfaces of the conductors. Due to this, the wires interlock with each other, which provides reliable electrical contact.
The junction is then isolated.
Most often, this method is used in situations where it is not possible to use another type of connection. For example, welding requires the presence of electricity so that the welding machine can be connected. When working in a small junction box, it is inconvenient to position the bolt connection, nut clamp or terminal block. And reaching up to the distribution box from the ceiling with a soldering iron is also not very convenient. It is in such cases that crimping wires using sleeves helps out.
The crimping method is most in demand:
- if it is necessary to connect wires in power lines with a high current load;
- for switching multi-core conductors;
- if it is necessary to connect large cross-section wires.
This is interesting: How to choose a cable channel for electrical wiring: let's look carefully
What is crimping with sleeves?
The essence of crimping is that electrical wires or cables are connected using conductive sleeves, which are tubes made of metal. The process of crimping cables, as a result of which a strong and reliable electrical connection is created, is as follows:
- The cores of the electrical wires, previously stripped of insulation, are inserted into the inner part of the crimp tube at both ends and must be connected.
- Using special press pliers or ordinary pliers, crimp the sleeve around the conductor placed in it. For higher reliability, the tube is crimped in two or three places.
- The place where the crimping is performed is isolated using TUT or electrical tape made of PVC for this purpose. If connection sleeves covered with a layer of insulation are used for crimping, there is no need for additional insulation of the formed connection.
Stages of crimping an electrical wire with a sleeve
Crimping wires with sleeves is especially relevant in the following situations:
- when connecting elements of electrical networks operated under high load;
- when connecting wires with a large cross-section;
- in cases where it is not possible to connect the wires in any other way (in particular, this method is used to connect wires in a junction box in which it is quite difficult to mount a terminal block;
- In addition, crimping sleeves are used to connect wires located at high altitudes or in conditions of limited visibility).
Crimping of wires with sleeves ensures excellent electrical contact and high mechanical strength of the connection
Let us list the most significant advantages of connecting wires by crimping.
- The tool for crimping wires, which is mainly used as press pliers, does not need to be connected to an electrical network, which distinguishes it favorably from electrical devices with which wires are connected by soldering. Thus, crimping (or sleeve, as this process is also often called) is practically the only possible way to form a high-quality connection of wires in places where there is no possibility of connecting the tool used to the electrical network.
- To connect wires using the crimping method, special knowledge and skills are not required. This cannot be said, for example, about soldering, which is unlikely to be done efficiently without the appropriate skills and experience.
- Using a special tool for crimping sleeves, you can create high-quality wire connections even in hard-to-reach places, such as distribution boxes and socket boxes. Moreover, the use of the crimping method for connecting wires in socket boxes makes it possible to reduce the length of the connected contacts to a minimum, which makes it possible to increase the density of the electrical installation performed.
An important advantage of using crimping is that using this method you can successfully connect wires whose cores are made of different metals. The same soldering cannot achieve this.
Twist connection
The easiest way to connect wires is twisting. Previously, this was the most common method, especially when wiring in a residential building. Now, according to the PUE, connecting wires in this way is prohibited. The twist must be soldered, welded or crimped. However, these methods of connecting wires begin with twisting.
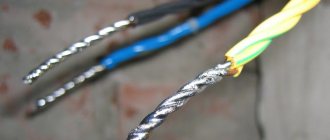
In order to perform high-quality twisting, the connected wires must be cleared of insulation to the required length. It ranges from 5 mm when connecting wires for headphones to 50 mm if it is necessary to connect wires with a cross-section of 2.5 mm². Thicker wires are usually not twisted together due to their high rigidity.
The wires are stripped with a sharp knife, insulation stripping pliers (ISR) or, after heating with a soldering iron or lighter, the insulation is easily removed with pliers or side cutters. For better contact, bare areas are cleaned with sandpaper. If the twist is supposed to be soldered, then it is better to tin the wires. Wires are tinned only with rosin and similar fluxes. This cannot be done with acid - it corrodes the wire and it begins to break at the soldering site. Even washing the soldering area in a soda solution doesn’t help. Acid vapors penetrate under the insulation and destroy the metal.
The stripped ends are folded parallel into one bundle. The ends are aligned together, the isolated part is held firmly with your hand, and the entire bundle is twisted with pliers. After this, the twist is soldered or welded.
If there is a need to connect the wires to increase the total length, then they are folded opposite each other. The cleaned areas are placed crosswise on top of each other, twisted together by hand and tightened tightly with two pliers.
You can only twist wire made of the same metal (copper with copper, and aluminum with aluminum) and of the same cross-section. Twisting wires of different sections will turn out uneven and will not provide good contact and mechanical strength. Even if it is soldered or crimped, these types of wire connections will not ensure good contact.
What is the joining process?
The use of terminals allows you to create reliable contact.
Before starting work, you need to purchase couplings suitable for the diameter of the wire. This figure should be exactly 2 times the diameter together with the insulating layer.
There are two types of couplings - simple and with complicated insulation. The former have a single layer of plastic, the latter are equipped with a layer of heat shrink on the surface and inside with a layer of glue and sealant.
It is worth taking a responsible approach to the choice of tool – press jaws. The best option is a modification equipped with a ratchet for fixation, which greatly simplifies the process of working with bare and insulated conductors.
Work begins by cutting the wire with wire cutters. Next, it is important to clear them of insulation to a length equal to 0.5 times the length of the sleeve. If several wires are connected on one side, first twist them. Next, the sleeve is put on and carefully healed with pliers. If heat shrink was included in the kit, put it on before crimping.
One side of the pliers is equipped with an oval sponge, and the other with the same sponges, only larger sizes. The smaller side is intended for clamping the wire insulation in the sleeve, and the second is for fixing the metal coupling.
The process of crimping wires using press pliers and lugs
To make a reliable connection, the pliers crimp the sleeve first on one side and then on the other. Next, heat shrink is installed and processed by fire from one side to the other. If the wires are connected on one side, heat shrink is applied in advance.
Standard crimping errors
There are several typical mistakes that novice electricians or those who carry out the core crimping process themselves make. For example:
- The used sleeve has a cross-section smaller than the wire. There is never any need to reduce the cross-section of the cores and adjust it to the diameter of the sleeve. This leads to an increase in resistance and a decrease in throughput. Where there was a combination, the vein will heat up and collapse.
- Large size sleeve. If the socket is used with a large diameter, it will not bring a strong and reliable connection. Even if you bend the wire several times, this will not lead to good performance, since the mechanical strength will drop by almost half.
- Cutting the sleeve into several parts. When crimping a cable with a short length of exposed ends, it is inconvenient to work with pliers, and the contact area is reduced.
- Crimping should be carried out exclusively using press jaws. Special tools were invented for this joining method. Therefore, you should not use pliers or a hammer, as this can damage both the sleeve and the cable. To prevent this from happening, it is necessary to use a tool such as press pliers, as they greatly simplify the work of crimping cable connections.
That's all I wanted to tell you about how wires are crimped with sleeves. We hope the information provided was useful and interesting for you!
You probably don't know:
- Methods for connecting LED strip
- Which electrical tape is best for electrical wiring?
- How to find a junction box in a wall
What it is
Crimping is a method of connecting conductors that involves the use of special conductor sleeves. The sleeves themselves are similar in appearance to ordinary metal tubes that act as a passive connecting mechanism.
Example of pressed wires
The cable cores that are to be connected are inserted into the tube from different ends, and then compressed with special press pliers. The end result is a reliable and even contact, forming a so-called electrical unit. The sleeve is compressed in two or more places depending on the type of wires, the cross-sectional area of their cores and the length of the tube itself. During compression, both the sleeve and the cores are deformed, and this, in turn, compresses the conductive surfaces. The result is strong and reliable electrical contact between two conductors.
Important! The connection point is usually insulated with a thermally insulating tube or polyvinyl chloride electrical tape. Crimper with insulating handles
Crimper with insulating handles
Wire crimping: common mistakes
Many novice electricians or people who do not have information in the field of electrical installation often make a number of mistakes that affect the subsequent operation of the entire electrical circuit.
Pressure testing can be carried out using sleeves or tips
Installation errors:
- The sleeve cross-section is smaller than the cable cross-section;
- Sleeve of larger cross-section;
- Saving;
- Crimping without using pliers.
When purchasing crimps (sleeves), many do not take into account such an important factor as the cable cross-section. Therefore, after purchasing a crimp sleeve or sleeves, it turns out that its cross-section is smaller than the cross-section of the wire.
The main mistake that is made in this case is reducing the cross-sectional area of the cable, which is completely unacceptable. This is due to the fact that at the junction of the wires, resistance increases, which leads to heating of the wires during operation. And if a device with higher power is connected to this network, the wire may simply burn out and lead to a short circuit.
The use of sleeves with a large cross-section will not allow achieving high-quality and reliable contact
It is important to understand that with this connection, the mechanical strength also decreases
In order to save on connecting elements, many divide one sleeve into several parts, thereby increasing the resistance accordingly.
The rules stipulate that crimping of sleeves must be done only with a special tool in the form of press pliers. Therefore, a hammer or pliers are completely unsuitable for this job.
This is due to the fact that using a hammer can damage the sleeve, and compressing the sleeve with pliers is not enough for good contact.
Materials
To perform the work, you will need not only the availability of materials in the form of sleeves, but also manual or mechanical (hydraulic) press tongs. Samples from the market are capable of crimping a sleeve with conductors with a cross-section of up to 120 millimeters square. For large cables, a hydraulically operated press is provided and driven by a suitable drive.
There are also special pliers with a matrix, which is designed to regulate the punches. This is convenient in the sense that you do not need to adjust the pliers to any size: just insert the conductor and the matrix itself will move into the desired position.
Welding - an alternative to crimping
Important! If you have to work with aluminum wires, you will need a special vaseline-quartz paste that removes the oxide film from the veins and prevents its reappearance.
You may be interested in this: Zero conductor
Copper conductors do not need such treatment and, to reduce friction, it is better to lubricate them with simple Vaseline. The thing is that during pressing and deformation, the veins can be damaged, and lubricants that conduct current can minimize the risk of damage.
Alternatives to crimping
Classification by material of manufacture
One of the main parameters, depending on which wire sleeves are divided into different types, is the material of their manufacture. The need to use dissimilar sleeves is determined by differences in the electrochemical properties of the connected wires made of different metals. So, if an inappropriate sleeve is chosen to connect wires made of a certain metal, the place of the formed contact will oxidize, which over time will lead to a decrease in its reliability in terms of electrical conductivity.
The main types of sleeves for crimping electrical wires, depending on the material from which such tubes are made, are:
- copper sleeves;
- tinned connecting sleeves;
- combined;
- isolated.
Copper
A copper sleeve, which is marked GM, is needed for crimping wires also made of copper. Taking into account the fact that the copper sleeve does not have a protective coating, it can only be used to connect wires operated in a non-aggressive environment. If you neglect this requirement, the copper sleeve will quickly oxidize and cease to perform its functions.
Copper cable sleeves must be made from copper tubes of grades M1 or M2
Tinned
To connect electrical wires operated in an aggressive environment, tinned copper sleeves for crimping are used, which are marked GML. In order to protect the main material of their manufacture - copper - from electrochemical corrosion, GML sleeves are coated with a special compound.
This is explained by the fact that part of the protective coating of such a tube is destroyed when it is compressed, which will lead to contact between aluminum and copper and, accordingly, to the development of electrochemical corrosion.
Connecting sleeves type GML, made of electrical copper with a tin-bismuth protective coating
Combined
Quite often, when installing electrical networks, it becomes necessary to connect wires whose cores are made of different metals. To solve such problems, combined type sleeves have been specially developed and are successfully used. The design feature of such crimp tubes, which are marked GAM, is that one half of them is an aluminum connecting sleeve, and the second is made of copper. At the junction of two such tubes, which are connected to each other by welding, there is a special limiter. It is necessary in order to prevent contact of two dissimilar wires inside the sleeve itself.
Adapter cable sleeve aluminum-copper 16/10 sq. mm
Another design feature of combined crimp tubes is that the part of them, which is the aluminum connecting sleeve, has a larger diameter than the tube intended for copper cables. This design feature is explained by the fact that aluminum, when compared with copper, has greater electrical resistance, therefore the wire made from it, which will be connected to the same electrical network with a copper conductor, must have a larger diameter.
The crimping itself using combined sleeve clamps is performed according to the same algorithm as the procedure with sleeves of any other type. However, it is necessary to carefully ensure that dissimilar wires are inserted into a tube of the appropriate metal.
Isolated
Among the crimping tubes used for crimping electrical wires, the category of insulated connecting sleeves is distinguished. The use of the latter eliminates the need to perform additional insulation of the contact area formed with their help. In terms of their design, insulated sleeves are the same tinned copper tubes, the outer surface of which is covered with an insulating layer of fairly durable and at the same time plastic PVC. Due to the mechanical properties of such a protective layer, sleeves of this type can be successfully crimped without compromising their original characteristics.
Fully insulated connection sleeves
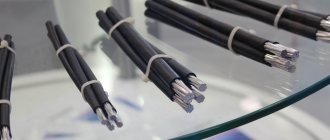
Insulated sleeves for hermetically sealed connection of SIP wire cores
Crimping tools
In any hardware store, the electrical goods department offers a large assortment of sleeves. A crimping device is also purchased to complete the task. The most budget and popular:
- Double-jaw equipment has the appearance of pliers, but is additionally equipped with a compression reinforcement with two jaws. There are also different types of crimping jaws, such as round tips or fork jaws. The average cost on the Russian market is 800 – 1000 rubles.
- An analogue of the previous device is four-jaw crimpers. They are intended exclusively for sleeves. The cost is several times higher and already starts from 2000 rubles.
- Wire stripping device. There are several types and modifications depending on the material from which the wiring is made.
A cutter can also be useful for making precise cuts. The price is more than acceptable, about 150 rubles.
How to connect electrical wires by soldering
Connecting electrical wires by soldering is very reliable. You can solder untwisted wires, but such soldering will be fragile due to the fact that the solder is a very soft metal. In addition, it is very difficult to lay two conductors parallel to each other, especially when suspended. And if you solder on some kind of base, the rosin will stick the soldering area to it.
A layer of rosin is applied to the pre-tinned and twisted conductors with a soldering iron. If another flux is used, it is applied in the appropriate manner. The power of the soldering iron is selected based on the cross-section of the wire - from 15 W when soldering headphones to 100 W when soldering twisted wires with a cross-section of 2.5 mm². After applying the flux, tin is applied to the twist with a soldering iron and heated until the solder completely melts and flows into the twist.
After the soldering has cooled, it is insulated with electrical tape or a piece of heat-shrinkable tubing is put on it and heated with a hairdryer, lighter or soldering iron.
When using a lighter or soldering iron, be careful not to overheat the heat shrink.
This method reliably connects wires, but is only suitable for thin wires, no more than 0.5 mm², or flexible ones up to 2.5 mm².
Connection of copper and aluminum
It is advisable to avoid such extensions. The best option for connecting copper to aluminum is terminals. Some models contain a special lubricant designed to increase the reliability of the contact and protect it from oxidation.
This connection is made accessible for inspection. It is not recommended to pass large currents through it. When making calculations, it is advisable to select them a step less than the permissible cross-section. If the wire is rated for 16 amps, then you should not pass more than 10 A through it.
Terminal block connection
A development of the bolted connection is the terminal connection. Terminal blocks come in two types - with a rectangular pressure washer and with a round one. When using a terminal block with a pressure washer, the insulation is removed to a length equal to half the width of the terminal block. The bolt is released, the wire is slipped under the washer and the bolt is clamped again. On one side, you can connect only two wires, preferably of the same cross-section and only flexible or only single-core.
Connecting to a terminal block with a round washer is no different from using a bolted connection.
The connection of the wires is reliable, but cumbersome. When connecting wires with a cross-section of more than 16 mm², the connection is unreliable or the use of lugs is necessary.
What does it mean to extend the wire
Extension means increasing the length of a cable or individual wire. This connection is made not only mechanically, but also electrically. The resulting contact should be as strong as possible and have minimal contact resistance. This is a mandatory requirement for power wiring and input cables.
Wire extension technology
How to connect wires by crimping
Another way to connect wires is crimping. This is a method in which a copper or aluminum sleeve is placed on the wires or cables to be connected, and then crimped with a special crimper. For thin sleeves, a manual crimper is used, and for thick ones, a hydraulic one is used. This method can even connect copper and aluminum wires, which is unacceptable with a bolted connection.
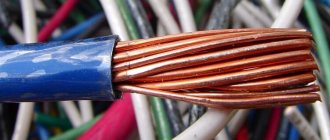
To connect using this method, the cable is stripped to a length greater than the length of the sleeve, so that after putting on the sleeve, the wire sticks out 10–15 mm. If thin conductors are connected by crimping, then twisting can be done first. If the cable has a large cross-section, then, on the contrary, in the stripped areas it is necessary to align the wire, fold all the cables together and give them a round shape. Depending on local conditions, the cables can be folded with the ends in one direction or in the opposite direction. This does not affect the reliability of the connection.
A sleeve is tightly placed on the prepared cables or, when laid in opposite directions, the wires are inserted into the sleeve from both sides. If there is still free space in the sleeve, it is filled with pieces of copper or aluminum wire. And if the cables do not fit in the sleeve, then a few wires (5–7%) can be cut off with side cutters. If you do not have a sleeve of the required size, you can take a cable lug by sawing off a flat part from it.
The sleeve is pressed 2–3 times along its length. The crimping points should not be located at the edges of the sleeve. It is necessary to retreat 7–10 mm from them so as not to crush the wire during crimping.
The advantage of this method is that it allows you to connect wires of different sections and from different materials, which is difficult with other connection methods.
Advantages and disadvantages
Like any type of connection, crimping has its positive and negative sides. When deciding on the type of connection, you should rely on many factors that make it impossible to use one or another method. Among the advantages of crimping:
- High degree of connection reliability. Only welding or soldering is more reliable than this method;
- Manufacturability of the process. The method takes a very short amount of time and does not require its performer to have any special knowledge in electricity, metals, and so on;
- The pressed sleeve does not require any attention and maintenance throughout the entire life of the cable;
- Does not depend on the availability of power and can be performed even in places where electricity has not yet been supplied.
You may be interested in Crimping cable lugs
Performing crimping
But this connection method has quite a few disadvantages. The main ones are:
- The need to have a special tool with you - press pliers or a crimper. You cannot replace them with ordinary pliers;
- The need to constantly carry with you different sleeves for each type of wire or cable, to distinguish between them;
- High costs for raw materials in the form of metal tubes and tools;
- The connection is cumbersome compared to the same methods of welding and soldering, which can result in a seam equal in diameter to an insulated cable.
Important! The method itself is a disadvantage because it is not removable. If necessary, you cannot take and unscrew the connection, and then screw it back.
Various crimp sleeves
