Despite the introduction of wi-fi into almost all areas of human life, wired technologies have not lost their relevance. In particular, we are talking about twisted pair cable. The key to success largely lies in stable work, regardless of conditions. For example, an ordinary user who connected a computer to a local network encountered it. No small importance is given to the quality of compression. It determines the speed of your network connection and whether errors will occur. If the need to carry out such manipulations arises at home, there are no specific requirements for the quality of the connection; they make do with the means at hand. Those who are employed in the IT industry and daily service up to 100 computers in the office and beyond should think about purchasing the appropriate tools. They will significantly speed up the process and improve the results obtained.
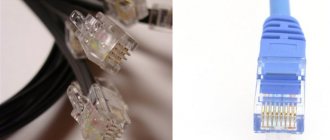
What is twisted pair?
A type of cable used to organize a local network consisting of several computers. The conductors are twisted in pairs. This is necessary to acquire protection from external influences; in addition, in this state they themselves do not act as a source of interference. The quality of communication improves, since the electromagnetic waves generated in the pair have a uniform effect on the wire and lead to a reduction in mutual interference during signal transmission.
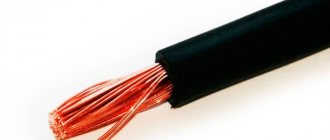
The power cord can have 2 or 4 internal cores. Different voltages in the conductors of one element provide an information signal.
The conductors that form the element are made of copper. Polyvinyl chloride or polypropylene is used as insulation. For the premium class, Teflon and polyethylene are appropriate. They are characterized by low dielectric losses and reliable protection against overheating.
The use of nylon thread for tearing greatly simplifies the cutting process. The outer shell is made from polyvinyl chloride and fire-resistant polymers.
The PVC shell is covered with hydrophobic polyethylene. The empty area is filled with the same gel. Sometimes they add a reservation with a special tape.
The shells received different colors:
- black (protection from dampness);
- orange (flame resistant);
- light gray (designed for installation inside residential buildings and offices).
Copper cable has a number of undeniable advantages that allow it to compete with optical networks and wireless technology.
Advantages:
- clean signal without interference (especially for grounded wires with a screen);
- the line supports the transmission of audio, video, telemetric data;
- low installation cost.
Flaws:
- reduction in signal quality at a distance of more than 2 km;
- limited number of twisted pairs in the cable.
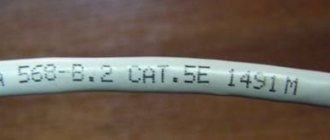
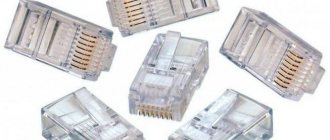
Crimping a twisted pair cable is a connection to a connector. The last one is a special eight-pin 8P8C connector. It is worth noting the fact that the unofficial name RJ45 was assigned to it. This is one of the most popular misconceptions. Crimping is carried out according to certain standards, without confusing colors.
The quality of signal transmission depends on how effectively it is carried out.
How is it carried out?
The procedure boils down to placing the wires into the grooves of the connector. Inside there is a special plate with slots - knives. They are necessary for cutting the protective shell and for additional pressure. The contact obtained in this way is not inferior in reliability to soldering.
RJ45 twisted pair installation includes:
- pruning;
- shell removal;
- cutting wires;
- connector crimping.
Securing the connector to the patch cord during crimping requires maximum concentration and attention from the performer. The slightest mistake can lead to breakdown of a single node or the entire communication system. It is preferable to purchase highly specialized tools, as they improve the quality of work and minimize errors.
How to crimp a cable with a screwdriver?
There is not always a drinking binge in the house. To quickly clamp the pairs, you can use a regular screwdriver and knife. Installation process:
- Choose a flat head screwdriver with a thickness of 3-4 mm. Since there is no insulation, you can use a regular knife. You need to be very careful in all actions; when working with these tools there is a risk of damaging the integrity of the cable.
The screwdriver must be flat - The order of straightening, routing, and bending wires remains unchanged. Cut the pairs in a straight line using the side knives. Removing the threads Cut the threads in a straight line The threads must be the same
- Insert the pairs into the connector.
Insert the wire into the connector - Crimping begins with attaching the strip to the connector shank. After fixing, you should not think about the fact that the cable will accidentally fly out and the whole procedure will have to be repeated again.
The place where the locking plate is located - Place the connector on a hard surface and press the tip of the screwdriver against the retaining bar. As a result of these actions, the lower plastic latch often breaks. To avoid this, choose a surface with a small groove or closing hole. For example, a meat board.
- Due to the applied force, the bar is lowered. As a result, the latch rests against the cable so that the wires do not accidentally fall out.
The cable is blocked by a bar - To crimp the pins, place the connector on a sturdy base. Press the contacts firmly. As a result, the metal legs will break the insulation. Make sure the tip of the screwdriver is over the pins and not between them before applying pressure to the pins. The pressure must be firm, otherwise you may hurt your fingers if the connector slips.
- Continue until each contact has broken through the insulation, making an electrical connection to the pair. Pushing the contacts one at a time
- You will need a magnifying glass to check. Inspect the front of the connector. No contact can protrude upward - if found, squeeze it.
- Crimp the other part of the cable in the same way.
Opinion of specialist Egor Razumny I know how to assemble and disassemble computers, laptops, tablets, phones. Sometimes this happened. I have the skills to diagnose faults using Google and Yandex. This may not work the first time, so I recommend keeping extra connectors in stock for training. I always have a bag in my closet just in case.
Crimper
Crimping is impossible without special pliers designed for working with telephone and network communications. For open electrical systems, this technique is the preferred option compared to soldering and welding.
Crimper required:
- for removing insulation;
- removal of damaged areas;
- installation of RJ-45 and RJ-11 connector (telephones).
Externally, the tool resembles pliers. The difference lies in the design of the jaws, which are mainly connected by a hinge mechanism. On the inside there are special recesses for a certain size of connectors and bushings - matrices. The jaws are closed through a hinge or parallel to each other. The working part is made of painted steel, less often improved. The edges are hardened and treated with an anti-corrosion compound. The head part has a curved or round shape. This reduces stress on the wrist. To increase productivity and comfort of use, the handles received a plastic coating, often with rubberized inserts. The length depends on the purpose. It varies from 175 to 210 mm.
How are they labeled?
A crimper is a universal device used for crimping cables. There are models on the market that are compatible with several types of wires. This became possible due to the fact that several different sockets were carved into the jaws. The number ranges from 4 to 6.
For identification, special markings are used. It is applied next to the matrix socket. In most cases, crimpers are universal, but there are also highly specialized models on the market.
- 6P (telephone cable);
- 8P (8P8S).
Often sleeve and tip manufacturers produce proprietary equipment. It is color coded. Matching with matrix socket makes it easy to use. There are no general standards for such classification. Interaction with cases of a certain brand and color can lead to a negative result when using a crimper from another manufacturer, despite the same color. Before use, you must pay attention to the letter designations, or use everything from one manufacturer.
What are they?
- Scissor. Reminds me of ticks. They are comfortable to work with, compress easily, are compatible with almost all tips, but work best with wires of small cross-section. Mainly used in organizing household networks. Often equipped with removable matrices. A set with replaceable templates is attached to the jaws. The solution allows you to use the tool in all possible cases.
- Retractable. Massive and heavy group. The parallel movement of the jaws allows for uniform compression. This connection is characterized by high reliability. The only drawback is that the operation takes longer.
- Collet. Universal group. The matrix was replaced with a diaphragm, which is compressed from 4 or 6 sides. The wire, regardless of diameter, is placed in the device and is evenly compressed on all sides. Before purchasing, please note that the crimper is not compatible with a number of popular tips. Pliers cannot be used when extending long wires. This is due to the closed head; after manipulation, it cannot be removed from the wires and embedded in communications.
Crimpers can be divided into 2 large groups:
- Automatic. Consists of an electric drive and an applicator compatible with a specific handpiece. With its help, wires are cleared of insulation, connectors are installed, floors are crimped using an automatic method. The group is designed for fast and efficient work with thick cables.
- Manual. The most popular and widespread group. They are divided into types depending on the tip (universal, specialized, hydraulic and electric).
How to work as a crimper?
The use is quite simple and does not cause any difficulties. It is enough to adhere to a certain sequence.
- Carefully remove the insulation according to the size of the tip. The wires are separated and cut off. They should be the same.
- The prepared cores are placed in the grooves according to the established sequence. For a tight crimp, install into the connector until it stops.
- The device is mounted into a connector in the fixture. Cut through the insulation. Make sure to make contact with the cord.
- By pulling the connector and wire in different directions, check the quality of the fastening.
- To test performance, special equipment is used. Green LEDs indicate a positive result, red LEDs indicate twisted wires or a short circuit. If there is no indication, a break has occurred.
How to choose?
Those who are involved in building telecommunications networks pay special attention to the selection of tools. It is possible to avoid problems at the wrong time, as well as fatigue during prolonged use, if it meets a number of criteria.
- Weight. Excessive lightness indicates low strength. Purchasing a crimper that is too heavy will cause the performer to get tired quickly. The heaviness should be felt, but in moderation.
- Ergonomics. The gun fits comfortably in the hand. Preferable with handles that have an anti-slip coating with grooves for fingers. The plastic is securely fastened and does not rotate. Discomfort caused by fatigue and chafing of the hands will reduce the effectiveness of completing tasks.
- Symmetry. The handle and press are placed on a common axis; curvature is unacceptable. There should be no displacements.
- Make sure there are no backlashes or jamming. Such problems indicate displacement of the driving knives relative to the grooves of the connector. The quality of crimping is significantly reduced, and the information signal may be lost.
- Functionality. Multi-position clamps with 2 - 3 RJ-11 or RJ-12, RJ45 sockets are preferred. Most models have stripping blades. This allows you to avoid purchasing special tools. The disadvantage is the increased weight. Having a special knife for even cutting will not be superfluous.
- Is there a ratchet? The option blocks the reverse movement of the handle and reduces hand fatigue.
- How the connector is installed when crimping. There are vertical and horizontal models. The choice depends on the performer.
Crimping theory
And now we come to the crimping procedure. But we need to clarify one more thing, the final frontier.
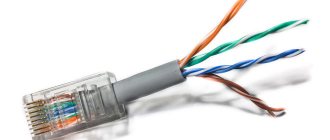
You've all seen the connector on the end of a twisted pair cable that still goes to the network connector on your network card or router. This plug has a special marking. The one that is mainly used now in home LAN is the RG-45. A little about the connector design and connection.
- The twisted pair is installed in the connector connector.
- Twisted pair cables pass through special grooves in the connector.
- The contact mechanism of the connector is a knife. In a workshop environment: separated, allowing passage for cable wires.
- During crimping, pressure is applied to the knives, which cuts the sheath and ensures tight contact with the wire strands.
- On the other hand, open contacts of the knives remain, which, when connected, provide communication with the network adapter.
Here is a photo of how the knives work:
And here is the connector in an enlarged view (the same tip of the wire or “jack”):
This connection transmits the signal reliably and flawlessly. But at first, beginners may not have enough pressure, and the connection either will not exist or will be established at a low speed (this is one of the reasons for the slowdown in network speed). The best way to fix this is to squeeze harder or squeeze again. In practice, at our university this procedure did not work for everyone the first time, so everyone starts somewhere.
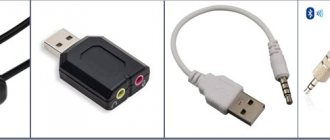
Stripper
It is used to remove insulation to gain access to individual wires. In premium models, the length of the stripped area is adjustable. Some of them support the functionality of a universal crimper. Strippers are available equipped with an additional knife or nippers for even cutting. The modification is relevant if the crimper has not received similar functionality. Most users prefer to perform such actions using a utility knife. For those who care about the speed and quality of the work done, you should think about mastering a stripper, since only with it can you achieve high-quality and quick removal of the outer shell.
Working with it does not cause much difficulty; it is enough to place the required piece in a special hole and press it down, turning it around the axis, and remove the cut insulation by hand. During manipulations, bending the conductor is strictly prohibited.
Advice from experienced users will help increase the efficiency of the operation, as well as avoid defects:
- Damage to the shell should be avoided, as in the future it will become a source of interference and other types of network problems;
- when removing the top layer of insulation, leave a small margin so that it fits inside the plastic tip and is fixed, this minimizes the risk of breaking individual wires at the base of the connector;
- stripping the end of the cores is not necessary; with sufficient force on the handle, the contacts will break through the insulation on their own.
The stripper is not compatible with foil-coated FTP twisted pair cable. They work with it using nail scissors.
The stripper comes in a wide variety of shapes. The part is represented by pliers, with straight jaws, or a curved working part and an end grip. This design makes it easier to work in confined spaces.
The stripper can have a cylindrical shape, with holes with blades located on the side.
Marking
The stripper is compatible with a cable of a certain cross-section. The value varies from 0.2 - 0.5 to 6 - 10 mm2. The blade is equipped with several holes, opposite which the cross-section is indicated. The numbers are in square millimeters and AWG, representing the gauge.
The handles are covered with insulating material that can withstand voltages up to 1000 V. Strippers with the function of crimping terminals of a specific color. They match the ferrule cuffs.
- Red (0.25 – 1.5 mm2).
- Blue (1.0 – 2.5 mm2).
- Yellow (2.5 – 6.0 mm2).
How to choose?
- Make sure there are no backlashes or creaks.
- Study how the blades are installed. If they are located too close to the handle, it is better to refuse the purchase. This is due to the high probability of damaging your finger.
- Supports cutting depth adjustment. The function is relevant for people working with wires of different thicknesses.
Crimping procedure
Now let's move on to the correct way to crimp the cable. Be careful when working: the main thing is not to damage yourself, and the connectors are cheap).
Step 1. Remove the insulation
First remove the insulation from the wire - you can carefully remove it with scissors or use a wire stripper with pliers - insert, twist and the casing blows off. It is fragile, so it can be removed quite easily. Removing the insulation is not that difficult - it only takes a couple of centimeters from the end. If nothing else, you'll cut everything out. The pliers have special marks indicating at what level the lining should be cut.
Step 2. Straighten the wires
Now we take our wires, straighten them and arrange them according to the pinout diagram. Give me some advice - try straightening them with a pencil or hand - they will become smooth and close to each other - this is what we need.
Step 3. Trim
It's time to cut and straighten our strands. We cut either with pliers, or with the same pliers, but also with a knife. Leave about an inch of clean thread. Over time, you will learn to measure distance accurately.
Step 4. Getting into the connector
The hardest part. Now we need to insert our design into the connector. After insertion, the connector moves down. Why is it difficult: the strands try not to get caught in their grooves, climb on neighbors, bend, get tangled. A recommendation that helps here is to be patient and once again pay attention to the processing of the pencil.
Step 5. Insert all the way
After the impact, we press the cable so that the wiring stops completely. In this case, the wrapper will be hidden in the connector itself. If the housing does not fit into the connector, fractures may occur in the future. If the reverse is short, the threads will not reach the knives. So everyone has experience and vision.
Step 6. Crimping
Now is the time to squeeze our knives - the methods were discussed above, but it is best to use pliers. Take it and squeeze it.
Step 7. Check and refinement
Be sure to check the connection on your computer or router before uninstalling the tools. Sometimes it may not work out the first time. The easiest way to correct the situation before getting angry is to squeeze the knives again, but harder. It often helps.
If there is no connection, please note this:
- Are the cables connected exactly as shown? did you take off? Check the connector.
- Have the wires reached the stop connector? Did you manage to get the knives?
The rest can only be attributed to a cable break.
Initially, before crimping the network cable, you can connect such covers. They perfectly protect against bending near the connector, but almost everything lives without them. There are many species, the article does not mention this. For reference.
Cable tester
After completing the crimping work, you need to make sure that the constructed network is working properly. For this purpose, professionals use a special electronic device with an RJ-45 connector.
A cable tester allows you to identify a number of important characteristics:
- length;
- wiring diagram;
- the amount of signal attenuation;
- level of interference at the near edge;
- copper loop resistance;
- loss on return.
A simple tester consists of two parts: main (master), remote (remote). One of the edges of the cable is connected to them. The modules are equipped with 1 to 8 indicator lights, the number corresponding to the number of conductor plus ground G. In normal condition they flash green. If there is a malfunction, there is no light. The red indication indicates that the wires are mixed up or a short circuit has occurred. Some models are equipped with a sound alert.
Using the tester, the following is detected:
- location of the break, a specific conductor;
- Is the wiring done correctly?
- presence of a short circuit.
Electronic devices are divided into:
- Protozoa. They have a light indication and help identify problems on the line such as mechanical damage and correct connection.
- With extended functionality. Built-in tone generators help identify split conductors.
- With LCD display. A tool with wide functionality. It allows you to identify all errors, as well as the distance to a break or short circuit, the type of outlet and the length of the wire.
Step-by-step algorithm for checking the functionality of twisted pair cables
- Make sure the cable is ready for use.
- One edge of the wire is placed in the main one, the other in the remote one.
- Turn on the device.
- If the signal passes successfully, the indicators turn green.
- The absence of light indicates a malfunction. To eliminate them, you may even need to replace a section of the cable.
How to choose?
A thoughtless purchase may result in the device being useless in certain situations. It is possible to avoid such problems if you pay attention to the following:
- the basic set of functions includes diagnostics of breaks and short circuits, the ability to determine shielding is preferable;
- the minimum length of the tested section is 300 m;
- for diagnosing installed networks, a length detector with a tone signal is important;
- support for twisted pairs categories 5, 5e, 6;
- The LCD display will make it easier to read the test results.
Standard crimping patterns
There are two twisted pair crimping or rj 45 pinout schemes:
- straight;
- through.
With direct crimping rj 45, the connectors (plugs) on both sides of the wire are connected according to the same circuit, but with a crossover the circuit changes.
Important! The data transfer speed depends on the crossover connection option.
The wire slots are numbered on the connector and each one is designed to hold a specific wire color depending on the option selected. Option T568A has the following connection diagram:
- 1 white-green;
- 2 green;
- 3 white-orange;
- 4 blue;
- 5 white-blue;
- 6 orange;
- 7 white-brown;
- 8 brown.
Option T568B is connected according to the following scheme:
- 1 white-orange;
- 2 oranges;
- 3 white-green;
- 4 blue;
- 5 white-blue;
- 6 green;
- 7 white-brown;
- 8 brown.
For direct connection, the last option is mainly used, for mixed connection - both.
Option No. 1 - straight 8-conductor cable
This option is suitable for connecting various types of electronic devices. For example, a cable connected in this way is used to connect a computer to switches. The RJ 45 plug is crimped according to option T568B on both sides of the cable.
Option No. 2 – 8-wire crossover
A crossover is used to connect devices of the same type, such as a computer, to a computer. Crossover or crossover is performed in two ways:
- data transfer speed 100 Mbit/s;
- the speed reaches 1000 Mbit/s. In the first case, the rj 45 connector is crimped on one end of the cable using the T568B option, and on the other using the T568A option.
In the second case, the plug is crimped according to option T568B, and the other end like this:
- white and green;
- green;
- white and orange;
- white-brown;
- brown;
- orange;
- blue;
- white and blue.
Advice! To disconnect a shielded twisted pair cable, use a metal-shelled connector.
Option No. 3 - straight 4-wire cable
For low speed networks, 8-pin (8-pin) 4-wire plugs can be used. To do this, it is important to know which contacts to use. Slots 1 and 2, 3 and 6 are used. Any two pairs are used, but it is important that the connection is the same on both ends, for example:
- white-orange connected to 1 contact;
- k 2 – orange;
- 3 – white-green;
- at 6 – green.
Warning! The remaining two pairs of cable cannot be used for other connections, since the contact between the wires will be broken, which will cause interference. A direct connection may be required for older electronic devices or slow home networks.
Option #4 – 4-wire crossover
This option is more of an informational nature, since deliberately reducing the speed is impractical for modern devices. Let's see how you can create a pinout for rg 45 - one of the names of rj 45. To get a crossover cable, simply swap the connected pairs. Let's say the first connector is connected according to the diagram shown above, then the second is crimped as follows:
- 1 contact – white-green;
- 2 contacts – green;
- 3 contacts – white-orange;
- 6 pin – orange.
The purpose of direct and cross-linking is the same as when using 4 pairs.
Crossing tool
A simple tool used to terminate twisted pair cables. It is necessary for connecting cables to cross-connections, plinths, panels and sockets. Power sockets clear the room of cables in wall and ceiling panels. Its use is relevant when laying a network.
A simple tool is a handle with a blade of a characteristic shape. Premium models received a hook for removing wires from their places and a screwdriver to make removing the plinths easier. Sometimes they come with a replaceable blade. A simple model is suitable for the home craftsman; for professional purposes, a “Swiss knife” is used.
For those who often have to deal with such work, it is preferable to pay attention to multifunctional models. It should include:
- customizable scissors;
- core position sensor;
- blade blocker;
- hook for removing from nests;
- screwdriver.
Additional functionality in the closed position is ergonomically hidden in the handle, like a Swiss knife.
How to work?
The procedure has much in common with twisted pair cable crimping.
- Remove the cover from the socket to provide access to the connection point.
- Remove the outer insulation at a distance of 6 - 8 cm.
- They unravel the cable.
- The veins are placed according to the color scheme. There are no tensions. The edges are trimmed with a blade.
- The working part is pressed into the socket to fix the cable.
- Close the lid and replace the socket or plinth.
Straight and cross crimp
Now let's move on to crimping options. They come in two types:
- Straight, that is, both ends of the twisted pair are crimped according to the same standard.
- Cross, in this case one of the ends is crimped according to the T568A standard, the second - T568B.
Figure 12. Direct (A) and cross (B) connection
This specificity is associated with the connection diagram. There are actually three options:
- Router-router. In this case, a cross line connects two routers or hubs.
- PC-PC. Everything is clear here, a network cable is used to directly connect two personal computers.
- Router-PC. That is, a personal computer is connected to a network node.
Let's take a quick look at the listed connection diagrams.
Crimping twisted pair cables according to the router-to-router scheme
With this connection option, it is necessary to use a direct circuit (see A in Fig. 12). But, when using smart nodes in the network topology, this restriction does not have to be observed. That is, direct and cross connection schemes are allowed, since the router is able to recognize its type. But, it is considered correct to adhere to the selected standard for a particular LAN.
Crimping twisted pair cables according to the computer-to-computer circuit
A completely different situation arises when PCs are connected to each other. In this case, only a crossover circuit can work. This type of connection was demonstrated in Figure 12 (B).
Crimping twisted pair according to the router-computer circuit
This type of connection is usually performed in a direct manner. For smart switches (switches), this condition is not necessary, but nevertheless, it is considered “good form” to adhere to this condition.
The best crimpers for crimping twisted pair cables
Cablexpert T-210 orange
Crimping pliers will become a reliable and faithful assistant for system administrators and home craftsmen. Compatible with RJ-45 connector. The working part is made of steel. To increase comfort during operation, the handle is covered with plastic. A significant advantage will be the ability to clean the conductor from insulation and subsequently trim it. The knives will not be difficult to replace. Compact dimensions and low weight will be an additional advantage.
Cablexpert T-210 orange
Advantages:
- nice price;
- simple design;
- do not require additional skills and abilities;
- for home use.
Flaws:
- the quality of the plastic raises questions;
- specific grip;
- no anti-slip coating;
- The cable cut length limiter interferes with the efficient performance of tasks.
Gross 17719
Taiwanese telephone and computer wire crimping pliers are compatible with the main sizes involved. The blades are made of SK5 tool steel. The two-component handle is pleasant to the touch and fits comfortably in the hand. Thanks to the ratchet mechanism, the contact is not interrupted until the end of the operation.
Gross 17719
Advantages:
- tool steel;
- two-component plastic handle with rubberized inserts;
- convenient placement of the connector eliminates the need to twist the cable, as with many other models;
- for professional activities;
- The spread of the handles is designed for small hands.
Flaws:
- the ratchet mechanism periodically fails;
- low quality blade for cleaning the conductor;
- the nuts need to be tightened periodically;
- During the cutting of the veins, 1 - 2 pieces are possible.
Knipex KN-975112
Professional product for interaction with twisted pair cables. Forged chrome vanadium steel with additional oil hardening guarantees premium quality. This product can withstand heavy loads and will last a long time. The design provides a longitudinal cutter and a knife for processing an area up to 12 mm long. Efficient force transmission via the linkage reduces fatigue. The crimper is equipped with a matrix with 3 slots. It supports precise parallel crimping. To improve quality, we equipped it with a forced locking function.
Knipex KN-975112
Advantages:
- compatible with 4, 6 and 8 way Western format plugs;
- support for working with round cables;
- two-component handles with anti-slip safe coating;
- blued steel handles;
- Made in Germany.
Flaws:
- too expensive;
- The delivery kit does not include a screwdriver for servicing the crimper.
Crimping RJ-45 cable
Before you get down to work, you need to fully learn the theoretical part of the question so that you don’t have to redo the mistakes you made. Although, all the same, if you are taking on this task for the first time, we advise you to buy several spare connectors (they cost 2-3 rubles apiece) to practice.
Let's see how to make a direct connection step by step, since we encounter it most often; after all, direct connections of computers to each other are used less and less today.
Table 2. Direct connection instructions
| Steps, photo | Description |
| We prepare all the necessary equipment. It’s better to sit at an empty table so that all the small details are at hand and don’t get lost anywhere. Measure the required piece of cable and cut it with wire cutters. |
| Step 2 - stripping of insulation | We take a stripper and remove the layer of outer insulation from the end of the cable, exposing about 2 cm of the internal cores. |
| Step 3 - core separation | For convenience, divide the wires in pairs, by color. Also inside you will find a fiberglass thread that can be cut. Bend the wires to the sides to make a cross like in the photo. |
| Now all the pairs need to be untwisted so that each core runs separately from the others; the direction of our cross remains unchanged for now. |
| We lay out the wires exactly according to the intended diagram. Press them tightly against each other and hold them with your fingers. The first in the scheme will be white-green, and the last will be brown. |
| To prevent long wires from interfering with installation, the wires must be cut at the same level - we use wire cutters for this. The width of your finger can be used to determine the overall length, as shown in the photo. |
| Next, we insert the cable into the inlet hole and push it inward so that the cores fall into the channels provided for them. |
| Next, take a crimper, place the connector in the appropriate socket and squeeze the handles of the tool. You need to squeeze firmly, but gently. As a result, we will get a strong connection that will be very difficult to break, even if we try very hard. |
After we have crimped the first end, we move on to the second and proceed in exactly the same order.
You can also crimp the cable through a cap, which will further strengthen the connection and protect it from mechanical damage.
Connector with cap
Crimping without crimper and other alternatives
If you don’t want to spend money on a tool for one-time crimping, which is quite logical, you can use a small flat-head screwdriver for your purposes.
The task is to press the terminals inward
We proceed according to the scheme described above until we reach the point of crimping the cable. Place it on a hard, flat surface with the contacts facing up. We take a screwdriver and press it on the contacts one by one. Be sure to wear a glove on the hand that holds the cable, otherwise it can be damaged by a tool that comes off. In the process, you will understand how the knife protrusions penetrate under the insulation and your work will go faster. We press hard, otherwise reliable contact will not work. Make sure that the contact is recessed slightly below the edges of the connector body. Place a rag under the cable to avoid accidentally damaging the table surface.
Fixing the connector on the insulation
After you have crimped all the contacts, carefully insert a screwdriver into the clamp to securely secure the connector to the cable. We do the same with the other end of the cable. After work, you will notice that the contacts are slightly damaged by the screwdriver; the crimper does not give such an effect.
Now take the cable, install it into the network and check its functionality. If the result is negative, then do not rush to blame your work, perhaps the problem is something else, check all the components of the network:
- If you have a cable that is known to work, replace the one you just made with it and see if a signal appears. If there is no such cable, then try connecting another device - this way you can find out if the problem is in the computer.
- Double-check the sequence of wires in the connectors; perhaps you didn’t notice something or simply got it mixed up.
- If such an oversight is discovered, the situation can only be corrected by biting off the end of the wire and installing a new connector.
- Try to press the contacts - perhaps they did not fit into the vein well.
- Also check your router and network settings on your computer - this is also a very common problem.
Such connectors do not need to be pressed.
Today you can find crimpless connectors in stores - they are more expensive than usual, but they are popular for their convenience. An example of such a detail is shown in the photo above. It has an opening casing, under which the slots for the wires will be visible. At the end you will see a hint on how to place the conductors to get an oblique or straight connection. Then the casing closes tightly. Please note that it has hard ribs on the inside. They will press the wires deep into the slots where the sharp contacts are located. In general, the principle is exactly the same, but it’s not the blade contacts that are pressed in, but the wires. The result is a high-quality connection without damage, and you don’t need any tools other than a knife and wire cutters for this.
This concludes the review of the topic. We think that if you follow the instructions exactly, there should be no problems with the connection.
Carrying out large-scale renovations almost always includes installing a home electrical network. Consequently, the question arises - which cable to use for wiring in an apartment or house? It would seem, what is the difficulty? The wealth of choice often only confuses the inexperienced consumer. In addition, not all of the samples on sale are suitable for the intended purpose. Therefore, in a special publication we will try to answer what type of cable and why you should choose.
Video - How to crimp a twisted pair cable with an RJ45 connector?
The best strippers for crimping twisted pair cables
Hyperline HT-352A
A universal device used to work with twisted pair cables. The body is made of ABS plastic reinforced with fiberglass and can withstand medium mechanical loads. A stainless steel knife cuts through almost any material.
Hyperline HT-352A
Advantages:
- notch adjustment;
- replaceable cartridge with knives for different types of conductors;
- universal device;
- made in Taiwan.
Flaws:
- there is no cutting knife;
- only 1 nest;
- often disappears from shelves.
Knipex KN-169501SB
The new product takes the stripping operation to a fundamentally new level of comfort. The stripper has an innovative ergonomic design. The edges are formed into a cone for a reason. This makes it much easier to access wires in narrow spaces. Guide edges make installation easier for stripping.
Knipex KN-169501SB
Advantages:
- body made of glass fiber reinforced plastic;
- does not slip in the hand;
- German quality.
Flaws:
- for use with the right hand only;
- performs poorly when interacting with a flat cable;
- longitudinal cut in the middle of the handle.
Panduit CJAST
Products from a world-famous company. It occupies a leading position in the field of innovative developments and infrastructure solutions. They solve issues related to interaction with life support systems of buildings. The company's portfolio includes all the necessary equipment for building data centers, cable systems and the industrial Internet.
Panduit CJAST
Advantages:
- compact dimensions;
- plastic case;
- work is carried out with one hand;
- American brand.
Flaws:
- high price;
- not compatible with flat cables.
Best Cable Testers for Twisted Pair Crimping
PROconnect 468
The model has undergone significant changes compared to its predecessor. The first thing that catches your eye is the bright yellow body, made of impact-resistant plastic. The circuitry has been updated. Quality casting combined with reliable components improves accuracy and efficiency.
The device includes 2 functional blocks, a transmitter and a receiver. LEDs are installed on both parts. When connected, they form a single, unbreakable circuit.
PROconnect 468
Advantages:
- performance;
- stylish design;
- effective implementation of assigned tasks;
- light weight;
- affordable price.
Flaws:
- Crowns are not included in delivery;
- cannot be repaired if broken.
Noyafa NF-488
Necessary for studying the state of a new or existing network, constructing pinouts, measuring voltage, current and power. The emitter body is equipped with 2 RJ-45 ports to determine the characteristics of PoE power supplied by network devices.
Noyafa NF-488
Advantages:
- checking the power consumed by connected devices;
- studying the state of the local network;
- defining a loop-back ring on the switch;
- checking the functionality of the network port response.
Flaws:
- food from crowns;
- impossibility of determining the length of a twisted pair.
FLUKE PRO3000
The test set is used to identify problems that could arise during the installation of a local network. A louder speaker helps speed up ray tracing in drywall, wood and other materials.
Operation is supported by the unique patented SmartTone technology. It consists of sending 5 distinct tones to identify individual pairs.
The tester consists of a tone generator and an inductive antenna probe.
FLUKE PRO3000
Advantages:
- unique patented technology;
- effectively copes with the task;
- manual adjustment of probe sensitivity;
- not fixed power button exception random operation in the case.
Flaws:
- high price.
LAN network cable crimping diagrams
There are two ways to make an Internet cable.
Most likely, you need the first method - direct crimping. Let's take a closer look. If you need a cable to connect a laptop, computer, TV or other equipment to a router or modem, then you need to make a cable according to this diagram. This is a direct crimping procedure. The simplest and most common way. Such a network cable, for example, comes with the router.
There are two crimping methods: T568A and T568B. I did this using the T568B circuit which you can see below. It turns out that we crimp both connectors equally.
The second method is criss-cross or criss-cross pattern. This cable is useful for connecting two computers directly (without a router).
I think you've decided on the pattern. Read more about this in the article: Twisted pair: what is it? Schemes and methods for crimping twisted pair cables. I will make a simple cable (direct crimp) according to the T568B scheme.
Best cross-connect tools for crimping twisted pair cables
REXANT 110 (ht-3140)
The new product is indispensable when laying cables on cross-connects, patch panels, sockets and modules; it is compatible with type 110 contacts. The double-sided tool steel blade effectively cuts conductors of any thickness. It is possible to replace the working part. The storage compartment for replaceable blades in the handle will please everyone. The plastic handle with a ribbed surface does not slip in the hand.
REXANT 110 (ht-3140)
Advantages:
- spring-loaded support for attaching the blade;
- The delivery set includes a knife with a double-sided cut;
- bright design;
- made of tool steel.
Flaws:
- It is difficult to purchase a separate blade for replacement.
Cabeus HT-3640R
This universal compact product is equipped with replaceable blades and inserts for cross panels of any type. The material used for the body was ABS plastic reinforced with glass fiber. For convenience, the handle is covered with thermoplastic rubber. Sharp chrome molybdenum steel blade edge.
Cabeus HT-3640R
Advantages:
- Twist-Lock for fixing and quickly changing knives;
- The handle has a blade holder.
Flaws:
- blade is not included in delivery.