In this article we will talk about what a roof heating cable is, why it is needed, how to choose it and install it correctly. After studying the information we provide, you will understand what exactly the craftsmen who will install the anti-icing system do, and you will know whether they offer the right cable for installation on the roof of your house.
Heating cable on the roof Source rmnt.ru
Why is a heating cable needed?
The situation with icicles and pieces of cloth that fall down, demolishing everything they come across in their path, is not uncommon. There are two ways to avoid tragedy:
- constantly clean the roofs of buildings and structures from snow mass;
- install a heating cable for the roof.
The second option is simpler in all respects, but it has one requirement - the presence of electricity as a power source. That is, it turns out that the electric current passing inside the cable turns into heat. The cable heats up and melts the snow. Water slowly flows down the drainage system without forming icicles or ice.
Heating for drains
Now let’s answer the question: does the drain need heating? For electric heating, there are systems based on a heating element in the form of a cable. Other components and parts:
- distribution block;
- sensors;
- controller;
- switchboard.
The distribution block combines power and heating wires. It consists of a signal wire connecting the unit with the sensors, couplings for hermetically sealing the parts and an installation box. The unit is often installed on the roof. It is protected from moisture. Sensors indicate the presence or absence of water, ambient temperature and precipitation. They are placed in gutters on the roof. The collected data is sent to the controller, which turns the heating system on or off.
The control panel ensures safe operation of the system. To equip it, you need to purchase 3-phase circuit breakers, a contactor and an alarm lamp. To lay and secure the heating cable, fasteners in the form of rivets, screws or nails, as well as heat-shrinkable tubes and mounting tape are required.
Types of heating cables
Today, manufacturers offer two types of roof heating cables: resistive and self-regulating.
Resistive
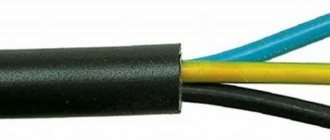
This cable was the first invention in anti-icing systems. Essentially, this is a copper core in a plastic braid, on top of which a shielding wire in the form of a mesh is laid (it also acts as a grounding wire). There is another protective plastic layer on top.
Resistive heating cable Source kak-sdelat-kryshu.ru
This variety works like an ordinary conductor, in which the greater the resistance, the more thermal energy is released. From a school physics course we show the formula for electrical resistance:
R = S,
where p is the density of the metal, L is the length of the conductor, S is the cross-sectional area of the cable.
It turns out that the longer the cable, the higher the density of the metal used in its manufacture, but the smaller the cross-section of the cores, the more heat the cable will generate. If the above parameters are accurate, the resistance will be the same for the entire length of the laid section. This means that the resistive conductor releases thermal energy along its entire length in the same amount.
This is not the best indicator for a roof anti-icing system. The thing is that the laid conductor is exposed to snow and ice along its length not equally. In some areas there is a large layer of snow, in some areas there is no snow cover at all. And the heat is lost equally along the entire length of the conductor. That is, the cable cannot itself react to loads by changing the amount of heat generated. Therefore, in some areas heat is wasted. This is the main disadvantage of heating cables for gutters and roofs.
A resistive cable may not cope with the task assigned to it Source stemedcaucus2.org
Resistive cables today are produced in two types: serial and zonal. They differ from each other in design features.
Consecutive
This is one core in a plastic braid, as described above, or a two-core product in which current flows through two wires in different directions. In this way, electromagnetic radiation is neutralized. That is, the safety of operation under voltage increases.
To increase the length of the heated section, pieces of the heating cable are connected in series. At the same time, pay attention to the formula, the resistance of the conductor decreases, which means its heat transfer decreases.
Zonal
These are two-core wires, the cores of which are connected to each other with a nichrome thread. It is wound in a spiral around the wires, connecting alternately to one core and then to the other. The connection is made through special so-called contact windows. Thus, the heating cable for the roof is divided into heat transfer zones.
The advantage of this variety is the ability to cut the conductor into sections that will work independently. In addition, in conjunction with other zones, if one of them is damaged, the others will work.
Twin-core cable for roof heating Source hi.decorexpro.com
Self-regulating cable
If you look at the design of a self-regulating heating cable for heating a roof, it is practically no different from a resistive two-core one. The only addition is the matrix to which the two cores are connected. The matrix is a semiconductor layer that responds to changing ambient temperatures. In this case, first of all, its resistance changes: the higher the temperature, the lower the resistance. Accordingly, less heat is generated.
It turns out that the conductor itself regulates the supply of electric current to one or another area depending on the temperature of the air or snow. This makes it possible to further save on current consumption.
The only negative is the high price. It is 2-4 times higher than that of resistive.
Self-regulating heating conductor Source farfors.ru
See also: Catalog of companies that specialize in carrying out calculations and performing electrical work of any complexity on a turnkey basis.
Benefits of using a heating system
The basis of the heating or anti-icing system is a special electrical cable, which is installed along the outer part of the roof and in the most dangerous places.
The principle of its operation is based on the fact that when electric current passes through the cable, significant thermal energy is released due to the increased electrical resistance of the conductors. Advantages of roof heating :
- Prevents the accumulation of excessive amounts of snow and ice, as well as icicles on the eaves.
- Eliminates the need for manual roof cleaning and icicle removal.
- Creating conditions for uniform melting of snow and systematic drainage of melt water.
- Eliminating the risk of ice jams blocking the drainage system.
- Increasing the durability of the roof by reducing mechanical loads.
- Possibility of process control and automation.
- Ensuring the aesthetic appearance of the structure in winter.
The heating system requires significant financial costs and the involvement of specialists for installation, but it helps to increase the service life of the roof and eliminates accidents that occur when snow avalanches and icicles fall from the roof.
Anti-icing system
Heating gutters and roofs is not just about heating cables. The system additionally includes:
- wire supplying power to the heating element;
- power unit;
- thermostat and RCD;
- fasteners;
- couplings.
The efficiency of the system depends on the thermostat. This device regulates the supply of electric current depending on the ambient temperature. Therefore, temperature sensors are additionally installed in the design. The simplest thermostat is a dual-range one. It only works to turn the anti-icing system on and off.
Wire with thermostat for heating the roof and gutters Source fishing-caravan.ru
A more advanced option is the so-called weather station. It monitors not only temperature, but also other parameters, for example, air humidity, which directly affects the formation of ice on roofs. Weather stations operate based on programmed parameters, hence the good savings in voltage consumption - up to 80%.
Heat the roof or gutter?
A natural question arises for home owners: is it necessary to heat the entire roof, or maybe it is enough to provide heating for the gutters? The answer depends on the quality of the roof insulation:
- If there is reliable thermal insulation of the ceiling of the house and a cold (non-residential) attic, then the roof is practically not heated by air currents rising from the interior. Snow on the roof melts naturally at a temperature close to 0 degrees. In this case, water drainage is ensured by a drainage system, and it is enough to prevent the formation of ice plugs in the drain, i.e., heat only it.
- If the roof insulation does not retain the heat rising from inside, the roof covering becomes noticeably warmer. The melting of snow on the slope begins uncontrollably already at an air temperature of minus 10–12 degrees. The roof eaves do not heat up, and the melt water freezes here, turning into icicles. The drainage system also becomes icy. Under these conditions, it is advisable to heat not only the drain, but also the most dangerous areas of the roof.
Important ! In some cases, the entire roof may become icy, and a heating system is needed over its entire surface, which is not economically justified. Under such circumstances, it is better to carry out a major overhaul by installing good thermal insulation of the roof.
Installation of an anti-icing system
So, we can conclude that a self-regulating heating cable for roofing is the best option, but expensive. As for installation methods, all the varieties presented here do not differ from each other.
- At the edge of the overhang, installation is carried out using a snake, the width of which varies between 60-120 cm. If the roof is covered with metal tiles or corrugated sheets, then installation is carried out along each lower wave.
Installation of wire on the edge of the overhang with a snake Source liderbudowlany.pl
- On valleys, the cable is laid in two parallel sections along the roof element. The distance between them is 30-50 cm.
- The same applies to horizontal gutters of the drainage system and vertical pipe risers.
Installation inside the gutter of a drainage system Source proroofer.ru
It is necessary to pay attention to how the cable should be laid in the receiving funnel - this is the element between the gutter and the pipe, as well as in the drain pipe located at the very bottom of the pipe riser. These two elements are more exposed to loads from melt water than others. Therefore, inside them the heating cable is laid in rings or in the form of a falling drop.
Installation of a heating cable inside the receiving funnel in the form of falling drops Source kareliyanews.ru
How many meters of cable are needed to heat the roof and gutters of a house?
To answer this question, you must first decide where and how it will be laid out and what power is needed.
On the roof, the cable is laid in a snake with a loop length of 30 to 60 cm and a distance between loops of 30-40 cm. The pattern is selected in such a way that the power per square meter of heated area is in the range of 200 - 250 W.
To prevent ice build-up in the gutters, 1 or 2 cable strands are installed in them. The choice depends on the diameter of the gutters and the power of the cable itself:
- The radius of the gutters is less than 7.5 cm - one thread with a power of 30 to 40 W/m is enough.
- The radius of the gutters is more than 7.5 cm - use 2 threads with a power of 30-40 W/m each.
Trench with two strands of heating cable. (photo No. 7)
- The minimum power of a heating cable for a roof is 25 W/m. If there is no wire of the required power, more threads are laid to achieve the specified power.
How to lay cables in valleys? It is enough to warm up 65-70% of the valley length. We stretch the cable vertically in both directions, and so that there is at least 1 m left to the overhang. It is important to ensure its power in the range from 250 to 300 W per square meter. m.
!
For the roof and drainage system we use a special heating cable with a power of 25-40 W/m.
Knowing the pattern of cable installation on the roof, as well as the length and required number of threads for heating the drain, you can calculate the length of the cable. It's simple: we calculate the length of the cable for heating each element and add it up.
Video description
Video on installing a heating wire on the roof and in the gutter:
Connecting the heating cable
This operation must be carried out carefully.
- Remove the plastic insulation.
- The shielding braid is cut lengthwise, rolling it into a bundle.
- Cut off the bottom insulating layer.
- The matrix is cut to a length of 3 cm.
- The conductors of the supply cable are also cleared of insulation.
- The wires are connected in pairs using a thermal tube. This is a plastic tube into which a heating conductor core is inserted on one side. It is pulled out from the opposite side of the tube and connected to the core of the supply wire. The connection is made by soldering. Then the heat tube is pulled over the joint and heated with a hairdryer. It expands, becomes soft, and after cooling decreases in size, compressing the veins together. The thermal tube performs insulation functions.
Using a heat tube and a hair dryer to connect two wires Source sosyalforum.org
- In this way, two wires are connected. And then two of them are immediately clamped with a sleeve, which will protect the connection from mechanical loads.
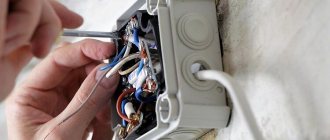
The supply wire is connected to an alternating current network with a voltage of 220 volts. An RCD is installed between the connection point and the wire. This device will protect the entire system from stray currents that appear if the insulation of one of the elements of the anti-icing system has been broken. That is, even when a person touches the wires, the current will not strike.
Please note that the anti-icing is a grounded system. Therefore, the shielding braid rolled into a bundle is connected to the grounding conductor of the supply wire in the same way as the wiring. In this case, two conductors (zero and phase) are connected by one sleeve, the grounding circuit by another.
When it comes to network connectivity, the anti-icing system is straightforward. It consumes little electricity, so a regular outlet will be enough. Although other options are not prohibited. For example, to the switchboard via a machine.
Installation and connection of automation
The heating system uses the following automatic control options:
- Simple thermostats . Their modules are mounted on a DIN rail and inserted into the heating cable connection diagram. The adjustment is achieved by changing the current strength. The most common devices operate within the range from minus 15 to plus 5 degrees. The on and off temperatures are set manually. The most common model is RT-330 with a maximum current of 8 A. A more modern option is the OJ Electronics ETR/F-1447 thermostat, designed for a maximum current of 16 A.
- Thermostats . These devices respond to signals from temperature sensors and operate automatically. The Raychem HTS-D model is popular, its setting range is from minus 20 to plus 25 degrees. Maximum current 16 A.
- Weather station . This is a more complex system that includes not only temperature sensors, but also moisture sensors. Some models have a separate precipitation sensor. The weather station provides optimal operating mode, allowing you to save energy. A common option is the Weather Station IS-11 model.
Installation of the control system is carried out strictly according to the instructions. After assembly, adjustment and test operation are carried out.
Control circuit and system protection
The heating control, parameter monitoring and protection circuit is assembled in the control panel (cabinet). The signal to the devices is supplied from sensors located directly in the working area and on the cable itself. The following equipment is installed in the switchboard:
- input circuit breaker;
- magnetic switch;
- automatic thermostat or weather station overload protection;
- residual current device (RCD) 30 mA;
- heating cable protection circuit breaker;
- emergency alarm (light, sound).
Modern models additionally provide:
- time relay;
- soft start device;
- current transformers;
- special controllers;
- as well as other branded devices.
When the equipment is properly configured, the system operates automatically, when human intervention is not needed.
Connection diagram option:
The heating system of the roof plays an important role in its arrangement. It ensures safety, eliminates the accumulation of snow and ice, and increases the durability of the roof.
Currently, several reliable systems are produced that ensure the fulfillment of the assigned tasks. You can install such a system yourself, but subject to safety requirements and basic installation rules.
Methods for installing a heating circuit
Water heating thermal cables are installed in two ways - outside and inside the pipe, each of them has its own pros and cons. The advantages of the first option are as follows:
- the conductor does not block part of the flow section of the main line;
- This method makes it easier to heat extended areas and shut-off valves;
- there is no need to install and maintain special units for inserting the cable into the pipeline.
External electric heating requires more power from the elements. If it is customary to lay a wire with a heat transfer of 10-13 W/m from the inside, then the pipe will have to be heated from the outside with a cable with a power of 15-40 W/m, which reduces the efficiency of the system.
The second unpleasant moment is the difficulty of repairing products buried in a trench. It is possible that to determine the location of the fault, the entire highway will have to be dug up. Conversely, when repairing a break or replacing pipes, you can accidentally damage the cable heater.
Heating the pipeline from the inside is not only more economical, but also more practical from a maintenance point of view. True, to run the conductor hermetically inside, you will have to install an additional pass-through unit. Again, if the street water supply is long, you need to increase the diameter of the pipe just to successfully push the cable through. And if a valve or tap is provided on the main line, then internal installation is not possible at all.
Instructions for outdoor installation
To make an external water heating circuit, in addition to the wires themselves, you will need fastening means - aluminum tape and plastic clamps - tightening. The work is performed in the following order:
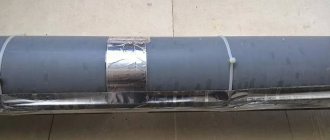
- Along the bottom of the pipe, where you plan to attach the heating cable for the water supply, stick a strip of aluminum tape. It will serve as a good heat dissipator.
- Apply a flat self-regulating conductor to the pipeline without twisting and secure it on top with a second strip of foil.
- Secure the heating element by pulling it to the main line with clamps every 20 cm, as shown in the photo below.
- To protect the shut-off valves from the cold, it is necessary to leave an allowance in the form of a hanging loop and continue installing the straight section. Then wrap a loop around the faucet or valve, glue it with tape and secure it with clamps.
For water mains running along the street, it is better to lay the cable in the form of a spiral, providing more efficient heating. The same applies to large-diameter pipes, when spiral installation becomes more profitable than laying 3-4 straight lines. The fastening technology remains unchanged - gluing foil and fixing it with clamps is carried out on all types of pipes - plastic and metal.
The last stage is thermal insulation of the pipeline, without which its heating loses all meaning. For insulation, sleeves made of foamed polyethylene or foam shells are used. Before installing the thermal insulation layer, do not forget to check the functionality of the cable heating of your communications. The process is shown in more detail in the video:
Embedding the circuit into the pipe
To successfully push the heating cable into the pipeline, you should select a ready-made feed-through kit of the required diameter. It includes the following details:
- housing with external or internal thread;
- rubber seal;
- 2 bronze washers;
- hollow clamp nut.
The unit is installed in the place where the water supply makes a 90° turn, only instead of an elbow a tee is mounted at this point. It is also very desirable that all turns in the supply line be made naturally - due to the permissible bending of the pipe (excluding steel and polypropylene). When there are no fittings on the line, pushing the heating conductor in is much easier, as is pulling it out for repairs.
Installation is carried out in the following sequence:
- Place a brass tee at the bend in the water line.
- If possible, straighten the twisted cable and pull the parts onto it in this order: nut, first washer, sealing gland, second washer.
- Screw the housing of the pass-through assembly into the tee, insert the wire there and push it to the required depth.
- Insert the washers into the socket along with the oil seal and tighten the nut.
Sequence of installation of parts
It is important here to assemble all the parts in the correct order, and before cutting the cable and installing the end sleeve, otherwise it will be difficult to tighten the gland. According to reviews on forums, this method of heating communications is quite often practiced at entrances to frame houses built on pile foundations
The subtleties of installation work are demonstrated in the next video:
Self-regulating wire
This cable has a more complex structure. The wire has 2 cores, around which there is a matrix. It is she who records the environmental conditions and based on this the power is controlled.
Advantages of a self-regulating cable:
- no additional control panel required;
- no need to install sensors;
- the circuit does not overheat;
- It is possible to divide the wire into pieces of 20 cm.
Even if the wire is twisted during installation, this will not affect its functionality in any way.
The downside of this self-regulating roofing cable is its price. It is many times larger than a resistive wire. But such a cable will be much cheaper to maintain. Another disadvantage is the possible breakdown of the self-regulating matrix and the entire system as a whole.
The instructions for laying the cable yourself are very simple, with the help of it you can complete the entire process yourself.
General technological requirements
During operation in an open space, the electrical system is subject to the negative influence of moisture and temperature changes. Therefore, in order to reduce mechanical damage, the electrical cable must meet the following technological requirements:
- UV resistance;
- Not subject to destruction due to changes in natural climate;
- Good to withstand high electrical voltage;
- Have high strength when loaded with snow;
- Reliable safety when contacting electrical energy;
- Good tightness to moisture.
Air source heat pumps for home heating
Cables are produced in couplings or coils.
You should know! As practice has shown, for installing an electrical system on the roof it is better to purchase wires in sections. With this choice, cable laying will progress faster. For drainpipes, it is recommended to purchase cable in a coil.
Installation work
Installation of roof heating is carried out in several stages. First, areas for laying wires are outlined, taking into account turns and difficulties. At sharp turns, the cable is cut into small pieces and connected using couplings.
Carrying out markings
Before marking, you need to carefully inspect the base. If there are protrusions and sharp corners on it, you need to get rid of them. This is not always possible to do; then the cable is cut into pieces and the pieces are connected using couplings.
We fix the heating cable
It is not enough to place the heaters on the prepared places. They still need to be firmly secured. Inside the pipe, fastening is done with mounting tape. The same method is used when wiring in a gutter. You need to choose a tape with maximum strength. The resistive conductor is attached every 25 cm, the self-regulating conductor is attached half as often, every 50 cm. The strips of tape are reinforced with rivets. They are replaced with polyurethane foam.
Inside the downpipes, the cable is placed in heat-shrinkable tubes. Fragments longer than 6 m are also secured using a metal cable. Cable laying on the roof is done using mounting tape and foam. Rivets are not suitable here, as they leave holes. After some time, the roof will begin to leak.
Features of the heating system arrangement
Methods for heating different types of roofs may vary. We are talking about the so-called “cold” and “warm” roofs. Let's look at the features of each option.
Heating a cold roof
This is the name given to a roof without thermal insulation along slopes with good ventilation. Most often, such roofs are located above non-residential attic spaces. They do not allow heat to pass out, so the snow cover on them does not melt throughout the winter.
For such structures, installing heated gutters will be sufficient. The linear power of the laid cable should gradually increase. They start with 20-30 W per p/m and end with 60-70 W per meter of drainage.
How to heat a warm roof?
A roof with thermal insulation is considered warm. They allow heat to pass out, so that even at sub-zero temperatures the snow cover on the surface of a warm roof can melt. The resulting water flows onto cold parts of the roof and freezes, forming ice dams. For this reason, it is necessary to arrange heating for the edge of the roof.
The so-called warm roof allows heat to pass out. Therefore, the snow over the “warm” areas melts, the melt water falls on the “cold” fragments and freezes
It is implemented in the form of heating sections laid along the edge of the roof. They are laid in the form of loops 0.3-0.5 m wide. In this case, the specific power of the resulting heating system should be from 200 to 250 W per square meter. The arrangement of heating gutters is implemented in a similar way to that used for cold roofing.


