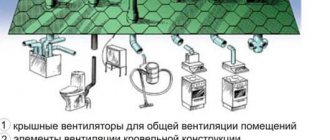
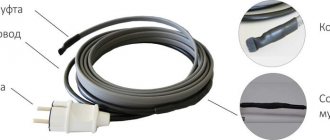
Winter cold poses a great danger to water supply systems, especially when it comes to private homes located outside cities and large settlements. Due to poor thermal insulation, pipes may freeze, which will result in a cutoff in water supply. The deeper the pipes are laid, the less susceptible they are to the harmful effects of cold weather. To avoid such situations, it is important to consider a high-quality protection system. The best option is a self-regulating heating cable, which is guaranteed to save pipes from ice jams.
What is a self-regulating wire
Structurally, a self-regulating cable is a flexible wire through which electrical energy flows. This is what causes it to heat up. To prevent the process of increasing temperatures from leading to fire or failure of the cable and nearby objects, the product is able to independently regulate its power depending on the ambient temperature. A simple relationship is observed: the lower the mercury column, the hotter the cable. The surprising thing is that the heating process can occur exclusively in a specific area where it is needed. If any part of the cable is at room temperature, then the power will be lower, and accordingly, the product will not heat up.
If we consider the design of the heating wire globally, we can distinguish three main components:
- conductors made of various metals through which electrical energy flows;
- a “smart” matrix of polymer substances that forces the cable to adapt to the ambient temperature and regulates the process of heat generation;
- an insulating shell consisting of many layers.
The main element that explains the principle of operation of the heating cable is the polymer matrix. Thanks to its presence, the wire exhibits self-regulating properties. The matrix consists of small particles, so its individual elements regulate heating independently of each other. This way, you don’t have to connect various sensors and other electronics to properly regulate the temperature.
Another useful cable option is that you can choose the length you need. Take regular scissors and cut the product where you need it. Connect to the network, as a result it will work without changes. Similar to self-regulation at every centimeter, the cable elements function and work independently of each other. An accidental break will not lead to failure. But such situations are rare, since the cable design is characterized by increased strength.
The main useful properties of a heating cable include:
- Increased resistance to mechanical stress. This is due to the presence of high-quality multilayer insulation.
- Resistant to moisture. It can be used in the water column without any problems. The main condition for this is to perform high-quality insulation using heat-shrinkable tubes.
- Economical. Since the cable independently regulates power, the product never works “just like that.”
The high strength is due to the multilayer structure, with the first two layers consisting of copper conductors and a polymer matrix. Already on top of them is installed insulation made of different materials (for example, fluoropolymers or polyolefin).
After this comes a layer of armor, which is used as copper braiding. Finally, an additional polyolefin layer is placed on top of it all. This design significantly increases the endurance and strength of the product. The copper braid also functions as a shield against electromagnetic radiation.
Using a thermostat
Standard thresholds for operation of a self-regulating cable are in the range of 3 – 13 degrees. This means that when the indicator is lower, the heating is turned on, and when the indicator is higher, it is turned off.
The temperature of well water is never negative; it is usually 4-5 degrees, which means that the heater will work constantly, consuming a considerable amount of electricity.
In the summer it can be turned off, but during the transition period autumn - spring you can not keep track and freeze the main line if the temperature suddenly drops. It’s easier with wells; in the hot summer, the water will warm up to the maximum operating temperature. There is no need to heat water for the toilet, and for the water heater or shower, the water is heated in the boiler.
Thus, the use of a thermostat provides many advantages, including the service life of the cable, which has a limited resource. It is better to set the shutdown temperature on it to 5-6 degrees.
Using a thermostat provides certain advantages, and every home craftsman can perform independent installation. But first it is better to monitor the temperature for a certain time and then make a decision on purchase and installation.
When installing this device, you need to pay attention to the location of the sensor. It should reflect information about the temperature of the water in the pipe. It is necessary to exclude the influence of the heater itself on the device in order to obtain reliable adjustments.
Operating principle and scope
The main difference between a self-regulating wire and cables of resistive and zonal operating principles is the design.
The resistive product operates on the principle of a boiler, so it is prohibited to shorten it. In this case, the conductors are the heating elements.
The zone heating wire can be cut into pieces, since its design involves the placement of parallel wires. A heating element consisting of high-resistance wire is placed between the cores. In certain areas, the wire comes into contact with the current-carrying conductor, which ensures heating in a specific section of the circuit.
As for the self-regulating cable, it differs from the previous two in the presence of a polymer matrix. The main elements are hidden under the braiding and protective screens - two current-carrying copper cores and a heating matrix. When examining the latter, you will find ordinary polyethylene. In fact, this device made it possible to create unique and modern heating elements. The matrix is a semiconductor that changes properties depending on the specific air temperature.
Example with heated floors
Self-regulating cables can be used to create heated floors. In the bathroom, the floor temperature will be lower, since heating equipment is usually installed in other rooms. The “degree” is also reduced by the fact that the floor in the bathroom or toilet is usually made of ceramic tiles, which are a “cold” building material. The temperature difference is not limited to this: at one end of the room it can be higher, at the other, which is closer to the windows, lower.
In this case, when using resistive or zone conductors, you will not be able to achieve a comfortable balance. The only way to do this is to divide the rooms into parts depending on the floor temperature under normal conditions, but this is a labor-intensive and painstaking process that involves installing thermostats and heat sensors.
The self-regulating wire eliminates the need to use such elements. You can place it over the entire surface of the floor, while the polymer matrix will take care of itself to create a uniformly heated floor surface. A simple but understandable example: you came home from the street and left your shoes, soaking wet, on a specific area of the floor. The self-regulating cable will detect a cold snap and begin to heat this area more strongly than others. This will happen until your boots warm up to the required temperature. And you will go outside in warm shoes! If there are no boots, then the cable does not heat up as much, which means energy savings occur.
Plumbing example
To prevent water from freezing in extreme cold, a self-regulating cable is used to wind the water valve. The valve is a structure of complex geometric shape, due to which the product cannot be in direct contact with every part of the metal. Zone and resistive wires will heat not only the valve, but also the environment.
If you install a self-regulating cable, the heating process will occur only in places of contact with metal. The principle of operation of the product is based on the efficiency of heat transfer: the more pronounced it is, the more the wire heats up. It is clear that upon contact with cooled metal, the thermal output will be much higher. This leads to an increase in the efficiency of the self-regulating wire compared to other heating analogues.
Example with roof heating
The roof is susceptible to icing in random areas, so it is impossible to determine a specific one. Thus, when using a zonal or resistive heating cable, you will have to lay it over the entire surface of the roof. This will significantly increase energy consumption.
Use a self-regulating cable with a semiconductor matrix, due to which only the area of the roof that freezes and where icicles can form will be heated. Moreover, after it is heated, the cable operates at half power for some time, so the efficiency of its operation is much higher.
Tip 5. Pay attention to installation methods
Outdoor installation
For this option, you can use any type of heating cable.
Advantages:
- Easy to install. Work can be done alone.
- Does not reduce the overall pipe capacity.
6 ways to lay outdoor cable
- It is enough to tape the conductor with special tape to small cross-section pipes. Suitable for areas with mild climates.
- Where climatic conditions are more severe, the cable is wrapped around large cross-section pipes. The lower the temperature, the denser the turns.
- When using a resistive conductor, when completing the winding, the second end can be returned to the starting point.
- We avoid superimposing one turn on another, that is, overlapping, since overheating is possible during operation.
- The average step is 5 cm.
- The material should fit snugly to the surface without sagging.
Before installation work, we prepare the outer surface of the pipe. We remove traces of corrosion and dirt from metal. The plastic one needs to be wrapped in foil.
Internal installation
Only two-core resistive heating cables are used for pipe cross-sections of 40 centimeters or more. Conductors that are inserted to a predetermined length. To use a self-regulating conductor, external protection must have a class of at least IP68.
At the point of output and connection to the network, a coupling is screwed on to seal the installation. There are restrictions: they must only be solid, without joining elements.
Tip 6. Seven basic recommendations
- For pipelines with variable temperature conditions, only a self-regulating cable is suitable. Especially in a situation where one part of the pipeline system is located indoors, and the other is underground or in the air. Resistive cable is energy inefficient.
- It is recommended to select the right insulating materials to make the system energy efficient.
- When winding, you need to clarify to what extent the bending of the material is allowed. If bent, rapid failure may occur.
- For household systems, a relay is connected to the cable to prevent current leakage.
- For the self-regulating conductor version, the use of a temperature sensor is recommended. It is set to turn on at a temperature of +3 and turn off when it reaches +13 degrees Celsius.
- When laid lengthwise, the length of the material is equal to the size of the pipe, with a certain margin. When winding, you need to take 1.6 - 1.7 pipe lengths.
- The sensor is isolated from the heater surface. It is important that the connection to the pipe is as tight as possible.
Main types of heating cables
There are two main types of heating cable - resistive and self-regulating. Each of them will be discussed below.
Resistive wire
The principle of operation of a resistive cable differs from a self-regulating one. The inner and outer surfaces of the pipeline are wrapped with cable, after which temperature sensors are installed. A thermostat is connected to the circuit, which receives readings from sensors. It is triggered by the slightest temperature fluctuations, however, the action threshold can be set manually. If the air temperature drops, the thermostat is activated, starting the heating of the resistive cable. Electricity begins to flow through the cable, which leads to the release of heat and heat exchange with the water supply. As soon as the pipes are heated to the required temperature, the cable automatically turns off.
Structurally, a resistive cable consists of insulated metal cores. Heating occurs along the entire length of the product, but without temperature control (thermostat), the device can burn out. To increase heating efficiency, water pipes are additionally insulated in order to reduce heat losses and achieve energy costs. Any materials that do not conduct heat can serve as insulation. For example, mineral wool.
Self-regulating wire
The self-regulating cable was developed as an alternative to the resistive version. It has the best technical characteristics and properties. The product can be used for heating water pipes, roofing or forming “warm floor” systems. Structurally, the device consists of two copper conductors located separately from each other, with polymer insulation that can respond to any temperature fluctuations and change resistance. This value increases or decreases in proportion to the ambient temperature, which leads to an increase or decrease in current strength.
The polymer matrix is able to respond to temperature changes at each individual point of the cable. Thus, the temperature will be different in each area. The product is characterized by efficiency and safety due to high-quality and durable insulation. The service life can exceed 20-30 years.
Recommendation. The self-regulating cable can be cut into pieces of arbitrary length and connected separately from each other. This does not in any way affect the performance and efficiency of the product as a whole.
Types - device, technical characteristics
Heating cables are divided into the following types: resistive, self-regulating, inductive.
They differ in operating principle, technical characteristics and design.
Resistive
Resistive cables come in linear and zonal types. For its effective operation, special equipment is required that will control the conductor, focusing on the ambient temperature.
The advantage of this type is low cost, reliability, ease of installation.
It should be said that such a conductor always releases the same amount of heat, regardless of the temperature of the air masses, so the consumption of electrical energy is low - which is not economically profitable.
Resistive is divided into:
- Linear - a wire whose ends are connected to the electrical supply. According to the number of current-carrying wires - single-core and double-core.
Single-core - consists of one heating core, usually a steel core, it is covered with an insulating layer of heat-resistant material that does not deform when heated. The wire comes with a screen to remove interference that is created by the cable itself and all kinds of protective devices.
The advantage of the single-core model is ease of use. The disadvantage is that it is not possible to cut to the desired size, the need to connect both ends in one place.
Twin-core - consists of two parallel conductors that transmit electric current. Their difference and advantage from the single-core type is that the second end does not need to be returned to the connection point, this is especially convenient when heating long pipelines.
- Zonal - its design is more complex compared to linear. It consists of two current-carrying copper wires, each of which has separate insulation. In addition, it is thicker than linear.
The difference between this type is that the internal insulation is equipped with windows every 1 - 2 meters. Through them, the conductor is connected to the heating wire, taking over the network voltage.
Thanks to this design feature, constant resistance is not present in the entire conductor, but only in one or another section-zone. The advantage is the ability to select the length of the section according to your needs. The downside is the high price.
The resistive heating conductor has a warranty period of up to 15 years, and when poured into a concrete screed, up to 50 years.
Self-regulating
A self-regulating heating cable is a modern model that differs from a resistive one not only in its design features, but also in its operating principle.
Self-regulating wires are conductors enclosed in a polymer matrix. A regulator is not required for operation; it will itself maintain the temperature at which it is set, so it will not overheat. This type is more expensive, but despite this, the increased efficiency makes it more economical.
In addition, it can be cut into pieces of any size. The guaranteed service life of this type is 10 - 15 years, but manufacturers include a reserve of up to 40%, which will significantly extend its operating time.
The self-regulating conductor can be shielded or unshielded:
- Shielded - the outer shell covers a braid of tinned copper wire, which protects against mechanical damage and serves as grounding. This cable is intended not only for heating the water supply, but also for installation outdoors - roofing, drainage.
The casing can be food grade - used for heating water supply and sewer systems inside, and with UV protection - mounted on the roof, where there is a lot of sunlight.
- Unshielded - the product does not have a protective shell. It is used for heating household pipelines; it is not installed outdoors, where exposure to aggressive environments is possible.
- Outer polyolefin sheath.
- Tinned copper wire braid.
- Elastomeric thermoplastic insulation.
- Polyester shell.
- Semiconductive self-regulating matrix.
- Copper conductors.
- Outer polyolefin sheath.
- Inner polyester shell.
- Semiconductive self-regulating matrix.
- Copper conductors
Shielded models are more expensive than those that do not have a shell.
The main areas of application of self-regulating heating cable:
- household pipes;
- icing systems (roofs, walkways);
- industry.
To heat various communications, a heating element of the following power is required. For:
- pipes inside - 10 W/m linear;
- pipeline outside - 15 W/m. P.;
- roofs and paths - 24-30 W/m.p.;
- anti-icing systems - up to 40.
What power is required for a heating cable for a water supply system?
The choice of specific power of the product depends on many factors, including the region of residence, the principle of laying the water supply system, the diameter of the pipes used, the presence or absence of insulation and the method of installing the heating element (inside or outside the pipe). Each manufacturer offers detailed product characteristics and tables that describe the dependence of cable consumption per meter of pipe. The table is generated separately for a specific wire model (power).
If there is average insulation of the water supply using 30 mm polystyrene foam shell, in a temperate climate, it is enough to use a cable with a power of 10 W/m to heat each meter of pipe from the inside. For external heating, products with a power of at least 17 W/m are suitable. The closer to the north, the higher the power of the wire.
Self-regulating wire power
Many people, when choosing a self-regulating heating cable for a water supply system, believe that the greater its power, the higher its functionality, but users thereby make an irreparable mistake. If you purchase a heating wire with more power than required, the energy costs will increase significantly, but the heating efficiency will remain the same. Therefore, to avoid this, you need to purchase equipment that meets your needs.
The power of a self-regulating heating product directly depends on the diameter of the pipe and the heat-insulating layer. The thicker the thermal insulation layer and the smaller the pipe diameter, the lower the power consumption. Accordingly, the larger the diameter of the pipe with a thin insulating layer, the higher power wire will be required. Therefore, before choosing a product, you need to familiarize yourself with the following table, which shows power values for certain pipe diameters.
Thus, having selected pipes based on power and temperature class standards, you can begin laying the thermal cable.
Laying and connection
Installation of the heating cable can be carried out in two ways - external and internal. In the first case, installation takes place along the pipe (the product can be attached with electrical tape or wrapped around the water supply), in the second, it is laid inside.
Hidden installation inside the pipe
Internal installation is not suitable for all pipes. It is important that the diameter of the water supply is at least 40 mm. With a smaller value, due to its dimensions, the cable will interfere with the free flow of water. It is also difficult to place heating on an overly long route. Therefore, a self-regulating cable is suitable for sections several meters long.
It is much easier to install on vertical sections of pipes, moving from top to bottom. To perform the procedure, use a tee and a sealing sleeve, which prevents the wire from slipping. In some situations, indoor installation is more rational than outdoor installation.
Placing the wire inside and connecting it to an AC source is not difficult. Much more difficult to assemble. Use the instructions with the sequence of actions described below:
- Remove insulation.
- Unravel the braid.
- Remove the corner.
- Prepare the sealing sleeve.
- Frame the coupling using a hair dryer.
- Glue the ends of the coupling together.
- Put on the cap.
- Strip the sealed end.
Open outdoor installation
To perform linear installation of a self-regulating cable along a pipe, less effort will be required. The wire can be fixed to the pipe using plastic clamps that can withstand high temperatures or fiberglass self-adhesive tape. Fastening elements must be installed at a distance of at least 30 cm. The use of metal parts is prohibited. To calculate the length of the wire, you don’t need to be a mathematician: it should be equal to the length of the pipe that you plan to heat.
Brief instructions:
- Secure the cable to the pipe.
- Apply aluminum tape or install clamps.
- Install insulation.
- Fix it on the pipe.
If the pipes are immersed in the ground, then the cable is placed somewhere on the side, and not above or below.
In addition to linear installation, spiral installation can be used. In this case, the cable is wound around the pipeline along its entire length, using a uniform pitch. The advantage of this method is that it ensures maximum contact with the pipe surface, the disadvantage is that the consumption of materials increases. This option is suitable for pipes of medium or large cross-section, which are used in sewer and drainage systems. However, it is often used to heat ordinary water pipes.
Which type to choose
When choosing a self-regulating cable, you need to take into account the characteristics and parameters of the product, the principle of operation, its operating conditions - the length of the section required for heating, maximum low temperatures.
Points to pay attention to when purchasing a heating wire:
- the presence of a protective braid - it gives reliability and provides grounding;
- type of external insulation;
- product power.
Its choice also depends on the area of application of the heating conductor. If the wire is needed to heat the sewer system, then a polyolefin product is suitable; for plumbing systems, fluoroplastic protection is recommended.
For outdoor installation, it is better to take a model with fluoropolymer insulation; it protects from moisture and ultraviolet radiation.
If it is necessary to heat pipes with a small diameter, a low-temperature conductor with a voltage of 15 W/m is suitable. The purpose of medium temperature (up to 30 W) is a large diameter pipeline. Types with high voltage are practically not used in everyday life.
It is recommended to install a cable without a shield in pipes that are laid in the ground, since it is not equipped with a grounding braid. The shielded one is safer, but it costs more, and their heating matrix is the same, so there is no point in burying a more expensive model in the ground.
When buying a self-regulating heating heater, you need to squeeze it with your fingers, then move it along its entire length. In a low-quality product, air cavities will be felt inside.
Thermal insulation of heating cables
Regardless of the type of heating wire used, it is important to ensure high-quality insulation. Thermal insulation materials are installed externally, covering the heating elements and the water supply as a whole. If you do not do this, the cable will heat not only the pipes, but also the surrounding air. The thickness of the thermal insulation is selected depending on external factors.
Polystyrene foam and polyethylene foam are considered reliable and long-proven insulation materials. They are characterized by resistance to moisture and provide protective shock absorption for the pipe. On the other hand, it is important to guarantee the protection of the insulation materials themselves, which is why “pipe-in-pipe” designs are often found. A water pipe installed in the ground or outside is wrapped with insulation and then placed in a larger diameter pipe.
Types of heating cable
All heating systems are divided into 2 large categories: resistive and self-regulating. Each type has its own area of application.
Suppose resistive cables are good for heating short sections of pipes with a small cross-section - up to 40 mm, and for long sections of water supply it is better to use a self-regulating cable (in other words, self-regulating, “samreg”).
Type #1 – resistive
The principle of operation of the cable is simple: a current passes through one or two cores located in the insulating winding, heating it. Maximum current and high resistance add up to a high heat dissipation coefficient.
Pieces of resistive cable of a certain length that have a constant resistance are available for sale. During operation, they give off the same amount of heat along their entire length.
A single-core cable, as the name suggests, has one core, double insulation and external protection. The single core acts as a heating element
When installing the system, you must remember that a single-core cable is connected at both ends, as in the following diagram: Schematically, a single-core connection resembles a loop: first it is connected to an energy source, then it is pulled (wound) along the entire length of the pipe and returns back
Closed heating circuits are more often used for heating roof drainage systems or for installing “warm floors”, but an option applicable to plumbing also exists.
A special feature of installing a single-core cable on a water pipe is that it is laid on both sides. In this case, only the external connection type is used
For internal installation, one core is not suitable, since laying the “loop” will take up a lot of internal space, and accidental crossing of wires can lead to overheating.
A two-core cable is distinguished by the separation of the functions of the cores: one is responsible for heating, the second is for supplying energy.
The connection diagram is also different. In “loop-shaped” installation there is no need: as a result, the cable is connected at one end to the power source, the other is pulled along the pipe
Two-core resistive cables are used for plumbing systems as actively as samregs. They can be mounted inside pipes using tees and seals.
The main advantage of a resistive cable is its low cost. Many note reliability, long service life (up to 10-15 years), and ease of installation.
But there are also disadvantages:
- high probability of overheating at the intersection or close location of two cables;
- fixed length – can neither be increased nor shortened;
- the impossibility of replacing a burnt-out section - it will have to be completely replaced;
- no power adjustment - it is always the same along the entire length.
In order not to spend money on constantly connecting the cable (which is impractical), install a thermostat with sensors. As soon as the temperature drops to + 2-3°C, it automatically starts heating; when the temperature rises to + 6-7°C, the energy is turned off.
Type #2 – self-regulating
This type of cable is universal and can be used for various applications: heating roofing elements and water supply systems, sewer lines and liquid containers.
Its feature is independent regulation of power and intensity of heat supply. As soon as the temperature drops below the control point (assuming +3°C), the cable begins to heat up without outside intervention.
Self-regulating cable diagram. The main difference from its resistive counterpart is the conductive heating matrix, which is responsible for regulating the heating temperature. The insulating layers are no different
The principle of operation of the samreg is based on the property of the conductor to reduce/increase the current depending on the resistance. As the resistance increases, the current decreases, which leads to a decrease in power.
What happens to the cable during cooling? The resistance drops - the current increases - the heating process begins.
The advantage of self-regulating models is the “zoning” of work. The cable itself distributes its “labor power”: it carefully warms up the cooling areas and maintains an optimal temperature where strong heating is not needed.
The self-regulating cable works constantly, and this is welcome in the cold season. However, during a thaw or in the spring, when frosts stop, it is irrational to keep it on (+)
To fully automate the process of turning the cable on/off, you can equip the system with a thermostat that is “linked” to the outside temperature.
Advantages and disadvantages
Let us highlight the main advantages of a self-regulating cable:
- Possibility to cut into pieces of arbitrary length (usually at least 20 cm). The properties and characteristics of the product will not change. There are no unheated areas on the surface. Similarly, there are no areas with excessively high temperatures.
- During the installation process, wires or segments can be crossed with each other. It is even recommended to do this when heating water pipes. The cable will not overheat and therefore will not fail.
- Even in the event of a break, the wire remains operational. A break in the current-carrying conductor does not lead to failure: up to this point the cable continues to function.
- When heating pipes with this cable, you can use elements located inside. This leads to increased efficiency.
- There is no need to use heat sensors or thermostats. The cable is connected directly to the voltage source or through a switch.
Not without its shortcomings. The main one is the cost of the product. Depending on the modification, with identical power and length, a self-regulating cable can cost two or three times more than a resistive or zonal product.
Another significant disadvantage is that it takes longer to heat a very frozen area. In other cases, its power may simply not be enough. Thus, the self-regulating wire is designed to constantly heat, maintaining the nominal temperature. On the other hand, low energy consumption allows this to be done without significant costs.
The third disadvantage is the high load at startup. Consider a cable with a power of 50 W/m. When such a cable is connected to the network, the load on it will be up to 100 W. This will happen until the cable heats up to the set temperature. This may take from one to five minutes. After this, if the wire is not disconnected from the network, the load does not exceed the specified value.
Advantages of self-regulating cables
A self-regulating cable for heating a water pipe has a rather higher price than a resistive cable. But, thanks to their advantages in operation, they pay for themselves in a fairly short period. The main advantages of a self-regulating product include:
- Reliability. The thermal cable is highly resistant to voltage surges and voltage increases for a long period. Therefore, in the event of a power failure, users should not worry that the product may malfunction.
- Self-regulation. The pipe heating cable itself distributes the temperature throughout all sections of the pipeline. It is also capable of independently increasing power when cooling the coolant.
- Ease of installation. Unlike its analogues, due to the continuous heating of the matrix, the thermal wire can be cut into pieces of different sizes according to the indicated markings. And also, without fear for its functional qualities, overlap can be allowed when used for shut-off and control equipment.
- Economy. According to experts, despite the fact that the heating cable for pipes has a high cost, its operating costs are lower than those of similar products. Therefore, when using it you can save up to 20%.
- Versatility. The thermal cable can be used both underground and in open areas .
- Lifetime. If secured correctly, the heating system can last up to 13 - 15 years.
Having considered all the positive qualities, it is also worth noting that this pipe cable can be used not only for the water supply pipeline, but also for the sewer system. Therefore, before purchasing it, you should pay attention to its division class.
Manufacturers
Ensto stands out in the domestic electrical products market, offering customers a wide range of self-regulating cables of various lengths and modifications. At the customer's request, the wire can be cut into lengths.
Among the more budget-friendly cable options, which are not inferior in quality to previous products, we can highlight the products of the Devi company.
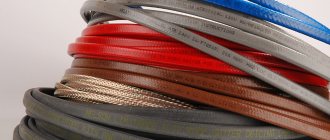
Food and non-food - 3 differences
Self-regulating cables are divided into food-grade cables, which can be laid directly into the pipe, and non-food-grade cables, which can be laid on top.
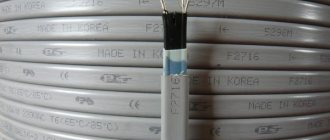
How do they differ from each other structurally? Firstly, the size.
Food grades, with fairly similar characteristics, have a smaller cross-section so as not to occupy useful space inside the water supply. Compare, the most common dimensions for external ones are 7*14mm, 7*15mm, and for internal ones – 5*7mm.
Mistake No. 4 If you get the size wrong, such a cable can actually reduce the water pressure.
At the same time, do not forget about the end coupling, which has a cross-section 1.5-2 times larger than the wire itself.
The second difference is the mandatory presence of a screen. External ones may not have it.
And thirdly, and most importantly, the external insulation material.
Here, for example, is a food option.
On the outside we have:
- fluoropolymer shell
This shell is chemically inert to aggressive environments and does not decompose inside the water supply.
Next come:
- armored, protective screen or braid
Error No. 5 Without such a grounding screen, the cable cannot be used inside the pipe.
- insulation layer
- two copper strands with a polymer between them
For the non-food model, the shell consists of ultraviolet-resistant polyolefin.
DIY heating cable: manufacturing instructions
In addition to using factory models, you can make a heating cable yourself. This does not require any special skills or knowledge:
- First you need to come up with an alternative to the product. Many installers recommend using a “field vik”. We are talking about a telephone cable used in military field conditions. The official marking is P274-M. The advantages of the product include small diameter, rigidity, endurance and insulation strength. The latter property allows the product to be used in conditions of high humidity.
- Please note that this cable cannot be compared with store-bought and factory analogues. It will not perform the function of self-regulation, and the isolation will not be food-grade. If you plan to use the wire only occasionally (at the dacha in the winter) and lay it inside pipelines, then you can do without the listed properties.
- When installing the field switch, separate it into separate wires. Bend one conductor in half and twist it in the opposite direction. At the open ends, the cable entry must be sealed. To do this, you can use a hose flange. To improve the tightness, you can take a fitting and thread the wires through it.
- Next, fill the fitting with epoxy glue and flatten it. To strengthen the connection, put on a union nut.
When choosing a self-regulating heating cable, you need to be careful. Study every detail, use the tips outlined above. There is no need to buy an overly powerful product for small areas, since the excess energy will be wasted, and you will not even know what you are paying for. Moreover, the efficiency of the cable will be similar to that of a wire with optimal power.
Self-regulating heater
There is no exaggeration in this name. Engineers have actually managed to create products that do not require external control.
Design of self-regulating heating cable for water supply
The diagram shows the usual elements: copper conductors, shielding, fluoroplastic insulation resistant to high temperatures. But here the main useful function is performed by a special matrix. Its conductivity changes with increasing/decreasing temperature. At the same time, the heating decreases/increases.
These products are more expensive than their resistive counterparts. However, they are much more economical to operate. When using them, the temperature will increase only where it is really needed.
Self-regulating and resistive heaters
Creation of a heating system
The implementation of plans will be easier if you divide the entire project into stages:
- Preparation of drawings and list of components, tools, consumables.
- Connecting heating elements to power wires.
- Installation inside (outside) of the pipeline.
- Additional activities.
Connecting the heater and power cable: instructions
Below is an algorithm of actions and features that will be useful in practice:
| Drawing | Instructions |
| Purchase a special kit designed for termination of self-regulating cables. It includes metal sleeves that create electrical connections. Heat-shrinkable tubes with adhesive inside will come in handy. When heated, they contract and provide the necessary insulation and tightness. | |
| The cable is cut to the required size. Protective sheaths are removed from the connected end at a length of 40-50 mm. The semiconductor matrix is carefully separated along the center line. | |
| Different tubes are placed on these areas and heated with a hairdryer. This will allow you to subsequently space the joints to improve insulation parameters. | |
| The conductors are removed from the outer layers by 9-11 mm. | |
| They are inserted into the sleeves and rigidly fixed using wire cutters. | |
| The preparation of this part of the structure is completed by putting on tubes of larger diameter (there is no need to heat them yet). | |
| Prepare the power cable in the same way. Remove insulation. Apply heat shrink tubing of suitable sizes. | |
| The wires are inserted into the sleeves one by one, taking into account different lengths, and secured with a clamp. | |
| The tubes are successively shifted and heated to obtain multi-layer reliable protection. | |
| Next we proceed to insulating the other end. Remember that the conductors in it are not connected, since the current only passes through the matrix. To completely eliminate the possibility of contact, the cable is cut with a “step”. | |
| A heat shrink sleeve is placed on top and heated. As a result, something like this will be created. |
Using the same technology, working devices are created using other types of self-regulating cables
Installation outside the pipe
With this option for placing the heater, the following table is used to approximately calculate the required power:
| Metal pipe diameter, inch | Power per 1 m length, W |
| up to ¾ | 16-17 |
| from ¾ to 1½ | 23-27 |
| over 1½ | 30-31 |
For more precise actions, you can use free calculator programs that are offered on the official websites of cable product sellers. In this case, specific operating conditions, liquid temperature, and installation features are taken into account. Experts do not recommend installing heaters with a power of more than 17 W per 1 m length on plastic pipes. But in reality, it is necessary to take into account the heat resistance of a certain type of polymer. Such restrictions do not apply to metal products.
Flat cables are better suited for this option. They adhere well to the surface and are easier to fix.
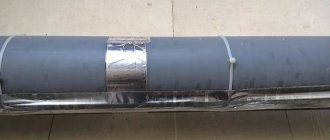
Typical installation of a cable for heating an outdoor water pipe
The cable is secured with clamps that are resistant to high temperatures. The pitch is chosen in such a way as to eliminate sagging. A protective casing is installed on top of the thermal insulation layer made of porous material to prevent mechanical damage.
If necessary, increase the heating by adding the required number of cables. It is advisable to place them in the lower part of the pipe, since this is where unwanted icing processes begin.
In this option, the insulation and heating element are protected by special metal shells
Attaching heating wires to water pipes with metalized tape reduces heat loss
Spiral installation
For your information! In some places you can reduce the winding pitch and make a reverse turn to increase the heating area.
During installation, special allowances are made around flanges, valves and fastening points.
Installing a heating cable inside a water pipe
This option looks preferable. Inside the pipe, the product is well protected from mechanical influences. The heater is located inside the liquid, so it performs its functions with maximum efficiency. The numbers confirm this. To maintain a positive temperature, 8-10 W per 1 m of route is sufficient. This figure is almost two times less than the previous (external) installation method.
But this technology can only be used on straight sections where there are no shut-off valves.
You can purchase a ready-made kit, or connect the heater and power cable according to the above algorithm src=»https://ventkam.ru/images/wp-content/uploads/2017/01/26-1.jpg» class=»aligncenter» width =»800″ height=»644″[/img] Manufacturers include bushings and sealing elements in such kits
When designing the pipeline, allow for a 90° turn and install a tee with the appropriate dimensions to accommodate the gland assembly.
Temperature control
A thermostat is used to automate work processes. The device itself is installed in an electrical panel. The temperature sensor is fixed to the pipe at the control point. It should be remembered that this element may fail over time, so it is installed in a place convenient for maintenance. The thermostat of a self-regulating heating cable for heating pipes is used in accordance with the instructions src=»https://ventkam.ru/images/wp-content/uploads/2017/01/28-1.jpg» class=»aligncenter» width=»850 ″ height=”286″[/img] Different electrical circuits are used to connect single- and double-core cables
In separate sets, a compact thermostat (with temperature sensor) is installed in the power supply circuit
Important! The disadvantage of compact thermostats is the lack of adjustment and remoteness from the work area.
Connecting pipeline heating to the electrical network using a heating cable
The total power of the heating system can be significant. Therefore, it is connected to a 220 V network through a separate machine. It is also recommended to install a specialized protection device (RCD) in this circuit. It constantly measures the current. When losses caused by insulation breakdown or touching a bare wire are detected, the heater quickly turns off.
Connecting the heater to the electrical network
Thermal insulation
This operation is required. It will prevent heat loss and prevent cold penetration. The best insulator is air, so porous materials that are resistant to humidity are used.
Special split tubes made of foamed polymers
The water supply is installed in a special channel, which is formed by Penoplex slabs.
Installation rules
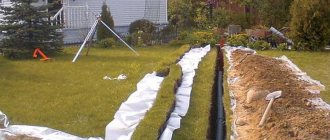
Any residential building now has a water supply and sewerage system that ensures comfortable living. But in winter, the external water supply may freeze if the installation depth is shallow. That’s why heating cables of different designs are used:
- for heating water supply
- for heating sewerage.
The thermal relay turns on the heating cable when the water temperature drops below the measured temperature on the pipe by 1-3°C and turns it off when the water temperature and the pipe temperature begin to equalize. The entire structure is insulated and insulated.
Since the pipeline is usually short, the cable itself consumes little electricity, and powerful relays are not required.
Self-regulating usually draws much more power than cable using a relay. The thermostat will help your water supply work in the most severe frosts.
Often used for heating sewer systems. Its main advantages in this case are that it can be cut to the required length, and the average power consumption of such a cable per 1 meter of pipe is 30-35 Watts.
If the total length of the cable does not exceed 80 meters, then it can be connected directly to an electrical outlet. If more, you will need to install a special isolation transformer.
The installation method is simple, just follow the included instructions:
- The instructions clearly indicate which coil pitch must be observed when winding the cable onto the pipe.
- The surface of the pipes must be clean and dry. The influence of any aggressive environment on the cable or its insulation should be completely eliminated.
- One end of the cable must be stripped 0.5-1 cm. Then a heat-shrinkable tube of a slightly larger diameter is put on it.
- All the wires that are in the cable must be separated and also stripped to 0.4-0.8 cm. Each of the wires is also covered with a heat-shrinkable tube.
- The tubes are heated with a hair dryer and the ends are stripped to 5-7 mm.
- The braid is inserted into a metal tube and clamped into it. Next, the wires of the heating and power cables are connected to each other.
- The ends of the supply cable are pre-stripped in the same way. The connection must be isolated.
Self-regulating cable - operating principle
Self-regulating, there is no closed loop or loop.
Error No. 2 There is no need to short the cores together at the end of the cable!
Between them, along the entire length, there is a cunning polymer, which, when cooled to a certain temperature, forms different conductivity bridges.
That is, at the cooling point, the loop of two wires closes on its own, current begins to flow between them and the cable heats up. In this case, you will have different temperatures along the entire length of the cable.
The hottest point will be in the coldest place. But at no point will the temperature exceed 85C. The nominal heating is 65 degrees.
This cable is completely fireproof. Even if it is overlapped on itself, it will still not burn.
Error No. 3 Make no mistake, when the weather is warm enough outside, it does not completely turn off on its own.
He simply reduces his consumption several times. There is no such option for its consumption to be zero when switched on.
Self-regs from different manufacturers differ in the quality of the so-called matrix. This is the same miracle polymer that transmits electricity through itself.
The vast majority of specialists use self-regulating types of cable to heat pipes. This is explained by their simpler operation and simplified installation.
You don't have to buy and connect a thermostat.
All you have to do is plug it into a power outlet, and it will immediately start working as it should.