It is better to install a box for an outdoor electricity meter, since it is no secret that its readings can be influenced by external environmental factors. The street box includes space for the meter itself and circuit breakers. The installation of this box must be carried out taking into account all the requirements stipulated by the operating rules of the electric meter.
Ready-made plastic panels are manufactured in accordance with all norms and rules for external operation of the electric meter. Overhead boxes, boxes or panels must be made of durable materials, and their design must be such that the electric meter is completely isolated from external environmental factors. It is best to install the box for the electric meter at the very beginning of the construction of the building, together with the meter itself and the input machine.
Requirements for electrical panels
The function of the shield is to distribute electrical circuits throughout the room and protect wiring in the event of a short circuit, therefore in residential and office buildings it must meet the requirements:
- The electrical panel must provide connection, distribution and metering of consumed electrical energy in a separate section of the network (apartment, house, office space).
- The existing panel switches must turn off the power to individual sections of the circuit without completely de-energizing the room. For example, automatic switches can turn off sockets or lighting in a room or throughout the room.
- The switchboard must have a general switch, with the help of which the voltage in the entire room is turned off.
- The switchboard housing must have space for connecting the ground loop. On some models, the door is connected to the housings by a separate grounding bus.
- The shields are equipped with ears for sealing.
- The electrical panel body must be made of non-flammable materials (plastic or metal with powder coated paint).
- Installed machines must be marked by zones or groups of consumers served. The marking is applied on the outside of the shield, and in case of double-sided service it is duplicated on the back side.
- The machines are separated by a “comb” type bus.
- The "on" and "off" positions on the switches must be indicated.
- The installed busbars are painted black for phase wires and blue for neutral wires.
- The bus must ensure the operation of the switchboard at a current value not less than that indicated on the input machine.
- The installation of electrical devices must be carried out in accordance with the documentation, which indicates technical parameters, such as the number of machines and the maximum permissible current.
- The panel body must have markings indicating electrical safety. The marking field indicates the rated voltage at which the safety of the shield is guaranteed.
- The shield must be accompanied by documentation indicating certification parameters, manufacturing standard (GOST or TU), protection class, installation recommendations, weight and dimensional data, current rating, frequency and voltage.
Why is an electrical panel needed?
The main functionality of the electrical panel is to distribute the electrical power coming into it through several channels, protecting the network from overloads and fires.
- Thanks to this, overloading one of the channels and burning out electrical appliances is prevented.
- Also, the risk of short circuit is reduced to zero.
- The old junction box is in many ways inferior to such a modern device.
- A little earlier, repairing a single element required a power outage throughout the entire room.
Now it is enough to turn off only the toggle switch responsible for a certain area.
Why do you need an RCD in the electrical panel?
A person is always surrounded by electrical devices. Most of them today are made and are excellent conductors of electric current. This can happen for a variety of reasons, but most often it happens due to damaged insulation.
If the device is not grounded, then touching it may be dangerous. To avoid accidents, experts recommend installing an RCD. This device helps protect you from electric shock due to damaged insulation or short circuit.
All work related to the assembly or installation of an electrical panel for the meter and machines can be done independently, but you must follow the rules of the Electrical Regulations. However, in practice you may encounter many nuances. Therefore, if you do not have experience, then it is better to entrust this work to professionals who work in the field of electrical networks.
Advantages of buying a ready-made kit
The shields produced by well-known manufacturers are already equipped with the minimum necessary parts. If you buy a separate case, you will have to buy all the contents yourself according to the dimensions of the purchased product. The following facts support the purchase of a complete installation kit:
- In such a box, all mounting elements are matched to the size of the housing and are equipped with the necessary fasteners.
- The space has been partitioned for various equipment.
- There is a place for sealing and obstacles for breaking the seals.
- The viewing window is located directly in front of the metering device screen. There is no need to open the door to record readings.
The appearance of such a device looks preferable to one assembled by yourself.
Installation of a meter and automation in the panel
The standards on how to properly connect an electric meter necessarily contain a requirement to install an input (fire) circuit breaker in front of it. The device must be selective (takes into account the response time of subsequent automation). There are single-pole circuit breakers, but double-pole ones will provide better protection. The rating is selected based on the total power and current of the devices at the facility.
The input circuit breaker snaps onto the DIN rail most often before the meter, it is possible after, but it must be connected in front of it, that is, first the input wires go to the AB, then further away from it.
Also, installing an electricity meter, how to connect a machine to a meter in a private house, involves installing automation after it (AV for each line, or better yet, RCD, RCBO).
Mandatory introductory machine
According to clause 7.1.64 of the PUE, the meter must be connected with a switching device, in its role as an input fire-fighting AV, which removes voltage from all phases when servicing the equipment; at the same time, it performs a protective shutdown in case of short circuits and overloads. Previously, its role was played by manual switches, but they do not have an automatic release function in case of dangerous factors.
Purpose and installation
Cabinets or boxes are used for distribution and metering of electricity, and are also used to protect the electric meter from short circuits and failures in readings that may be caused by adverse weather conditions. It is necessary to install a street shield in accordance with the PUE; it is advisable not to do this yourself and not to trust this process to dubious specialists. You cannot install shields and meters on poles owned by the organization, since these actions are illegal and will lead to administrative liability, as well as the payment of a fine.
To install the cabinet, you must contact a specialized company. It is also necessary to purchase an impregnated wooden or reinforced concrete pole on which it will be attached. If you already have a pole, then the costs can be avoided. But if it is not there, then after purchasing it you need to install it; this can be done by the company from which you purchased it, or you can do it yourself with the help of a professional. To do this, you need to dig a hole in the place you need and install supports at the border of the site. Then it is necessary to install the SIP wire, after which the installation of the electric meter itself is allowed. And to obtain electricity in the private sector, you need to lay an overhead line from the power line to the house; these actions must be entrusted to a specialist, since it is prohibited to do this yourself.
To attach the electric meter with your own hands, you need to evenly distribute it and the contact plates in the shield. After which there should be some space left for fastening and convenient installation of all connecting wires. Then you need to secure the meter and plate, and then start wiring. To do this, you need to transfer the phase from the electric meter directly to the machine, which is designed for an electric stove. If it’s not there, then use any other one. To do this, remove the red or brown core from the cable; this is done by carefully cutting it with a knife.
Then you need to measure the length of the wire, taking into account the fact that the fastening will be carried out only vertically or horizontally, it cannot be done obliquely. And after that, strip the wire by 2 cm, and insert it into the desired terminal, tightening it with bolts. Then make U-shaped jumpers from the wires, and connect them to the connection of the machine, connect all the contacts on the circuit breakers.
DIY wardrobe
If you have experience and desire, you can arrange a cabinet for an electric meter yourself. You will need to buy the structure itself, arm yourself with the necessary tools and assemble the electrical panel in accordance with the specifics of the home electrical network.
If you come across a cabinet of the required dimensions, but it lacks a window, lugs for seals or some holes, it is permissible to add these elements. But the work must be carried out in accordance with safety regulations and the requirements of regulatory organizations.
All necessary equipment is mounted on DIN rails. Many models of metering devices come with parts that may be useful during installation (stickers, caps, fasteners). The main task is to assemble the devices and connect them correctly with each other.
Models of external meters
If you are buying a new meter and not removing the existing one from the premises, you need a device suitable for use in outdoor conditions.
Please note the following points:
- Induction models are much more sensitive to temperature changes than electronic ones.
- DIN rail is preferable as a mounting method.
- Go to the website of the electricity sales organization and see which models are allowed for installation in Russia.
- For a multi-tariff payment system, choose a device that can take into account more than three tariffs.
Brand recognition and the presence of service centers also matter. A trusted manufacturer means quality, maintainability, and loyalty of inspection organizations.
Consider purchasing a counter and a box from the same manufacturer: this will make it easier to fully integrate the devices and the shell
Among the commercially available domestic brands, we can consider the following: INCOTEX, Taipit, Energomera, EKF. Particularly popular is the model “Mercury” 230 AM-03. It has a single tariff and is capable of giving accurate readings at temperatures ranging from -40 to +55 degrees.
Of the foreign manufacturers that have proven themselves well: Swedish-Swiss ABB, French Schneider Electric, Turkish Legrand. But European brands often have operating temperature ranges that do not correspond to Russian realities.
It is advisable to consult with specialists from the service organization in your region. Usually they have a list of devices that have already shown their best performance during operation.
Automatic and heater
An automatic switch is installed in the box before the meter. Its parameters must be calculated from the total power of all consumers - electrical appliances installed or planned in the house and on the street/garage and other domestic buildings.
If, for example, the total power is 25 kW, then a 63 A automatic machine is optimally suitable for this value. In addition to the input one, you need an outgoing line automatic machine, protective for the heater and modem (if any). Using the latter, the readings are automatically transmitted to the processing center. But such a scheme cannot do without a heater.
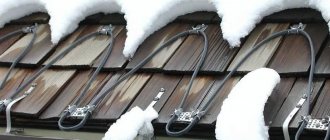
The heater for the electrical panel can be turned on and off manually or automatically. It is needed to maintain optimal temperature in cold weather - electrical appliances need heat to work without errors
Heaters for electrical panels are made of aluminum, which is coated with non-flammable thermoplastics.
The main functions of the element are to prevent the appearance of condensation, which prevents corrosive changes in current-carrying busbars and contacts and protects devices from high humidity.
Transfer input device and SPD
If the electrical installation includes an autonomous power source, a backup device must be installed after the meter. This device is needed to manually switch consumers from the external network to the generator and back.
The reserve input device eliminates the simultaneous use of two different power sources (external network and generator), which is its task
To protect the installation from lightning strikes, high-voltage surges and fires from these impacts, an SPD (surge protection device) is added to the panel. It is placed after the input circuit breaker and through a separate fuse. An SPD is required if entry into the building is carried out via an airway.
Additionally, a fire protection RCD and a cross-module for distributing electricity to different groups of consumers can be installed in the panel. Sometimes a differential machine is also added to the box.
The socket is one of the optional elements. But if construction is just underway on your site or you need a street connection for some equipment, you can’t do without it. And don’t forget about the zero rail, it combines all the zero cables and is used for connecting cores.
Types of electrical panels
According to installation methods, shields are divided into two types:
- Invoices (do not require niches and “slotting” work);
- Built-in (a special niche is made for their installation).
Shields are made of two types of material:
- Plastic electrical panels have an attractive appearance, are protected from corrosion and rotting, and are resistant to fire. With the available variety of colors of such shields, they can become a good part of the interior and complement it. This type of shields can also be anti-vandal, and can be safely installed outdoors - they are quite impact-resistant;
- Metal shields are good old shields, tested over a long period of time. But recently they are beginning to give way to electrical panels made from other materials. Now there is no significant difference in the materials of this product. Sometimes manufacturers mix different materials in one product;
There are two types of shields according to their purpose:
- Control panels (oversee the operation of actuators);
- Power boards (create switching of electrical circuits).
To assemble the electrical panel, you will first need:
- The body of the product itself;
- Circuit breakers;
- Tire zero;
- Counter;
- Power wiring with different cross-sections;
- Buses designed for power distribution.
Nuances
The selection and installation of an electric meter in the garage should be made taking into account the following nuances:
- total current load - usually its value is within 50 A, if you intend to use powerful equipment, you must choose a product with a higher characteristic;
- type of network – single or three phase;
- method of fastening - depending on this, the box is selected;
- number of tariffs – determines the choice of device type;
- accuracy class - usually ranging from 1.5 to 2.
The owner needs to make sure that the device is accompanied by the necessary passport documentation, and the quality of the product is confirmed by the appropriate certificate. You must purchase the required additional equipment.
A correctly selected and installed meter will ensure normal operation of the equipment connected in the garage and will save the owner from problems with the resource supplier.
How to choose the right one
The choice of an electric meter depends on the characteristics of the network operation:
- single-phase induction - suitable for low energy consumption, usually only for lighting and switching on low-power consumers;
- three-phase electronic - if you plan to use machines and a welding unit. Such a device, as a rule, must be connected via a transformer;
In the latter case, the owner has the opportunity to take into account consumption according to several tariff plans.
You should also take into account the temperature range of the device, based on operating conditions.
It is important to correctly determine the current characteristics of the meter and the power of the machine when turned on. It also depends on the total power of the connected devices
Recommended Models
Models of electrical panels are not tied to manufacturers of modular elements; for example, a Hager electric machine can be installed in an ABB housing without any problems. Therefore, their functionality is determined by ease of installation and protection class. Among the many products produced, some models are especially popular for installation in apartments. But if in industrial buildings the main criterion is reliability, then in apartments it is aesthetics.
For hidden installation, it is recommended to purchase the Hager Cosmos VR118TD shield. Its door is made of transparent plastic; if desired, it can be easily removed from its hinges. Opening direction is up. The box is equipped with grounding and zero busbars made of brass. The degree of protection corresponds to IP 31. The number of installed modules is eighteen. This shield is distinguished by its beautiful appearance, ease of installation and low price.
If you need an external shield, you can purchase the VIKO LOTUS model. This inexpensive model will be especially relevant for residents of Khrushchev-era apartment buildings. It allows you to accommodate twelve modules. The kit contains tires, all necessary fasteners and a DIN rail. The white color of the product and its darkened door are suitable for any interior.
Building a power supply system without using electrical panels is almost impossible. Their installation not only makes it convenient to turn on and off the power supply on certain lines, but also increases the safety of using the power network as a whole. At the same time, boxes for placing meters and electrical modules come in different placements and can be selected to suit any interior.
How to assemble an electrical panel
After you have prepared the diagram and selected all the necessary components, you can begin the most important and responsible work - assembly. It is best if it is performed by a professional.
First, the meter is installed by a special organization or, in rare cases, independently, then we follow 11 steps:
- Installing the housing on a prepared wall or niche;
- Connect the supply wiring on one side, and connect the wires from the consumers on the other side;
- For safe contact with circuit breaker terminals, it is necessary to strip the wires;
- Installation of the DIN rail in the housing itself;
- Install the components onto the bus. The counter is the same;
- Installation of two types of buses – neutral and grounding;
- It is necessary to prepare cut pieces of wires for jumpers;
- Next, the circuit is connected into one circuit;
- It is necessary to test the product for the quality of connections;
- The meter is turned on and sealed. In this case, a specialist from the sales control organization must be present;
- The equipment is ready for operation and can be started in control mode.
But even after a test run of the device has been carried out, it is necessary to carefully examine all the components so that the machines do not operate, and there is no burning smell or short circuits.
If nothing of the kind is noticed, then you can safely use the equipment for its intended purpose.
Box for metering device
Given the nature of the operation of the electric meter, it is important to ensure its reliable protection. This is ensured by using a special box
Such boxes are marked as follows, depending on the variety:
- Control room is the simplest model,
- ShchVR - a box buried in the wall,
- ShchRN – mounted distribution box.
In addition to the meter itself, a circuit breaker, grounding and neutral busbars can be placed inside the box.
The box may have the following design:
- floor;
- built-in;
- waybill (hinged);
- hidden or open;
- whole or dismountable.
The choice should be determined by the type of device and the designed installation design. To do this, the owner must use the help of appropriate specialists.
Installation work and assembly rules
For built-in boxes for the electric meter, it is recommended to make a plasterboard false wall, where it will be convenient to place it without resorting to concrete chipping (this is generally prohibited in load-bearing structures).
An electrical readout is placed in the niche; it is “grabbed” on the sides with special glue, self-tapping screws or plaster.
The cable is being laid. To do this, you can cut grooves, or secure the wiring to the wall using a cable channel.
Next, the counter is installed. Some models have a tongue at the bottom that is pulled back, the device is placed on the DIN rail and the tongue snaps into place.
Box for electric meter
The meter is connected. It has four outputs on the bottom panel. The first is the positive input, the second is the positive output. The third is the minus input, the fourth is the minus output. To make the connection, the edge of the wire is stripped to 27 mm. The bare wire should not protrude beyond the device body, and the braid should not extend inside the clamping contact.
There must be a terminal with the “ground” symbol on the meter body. Zero is connected to it.
Basic machines can be used on the most powerful equipment and made them rated at 32 Amperes. And for additional branches you can already install weaker packages (depending on what exactly will be connected through them). You can also run a thinner cable, for example, the main one is 2.5 square meters. mm, and the “weaker” branch is 0.5 sq. mm.
Box after installation
To connect an additional packet, take a small piece of wire (the same cross-section as at the input, so that they are pressed equally). The ends are trimmed. One end is clamped together with the input to the main machine, and the second is transferred to the input of the additional one. Same with the second main one. Each new pair of packetizers is connected in parallel through the previous pair.
Block 2
Grounding
In private houses, a pin is usually driven into the ground to the groundwater level, to which a zero is connected. In the house everything is in the hands of the owner. But how to make grounding in an apartment if there is none?
Until 1998, the presence of grounding was not considered a mandatory component of the circuit.
TN-CS
A five-wire wire (for three-phase power supply) is inserted into the access panel for the electric meter and machines:
- 1,2,3, red or brown wires – phase (+).
- 4, blue – zero (-).
- 5, green or yellow-green, - earth.
Or three-wire for single-phase power supply, but the earth (PE) is still present here and there will be no problems with connecting European sockets.
In older houses there was a TN-C circuit. There was no separate ground, and the grounding of the “zero” wire was carried out at the transformer substation. The cable in such houses is four-wire (for three-phase power):
- 1,2,3, red – phase (+).
- 4, blue – zero (-).
For single-phase, these are two wires (phase and PEN).
Since the neutral conductor combines two wires - zero and ground (PE and N), it is called a PEN conductor. In houses with such a scheme, there are no grounding contacts in sockets.
Grounding diagram in a private house
If you need to install the grounding yourself, all sockets in the apartment are replaced with “Euro” ones, a separate cable is pulled and connected to the house PEN wire (it is not advisable to do this yourself, all questions should be directed to the chief engineer of the management company).
The division inside the readout into a protective wire and a neutral wire was done even in old Soviet panels, but it is possible to “zero” only if the cable along its entire length is at least 10 mm (for copper) or 16 mm (for aluminum). And if the house has re-grounding. A management engineer can know this.
By the way, it is prohibited to install RCDs in TN-C systems. Without grounding and without an RCD, people in such houses are completely deprived of protection from electric shock. Grounding for heating, and even more so for gas, is also strictly forbidden!
In general, the TN-C system is recognized as obsolete in the country; it is no longer installed and cannot be reproduced during a major renovation of a building.
Due to a lack of funds, electric companies make duplicate grounding at the entrance to the house, and then separate the PEN wire into neutral and ground. One way or another, the TN-C scheme will disappear from our high-rise buildings.
Conclusion
So, choose an electrical cabinet based on the size of your electric meter and the number of packages you will install. Remember that you will have to call electricians at two stages: when connecting to a common circuit and for sealing and programming the meter. They can check everything and draw up the necessary papers.
Metering board or “box with meter”?
The power supply to a house, apartment, cottage or future construction site begins with the electricity metering panel. This is an electrical panel with the help of which connection to the electrical network is made, metering of consumed electricity, distribution of electricity and preliminary protection. The design of these electrical panels contains no more than 10-15 elements, but 90% of the panels are designed and assembled incorrectly, and besides, their use is dangerous. This applies not only to panels assembled by skilled electricians, but also to factory-made metering panels. Here is a classic example of a factory-made product that was made in violation of regulations and is potentially dangerous to your life. Such shields should be sold exclusively in the “couch” store.
You may ask, how can this be?! After all, the electricity supply organization accepted the metering board and sealed it!
The answer is simple. Firstly , the balance limit is located at the terminals of the input machine, so you are responsible for everything that is inside the shield. Secondly , when accepting the electrical panel, the connection of the electric meter is checked, i.e. so that it would not be possible to connect bypassing it, simply so that electricity would not be stolen. The rating of the input circuit breaker is also checked, which limits the power consumption of electricity. That’s why the terminals of the input circuit breaker and the meter are sealed. Networkers are not interested in everything else.
Unscrupulous manufacturers take advantage of the lack of awareness of buyers in the field of electrical installation rules (PUE). Knowing that when choosing a metering board, the consumer will choose the one that is cheaper from several options, since he does not see and cannot understand the difference between the electrical panels.
I copied photos of several metering panels from the Internet and all of them turned out to be in violation. Most likely, you have it installed or you will purchase exactly one of the samples .
Let's look at typical mistakes.
Mistake #1.
As a rule, connecting a house to the electrical network is done using a self-supporting insulated wire (SIP). The SIP, in turn, is inserted into the switchboard and connected to the input circuit breaker of the metering panel. At this stage, the first serious mistakes are made.
The SIP section, which is located in the switchboard before the input machine, is the most unprotected part of the metering switchboard.
If the insulation of the self-supporting insulation wire is broken and it is shorted to the panel body before the input circuit breaker, the protection will not work, since the water circuit breaker is located higher, and such an accident is not visible to the substation, due to the small currents for it. As a result, the shield body will be energized or simply burn out. Touching such an emergency shield is deadly.
How can such damage to SIP occur? The SIP is inserted into the panel body through a hole, the edges of which are sharp; they can damage the insulation, especially if this is not done carefully. Of course, rubber seals are included with the housing, but their task is to protect against splashing water and that’s all.
You can also find something like this.
To protect the SIP, it is necessary to use plastic penetrations, which are purchased separately. The installation of self-supporting insulated wires in the switchboard body up to the input circuit breaker must be done in corrugation.
Mistake #2.
The second and most common mistake is how the SIP is connected to the input machine of the metering board. Everywhere this is done simply, the wire is protected and clamped into the terminal of the input machine, and an inexpensive machine with square terminals.
This is absolutely impossible to do. A rectangular terminal cannot completely compress a round SIP wire, and since aluminum has the property of fluidity, over time this connection weakens and begins to heat up.
As a result, the voltage in the house jumps, and then the machine breaks down.
There are hundreds of such examples. Regular tightening of the terminals of the machine is required, but this is impossible to do, because... it is sealed.
A half-measure is to use machines with semicircular terminals and then stretch them for several days before sealing, but the problem still cannot be completely solved.
SIP is a stranded aluminum wire. It cannot be connected without first terminating with a lug.
There are special lugs for connecting self-supporting insulated wires to circuit breakers of the NShA or NShAL type.
It looks like this:
Under no circumstances should you crimp SIP lugs designed for copper wires, even if they are tinned.
It is very common to find circuit breakers with copper terminals. They also cannot be used to connect SIP. Copper and aluminum are not compatible in direct electrical contact; they form a galvanic couple.
Passing an electric current through such a connection will cause the process of electrolysis. Both metals will begin to deteriorate at the point of contact, which will lead to heating and complete failure of the connection, ultimately the machine will burn out. And even if you have an input machine of a famous brand with copper terminals installed in your metering panel, it will fail in the very near future.
Mistake #3
The choice of an input circuit breaker usually involves selecting its rating according to the technical specifications, thereby limiting the maximum power consumption.
But there is another important parameter that the average user will not pay attention to. This is the rated breaking capacity of the circuit breaker, i.e. the maximum short circuit current that the machine is capable of turning off.
To determine the short circuit current in your electrical network, you need to make special measurements. But since no one does this, it is recommended to install circuit breakers with a rated breaking capacity of 6000 A at the input.
According to GOST 32397-2013 Distribution panels for industrial and public buildings. General technical conditions. Clause 6.6.6: The breaking capacity of protective devices installed at the inputs of the panels must be at least 6000 A for rated currents up to 63 A and 10,000 A for rated currents up to 125 A.
But in life everything is different. Automatic switches with a breaking capacity of 4500 A are cheaper, so they are almost always installed in order to save money.
By the way, in the European Union the use of circuit breakers with a rated breaking capacity of less than 6000 A is prohibited.
Mistake #4
Very often you can find metering panels in which the connections are made with wire, beautifully laid and bent at right angles.
The sight of such a shield should alert you. This is what manufacturers do who want to save money and use single-core wire during assembly. For connections inside the switchboard, it is necessary to use an installation stranded wire, for example, brand PV3, which meets the requirements for flexibility for installation. The use of a single-core wire itself is not a critical mistake, but when connecting the switchboard, upgrading it, or replacing components, you will encounter serious difficulties. In addition, there is a risk that the wire will break at the bend and the connection will be broken.
Mistake #5
An error that occurs almost always is that the SIP neutral conductor is connected to the metering panel according to the “zero to meter” principle.
You can't do that. And there are several serious reasons for this.
The neutral conductor also performs a protective function and SPECIAL measures must be applied to it to ensure its reliable mechanical connection.
Many people believe that it is the phase conductor that must be connected reliably. This is not entirely true. Of course, the connection of the phase conductor must be of high quality, but the “burning out” of the zero, the break of the PEN conductor or its poor connection leads to more serious accidents: the network voltage can reach 380 volts, a dangerous potential appears on the housings of household appliances and the likelihood of electric shock to a person. In this case, the RCD will not trip when a person touches the body of the device, which is energized. In the article “ RCD and grounding ” I gave an example of the consequences of a zero violation.
The neutral conductor of the SIP must be connected in the metering panel through a feed-through terminal, which provides maximum mechanical strength and reliability of the connection, without breaking the neutral conductor of the SIP.
A neutral conductor connected directly to the meter is a critical mistake ; you cannot do this, no matter what anyone tells you. You will not be able to control and maintain the connection of the SIP conductor in the meter under the seal. This is a matter of your safety!!!
Mistake #6
This error is an excellent example of what not to do, and speaks of the illiteracy of the shield manufacturer and its attitude towards you and your safety.
To connect power tools during construction, a modular socket is often installed in metering panels. It is protected by a circuit breaker and EVERYTHING!!!!!
According to the Rules for the Operation of Electrical Installations: clause 7.1.71. To protect group lines supplying plug sockets for portable electrical appliances, it is recommended to provide residual current devices (RCDs).
clause 7.1.72 If the overcurrent protection device (circuit breaker, fuse) does not provide an automatic shutdown time of 0.4 s at a rated voltage of 220 V due to low values of short circuit currents and the installation is not covered by a potential equalization system, the installation of an RCD is mandatory.
The use of an RCD in the metering panel to protect the outlet line is strictly MANDATORY. During construction, there is a high probability of damage to the power cable, tool insulation and, as a result, leakage current. An RCD with a differential operating current of no more than 30 mA is the only human protection in this case.
Mistake #7
One of the most difficult errors to understand looks like this:
It is accepted by 99.99999% of manufacturers. Everything seems to be right, but it’s just wrong. And this is not easy to understand.
The grounding terminal of the modular socket in the metering panel CANNOT be connected to the PEN conductor of the SIP.
This will seem extremely strange to you. It is generally accepted that grounding is protection. And again, not much is wrong.
It's all about the PEN conductor and the shortcomings of the TN-C or TN-CS grounding systems, and this is how most houses, cottages and summer cottages are connected. In the event of an accident on the line, “burning out” of the zero, poor-quality connection of the PEN conductor, a dangerous potential may appear on the grounded housings of electrical appliances. High touch voltage is generated between the body of the electrical appliance and the actual ground on which you are standing, which is extremely dangerous!!! Protection in this case is only a potential equalization system, which cannot be done on the street unless you roll out a grounded chain-link mesh over the entire area.
For temporary power supply to a construction site, it is necessary to use a TT grounding system. The housing of the electrical consumer must have independent grounding from the supply network. The use of RCD is strictly MANDATORY !!!!!
As a conclusion. You cannot buy a “standard” metering panel until you have decided how you will connect the house to it and how the grounding system will be installed. Otherwise, you will have to redo it, and it will cost the same as a new shield.
That seems to be all for today!
If you are planning to assemble a switchboard yourself and do electrical work in your house or apartment, we are ready to make a project for you. example project
Electrical design. Assembly of electrical panels for houses and apartments. Tel. 5 Email: [email protected]
General information
There are many types of such equipment on sale. Prices, sizes, materials of manufacture will be found for any buyer and purpose. But first you need to understand what this electrical installation component is.
Purpose of the mounting box
Most people, when buying such equipment, pay attention only to the appearance of the product.
How it will look in the surrounding environment is, of course, important. But first of all, such boxes must meet the following requirements: But first of all, such boxes must meet the following requirements:
But first of all, such boxes must meet the following requirements:
- All installation and maintenance work is carried out under conditions that meet safety conditions.
- Metal enclosures are grounded.
- The material of the box must withstand temperature fluctuations, precipitation of all types, and solar radiation.
Plastic boxes are safer and look more attractive than metal ones. Such electrical installation devices go by different names. Some call them meter cabinets, others call them boxes. There is no single standard, and manufacturers define products in their own way. However, they all must be practical and convenient.
Most support mounting internal components using a standard DIN rail, allowing you to mount the equipment yourself. In addition to the meter, it is installed by trained specialists after receiving permission from the supervisory company.
Features of the box design
According to the rules, all protective boxes suitable for installation must comply with security levels from IP 20 to IP 65. In addition to size and color, they can be:
- Open installation.
- Secret.
- For floor mounting.
- For inline location.
- Invoices.
- Solid or collapsible.
Quality requirements
Even for such a simple-to-manufacture device as a box for an electricity meter in an apartment or on the street, high-quality execution of all its components is important. This will enable the owner to take readings comfortably and safely
When purchasing a metal cabinet, you need to pay attention to the following points:
To make the box itself, steel with a thickness of at least 1.2 millimeters is used. Thin iron will not provide sufficient strength and long-term use. Practice shows that the door of such shields is the first to sag. This violates the tightness of the structure and threatens the destruction of electrical devices installed inside. Industrial production involves testing finished samples in installations that simulate the most difficult weather conditions. If they pass the test, this means that the quality of the paint application is good and the sample will last a long time. Large manufacturers guarantee a service life of up to 15 years. Availability of a locking device. An outdoor box for an electricity meter must be selected with a lock that can be locked with a key. Its design can be any, the main thing is that there is a seal between the metal of the door and the cylinder. The thickness of the constipation is also important. The hole must be sealed. If there is a window for data control, then a seal is also needed here. Fastening must be provided with screws or self-tapping screws, since even the best glue dries out and the glass falls out. The cabinet door must be grounded. Since the first touch falls on it, if it is energized, you can get an electric shock with its help. Except for the door, the entire body is grounded
It is best if several bolts are provided for these purposes. Particular attention should be paid to the quality of seals. They are made of plastic rubber in the shape of a ring. There should be no breaks in it to avoid leakage. Semicircular bends along the edges of the door and body ensure a tight fit of the sealing gaskets, and if they break, they prevent water from getting inside.
There should be no breaks in it to avoid leakage. Semicircular bends along the edges of the door and body ensure a tight fit of the sealing gaskets, and if they break, they prevent water from getting inside.
Elements and purpose of the shield
After purchasing such an electrical panel with standard equipment, you will receive:
- electric meter;
- differential automatic machines;
- introductory machine;
- circuit breakers;
- two tires.
Now it’s time to familiarize yourself with the purpose of the elements that are present here:
- The shield has a DIN rail. This is a special device that is made of metal plates. You can cut the slats to the desired size using a hacksaw.
- Electric meter – installed to record electricity consumption.
- Circuit breakers are designed to protect electrical wiring. Before installing them, you will first need to determine the power of the devices connected to the network.
- Distribution bus - needed to connect neutral wires. Such tires can be closed or open.
- RCD is a residual current device that will ensure safety from electric shock.
- Electrical wires.
Features of precision mounting
Everything is based on two exact sciences - mathematics and physics. Therefore, before you begin installing an electrical panel, you need to become at least a little familiar with this system, watch video tutorials, read articles on a given topic, and explanations of various types of circuits.
But before you settle on any option, you need to study the types and sizes of electrical panels.