In this article we will look at two methods of insulating wires using vinyl insulating tape and heat shrink tubing. You will learn how to do it right and wrong, what tools are needed and some “company secrets”.
How to properly insulate with electrical tape
Suppose you need to isolate fragmented insulation. You don't need to wrap the entire section at once; apply the tape to the cable insulation next to the damaged part of the insulation onto the undamaged section. But before you do this, make sure that the cord is not dusty, damp or dirty (the glue cannot stick in this case).
Consistently moving the insulating tape towards the damage and slightly pulling, wind the tape until you reach the undamaged wire insulation on the other side of the damage.
If the tape is much wider than the frayed area, simply wrap it 3 times in one place so that the damage is in the center.
Insulating tape can be cut efficiently using side cutters, but this is not always possible or affordable.
You can do without tools at all and firmly grasp the selected area on both sides of the area, stretch the electrical tape and eventually tear it. Of course, the edge of a torn ribbon will not be very beautiful, but in many cases it will do.
It is important that the breaks occur quickly. By slowly stretching the tape until it breaks, we will reach the point that the tape will be greatly stretched and even more damaged.
Increased contact strength
Another example of why you need to cover the solder and the repair area with insulating material is to increase the contact strength. Usually, when repairing connectors or cables, a radical option for strengthening the contact is used. It's a mixture of baking soda and superglue. You can also use a compound that hardens with hot air and epoxy resin.
Such methods are used only to strengthen contact when fastening points, part of the board are missing, or there is serious damage to the part.
When a torn cable is repaired, it can also be further strengthened with a solution of soda and superglue. But be careful and careful with this method - superglue and epoxy resin eat into the surface of the material, and it will not be possible to remove them later for repeated repairs.
Heat-shrink tubing
Instead of insulating tape, in many electrical work you can and should use heat shrink tubing. What are the differences between these insulation solutions?
- Heat shrink is usually a more durable, aesthetically pleasing and durable solution.
- To “attach” it to a wire or other element, you need to heat the tube.
- Heat shrink is not universal, its size must be adapted to the insulated element.
- Unlike insulating tape, heat shrink tubing is rigid and non-removable
What is important when choosing heat shrink
Size. One of them is the diameter of the hole before heating. And the second is the minimum diameter of the hole after heating. The tube will not shrink indefinitely
Therefore, the tube must not only fit onto the cable before insulation, but also be pressed against the wire or connector after heating. If you want to use a cable marking tube, its color is important. Non-flammability. This parameter should also be of interest, especially when we intend to use a lighter to heat the heat shrink tube.
Heat shrink tubing can be purchased in long sections (usually 1m), but you can also buy a set of several short pieces of different colored heat shrink in one package.
Vinyl insulation tape
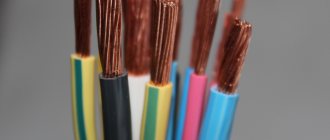
This item should always be in every electrician's drawer. And preferably several skeins in different colors: blue (for mass), yellow-green (protection) and phase (brown, black, gray, red). With this set, the marking of the ends of the wires will be functional by color.
What is important when choosing electrical tape?
- Color - this has already been said
- Width – if you don’t have any special preferences, you can take the standard size 19 mm.
- Length – the longer it is, the better
- Stickiness is a factor that also needs to be taken into account. Unfortunately, every manufacturer describes that the adhesiveness is great and the tape will last until the end of the world. It can be assumed that the cheaper the tape, the worse the adhesiveness. So when you buy branded insulating tape at an electrical store, most likely it will be of high quality.
How to properly insulate with heat shrink
First of all, we need a heat source:
- Matches are the last resort. Only if the element is small and easily accessible. In addition, you will breathe in sulfur and harmful emissions.
- Lighter - for easily accessible items, you can take this, but be careful! So the wire insulation can be completely burned.
- A hot air gun is the best, but also the most expensive solution. Unlike open fire sources, the ability to direct heat from any angle is preferable, as it will be very difficult to damage the wire. It is best to have a heat hair dryer with adjustable heating temperature to adapt to different occasions. You can try a regular home hair dryer, but this is a perversion.
Insulating the heat tube with a lighter
First, cut the heat shrink tube corresponding to the cable diameter according to the table. It should be slightly longer than the damage, so as to capture the wire insulation on both sides by a few millimeters.
We place a piece on the cable at the damage site and heat the heat shrink tube until it clamps the cable insulation. If the cord or element is thick, you will have to rotate it so that the heat reaches the tube from all sides.
Attention! The flame should be kept away from the wire. It's worth practicing before you start the real work.
Standard insulation is designed for a maximum temperature of 70C. Even if the flame does not destroy the insulation, it may catch fire or begin to smolder, especially when working for a long time.
Heat gun for insulation
We can say that such a hair dryer (also called a heat gun) is a slightly more powerful hair dryer (just kidding). It creates an air flow with a controlled temperature from several tens to several hundred degrees.
If the heat gun has a temperature adjustment, start with a lower setting, it may take longer for the heat shrink to react, but this will safely reach the optimal temperature setting. If your heat gun doesn't have this setting, start blowing from a distance. If you notice that the heat shrink is unevenly distributed along the cord, you can rotate it around to warm the tube on each side.
Attention! When directing the air flow to the object, be careful, the heat gun can blow air of about 500C. Sometimes after such work with wires in the installation box, the paint begins to peel off the wall! If you use heat shrink tubing to insulate a solder joint, do not overheat it for long periods of time.
If you use heat shrink tubing to insulate a solder joint, do not overheat it for long periods of time.
Insulation of electrical appliance wires
Damage to wires especially often occurs with devices such as a vacuum cleaner or household extension cord. The wire is located on the floor and is often subject to mechanical stress, so it can be damaged. How and with what electrical wires are insulated will depend on where they are used and on the standards of their insulation resistance. The easiest way is to wrap the damaged area with electrical tape.
Selecting electrical tape
There are many types of electrical tape, but the most common are PVC and CB tapes. Rubberized cotton material has a practical advantage. This insulating tape is more resistant to moisture, low and high temperatures, so it is preferable for outdoor conditions.
PVC insulating tape is more suitable for insulating wires connecting household appliances. Its advantage lies in aesthetic indicators. The material can be matched to the color of the wire and it is easier to work with.
When is insulation needed?
- Wire color code. Sometimes you don't have the color of wire you need on hand. No problem—just have the correct color of electrical tape or “thermocouple” and use it to indicate proper cable functionality at both ends.
- Cable insulation - during electrical installation work, accidental damage to the wire insulation can occur. Usually they do not replace the entire wire, but put a patch on it.
- The housing can touch not only cable insulation, but also connectors that do not have their own insulation, or, for example, need to be protected from mechanical damage and moisture.
- Strengthening connections - sometimes the outer sheath of the power cord of a device is damaged or frayed. Then such a cable hangs on two or three wires without a protective layer. It’s only a matter of time before a complete breakdown occurs. There are also two options: replace the power cord or try to strengthen it at the site of damage.
- It happens that due to a large number of devices or cables, there is a bundle of wires in a certain area. They can be laid in the cable, secured with cable ties, covered with a frame or, if it is a short section, they should be wrapped with a heat shrink sleeve.
Application of side cutters
Most novice electricians, when they decide to work with side cutters, do not use them correctly.
So, most often, this tool for removing insulation from wires is picked up at random and no attention is paid to the position of the cutting edges. But, by the way, if you took the side cutters incorrectly, then you will have to apply more force
In addition, there is a high risk of breaking or taking a bite.
The technology for working with side cutters is as follows: direct the cutting edges in the opposite direction to the movement of the tool. This is because with this arrangement the blade will cut even with minimal effort. As a result, you get the sheath removed by the tube and an undamaged wire.
Preparation
Before you begin insulating electrical wires, you must turn off the voltage in the house using automatic switches. You should prepare materials and tools for work, focusing on their quality and integrity.
The following types of insulation materials are distinguished:
- electrical tape (PVC, cotton);
- heat-shrink tubing;
- special terminals.
Electrical insulating tapes are resistant to moisture. They do not become limp or peel off for a long time. Compared to PVC, CB electrical tape is more resistant to moisture and mechanical damage. It is used to connect electrical wires in cars.
Although thermal tubes are considered the best material. They are used everywhere because they hold insulation underwater or in the ground. And the service life can last for decades. Special terminals are used very rarely and only in a specialized area: twist insulation. But the technical characteristics are similar to heat-shrinkable tubing.
Accordingly, when there are several types of materials for work, various methods of insulating wiring are used. And which wire insulation will seem better can only be understood after familiarizing yourself with all the methods.
Correct interior doors
The best door for soundproofing is a solid swing door with a threshold and a perimeter rebate. Look for the quietest examples in hotel collections. Externally they are ordinary, but have an increased sound insulation index. However, these characteristics may also be useless if the box is placed on polyurethane foam. There is a nuance: the tighter the door is closed, the quieter it will be in the room and the worse the ventilation will work. For such cases, they came up with a retractable threshold that hides right in the door.
Insulation requirements
The insulating material, in addition to its dielectric properties, also serves as mechanical protection. Depending on the operating conditions and the method of wiring installation, other requirements are imposed on it:
- tensile strength and abrasion;
- resistance to frequent bending;
- chemical resistance to the operating environment;
- resistance to high temperatures;
- resistance to aging.
Requirements for insulation performed at the installation site or during repairs depend on the operating conditions and purpose. The conductivity of the operating environment, mechanical loads and the influence of external factors are taken into account.
Terminals for isolating wiring connections
The products are a contact part, which is placed in a dielectric housing. Available in the form of pads and caps. Fixation of current-carrying wires can be done with screws or clamps. This option is perfect for forming contact connections in a junction box with your own hands.
Insulated crimp terminal
Read also: Is it possible to smoke hookah without tobacco?
The disadvantages of the terminal connection include:
- increasing the volume of wiring at the contact point;
- exposure to moisture.
Garden Extension Cord Insulation
To connect garden equipment, extension cords with a moisture protection rating of IP 54 are used. If the insulation has been damaged, it must be sealed to ensure complete safety of operation in open spaces with direct contact with the soil. You can completely seal the damaged area using heat-shrinkable tape. It is wrapped around the damaged area, just like with simple electrical tape, and then heated with a hairdryer.
When heated, the material shrinks longitudinally and compresses the wire tightly. Also, hot-melt adhesive is released from the inside of the tape during shrinkage, which ensures tightness. In terms of sealing, heat-shrinkable tape is not inferior to a tube made of a similar material. Moreover, it can be applied using the winding method. In the case of a tube, you need to put it on the wire, but due to the monolithic plug and socket at the ends of the extension cord, this will not be possible.
Express wire insulation: video
- Which wire is best for installing wiring in a wooden house?
- How to make hidden wiring and which cable to choose
- Hidden wiring indicator: what is it and how to do it correctly
Precautionary measures
Before you begin insulating the wires of the electrical network and household appliances, you must make sure that the network is de-energized. It is recommended to turn off the voltage using a special circuit breaker. Next, use a flat screwdriver with an indicator to check the presence of voltage at the output - the place where the work will be carried out.
When performing work, the quality of the materials used matters. If a material is flammable and susceptible to thermal effects, this will inevitably lead to accidents or emergency situations in the future.
All wire connections must be properly insulated. First of all, human safety, reliability of contact, absence of current leakage to the ground and elimination of short circuit depend on this. Several strands (connections) are placed in one distribution box and contact cannot be allowed between them. Also, insulating wire connections protects against the appearance of traces of oxidation and corrosion on the surface of metals. There are several ways to insulate wires, which we will discuss below.
How to insulate wires?
This can be done with:
- heat-shrinkable tube;
- ordinary PVC electrical tape;
- isolated terminals.
1. Insulate wire connections using heat-shrinkable tubing.
Today, heat-shrinkable tubing can be purchased at any radio and electrical goods store, and recently it has become very popular. It is produced in different diameters, is non-toxic, does not support combustion, its operating mode is from -55 0C to +105 0C and the operating voltage is up to 1 kV.
Here you will need an industrial hair dryer to shrink the tube onto the cores. However, it is expensive and many cannot afford it at home. Therefore, they get out of this situation with the help of a lighter.
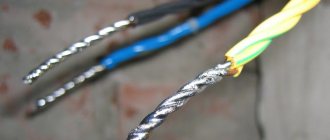
When connecting wires, it is often necessary to put on heat-shrinkable tubing in advance. Remember this, otherwise you will have to disassemble the connection.
We cut off the tube with a margin so that the free sections protrude from both sides of the exposed part of the wire at least one centimeter.
We put the heat-shrinkable tube on the twist. The photo shows that it is intended for use in networks with voltages up to 600 V and at temperatures up to 125 0C.
Using a hairdryer or lighter, place it in place. That's all - it's fast, reliable and inexpensive.
2. Insulate wire connections using regular PVC insulating tape.
Insulating tape is perhaps the most common material used in insulating twists and other connections. It is available and often inexpensive.
It is worth noting that any electrical tape is not suitable for reliable insulation of wires. Most duct tape sold is only suitable for wrapping around a shovel handle or putter, not for use on electrics.
If your twists are in a distribution box that will be plastered, then spend an extra 100-200 rubles on high-quality and reliable electrical tape, for example, 3M Scotch. One skein should be enough for you. This will allow you to obtain reliable wire insulation and avoid various emergency situations.
How I insulate wires using electrical tape:
I start winding the wires from the standard insulation at a slight angle so that the winding moves towards the end of the twist...
I continue to wind until I go beyond the twist and get an empty tube with a length equal to the width of the insulating tape...
Then I bend this empty section of twisted electrical tape and lay it along the twist in the opposite direction. Then I continue to wind the electrical tape at an angle, but towards the standard wire insulation...
At the final stage, I cut off the excess insulating tape. This method of winding lasts a long time and there are no problems with the appearance of the very tip of the twist being exposed.
3. Insulate wire connections using insulated terminals.
This insulation option involves the use of different connecting terminal blocks that have a dielectric housing. These are ZVI screw clamps, PPE connecting insulating clamps, and Vago universal self-clamping terminals.
If you connect the wires in the junction box using these materials, then you will not have to additionally insulate the connection point. All terminals listed are already well insulated.
Above we explained how and what to insulate the wires with. How do you do this?
Let's smile:
Worker: “I have perfectly studied this lathe, this cutter and electric sharpener. Now I know them like the back of my hand.
Eggs! Are you kidding me?
One can understand how, against the backdrop of a general shortage in the USSR, the myth spread that cardboard egg trays were an excellent means of reflecting and absorbing sounds. But the fact that he is still alive is simply amazing. Maybe it's due to the external resemblance to acoustic foam rubber, a truly effective sound absorber? Back in the late 80s, tests by Riverbank Acoustical Laboratories showed that the acoustic properties of trays were inferior even to a velvet curtain. Carpets, by the way, are also no sound insulators.
Electrical wiring insulation requirements
The material intended for insulation has not only dielectric properties, but also performs a protective function. Depending on the installation method and conditions of use, other requirements may be imposed on the insulation.
- Long service life, high degree of resistance to aging.
- High resistance to abrasion and tearing.
- Resistance to temperature influences, especially high temperatures.
- No possibility of bending.
- Chemical resistance.
Requirements for insulating material vary depending on the mechanical influences of the environment, mechanical loads, and current conductivity in the environment of use.
Coupling and its insulation
Cable insulation sleeve
The coupling is used in cases where it is necessary to extend the wire, for example, when moving a switch or socket. The coupling along with the wiring will be embedded in the wall, so its insulation must be airtight. The most reliable option in this case is to use heat shrink tubing. When choosing, the degree of its shrinkage is taken into account
As a rule, this part is characterized by threefold shrinkage; it is important to take this into account when choosing the required diameter. Insulation is carried out in several stages - first of all, the cores, and then the rest of the area
As soon as the wires are connected, the tube is pulled to the end of the wire.
Insulation of current-carrying conductors
The places where the wires are connected are insulated using ordinary electrical tape, but the contact will be thicker, and it will be more difficult to put a heat-shrinkable tube on it. As an analogue, it is preferable to use special heat-shrinkable material. Shrinkage is carried out using an ordinary lighter or a hair dryer.
Shell insulation layer
At this stage, the insulation of current-carrying parts should already be completed; for complete and reliable sealing, the coupling shell is additionally processed. This is especially important when coupling sheathed cables or wires. The tube must hide the connection point and extend at least 1 cm onto the outer insulating layer on both sides, otherwise there is a possibility of dust and moisture getting under the factory wiring sheath.
Preliminary stage of work
Before you start insulating wires yourself, it is recommended that you carefully familiarize yourself with safety precautions and work rules. This procedure can only be carried out when the power supply is de-energized. However, a disabled machine is not a guarantee of safety. Immediately before starting work, you should check the absence of voltage with a special indicator. In the future, you will need to clean the surface to be treated from dirt, dust, and so on.
De-energize the electrical network before starting work
