Special devices—temperature sensors—help control the degree of heating of any object, regardless of its physical state. Their operating principles and execution may differ significantly. This allows you to choose the best option depending on your goals. Knowing what the device is intended for, it is worth figuring out how to connect the device so that it allows you to take readings with a given accuracy.
Thermocouple
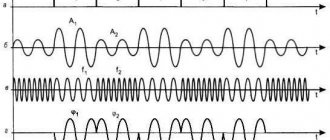
Structurally, a thermocouple consists of soldering two wires of different metals. The temperature difference between the hot and cold ends provokes the appearance of an emf in the circuit, the magnitude of which depends on the material and thermoelectric force of the thermocouple and can be from 40 to 60 μV. Combinations of nickel-chrome, chromium-aluminum, iron-nickel, iron-constantan and others are used as thermocouple materials. The thermocouple provides high accuracy, but measuring this accuracy is problematic. Being a relative sensor, a thermocouple has a voltage level dependent on the temperature difference between the junctions. The cold junction usually has the temperature of the environment in which it is located. If we delve deeper into the principle of operation of a thermocouple, it looks like this: at the hot and cold ends of the thermocouple there are two temperatures, the difference of which determines the emf. The cold junction temperature must be compensated. A solution to this problem in a hardware environment is to use a second thermocouple placed in an environment with a previously known temperature. The software environment uses a different, absolute temperature sensor placed in an isothermal chamber along with the cold junctions. Such a sensor controls the temperature of the junctions with a specified accuracy. When working with a thermocouple, there are a number of difficulties that accompany taking data from the sensor:
- Thermocouple nonlinearity
. To convert the EMF value to temperature and vice versa, high-order polynomials are used, prescribed in GOST - The thermo-EMF values
obtained from a thermocouple are small, on the order of units and hundreds of microvolts, which makes it impossible to use conventional analog-to-digital converters. To obtain undistorted data from the thermocouple, precision multi-bit, low-noise analog-to-digital converters are used
Connection procedure
The temperature sensor connection diagram may differ significantly. It all depends on which variety is preferred. Before proceeding with installation, it is necessary to determine the required accuracy and purpose of the device. If it is to be used to control indoor air temperature, one circuit will be required. If you need to measure the degree of heating of a substance, you will have to use another one.
How to connect silicon
To connect a silicon-type temperature sensor, the following circuit can be used:
- 2-wire. It is relevant in the absence of increased requirements for high accuracy, since in this case the resistance of the connected wires is added to the measured resistance. This significantly increases the amount of additional error;
- 3-wire. Installing a temperature sensor according to this scheme improves accuracy. This connection allows you to measure the resistance of the wires, and then subtract the resulting value from the measured one;
- 4-wire. According to this scheme, the device is connected in such a way as to completely eliminate the influence of the supply wires. This allows you to get rid of additional errors and significantly increase the control accuracy.
How to connect a thermocouple
To connect the cold ends, compensation wires are used or installation is carried out directly to the analog input terminals. In this case, it is important to observe the polarity at the input to the industrial controller used for software compensation of the cold junction temperature and subsequent calculation of the temperature at a given point.
Internal compensation is performed using the temperature of the module used to connect the thermocouple. For accurate external compensation, the temperature of the cold junction is controlled by an additional resistance thermometer connected to a special input.
How to use a contactless device
Non-contact temperature sensors have the ability to determine the degree of heating of the device. In this case, a direct connection is not required. The device approaches the controlled object and its alignment with the corresponding sensor is ensured. This has a significant impact on the final result, which largely depends on the experience and knowledge of the specialist performing the measurements. If we change the contactless device to a contact model, the accuracy will increase.
The diagram provided in the instructions for a specific device indicates the procedure for connecting and subsequent operation of the temperature sensor. Before you begin installation work, you should familiarize yourself with it carefully in order to avoid common mistakes made by inexperienced users when performing installation work on their own.
Thermistors
A simpler and more common device for measuring temperature is thermistors. Their work is based on the principle of dependence of the resistance of materials on external temperature. Metal resistance thermometers, especially platinum ones, provide high accuracy and linearity of measurements. The main characteristic of a resistance thermometer is the base resistance of the thermometer at a certain temperature. According to GOST, resistance at zero degrees Celsius is considered basic. GOST recommends using several resistance values in Ohms and a temperature coefficient, which is determined by the formula: Tc = (Re – R0c)/(Te – T0c)*1/R0c,
Where
Re
is the resistance at our temperature;
R0c
– resistance at zero degrees;
Te
is our temperature;
T0c
– zero temperature. GOST thermistors contains temperature coefficients for various thermometers made of platinum, copper and nickel and polynomial coefficients for calculating temperature from the current resistance of the resistor. Although resistance thermometers have a small temperature coefficient of resistance, it is easier to obtain high accuracy when measuring resistance than when measuring small voltage values when working with a thermocouple. To measure resistance, a thermal resistance is connected to the current source circuit, after which the differential voltage is measured. The temperature coefficient when using semiconductors will be a fraction of a percent. For such measurements, analog-to-digital converters are used. Temperature sensors implemented in the form of integrated circuits are equipped with an analog output corresponding to the supply voltage. To digitize the signal from such sensors, eight- or ten-bit ADCs are used.
Principle of operation
The main function of the DS18B20 chip is to transform the readings of the built-in temperature sensor into a digital code. This conversion depends on the conversion resolution set by the user, which varies from 9 to 12 bits (0.5°–0.625°C). If no settings have been made, the configuration register setting corresponds to 12 bits.
In the initial state, DS18B20 is at rest, or in other words, at a low energy level. To start measurements, the microcontroller sends a signal [0x44], after which the received data is stored in a register, and the sensor itself goes into “rest” mode.
When the DS18B20 digital temperature sensor operates from an independent power source, the microcontroller is able to control the process of executing the command [0x44], which measures the temperature. Thus, the DS18B20 temperature sensor will generate a logical “0” during the transformation of temperature readings and a logical “1” if the conversion process is completed.
If the microcircuit is powered using the “parasitic method”, then control of logical “0” and “1” is impossible, since a high level of supply voltage will constantly be on the bus.
After removing and processing the signal from the temperature sensor in the DS18B20 chip, the received data in degrees Celsius is stored in the form of a 16-bit number with a sign (S), which is responsible for the “+” or “-” sign of temperature. The temperature register structure will look like below.
If the temperature reading is above “0”, then the indicator is S=0, but if the temperature value is negative, then S=1. Below is a table of data and temperature correspondence.
Quartz temperature converters
If it is necessary to expand the range of measured temperatures, quartz converters are used. They allow measurements in the range from -80 to +250 degrees Celsius. The principle of their operation is based on the frequency dependence of quartz on temperature. The function of the converter varies depending on the location of the cut along the crystal axes. Quartz sensors provide high sensitivity and measurement resolution, coupled with operational stability. Due to these properties, quartz sensors are widely used in digital thermometers.
Application
It is worth understanding that each type of sensor is designed for use in special conditions. In almost all areas of production and life, it is necessary to know the temperature. Thus, it is necessary to use thermistors to obtain absolute indicators, to collect indicators in rooms - noise, to obtain the most accurate data - digital, and so on.
The world of temperature sensors covers all areas of life where measurement is required. It could be a room, a liquid or an object with completely different nuances. Some rooms have high humidity, others should not be entered. Similar parallels can be drawn with liquids and objects. When choosing a suitable thermometer, you need to pay attention to the nuances of the measurement conditions.
Noise temperature sensors
The operation of noise temperature sensors is based on the dependence of the noise potential difference across the resistor on temperature. In practice, to measure temperature with noise sensors, you need to compare the noise of two identical resistors, one of which is located in an environment with a known temperature, the second in an environment whose temperature needs to be measured. The temperature range that can be measured using noise sensors is from -270 to +1100 degrees. The main advantage of noise sensors - the ability to measure temperature in thermodynamics - is complicated by the extremely low noise voltage, comparable to the self-noise level of the amplifier. This makes noise voltage extremely difficult to measure.
Selection options
To make the correct choice of a suitable thermometer, it is necessary to determine several conditions that must be met for comfortable operation of the device.
Operating temperature range
You need to know at what temperatures the thermometer will be used. It is also necessary to determine what error will be acceptable in obtaining the results. If the temperature range is small, then thermistors are suitable. In the harshest conditions, mainly noise devices are functional.
Conditions for taking measurements
Is it possible to place the thermometer in the medium or material that needs to be replaced. If not, then data can be obtained using radiation thermometers, which measure the temperature through obstacles.
Operating time before calibration or replacement
Set the operating conditions of the sensor. The environment can be standard, high humidity, oxidizing, fire hazardous, and so on.
Output signal magnitude
The output signal must correspond to the capabilities of electrical measuring instruments for further processing of the received data. This depends on the obtained temperature indicators converted into energy.
Other technical data
There are also secondary factors to consider when determining the appropriate type of temperature sensor. These nuances allow you to choose the most suitable device to obtain the necessary data.
Error
It will take a lot of time to get the most accurate results. The best indicator is given by a bimetallic thermometer, built on the NQR principle and digital. The first ones are faster, and the second ones are more accurate.
Permission
This indicator allows you to obtain more accurate temperature measurement resolution increments from the sensor. A prominent representative is the DS18B20, which can operate in 9, 10, 11 and 12 bit resolution. The smallest mode will give 0.5°C, and the maximum - 0.0625°C.
Voltage
The value of the output voltage will be affected by the resistance of the resistor. Depending on this, the voltage can be linear (vary depending on temperature) and nonlinear. Each sensor has its own reference values at the thermometer terminals, which depend on the temperature of the object being measured.
Response time
The indicator is responsible for the speed of obtaining measurement results. As a rule, quick measurements can be obtained with a large error. To eliminate this drawback, you will need to neglect the response time and increase it to the required accuracy.
NQR temperature sensors
Functioning of NQR thermometers
– nuclear quadrupole resonance, occurs due to the action of the field gradient of the crystal lattice current and the nuclear moment, which is caused by the deviation of the charge from the symmetry of the sphere. This creates a procession of cannonballs. The frequency depends on the grating field gradient and for different substances can reach thousands of megahertz. The gradient depends on temperature, with an increase in temperature, the NQR frequency decreases. Structurally, NQR temperature sensors are an ampoule with a substance placed in an inductance winding connected to a generator circuit. When the generator frequency matches the NQR frequency, the generator energy is absorbed. When measuring a temperature of -263 degrees, the tolerance is ±0.02 degrees, and at 27 degrees - ±0.002 degrees. Despite the significant nonlinearity of the conversion function, NQR thermometers have unlimited time stability.
Electronic thermal relays
These are already quite complex electronic devices that switch the load using electromagnetic relays, contactors; almost all of the above types can serve as temperature sensors. The signal is processed by a microcontroller or a specialized electronic circuit. Such devices can have several channels, for example, four, that is, they can monitor four points and control four loads, and provide information on an electronic display. For installation in an electrical panel, a thermal relay is produced in a housing for a DIN rail.
Volumetric transducers
The property of substances to expand and contract with temperature changes has found application in volumetric sensors. The range of measured temperatures depends on the stability of the properties of the materials. Typically this range is from -60 to +400 degrees Celsius with a tolerance of 10 to 5%. When working with liquid, the sensor interval depends on the boiling and freezing points. At the same time, the measurement error ranges from 1 to 3% and depends on the temperature of the environment. The lower limit of measurements when working with gas is determined by the temperature at which the gas transitions to the liquid state, the upper limit is determined by the resistance of the cylinder to temperature.
VAZ 2114, VAZ 2115
On these cars, GM 2112-3851010-01 can be used as a DTOZH. The location of the device is between the cylinder head and the thermostat.
To check, it is recommended to dismantle the element (open-end wrench size 19). To do this, you need to wait until the engine cools down, reset the negative voltage on the battery and drain the antifreeze.
After this, you need to dismantle the device and check it by heating the liquid, a thermometer and a multimeter.
The following parameters must be present.
Table 2.
| Temperature, 0C | Resistance, Ohm | Voltage, V |
| +30 | 1350-1880 | 8 |
| +50 | 585-820 | 7,6 |
| +70 | 280-390 | 6,85 |
| +90 | 155-196 | 5,6 |
| +110 | 87-109 | 4,7 |
If there is a discrepancy in the readings, the device must be replaced.
Repair
The thermocouple (thermistor) cannot be repaired - it is too miniature and has no replaceable parts. The wiring can be repaired (soldered, twisted, replaced), but not the specified elements. The sensor tube for mechanical thermostats is especially not repairable: no matter how well the hole in it is insulated during repair, including solder, sooner or later it will depressurize, and a bellows with flaws is extremely difficult to bring into proper condition - there will always be miscalibration.
The exceptions are the following cases:
- when the contacts come off, there is a break, a short circuit, an incorrect fit - then the connections are resoldered, the parts are positioned properly;
- installing a new thermocouple on an already installed cable (simply cut and solder in place of the old thermistor, without snapping off the wiring chip from the control unit).
A case of repair from user experience
Let's give an example of how the location of a thermistor affects its performance. The case of the Liebherr CP4003 refrigerator is described. In this model, if the temperature sensor malfunctions, an alarm sound is generated, which was observed by the user. The owner ordered a new sensor, but also decided to simultaneously check the old product and try to revive it.
The refrigerator was turned off, defrosted, and the chambers were dried. Then the protective panel (cover) was removed from the detector. In this case, the device type is no frost, and the part in question is placed on a “crying wall”. The detector was dried with a regular hairdryer without removing it from its seat. In this case, it is necessary to ensure that the directed heat is moderate; high temperatures can damage and melt plastic parts. After these procedures, we launched it and everything worked properly.
Obviously, the cause of the problem is an unsuccessful location for installing the temperature sensor. Over time, due to aggressive conditions, the sensor depressurizes, condensation gets inside, which distorts the readings. Accordingly, the system issues an alarm about a breakdown; incorrect messages are sent to the compressor, forcing it to work constantly.
The further solution was that the protective panel was not mounted, the element was left open, without a cover, and condensation was removed from the walls near the device once a week with an ordinary rag or napkin. The new sensor was not needed and was left as a spare.
Causes
We can say with confidence that the temperature sensor is one of the parts of the refrigerator that breaks less often than all its components. Due to its simplicity of design, the element is resistant to mechanical loads, humidity, temperature changes, and electricity.
Causes of refrigerator temperature sensor failures:
- common reasons: wear and tear over time, loss of contacts or other parts, manufacturing defects, mechanical damage;
- for electronic types: significant or systematic voltage drops;
- burnout, burnout of contacts, electrical circuit malfunctions, breaks, short circuits not only in the detector itself, but also in the wiring going to it;
- the tube or other parts do not fit properly inside the thermostat;
Frequent thermistor malfunctions (electronic sensor type)
Bad, soured contacts, due to which the resistance increases, can cause incorrect operation. To clean the terminals, just pull out and insert the chip several times.
Other failures: problems with the thermocouple itself; it may be open or shorted (the resistance is either 0 or infinitely high). In this case, the electronics in the self-diagnosis mode of the refrigerator (displayed when it is turned on) displays an error code, often “02”. But the warning option with graphic symbols is only available on models with a display; on some products, the system issues alarm signals, the decoding of which is indicated in the instructions. The simplest products may not have self-diagnosis at all.
Niva Chevrolet
For installation, you can use DTOZH 2112-3851010 Kaluga (23.3828). It is difficult to visually determine the location of the device, because it is covered by other parts.
After removing them, you can see that the device is located in the upper part of the thermostat in the hole in the front pipe of the water jacket (the one that goes into the cylinder block). After unscrewing it (snap on 19), antifreeze does not flow.
The check is carried out according to the same schemes as discussed above. In this case, you need to have before your eyes a table with the parameters of temperature and resistance of the DTOZH.
Table 3.
| Temperature, 0C | Resistance, Ohm |
| +100 | 177 |
| +90 | 241 |
| +80 | 332 |
| +70 | 467 |
| +60 | 667 |
| +50 | 973 |
| +45 | 1188 |
| +40 | 1459 |
| +35 | 1802 |
| +30 | 2238 |
| +25 | 2796 |
| +20 | 3520 |
| +15 | 4450 |
| +10 | 5670 |
| +5 | 7280 |
| 0 | 9420 |
| -4 | 12300 |
| -10 | 16180 |
| -15 | 21450 |
| -20 | 28680 |
| -30 | 52700 |
| -40 | 100700 |
Also on the Chevrolet Niva, in the area of the 4th spark plug, there is a DUTOZH (coolant temperature indicating sensor), which displays data on the instrument panel; it does not transmit information to the ECU and does not affect the operation of the engine.
But it can provide incorrect data to the instrument panel and mislead the driver.
You can unscrew it without draining the coolant, but before doing this, relieve the pressure in the system by unscrewing the cap of the expansion tank.
It is also checked by comparing the temperature with the readings of the multimeter.
See table below.
How to check DTOZH
Checking the sensor with a multimeter
The easiest way to check the coolant sensor is with a multimeter. Before you begin, it should be noted that different cars will have different resistance ratings at low and high temperatures. Therefore you need to know him. The vehicle manual will give you the exact answer.
The verification procedure itself is extremely simple. The sensor needs to be unscrewed and a multimeter connected to its contacts. Heat the water to a certain temperature specified in the manual (this is necessary so that you have something to compare it with), and lower the device into it.
If the indicator does not coincide with what is indicated in the manual, then the problem is in the sensor. If it matches, it means it’s working properly and the electronics or thermostat are to blame.
The importance of timely replacement
The temperature sensor itself costs about 350 rubles, but this only applies to such a part in the form of two wires with a chip and a sensitive element (thermocouple) to electronic thermostats (control units). If you buy a mechanical thermostat with a sensor tube (usually if it breaks, you will need the entire assembly, not just this tube), then you will have to pay 600–1700 rubles. and more. But untimely updating will result in even greater costs. The malfunction of such a seemingly insignificant element leads to failure of the compressor, and this is already a very significant repair cost - the price of a new motor can exceed a quarter of the cost of the refrigerator.
The process of replacing refrigerator temperature sensors
Removing the old one and installing a new thermistor or thermostat with a tube sensor is difficult only if they are hidden far behind the casing. Then you need to remove the cabinet panels.
If the sensor is electronic, then the disconnection itself is simple - there is a plastic plug on it, which is connected to the thermostat or a segment of the control unit (there are connectors there). All you need to do is snap it off, remove the old one and snap on the new product in the same way.
If it is difficult to get to the electronic thermostat, you can simply cut off and solder the wiring to the new sensor (we will discuss the process below), but with a mechanical unit such a procedure is impossible - there are no wiring, but a tube.
Mechanical models are tubes that go into the thermostat with a metal plate attached with bolts or clamps to it; theoretically, it is enough to unscrew/bend them and attach a new spare part in the same way. But they almost never do that. For this type of assembly, it is difficult to find sensors on sale - tubes with a bellows (we have already described this disadvantage above), they are usually not sold separately. Then there is only one way out - buy this part via the Internet, in workshops, but it is not a fact that it will be possible to attach it, and also that there will be no calibration.
For the above reasons, and also to eliminate miscalibration, they purchase a whole thermostat of this type - this is typical for mechanical options. It will be necessary to replace the entire thermostats of the described type, together with the detector tube. They are pulled out as follows: remove the cover near the selector, the device cover and the handle, after which the assembly itself is removed. Remember the location of the wiring in the terminals. The new product is inserted using the described steps in reverse order, observing the memorized location of the power wires to the thermostat.
All information about whether temperature sensors are sold for a specific refrigerator model and whether they are available separately from the thermostat can be found on special forums by contacting the support service on the manufacturers’ websites. Usually in the instructions and on the Internet you can also find a description of the replacement process for specific models with schematic images.
Installing a new electronic temperature sensor
Let's consider the option of replacing only the sensitive part without updating the entire cable; the advantage is that there is no need to disassemble the walls of the refrigerator:
- Remove the sensor from its seat.
- Make sure that the new part fits the clamps and fits into the recesses in the plastic.
- Cut the cable near the most sensitive part; do not shorten it. The length of the cord should be approximately the same as it was before in order to fit into the recesses in the seat, a difference of a few mm is allowed.
- Strip the ends.
- Install new insulation - two heat-shrinkable tubes for each wire and one thicker one, covering all the wires at once.
- Solder the wires of the new thermocouple to the mating ends.
- Slide the heat shrink over the connection, heat it with a lighter - the insulation will tighten and secure.
In extreme cases, instead of heat shrinking, you can use electrical tape as insulation, and instead of soldering, you can use twisting, but such a connection will be less reliable.
Kalina
The official version of the DTOZH for the VAZ 2112 is 2112-3851010. But you can use analogues, for example, ERA (33026), Luzar (LS 0112), Fenox (TSN 2211207).
The location of the sensor on a car with an 8- and 16-valve engine is near the thermostat. In this case, the device is slightly closed by the filter housing.
In this case, on the Lada Kalina 1 you will have to remove the air filter to access the temperature meter.
To unscrew, use a 19 key. There is no need to drain the antifreeze.
Check, as in the previous case, after removing the device with the key to “19”.
For temperature and resistance readings, see Table 3.
Checking the presence of operating voltage is carried out with a multimeter with the ignition on without removing the sensor between the block terminal “B” and ground (there are two terminals on the blocks “A” and “B”), standard readings are within 4.8-5.2 V.