Light bulbs are consumables that, depending on the quality of production and operating conditions, have a certain “lifetime”. This “life” ends the moment when, after turning on the lamp again, you are still standing in a dark or partially lit room. Sometimes you come across lamps that are so complex in design that replacing them becomes a whole undertaking. This is especially true for built-in LED and halogen devices with non-standard models.
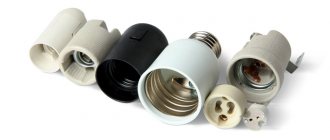
In this article we will look at the types of sockets found in everyday life, as well as ways to remove various light bulbs from any lamp and replace them with new ones. Separately, it is worth considering the issue of replacing them in a suspended ceiling. We will also find out how to change a halogen lamp.
Step-by-step instructions on how to replace a fluorescent lamp in a ceiling light
To change a burnt-out fluorescent lamp in a ceiling light:
- Relieve the voltage from the lamp. To be safe, turn off the power supply at the panel.
- Provide access to the lamp by removing the shade or reflective grille. The lampshades are attached to the light source with screws or latches. Unscrew the screws and release the latch lock. Remove the lampshade or reflective grille.
If there is no glow, press the light source - there may be poor contact between the base and the socket.
How to remove, insert and assemble lamps with G5 and G13 sockets
Fluorescent light sources with G5 and G13 sockets are used in the kitchen, bathroom, and for illuminating mirrors. They are installed in ceiling lamps. Burnout is confirmed by a dark ring at the end of the flask. The cause of the malfunction may be a failure of the starter (ballast) or throttle. To replace the fluorescent source:
- Relieve the voltage from the lamp. To be safe, turn off the power supply at the panel.
- Disassemble the lamp. Provide access to the bulb by removing the lampshade or reflective grille. The lampshades are attached to the light source with screws and latches. Unscrew the screws with a screwdriver or release the latch lock. Remove the lampshade or reflective grille.
- In single-lamp lamps, the shade is attached to the lamp itself. In this case, pull it and release the burnt out light source.
- To remove the flask, grab it with both hands and turn it around its axis 900 in any direction. The pins of the base will come out of the guide sockets in the socket.
- Pull the light source away from the fixture and out of the socket.
- Buy a new lamp. Its characteristics and dimensions must be the same as those of the burnt-out source.
- To install a new light source, place its ends into the socket until it stops, turn it at an angle of 900 in any direction until it clicks slightly. Lock the position. Apply power to the lamp and check its operation. If the light is normal, replace the lampshade or grille. If the lamp does not light, turn it off and move the bulb in different directions for better contact with the cartridge. If there is no light, remove it and reinstall it.
Expert opinion
It-Technology, Electrical power and electronics specialist
Ask questions to the “Specialist for modernization of energy generation systems”
How to unscrew a light bulb from a suspended ceiling? How to safely change a broken one, how to replace a halogen light bulb, and how to change other types of modern light bulbs. In case of simultaneous preparation of contacts for the subsequent installation of a new chandelier, it is worth making the necessary grouping and securing the wires in the terminals. Ask, I'm in touch!
Dismantling options
Depending on the purpose, the chandelier can be removed for:
In this case, the dismantling option will be completely different for each case. So, to replace a light bulb, it is not at all necessary to remove the entire structure; it is enough to remove the lampshade, which can be dismantled by unscrewing the bolts, unscrewing the threads, removing the spacers or pressing the clamps.
If you need to wash a chandelier or perform finishing work, and the device is removed temporarily, and a socket with a light bulb is installed for the period of cosmetic repairs. In this option, dismantling is also partial, since it is advisable to leave some elements in place. You only need to release the power wires to which you connect a temporary lighting fixture.
What kind of lighting do you prefer?
Built-in Chandelier
In the case of a complete replacement, all elements are dismantled. And if the fastening structures interfere with the newly installed equipment, they are also removed.
Connecting a two-gang switch
The next one will be a circuit that uses a two-key switch.
A feature of its design is the presence of two output pins, each of which can be connected to the input (phase) pin independently of each other.
This allows you to create two separate branches from one input wire, for which power control is provided with its own switch key.
Typically, a two-key switch is used to power two lamps, but there are situations when only one lighting element needs to be powered, that is, to create one branch.
In this case, the connection does not differ from that described above. The only thing is to decide which key will be working and connect a phase conductor to its output terminal.
With this connection, the second key will be disabled.
Replacing a GU5.3 or GU10 LED Bulb
Such a base is often secured with a retaining ring. They are secured in the socket with two conductive pins until they click (GU5.3) or by turning 90 degrees (GU10). Replacing them is quite simple using the following instructions.
- Turn off the network power;
- Before replacing, check the power of the lamp being replaced. It must correspond to the burnt-out power. If you install a more powerful lamp, you can damage the controller or transformer, if installed. When installed, they are calculated for a certain power indicator of the connected load;
- remove the retaining ring, which is located along the diameter of the body. Pull it gently and the light bulb will easily come out of the spotlight. If the ring has two tendrils sticking out inward, just squeeze them;
- remove the light bulb from the socket, holding the base with your other hand, install a new one;
- return the retaining ring to the groove.
Expert opinion
It-Technology, Electrical power and electronics specialist
Ask questions to the “Specialist for modernization of energy generation systems”
How to remove a chandelier from the ceiling yourself: the procedure and rules for dismantling and replacing an old lamp in an apartment However, in this case, experts recommend replacing the entire lamp at once, since repair work will cost about the same as a new lighting fixture. Ask, I'm in touch!
Useful tips
Some ordinary people, having set out to remove a chandelier from the ceiling, are faced with a number of unforeseen problems.
Therefore, next we will look at the most common of them.:
- Due to prolonged inactivity, the decorative nuts cannot be unscrewed - in this case, they need to be treated with vinegar, transformer oil or WD-40 along the contact lines.
- After dismantling, you have bitten off the wires and are now too short to connect to - try working out the surrounding area around the wire a little to free up at least one centimeter of the wires.
- If the lighting device is supported by disposable dowels, it is better not to reuse them to secure a new lighting device.
- If you want the decorative cap to fit tightly to the stretch ceiling, the hook should be placed 3 - 4 mm above the canvas.
- The hook does not always need to be dismantled; in some situations it can simply be bent to one side.
Rice. 9: bend the hook
Base G9 and G4
These miniature light bulbs are similar in design, they differ in size, but their installation principle is the same. Due to their low weight, they are attached only to the socket with the base. Additional fastenings are usually not provided. Let's look at how to replace such a light bulb in a spotlight.
- De-energize the lamp by turning off the mains power;
- if there is a decorative light diffuser, remove it;
- We take the body of the light bulb and pull it out with a slight force;
- install a new one by inserting the pins into the socket. If you have a halogen, when installing, handle it only with gloves or a cloth.
Replacing light in furniture lighting
Any spotlights on furniture and kitchen equipment are replaced in 99% of cases using one of the above methods. The whole difficulty of replacement lies in dismantling the decorative lamp diffuser.
Strict requirements for the appearance of the lamp force designers to hide the fastenings as much as possible and you need to use your imagination to understand how to remove this or that lamp.
Replacing a spotlight
If removing the lamp in a spotlight is impossible for any reason, a complete replacement of the device in the ceiling structure will be required.
To remove the housing of the built-in lamp from the ceiling surface, you will need a screwdriver with a flat and thin end or, in extreme cases, a knife.
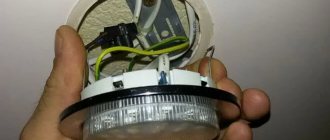
It is necessary to carefully pry the decorative trim around the entire perimeter and provide access to the latches that are located on the body of the product. Having loosened the latches, the lamp is removed from the groove and disconnected from the power supply.
In some designs of recessed lighting devices, the latches are placed outside. And in order to remove the spotlight from its standard location, it is enough to simply loosen them.
Replacement of a surface-mounted ceiling light is carried out in the same way if it is equipped with mounting latches. If there is a lampshade , it must first be removed.
After removing the device and disconnecting it from the power supply, a working product of similar dimensions and design is installed in its place.
In conclusion, it is necessary to recall that all work related to the replacement of lamps in spotlights, as well as the replacement of all non-working products, is carried out with the power supply turned off .
Expert opinion
It-Technology, Electrical power and electronics specialist
Ask questions to the “Specialist for modernization of energy generation systems”
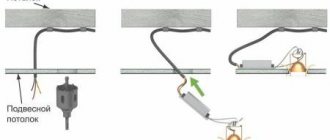
Removing a chandelier from a suspended ceiling If no work on installing a new light source is planned in the near future, then the wires must be insulated. Ask, I'm in touch!
Rules for recycling light sources
After unscrewing a used lamp, do not throw it away. Try to handle it as carefully as possible. Do not place on a hard surface or where people could easily sit on it.
Never throw the lamp into a bin with other household waste. After dismantling the product, try to get rid of it immediately after finishing the work. This will be more reliable and no unpleasant situations will happen.
Important! Only incandescent or LED light bulbs may be disposed of in the household waste bin. The only harm they can cause is a cut if handled carelessly.
All light sources containing mercury inside must be handed over to the people who are responsible for their disposal - this could be an electrician at your housing office. You can also take them to a special collection point or throw them away in a specialized container. You can congratulate yourself on a successful replacement only after you have disposed of the damaged lamp.
Only after you have managed to change a light bulb yourself can you call yourself a real master, expect praise from your household and continue to live peacefully, enjoying comfort and safety.
Subscribe to our Social networks
