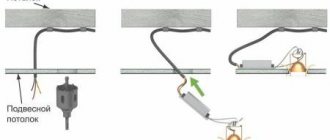
Any adult, at least once in his life, has encountered a situation that seems simplest at first glance - an incandescent lamp has burned out and needs to be replaced. It may seem that no problems can arise here. Unscrew the burnt one from the chandelier, replace it with a new one - and that’s it. But even here troubles may await.
Due to high humidity (oxidation and rust on the base and inside the socket), due to a manufacturing defect in the lamp or a sudden voltage surge, a situation may arise in which the base remains inside. It makes sense to figure out how to get the rest of the light element, i.e. how to unscrew the light bulb base from the socket. Someone might say, “Take off the lamp and work quietly.” But there are much simpler options.
The main mistakes people make when getting bitten by insects
Not knowing how to remove a tick at home correctly, people listen to the advice of others. Sometimes such recommendations are, to put it mildly, not effective, and can even cause additional harm. Here's how not to remove an insect from your skin:
- Do not pull the tick sharply or too hard. Because of this, the proboscis may remain inside the skin.
- Dirty hands or tools can cause infection.
- There is no need to try to crush the insect before removing it.
- There is no point in pouring oil over an area with a tick and expecting it to come out on its own. The insect will suffocate and remain in the body because the oil will block the hole for its breathing. Moreover, in such a situation, the tick may well spew out all its saliva, and the risk of contracting diseases will increase significantly.
- A cap of water applied to an area of skin will also be useless. The insect will not come out to swim there.
- Burning with a cigarette, applying any caustic liquid such as ammonia, gasoline, vinegar, and so on will also not bring the desired result.
And now about how to remove a tick from a person without causing him additional harm. What to do after the insect is removed from the skin?
Opening by cutting the flask
So, the instructions on how to open a light bulb in order to save the base involve removing the insides through the bottom of the contact part. But often, for further use of the lamp, it is not at all necessary to preserve its base. In this case, the problem of how to get the insides out of a light bulb disappears by itself - the task is to efficiently cut the bulb at the base and separate everything unnecessary from it.
Thermal method
It is based on the fact that with a rapid change in temperature, due to uneven expansion, the glass breaks at the point of stress. To control the process, you need to locally heat the flask along the line of the future cut, and then cool it sharply. For this you will need:
- silk thread;
- alcohol;
- container with water.
First of all, you need to wrap a thread around the base of the flask. It doesn’t hurt to mark the future line for separating the base by marking it with a glass cutter. A ring of wound thread is moistened with alcohol liquid and set on fire. During combustion, you need to rotate the bulb for uniform and complete burnout. As soon as the flame goes out, you need to immerse the hot area in a vessel with water. As a result of thermal shock, the light bulb will crack exactly along the line of the most intense heating.
After cutting the bulb, the edges of the chip should be smoothed using sandpaper. It is better to carry out this procedure by moistening the paper with water so that fine glass dust does not accidentally get into the respiratory tract or eyes.
Mechanical method
It consists of cutting the flow at the base of the cylinder with various tools. The easiest way to do this is with a diamond file with edges. You can make the cut using rotary tools - on a grinding wheel or with a Dremel with appropriate discs. In this case, it will be useful to wrap the cut area with insulating tape in one layer and make a cut directly along the tape. This method does not require water cooling, and therefore is not difficult if you have a tool and suitable abrasives.
There are other methods for disassembling light bulbs, such as cutting with a laser or cutting with nichrome thread using electricity. But they can be too demanding on equipment that the home craftsman does not always have on hand.
It is important to remember that all of the opening methods listed apply only to incandescent lamps. In no case should luminescent devices be disassembled using such methods - they contain highly toxic mercury vapor, so their disposal is carried out only at specialized enterprises
To decorate the interior or make various crafts, many people began to use ordinary incandescent lamps. However, to use it, you need to disassemble it, and this is not so easy, because you need to take into account several features. If you do not take them into account, the lamp may burst and scratch a person. Therefore, in this article we decided to tell you how to disassemble a lamp at home using a minimum amount of materials.
Top 5 ways to unscrew a light bulb base from a socket
The situation when a light bulb bursts or when unscrewing the base remains in the socket has happened to many people. There is a solution to the problem and there are plenty of different methods on how to unscrew a light bulb base from a socket. The reasons for this situation are most often: poor quality of the lamp, voltage drop, exhaustion of the lamp's service life, burnout.
Pliers or needle nose pliers
The first method you should resort to is using pliers or needle-nose pliers. The latter are more convenient due to the fact that they have thin, elongated “sponges” that can reach many hard-to-reach places. They are very convenient for capturing small parts. It will also be easy to separate the base from the socket.
Using needle nose pliersImportant! The handles of thin-nose pliers should be rubber or plastic. If such a tool is not at hand, the last resort is to wrap the handles with several balls of electrical tape. Procedure:
Procedure:
Remove any remaining glass, if any. Next, grab the base with a tool, twisting it outward. The lamp shade must be held so that it does not come off
It is important not to damage the circumference of the cartridge. If the base does not give in, you can carefully bend its sides inward and then unscrew it.
During the process, the base may begin to tear or become deformed, this is not a big deal, it will even be easier to remove it, the main thing is that it does not damage the cartridge.
If you can’t grab the edges, you can try another option - place the needle-nose pliers inside the base and push the ends apart so that they rest against the side walls. You need to twist counterclockwise.
Potato
The method is simple, although it does not always help. To do this, you need to have pieces of glass sticking out of the base; in this case, there is no need to remove them. To implement this method you need:
- Cut a fairly large potato (raw) in half and separate its parts. They must be clean and dry.
- Place a potato over the fragments so that they cut firmly into the flesh.
- All that remains is to unscrew the base from the socket.
After use, potatoes should be thrown away. Other fruits and vegetables will not help because their flesh is not as dense.
The potato will help you unscrew the base
Unscrew the cartridge
The essence of the method is to disassemble the cartridge itself. True, this can only be done with carbolite cartridges, which are installed in old lighting fixtures from the USSR era. Ceramic ones, which are mainly used in modern chandeliers, are not intended for such disassembly. Let's return to disassembling the cartridge. It consists of the following parts:
- 2 carbolite halves.
- Threaded connection.
- Ceramic core with brass contacts.
One of the halves contains a metal sleeve into which the base is screwed. To remove the base, you must separate the base. All that remains is to unscrew the base; the already familiar thin-nose pliers will help with this. After removal, the cartridge should be collected and can be used again.
We use a cork
To implement this method you will need a cork plug. It needs to be adjusted to the size of the base. When the plug fits tightly into it, you should carefully unscrew it along with the stuck element of the light bulb.
Unscrewing with a cork
If there are pieces of glass left, you can string a cork on them. In this case, it is necessary to achieve their dense recessing into the soft cortical surface.
What to do if the light bulb is simply stuck in the socket
All of the above methods are suitable if the light bulb is not stuck, but simply burst. An option is to unscrew the socket from the chandelier.
If this method cannot be implemented, then you will have to break the glass part of the lamp and use one of the options proposed above.
You may come across advice to use a spray like WD-40 or “KONTAKT”. But there is a risk that even with the machines turned off, the device will be dangerous. In this case, it will not be possible to check whether there is a phase, since the lamp is stuck. The only way when using such a spray is absolutely safe is to remove the chandelier completely, disconnecting it from the power cables.
Conclusion
You can unscrew the base if it is stuck in the socket in different ways
The most important thing is to take safety precautions and turn off the power to the lamp before starting work.
Why do lamps become deformed and stick?
It happens that the light bulb gets stuck in the socket. If it is deformed, then the reason for this phenomenon may be frequent surges in voltage, expired service life, perhaps the element was already damaged before screwing in. When you can’t unscrew it even with force, you can try to pull out the entire cartridge. Usually this is a three-part design; after removal, the cartridge is disassembled; if the base can be removed, then good, but if not, you will have to buy the same part for replacement.
The cartridge is in disassembled condition.
Another common problem is sticking. It appears when there is loose contact at the screwing point. The procedure is the same: you need to try to make an effort to unscrew or remove the cartridge. You can also lightly spray with a spray to dissolve rust; it often appears in the design of street lamps or in rooms with high humidity levels.
Before spraying or any other manipulations, be sure to turn off the machine. It is better to dismantle the lamp.
By the way, such problems can be avoided by adhering to certain rules:
- Before screwing in, the lamp must be checked for deformation and damage.
- You only need to work with clean hands so that no greasy stains remain on the base.
- The lighting element must be screwed tightly.
- Use only lamp models that are suitable for a particular luminaire.
For additional protection, you can apply a little graphite to the base; it will increase the density of the connection and eliminate the possibility of sticking.
A simple pencil is suitable for coating with graphite.
Solution options
There are several ways to unscrew a light bulb if it has burst, and each of them is good in its own way. The main thing that needs to be done first is to turn off the power to the damaged chandelier or other lighting device.
Ideally, of course, if the electrical wiring was installed with several inputs, then it is possible to turn off the power from the circuit breaker to only part of the room, leaving yourself the opportunity to connect a portable lamp in the next room. If this is not possible, then you will have to turn off the power to the entire apartment and illuminate it with a flashlight or cell phone when removing the broken light bulb. If there is a central tube left in the cartridge in addition to the base, it is carefully broken.
When the power is turned off, you should not rely on the switch of a broken lighting fixture - it may be powered during installation incorrectly and interrupt the neutral wire rather than the phase wire.
Well, then let’s look at the following options with which you can decide how to unscrew a broken light bulb from the socket.
Pliers
Unscrewing the base using pliers After carefully removing the remaining fragments, you need to pick up the edge of the base with pliers (without grabbing the cartridge) and begin to rotate it counterclockwise. If the metal base has become stuck or stuck due to rust, it would not hurt to first spray the stuck surface with cologne or toilet water so that the liquid gets between the base and the cartridge, and give it a little time to soak. Another acceptable option is to stick the pliers in and open them, after which you can try to unscrew the part.
Disassembly
This option is not feasible with new ceramics. It can be used if the cartridge is made of carbolite, because it will be collapsible. How to unscrew the cartridge? It is not difficult. You need to carefully, holding the base with one hand, unscrew the cylinder, dividing it in two. The “skirt” with the base stuck in it will remain in your hands. Here, no longer under the ceiling, you can safely unscrew the base of the light bulb using any of the suggested methods.
Plastic bottle
This option requires caution, because hot plastic that gets on the skin is a very painful thing. So, the neck of a soda bottle is heated over an open fire to the melting point, after which it is inserted inside the metal base
You need to wait a little until the plastic cools down, after which you can turn the light bulb out of the socket. The fact is that the heated plastic sticks inside the base of the light bulb, penetrating into irregularities, with the help of which it fixes the base. At the same time, heating the base burns off some of the oxidation and rust.
Unscrewing the base using a plastic bottle
https://youtube.com/watch?v=eSuJ4Dfw7gg
Champagne cork
Similarly, you can use a wine or champagne cork. Its edges need to be slightly sharpened by chamfering, and then driven into the stuck base of the light bulb. Slowly, using a gentle unscrewing motion, try to unscrew the base and pull it out. Any metal base of any lamp with a screw base is unscrewed exclusively counterclockwise - this must be remembered so as not to waste energy and time.
Potato
Probably the most interesting and unusual method of all presented. It can be used if there are fragments of the bulb sticking out of the base. The potato must be cut into two parts, take one of them in your hand and, as it were, “plant” the cut part on the protruding pieces of glass. Then simply unscrew the base from the socket.
Unscrewing the base using a regular potato
About disassembling an incandescent lamp
Old lamps are used to create vases and containers for spices, miniature aquariums and many other crafts.
If you decide to master this process, then you should start with an ordinary incandescent light bulb. Inside it does not have a filling that is hazardous to health in the form of additives from harmful substances. Therefore, disassembling it is not only simple, but also completely harmless to health.
Briefly about the device
To begin dismantling the insides of the lamp, you need to become familiar with its structure in general terms. The main element is the filament body, the ends of which hold the electrodes.
Additional rigidity is created by holders mounted on a glass support - a bead. The rod is connected to a leg, which includes electrodes, a rod, and a plate.
Lamp and its leg. The components of the structure are: bulb (1), filament body (2), additional stands (3), rod (4), electrodes (5), blade (6), intermediate leads (7), plate (8), rod (9 ), external terminals (10), terminals (11), base (12) (+)
All internal elements will have to be removed from the flask through its lower part.
How to disassemble
Here it is necessary to take into account some nuances, because You will have to work with glass. The material of the leg is very thin, while that of the base insulator is quite rough.
How to unscrew a light bulb if it is stuck or burst in the socket
To prevent flying fragments and associated risks, you need to use a cardboard box as a workspace. Its bottom is covered with soft material.
Before starting the operation, you need to arm yourself with thin-nose pliers. With their help, it will be possible to dismantle the contact, firmly sealed at the neck of the flask.
The element is loosened and turned until the two wires going to the main part of the lamp - the filament body - break. Next, the released contact is removed.
The next task is to open the base insulation. This will require the same tool. Using thin-nose pliers, swing the light bulb leg and remove it complete with the plate, rod, electrodes, and filament body.
Having opened access to the internal cavity of the lamp, carefully clean it with a piece of textile. Without the insides of the light bulb, only the heat-resistant glass bulb remains.
This is an example of using LN as a mini-greenhouse for growing small plants. This craft can be presented as an original gift.
How to use it depends on your imagination - it can become a container for spices, a tiny aquarium, a lampshade or a lamp.
For some crafts, a base will be superfluous. It is not difficult to remove since the connection is not very strong. You can simply keep it for a day in a mixture of hydrochloric acid with ammonium nitrate or in hydrofluoric acid. Which will dissolve the glue that attaches the base to the base of the flask.
With this option, it is important to thoroughly rinse the product in a soapy solution after the acid. And don’t forget to wear gloves to carry out all manipulations
All types and types of sockets for lighting lamps - marking rules and what are the differences
This is what the contact extraction process looks like. It is grabbed with thin-nose pliers, loosened well, and then easily removed from the bottom of the base
Another way is to unscrew the part at the point of contact with the glass, then remove the glue and remove the vessel. Sometimes it is enough to scratch the junction of the base and the bulb with a glass cutter to get rid of it.
Disassembling the lamp with socket
When replacing a light bulb, all sorts of troubles happen. It also happens that it separates from the base. In this case, you cannot do without disassembling the cartridge. The work requires the use of protective equipment in the form of glasses and rubber gloves.
Turn off the electricity and make sure there is no voltage by using an indicator. Remove debris from the floor.
Next, they arm themselves with narrow-nose pliers and, rotating the base in the direction opposite to the clockwise movement, turn it out. For a more secure grip, the edges of the base are bent inward.
Some craftsmen use a simple plastic bottle to remove the base from the cartridge. The neck is heated until it softens, and then screwed into the base. After 30 seconds, begin twisting by rotating the bottle
If the attempt fails, the connection must be loosened by rotating in different directions. When this action does not bring results, the tool is rested against the inner walls of the base and unscrewed in this way.
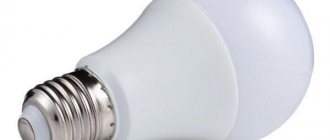
How to disassemble an LED lamp?
A diode light bulb is usually disassembled for repair, which is quite simple. The diode lamp consists of:
- housings;
- base;
- light diffuser;
- drivers;
- LED block.
Diagnosis of faults begins with checking the voltage supply to the cartridge contacts. If power is present, but the diode does not light, then the problem is not in the socket, but in the light bulb itself. You can check this way: screw any working light bulb into the socket.
If the lamp cannot be repaired, but the diodes themselves are in good working order, they can be used to create a new LED light bulb. In the form of a housing, you can use a regular incandescent lamp. This allows you to save a lot, because a new ice light bulb is expensive.
Can the problem be prevented?
To prevent this situation, you need to follow some rules:
- select light bulbs of suitable power;
- the light source should sit very tightly in the socket, but there is no need to twist it all the way with force;
- It wouldn’t hurt to coat the lamp threads with graphite;
- do not purchase the cheapest devices from unknown companies;
- Make sure there are no power surges in the house or apartment.
By following these simple rules, you can avoid the lamp breaking or exploding.
A light bulb has burst, how to unscrew it from the socket
Initially, we will tell you the main recommendations that you must follow. If you start to unscrew the lamp and suddenly it bursts, do not rush to do something, time does not push you in such a situation. In fact, unscrewing a broken lamp is quite simple, but initially you need to turn off the lights in the entire house using the machine. If the lamp bursts on a table lamp, then it is enough to simply pull it out of the network.
Please note that if the lights in the entire house have gone out, you need to get a flashlight to dismantle the light bulb. You can also use a regular mobile phone, the main thing is to find an assistant who will shine the light for you
The process of replacing a light bulb - which way to unscrew
Light bulbs have to be changed infrequently, so every time a simple question arises, such as the direction of unscrewing. If a person stands in front of the socket, then he can remove the light bulb by unscrewing it counterclockwise, and screw it in clockwise, respectively.
To dismantle, unscrew it counterclockwise.
It’s easier to remember how to do the work correctly using examples. Therefore, you should remember that the light bulb is unscrewed and screwed in exactly the same way as the cap from a bottle of water, alcohol, or sunflower oil.
The replacement shouldn't cause many problems. It is also important to replace the old light bulb with a new one of the same power. Difficulties begin when the light bulb cannot be unscrewed or it has burst. But even in such a situation there are effective methods.
What to do if the light bulb does not come out of the socket?
Any adult, at least once in his life, has encountered a situation that seems simplest at first glance - an incandescent lamp has burned out and needs to be replaced. It may seem that no problems can arise here. Unscrew the burnt one from the chandelier, replace it with a new one - and that’s it. But even here troubles may await.
Due to high humidity (oxidation and rust on the base and inside the socket), due to a manufacturing defect in the lamp or a sudden voltage surge, a situation may arise in which the base remains inside.
It makes sense to figure out how to get the rest of the light element, i.e. how to unscrew the light bulb base from the socket. Someone might say, “Take off the lamp and work quietly.”
But there are much simpler options.
Options for the development of events
An incandescent (or halogen) light bulb burst due to a power surge or a manufacturing defect during operation. Then in the socket, in addition to the base itself, there will also be sharp fragments from the light bulb sticking out of it.
In this case, you need to be especially careful when dismantling the remaining part of the light fixture.
Or it may happen that the bulb breaks when unscrewing, if there is rust inside the cartridge that prevents the base from being unscrewed.
Also, the cause of such trouble can be a defect in which the flask itself easily separates from the metal base.
How to unscrew a broken light bulb in any of the above cases without resorting to the help of specialists? The main thing is calm. You should not rush anywhere when removing the remains of the damaged light element, so that no further trouble occurs, such as a cut on the glass or a broken cartridge.
Solution options
There are several ways to unscrew a light bulb if it has burst, and each of them is good in its own way. The main thing that needs to be done first is to turn off the power to the damaged chandelier or other lighting device.
Ideally, of course, if the electrical wiring was installed with several inputs, then it is possible to turn off the power from the circuit breaker to only part of the room, leaving yourself the opportunity to connect a portable lamp in the next room.
If this is not possible, then you will have to turn off the power to the entire apartment and illuminate it with a flashlight or cell phone when removing the broken light bulb. If there is a central tube left in the cartridge in addition to the base, it is carefully broken.
When the power is turned off, you should not rely on the switch of a broken lighting fixture - it may be powered during installation incorrectly and interrupt the neutral wire rather than the phase wire.
Well, then let’s look at the following options with which you can decide how to unscrew a broken light bulb from the socket.
Champagne cork
Similarly, you can use a wine or champagne cork. Its edges need to be slightly sharpened by chamfering, and then driven into the stuck base of the light bulb.
Slowly, using a gentle unscrewing motion, try to unscrew the base and pull it out.
Any metal base of any lamp with a screw base is unscrewed exclusively counterclockwise - this must be remembered so as not to waste energy and time.
Measures to prevent such troubles
The first thing to note is that you should not install lamps that exceed the limit of the possible power of the socket or lamp so that they do not burst. The fact is that the more current a lighting device consumes and the brighter it shines, the more heat is generated during its operation. And this can lead to the situation described above.
Of course, the lamp must be screwed tightly into the socket, but still, during installation, you need to find such a tightening point so that you can then unscrew it. There is no point in pulling the lamp as far as you can. You can also pre-coat the base threads with graphite.
There is no need to leave greasy stains on the glass; it is advisable to carry out the work with gloves. In addition, your hands will be more protected if the lamp breaks.
You should purchase lamps only in trusted stores and do not chase after cheap goods, which are most often illiquid, i.e., should not have gone on sale at all.
By following simple rules, you can be sure that even if such a nuisance happens, you can easily get rid of it.
Safety first
The first thing to do in such a situation is to ensure that the work is carried out safely. Do not forget that the lighting device is powered from a 220 V network, and in a burst lamp, the current-carrying elements become exposed. Therefore, before approaching the chuck, be sure to relieve tension.
It should be noted that simply pressing the switch that turned on this particular chandelier is not always enough. Since the switching device may not break the phase circuit, but break the zero. This option is only acceptable in situations where you have an indicator screwdriver to verify that there is no potential. Or if you unscrew a light bulb from a socket while wearing dielectric gloves.
The best option is to turn off the input machine in the apartment. If you have a sectioned power supply for rooms or consumers, you can turn off the required lamp with a separate circuit breaker, leaving all other nodes energized. If the power supply of the entire apartment is turned off, keep in mind that there will be no lighting and there will be nothing to connect to. Therefore, take a portable flashlight or light a candle in advance so as not to cut yourself on the sharp edges of a broken light bulb in the dark.
How to unscrew the base of a broken light bulb from its socket: tips, life hacks
The easiest way that an electrician uses is to unscrew the base using pliers or pliers. You can do the job using thin-nose pliers. They have tweezer-shaped tips, quite thin and sharp. It is possible to drive them between the cartridge and the base. This method is not always advisable to use; there are other, more effective, accurate, unusual methods.
The socket is stuck in the socket
The most interesting thing is that not all electricians know about these methods of unscrewing the base from the socket. Here are some options:
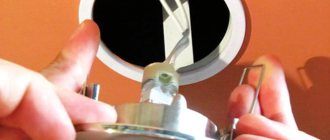
- Using a plastic bottle. The fact is that the circumference of the neck of a plastic bottle corresponds to the diameter of the base. Using a match or lighter, standing directly on a chair near the light bulb, you need to heat the neck of the bottle so that it begins to melt. After this, press it firmly against the base and wait for the plastic to harden again. After hardening, it will stick tightly to the base and you can remove the base itself along with the plastic bottle by twisting the bottle. This method is advisable to use if you still have glass sticking out of the base, and you cannot or do not want to cut your hands while removing them. This method eliminates electric shock, as there is no need to use metal objects to remove the base from the socket.
- Another unusual way is to use a peel. This is an ordinary wine cork. You need to slightly cut off its circumference so that it becomes the diameter of the base. Insert the plug tightly into the base and unscrew it. The method is suitable even if there are fragments sticking out. These fragments will further strengthen everything. That is, the plug fits well into the base, you can easily unscrew it.
- If the base is stuck to the cartridge, then you need to disassemble the cartridge. But this method is suitable if the cartridge is of the Soviet type, that is, made of the appropriate alloy, it can be disassembled. The cartridge is disassembled into three parts. You can use thin-nose pliers to unscrew the base from the socket. This method is used if all the methods described above did not work and you were unable to remove the cartridge. But it happens that the cartridge deteriorates and the base tightly sticks to it. In this case, the only solution to the problem is to replace the cartridge. Let us remind you that the method of disassembling the cartridge is not suitable if these are ceramic cartridges. They are non-separable and are most often sold with modern lamps and fixtures.
The socket is stuck in the socket
Do not be upset or panic if the light bulb bursts and the base remains in the socket. There are safe and easy ways to remove the base from the socket, without the use of special tools or pliers.
Radical ways to remove a lamp
If none of the above methods fails and the remains of the lighting element are still inside the socket, then it may even be necessary to replace the latter. An alternative to this measure could be a radical option, which involves crushing the base and then removing it. Moreover, in this case, tools with thin jaws (for example, pliers) may be required.
And the technique itself is associated with a high probability of damage to the cartridge, which is why such work should be performed with extreme caution
Considering all of the above, we can say that unscrewing a stuck lamp yourself is not so difficult, the main thing is to follow the standard recommendations.
Effective ways to unscrew a broken light bulb
When it was not possible to remove the light bulb safely, or it burst during operation, the task becomes more complicated. A base with the remains of broken glass sticks out of the socket. It is almost impossible to twist it by hand without cutting yourself. Improvised tools and various folk remedies will come to the rescue.
First you need to turn off the power to the room.
Ways to remove the base without removing the cartridge
You can, of course, try to do this with your bare hands, but it’s still better not completely “naked,” but using protective gloves. It will be possible to get out the remains of the lamp only if it was not screwed tightly before and did not stick.
It's better to use tools. The simplest and most reliable option is to use pliers. If you don’t have them on hand, even a plastic bottle or half a potato can help.
Using pliers or pliers
Ordinary pliers can help in this situation, but even better are thin-nose pliers, which make it easier to penetrate inside the structure. With such a tool it is much easier to grab any small elements, including the base.
Step-by-step instruction:
- It is better to beat off sharp remains of glass for ease of work.
- Clamp the base with thin-nose pliers and twist counterclockwise. In this case, it is necessary to hold the lampshade, it may come off.
- If it is not possible to unscrew the base, then its sides are pressed with the “lips” of the tool or a screwdriver.
Unscrewing the base.
If it is not possible to grab the base, you can try the reverse method. To do this, thin-nose pliers are inserted inside the structure and pulled apart
It is important not to damage the cartridge when performing work.
Plastic bottle method
If you don’t have the necessary tools at hand, a plastic bottle will help you unscrew the stuck base from the socket. Oddly enough, the diameter of the neck of a standard small bottle (volume from 0.2 to 3 liters) coincides with the diameter of the base.
Instructions:
- First you need to remove all remaining glass.
- Heat the neck of a plastic bottle until it begins to melt. At home, a candle is suitable for this.
- Insert the bottle into the base and wait until the heated plastic sets.
- After fixing it inside the base, you can begin to unscrew the remains of the lamp.
Using a bottle with a fused neck.
In general, the method is simple, but requires accuracy and a little preparation. Hands should be protected with gloves, long sleeves, and at least a newspaper should be laid on the floor. This will protect against hot plastic getting on your skin or flooring.
Application of potatoes
When there are no pliers or a plastic bottle in the house, you can take regular potatoes. The method will be effective only if there are sharp remains of glass sticking out of the light bulb. They will allow you to get hooked.
Procedure:
Large raw potatoes should be cut in half
It is important to keep the product dry for safety, so wipe it off. Place a potato on the sharp remains of glass so that they go deep enough. Start unscrewing the base.. Successfully unscrewed lamp.
Successfully unscrewed lamp.
Because of its structure, potatoes are suitable for this purpose; they are soft enough for the glass to fit into it, and dense enough not to be cut when twisted.
Wine cork
Using a cork plug, you can also unscrew the base; to do this, the plug is cut to its size and inserted inside. When scrolling, you can remove the base. You can also use a cork in a similar way to potatoes, string it onto the remaining pieces of glass.
Inserting the plug into the base.
Disassembling the cartridge
Carbolite cartridge of collapsible design.
The cartridge consists of two parts: a threaded connection and a core with contacts. First you need to separate the base. Use your hand or pliers to pull out the base. If the cartridge is not damaged, it can be collected and used again.
Alternative methods
In addition to the basic methods of removing the remains of a light bulb from the socket, there are several more methods:
- Use paper or fabric. The material is tightly twisted and inserted inside the cartridge, after which the structure is unscrewed counterclockwise.
- Scissors. The tool is inserted inside the base, its knives are straightened so that they rest tightly against the walls, then all that remains is to scroll.
- Special tool. The problem is so common that to solve it, a tool has been invented that can easily pull out the base. Additionally, its design has a protective “skirt” against falling fragments.
Special tool.
Don't forget about safety
Precaution is the most important step when working with electrical equipment. The following safety conditions must be observed:
- First of all, before carrying out work, you should turn off the power to the apartment. This is done by turning off a special toggle switch in the electrical panel.
- All work must be carried out with rubber gloves.
- Tools used for twisting must have wooden handles or be wrapped in electrical tape.
- It is advisable to first check the presence of voltage with a special tester. If the test result is positive and the indicator on the thin screwdriver lights up, you should call a technician, as this is caused by problems with the wiring.
- You need to collect all the pieces from the light bulb or put a bag on it before breaking it. Additionally, it is recommended to cover the floor with newspapers or film.
- Once the cartridge is removed, it must be cleaned and inspected for damage. If the device is not damaged, it can be installed back into the chandelier.
- After work, it is important to properly dispose of incandescent or halogen lamps. They consist of materials that are recycled or disposed of separately from other waste. LED lamps are disposed of along with normal household waste.
By following the instructions, you can independently remove the broken light bulb from the socket without any problems.
How to replace a cartridge in a chandelier (video)
Using this information, you can easily cope not only with electrical installation work, but also be able to quickly and efficiently repair a chandelier or lamp without calling an electrician.
One of the main components of a chandelier or lamp is an electric socket, through which not only the light bulb is fixed and current is transmitted to it, but also the lampshade and other elements for controlling the light source are attached.
The design of the product consists of the following elements:
- cylindrical body;
- internal threaded sleeve;
- ceramic insert;
- a pair of brass or copper contacts;
- bottom;
- fasteners.
The design of the product body eliminates the possibility of electric shock when screwing in the light bulb. This is due to the fact that when the central contacts touch, the base is inside the cartridge.
Safety rules when removing and replacing a light bulb
Working with electricity is unsafe, especially for a person without experience. You can always forget something by mistake or do it wrong. Therefore, before unscrewing and replacing light bulbs, you should adhere to the following rules:
- You definitely need to turn off the power to the room. If you plan to use liquid agents to corrode rust, it is better to first turn off the power and remove the lamp.
- All measuring and twisting tools should be at hand before starting.
- Screwdrivers, pliers and other tools must have rubberized handles.
Other materials are covered with electrical tape. It is safer to use tools with rubberized handles. - When screwing in light bulbs, the new element must be similar to the old one and be suitable for the lamp.
- Work must be carried out wearing rubber gloves and safety glasses.
Tip: how to unscrew a light bulb socket from its socket
Sometimes the light bulb base gets stuck in the socket and is difficult to pull out. If you unscrew the glass bulb, it breaks off and the metal part gets stuck. To remove it from there, you must first turn off the power to the chandelier or other lamp with which the problem occurred. In this case, it is better to turn off the light on the panel, especially if you are not sure that the switch opens the phase.
Next, there are at least two options:
- Insert scissors into the base and open them. The ends will rest against the threads from the inside. Applying force to open the scissors, scroll them counterclockwise.
- Use pliers to pick up the metal edge of the part, bend it slightly inward and, grasping it with pliers, unscrew the base.
Look at the video for another way to unscrew part of a broken light bulb using a plastic bottle:
Reasons for a light bulb to burst
House owners often have a question: why do light bulbs burst?
As a rule, there are always several answers:
- Periodic voltage drops in the electrical network;
- The life of the light bulb has expired;
- Mechanical deformation of the light bulb or socket when screwed into the lamp;
- Sudden changes in temperature;
- High humidity for which the device is not designed.
What to do if a light bulb bursts and it is not possible to immediately call an electrician? The answer is simple - unscrew the base with your own hands. These manipulations are simple, but caution must be observed when working with electrical devices.
Top 6 most effective ways
Before removing the base from the light bulb, you need to decide on the technique. If the lamp breaks, use 6 main methods to remove it. Each of them has its own advantages and disadvantages; the choice of the appropriate one is determined by the skills, convenience of the user and the availability of appropriate tools in the house.
For illumination, it is better to use a flashlight placed on your forehead. If the light bulb is removed from a table lamp or sconce, simply unplug it. If there are several machines installed in the apartment, you can turn off the power to a specific room and bring an extension cord from another with the lamp on.
Pliers or needle nose pliers
You can unscrew the burst part using pliers (pliers, thin-nosed pliers). The tool is selected taking into account ease of use; it is desirable that it be equipped with insulating handles. The following algorithm must be performed:
- carefully remove any remaining glass;
- grab the base body with pliers;
- start unscrewing the part;
- If you can’t reach the base, you can bend its side walls inward and start unscrewing it.
The method requires special care in execution. During operation, you need to hold the lampshade so that it does not fall off. The base may become deformed; the main thing is to ensure that the cartridge is not damaged. If you can’t pull out the element with pliers, you can take thin-nose pliers, place them inside the base and push the ends into the side walls. The part is unscrewed counterclockwise.
Scissors
If the lamp bursts, it can be removed using scissors. The technique is similar to the method of removing with thin-nose pliers. The scissors must be placed in the center of the base, straightened so that the blades rest against the edges of the component. Then you need to unscrew the base counterclockwise.
Plastic bottle
If you don’t have a special tool at home, you can separate the glass flask using a bottle. This is one of the simplest, most convenient and safest methods. The diameter of the bottle neck is sized to fit the common e27 base.
Before unscrewing the light bulb base, you need to:
- slightly melt the neck of the bottle with a lighter;
- insert the neck part into the base;
- press, wait;
- When the plastic has cooled and stuck to the base, you can unscrew the part.
It takes about 30-60 seconds to harden. This method allows you to safely remove the broken part without touching the cartridge.
You need to work with a heated bottle carefully, as drops of plastic can get on your skin. Additionally, you need to cover the floor with film.
Potato
You can get some of it out using plain potatoes. The method does not always work; you need glass remains sticking out of the base.
Action algorithm:
- cut raw dry potatoes in half;
- put half a potato on the fragments so that they cut into the pulp;
- unscrew the base.
Then the potato needs to be thrown away.
Unscrew the cartridge
Suitable for old carbolite cartridges. This method is not valid for ceramic chandeliers. The carbolite cartridge consists of two halves of a threaded connection and a ceramic core. These parts need to be disassembled.
Procedure:
- a base is screwed to the half with a metal sleeve, the base should be separated from it;
- The base is unscrewed using thin-nose pliers.
After removing the base, the cartridge is put back together. It can be used again.
Cork
A wine cork stopper can also be used to remove the cap. It is first cut to fit the size of the base. Then it is installed in the base and unscrewed along with the stuck parts of the lamp. It is convenient to use this method if there are still pieces of glass on which you can attach the cork.
Method #2 – plastic bottle
Another life hack that will help us deal with a broken light bulb is an ordinary plastic bottle. Its neck fits perfectly into the base.
In order to unscrew a broken light bulb, you need to slightly melt the neck of the bottle with matches or a lighter, place it in the remaining base and wait a while.
After the plastic hardens and is soldered to the base, begin to unscrew the resulting structure. It takes about 10-15 seconds for the plastic to melt and harden.
This method will help to guarantee the preservation of the socket and quickly remove the remains of the damaged light bulb from it. The risk of electric shock is minimal here.
Unconventional methods
Non-traditional or “folk” approaches to removing a broken light bulb include the following two methods.
We use a regular cork
To remove a broken light bulb, you can use a plug of a suitable size (if you have one on your household).
Please note:
It must be soft enough for glass shards to easily enter its body (photo below).
The sequence of actions in this situation is quite simple; it comes down to pressing the plug into the base (completely capturing the glass fragments) and trying to unscrew it counterclockwise. If you fail to do this the first time, you should try again.
Or a plastic bottle
It turned out that the neck of the plastic bottle was the perfect size for the lamp base. To use it for the stated purposes you will need to do the following:
1. First, the neck of the bottle melts a little on the flame of a lighter, and then is brought to the base (photo below).
2. Then the heated part is inserted into it, after which a short exposure is made.
3. As soon as the plastic has cooled, you should begin to unscrew the lamp base (as was done in the previous case).
In conclusion, we note that in all the situations considered, you need to act carefully, trying not to damage the cartridge that is still serviceable.
Crafts from incandescent lamps
Let's look at examples of using an incandescent lamp. Many decorators use an old lamp to make a mini-terrarium. Some DIYers have learned to convert a standard lamp into an economical LED lighting device.
Original mini-terrarium made from a light bulb
First, the light bulb is prepared. Having taken out the contact, split the black insulation and pull it out. Using a flathead screwdriver, peel off the inner structure and then remove it. An empty flask with a base and a smooth, neat hole remains in your hands.
Next, you can take a beautiful stone or make a twisted stand from wire. In the first case, hot melt adhesive is applied to one of the faces at four points and a light bulb is glued. Now you can start decorating.
Ordinary forest moss is used as a filler for the terrarium. To this you need to add some soil and tree bark. To ensure that all this is inside, a cone is made from paper and inserted into the hole. A drainage of small pebbles is poured onto the bottom of the lamp, and a layer of sand is placed on it.
Carefully level everything with a stick and add soil. Then they take tweezers and use them to lay the plants. Water is drawn into a syringe with a needle and “watered” the planted area. Now the hole needs to be closed. To do this, you can use an acorn cap or a cork cut from a branch.
The terrarium is hermetically sealed, but it continues to consume carbon dioxide, produce oxygen, and circulate water. It's a kind of small planet with its own climate
Its own microflora is formed inside. Plants continue to grow and develop.
Making an LED lamp
Some home craftsmen make their own LED lighting devices based on incandescent lamps.
To do this, heat the soldering iron and remove the solder at the lowest point of the base. Next, the insulation is cracked, the internal filling is removed and the hole is expanded to the maximum.
Three LEDs are connected in parallel. A resistor is soldered to the “plus” of each of them. Since the resistance value depends on the power source, its value may be different. Two wires are connected to the circuit to supply voltage.
Thus, with a little effort, you can modernize a regular incandescent lamp by converting it into an LED one. In addition to the satisfaction of a job well done, you will also receive cost savings.
The structure is inserted into the hole and carefully straightened to prevent the wires from connecting to each other. The wires are brought out through the hole in the base. Connect the lamp to a constant voltage to check its functionality. Then the base is soldered.
How to avoid such troubles?
To reduce the risk of a problem, it is recommended to install lamps that match the power parameters of the lamp. When using products with increased power, intense heat generation occurs, leading to deformation of the cartridge and base. The increased current promotes sparking at contact points, which further increases the risk of parts burning. To reduce sparking, you need to screw the lamp base tightly into the socket.
For luminaires installed in damp rooms, it is recommended to treat metal parts with a special compound that repels moisture. It is allowed to use a pencil lead, which is used to rub the surface of the base and the metal part of the cartridge. It is recommended to remove traces of corrosion or replace parts, since rusted elements impair contact and contribute to the burning of parts.
If the lamp uses a light source with the bulb filled with inert gas, then install the lamp while wearing gloves. Oiling the flask leads to uneven heating of the glass and destruction due to thermal stress.
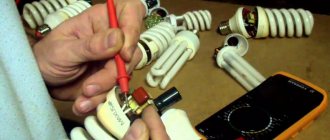
Safe work with fluorescent lamps
CFLs can be disassembled, but not for the purpose of further use for crafts, but only if you need to repair the launcher. It is better not to touch the bulb of a fluorescent lamp at all, since you need to stay away from toxic mercury vapors.
The wires coming from the lamp filament to the board are sometimes not soldered to the latter, but wound onto special pins
This lamp consists of five parts:
- U-shaped or spiral flask;
- the upper component of the body with the bulb attached to it;
- an electronic board with a ballast mounted on it;
- lower housing element with electronic ballast placed in it;
- plinth - together with the bottom of the case, this is an integral structure.
To disassemble and access the launch controller, use a flat-head screwdriver with a wide tip. With its help, the housing latches are disconnected one by one. To perform the operation, you need to insert the tool into the groove and turn it.
This is not so easy to do. After prolonged use, accompanied by constant heating, the plastic loses volatile substances and becomes hard. The latches themselves often break during the disconnection process.
The lamp opening line is located in the place where the technical parameters of the device and the name are written. The base of the flask is also located here.
If the constipations do break, they are simply cut off with a sharp tool or sawed off. To do this, you need to arm yourself with a small disk cutter. You can buy it or make it yourself.
First, measure the circumference of the body with a caliper. Then a pin with a cutter is inserted into the chuck of the drilling machine. This is done in such a way that the latter is above the frame at a height equal to ½ the diameter of the lamp body.
The drilling equipment is turned on, the lamp body is pressed against the cutting tool and the outer part of the body is carefully cut. Similar cuts are made at intervals of 1.5 cm along the entire contour
A screwdriver with a thin rod is inserted into the slots and the cuttings are lifted. Then take a screwdriver one size larger and open the housing of the lighting fixture.
Next, check the lamp bulb for serviceability. Why take a multimeter and check the conclusions in pairs. Resistance within 15 ohms is considered normal. If everything is normal, they conclude that the ballast module is faulty.
If the filament breaks, the ballast may still be operational. In this case, the flask is disposed of, and the working device is used as a spare part.
If there is a fuse in the control circuit, it may blow. The issue is resolved by installing a resistor with a resistance of several ohms in its place.
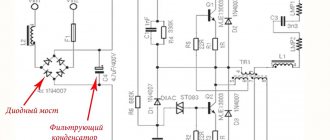
Burnt elements on the electronic board are visible to the naked eye. Based on the power of the lamp, this could be one or a pair of resistors, transistors or swollen capacitors (+)
If only one filament has burned out, it can be shunted with a resistance, but this will result in an overload of the ballast. Such a restored lamp will not be able to work for a long time - a year maximum.
Once the repair is complete, the two halves of the lamp are simply glued together. To simplify the reconstruction process, the product is sometimes heated using a hair dryer.
If the lamp cannot be repaired, it must be disposed of. Read about where to dispose of used fluorescent lamps in this article.