When unscrewing from the base, the light bulb may burst. In some cases, the base may remain inside and be difficult to remove.
This may be due to oxidation and rust in the inside of the cartridge, due to manufacturing defects, sudden voltage surges, poor quality products and other reasons.
You can remove the stuck part from the chandelier using several proven methods, using which even a person without experience can remove the base.
It is important to follow safety precautions when working and turn off the electricity, otherwise there is a risk of electric shock.
Top 6 most effective ways
Before removing the base from the light bulb, you need to decide on the technique. If the lamp breaks, use 6 main methods to remove it. Each of them has its own advantages and disadvantages; the choice of the appropriate one is determined by the skills, convenience of the user and the availability of appropriate tools in the house.
Important! Before removing a broken light bulb from a chandelier, be sure to turn off the power in the room.
For illumination, it is better to use a flashlight placed on your forehead. If the light bulb is removed from a table lamp or sconce, simply unplug it. If there are several machines installed in the apartment, you can turn off the power to a specific room and bring an extension cord from another with the lamp on.
Pliers or needle nose pliers
You can unscrew the burst part using pliers (pliers, thin-nosed pliers). The tool is selected taking into account ease of use; it is desirable that it be equipped with insulating handles. The following algorithm must be performed:
- carefully remove any remaining glass;
- grab the base body with pliers;
- start unscrewing the part;
- If you can’t reach the base, you can bend its side walls inward and start unscrewing it.
The method requires special care in execution. During operation, you need to hold the lampshade so that it does not fall off. The base may become deformed; the main thing is to ensure that the cartridge is not damaged. If you can’t pull out the element with pliers, you can take thin-nose pliers, place them inside the base and push the ends into the side walls. The part is unscrewed counterclockwise.
Scissors
If the lamp bursts, it can be removed using scissors. The technique is similar to the method of removing with thin-nose pliers. The scissors must be placed in the center of the base, straightened so that the blades rest against the edges of the component. Then you need to unscrew the base counterclockwise.
Plastic bottle
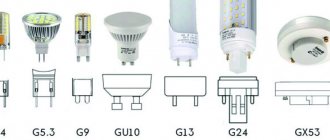
If you don’t have a special tool at home, you can separate the glass flask using a bottle. This is one of the simplest, most convenient and safest methods. The diameter of the bottle neck is sized to fit the common e27 base.
Possible causes of the explosion
It is possible that short, but at the same time, powerful power surges occur in the network. Most often, this can occur in newly built houses, where electricians install a network with excess voltage. A regular 220W lamp may not hold up. The result is overheating and increased pressure, provoking an explosion.
Therefore, it is better to purchase 240W. If you use halogen lamps, you should be careful when buying Chinese-made ones, as they are mostly sold of poor quality with uneven, damaged bases and defective glass bulbs. Incorrectly selected lamp and poor contact with the socket. Lack of fuse in the bulb. Increased humidity in the room. Sudden changes in temperature. Most often this happens with simple tungsten filament lamps. Old switches that are unable to reduce the voltage to the lamp when it is turned on
In this case, replace them with rheostatic ones.
What to do if the light bulb is stuck in the socket
When gluing the base and the cartridge, you will have to unscrew the entire product. When the lamp gets stuck, you can break the glass bulb and use the methods described above. It is important that the fragments do not scatter throughout the house. To do this, before breaking, you need to place a container under the lamp. You also need to ensure that the cartridge is not damaged, otherwise it will not be usable.
You can use WD-40 or KONTAKT spray to remove the light source from a removed chandelier. This method is not applicable to a lamp mounted on the ceiling due to its danger.
LED lamp from incandescent lamp
- Remove the solder on the bottom contact of the incandescent lamp base by melting it with a soldering iron.
- Use needle nose pliers to break the black glass that serves as insulation.
- Use a screwdriver to remove the glass stem and remove everything from the lamp. Enlarge the hole as much as possible.
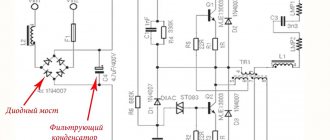
- Solder a circuit of three LEDs by connecting them in parallel and adding a 56 Ohm resistor to each. The resistor is soldered to the “+” of the LED (Fig. below a). The resistance value may vary as it depends on the power source.
- Solder two insulated voltage supply wires to the circuit.
- Insert the resulting structure into the hole in the base and carefully unfold it inside the light bulb so that the wires do not short-circuit with each other.
- Remove the power wires from the hole in the base.
- Check the serviceability of the light bulb by connecting it to a constant voltage source (Fig. b).
- Fill the base inside with hot glue using a gun and let it harden.
This way you can make a cheap and economical LED lamp, because the cost of the finished model is high, and low-quality products are often found.
How to prevent the problem
To prevent such a situation when you need to select a method for removing the base, it is recommended to comply with the following requirements:
- install only lamps of suitable power in the socket;
- secure the light bulb tightly into the socket, but do not press it all the way;
- You can first coat the thread with graphite;
- do not buy cheap products from unknown manufacturers;
- work with gloves so that no greasy marks remain on the lamp;
- Monitor voltage surges in the apartment, install additional stabilizers if necessary.
Following these simple rules will help prevent your light bulb from breaking or exploding.
Main conclusions
A broken light bulb requires additional effort to remove it from the socket.
The procedure can be carried out in several ways - using a plastic bottle, a potato, special devices and other effective methods.
The choice depends on the type of breakdown, the availability of tools in the house and the type of product.
During operation, turn off the electricity, wear safety glasses and gloves, and follow safety rules.
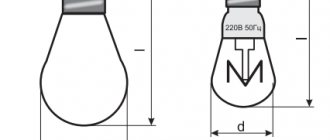
Usually the base is attached to the glass bulb with special glue. Over time, the glue begins to crumble, so if the light bulb is old, then with a little force when turning the base it begins to spin and comes off easily. If this does not happen, then do not despair, you can try another method. Take a thin screwdriver or a strong knife and carefully bend a small section of the base at the junction of it with the bulb. Next, use paastijas to pick up the bent part and tear off a strip of the base. Then everything is simple, crumble the remaining glue and remove the remains of the base. It is important to remember safety precautions during this work, because the work is done with glass, and it has the ability to break.
I won’t ask why you need this, but I’ll just note that it’s best to separate the glass bulb from the light bulb and use it for further making souvenirs.
It is worth noting that there are light bulbs in which the base comes off quite easily, but there are also those where it is almost impossible to separate it.
This work is quite painstaking; between the base and the glass of the light bulb there is a special glue on which the bulb is installed in the factory. This glue from some manufacturers is of rather poor quality, so choose light bulbs where this glue crumbles well.
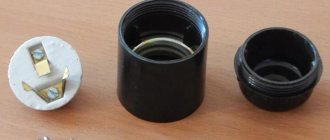
Don’t try to remove the base right away, you need to crumble the glue well, to do this, make yourself a scraper out of natfel, just cut it at an angle at the end and saw something like a hook on the grinder’s cutting wheel. This hook is best for crumbling glue.
After you have crumbled a lot of glue, wrap the glass in a rag that can protect your hand in case the glass breaks, and try to rotate the base with your other hand; if that doesn’t work, then continue crumbling the glue until the base starts to wobble.
As a rule, when it starts to wobble a little, more and more glue spills out with each movement in a circle.
There is not much glue left on the glass; it can be easily cleaned off with a file or sandpaper, and from the cartridge side you can continue to crumble it with any metal object.
«>
Don't forget about safety
Precaution is the most important step when working with electrical equipment. The following safety conditions must be observed:
- First of all, before carrying out work, you should turn off the power to the apartment. This is done by turning off a special toggle switch in the electrical panel.
- All work must be carried out with rubber gloves.
- Tools used for twisting must have wooden handles or be wrapped in electrical tape.
- It is advisable to first check the presence of voltage with a special tester. If the test result is positive and the indicator on the thin screwdriver lights up, you should call a technician, as this is caused by problems with the wiring.
- You need to collect all the pieces from the light bulb or put a bag on it before breaking it. Additionally, it is recommended to cover the floor with newspapers or film.
- Once the cartridge is removed, it must be cleaned and inspected for damage. If the device is not damaged, it can be installed back into the chandelier.
- After work, it is important to properly dispose of incandescent or halogen lamps. They consist of materials that are recycled or disposed of separately from other waste. LED lamps are disposed of along with normal household waste.
By following the instructions, you can independently remove the broken light bulb from the socket without any problems.
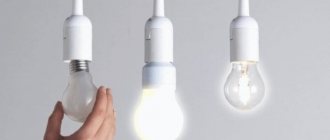
Replacing the LED lamp
When working with lighting devices, the first thing you need to do is turn off the power to the apartment. To do this, turn off the required element in the power supply branch
Do this with due care and caution, following safety rules. It is also better to take a chair and any other stand with which it will be convenient for you to do your work. Be careful with the stretch ceiling fabric, any sudden movement can damage it
Now proceed to directly replacing the lamp
Be careful with the stretch ceiling fabric; any sudden movement can damage it. Now proceed to directly replacing the lamp.
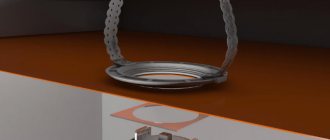
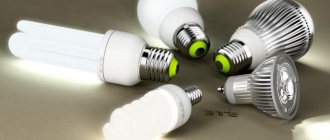
To begin, unlock the lamp in the mounting system. A special fixing ring is responsible for this. Be careful, the ring can easily slip out of your hand. Next, slowly unscrew the old lamp. Inspect it and select a new lamp with the appropriate characteristics: size and power. After replacing the lamp, return the retaining ring to its place and secure it in proper condition.
Here are some tips on how to remove a light bulb from a stretch ceiling:
- If the ceiling requires the installation of LED lamps, but you definitely don’t have enough power, use a little trick: instead of the usual, standard yellow color, buy white. With this simple replacement you will increase the brightness of the lightening without affecting the power consumed.
- To achieve a harmonious effect of transmitting light into the suspended ceiling of one room, it is better to mount lamps of the same model. This way you will get an aesthetic and attractive appearance. If for any reason you cannot find the lamp you need, replace everything in the room. To do this, always purchase a couple more light bulbs so that you can quickly replace them at the right time.
- To make the lamp last longer, do not screw it into the lamp with your bare hands. Use gloves or a dry cloth.
- Do not forget that a suspended ceiling will not withstand an overly powerful lamp. It is better to purchase it with a power of no more than 35 W to avoid possible damage to the material.
