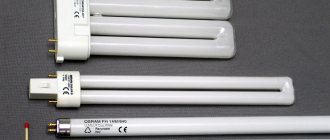
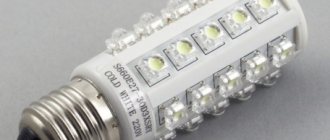
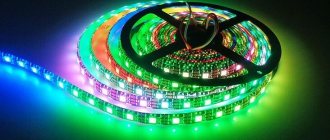
Unlike conventional incandescent lamps, semiconductor ice lamps consume much less electricity and are therefore classified as economical. At the same time, the durability of their operation for some models of illuminators increases several times. Samples of modern models of LED ice lamps can be found in the figure below.
Samples of LED lamps
The circuit of a 220 V LED lamp is designed in such a way that the voltage at its output is reduced by the driver to the required value, which, as a rule, does not exceed 1.8-4.0 Volts (on each LED).
Operating principle of LED lamps
An LED light bulb is a semiconductor element containing several layers responsible for converting the current flowing through them into visible light.
Important! When the composition of this layer changes, radiation of a certain color (red, green, yellow or blue) is generated in it.
Since LED bulbs need to produce pure daylight, their designers had to use a little trick of coating the blue emitter with a yellow phosphor. In this design, under the influence of photons in the blue range, the yellow phosphor begins to emit its own colorless radiation.
External power supplies not included in delivery
When buying an external power supply, you need to know that it will achieve maximum efficiency at 80% of the rated power. To obtain the optimal value, it is necessary to multiply the power of the LED light source by 1.2-1.15 (safety factor).
If a unit is purchased with the expectation that additional light sources will be connected to it in the future, then the power of the lamps that will be connected immediately should be 1.2 times less than the minimum load of the power supply unit. Otherwise, when turned on, the idle speed protection will work.
It is advisable to connect the external unit even to those lighting fixtures that have built-in drivers. The degree of protection of the power supply is also important. If the lamp is installed outdoors or in a room with high humidity levels, protection level IP65 will be required. You should not overpay if the lighting system is installed in a heated residential area.
Types of LEDs
Due to different approaches to assembling semiconductor chips, it was possible to create the following types of LED emitters:
- DIP - LED lamps made on the basis of a crystal with a lens placed on top and two lead conductors. This option is the most common in practice and is used to organize lighting in various lighting devices;
- The so-called “Piranha”, partially reminiscent of the previous design, but having four terminals. Increasing the number of contacts increases its reliability and improves heat dissipation (see figure below);
Piranha lamp
LED lamp repair
Additional Information. Such LEDs are mostly used in the automotive industry.
- SMD LED emitters can be placed on flat surfaces, due to which it is possible to reduce the dimensions of the lamp and also improve heat dissipation properties. They are available in a wide variety of designs and are used in modern light sources;
- Products manufactured using COB technologies, according to which the chip is soldered directly into the board. Due to this device, the semiconductor ice junction is reliably protected from oxidation and overheating. At the same time, the intensity of the diode glow increases significantly.
Note! The peculiarity of the above versions is that if the LED burns out, it will have to be replaced completely, since it is impossible to repair these products by replacing a separate chip.
Another disadvantage of such LEDs is their small size, which forces them to be assembled in groups of several pieces. In addition, the crystal built into them gradually ages, as a result of which the brightness of the ice emitter decreases over time. Next, we will consider the design of a 220V LED lamp.
How to disassemble
Repairing an LED light bulb begins with disassembling it. There is no vacuum in it, so this is possible. The diffuser and base can usually be separated without problems. They are connected using notches on various parts.
Most parts of the LED lamp are held on by clips
There are two options. Easier to disassemble and more complex. In a simple case, the lamp parts are connected only by mechanical latches. In the more complex one, in addition to the latches, there is also silicone, which ensures the waterproofness of the lamp. Such specimens can be used at high humidity. You need to disassemble the LED lamp as follows:
- Hold the base in your hands and turn the radiator counterclockwise. The diffuser is removed in the same way.
- In some LED light bulbs, the connections are filled with silicone. In this case, turn, don't turn, nothing moves. If you look closely, you can see the sealant. In this case, a solvent is needed. You draw it into a syringe (without a needle or with a thick needle), carefully inject the liquid around the perimeter. You need to hold it for 5-10 minutes, and then try again. It is usually not possible to disassemble an LED light bulb the first time, but three or four passes help.
The boards inside the lamp are either inserted into slots or are also held in place with latches. It’s easier to push them away with a flat-head screwdriver while simultaneously pushing the board up. The effort should not be excessive, as the latches are plastic and may break.
LED diode device
Learning to control LED strip
The design of a 220-volt LED lamp is not very complicated and can be considered even at the amateur level. A classic 220-volt LED lamp includes the following required elements:
- Load-bearing body with plinth;
- Special diverging lens;
- Heat dissipating radiator;
- LED module;
- LED lamp drivers;
- Power unit.
You can familiarize yourself with the structure of a 220-volt LED lamp (SOV technology) in the figure below.
Structure of an LED illuminator
This LED device is manufactured as a single unit and contains in its design a large number of homogeneous crystals, which are soldered during assembly to form numerous contacts. To connect it to the driver, it is enough to connect only one of the contact pairs (the remaining crystals are connected in parallel).
These products can be round or cylindrical in shape, and they are connected to the network using a special threaded or pin base. For a public LED system, as a rule, luminaires are selected whose color temperature is 2700K, 3500K or 5000K (in this case, the spectrum gradations can take any value). Such devices are often used for decorative purposes and for lighting advertising banners and billboards.
Let's look at the individual LED lamp modules in more detail.
Driver
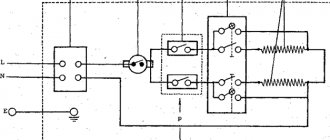
In a simplified form, the driver circuit used to power the lamp from a 220 Volt network looks like it is shown in the figure below.
Simple driver circuit
The number of parts in this device, which performs the matching function, is relatively small, which is explained by the peculiarities of the circuit design. Its electrical circuit contains two quenching resistors R1, R2 and LEDs HL1 and HL2 connected to them in a back-to-back manner.
Additional Information. This inclusion of limiting elements ensures that the circuit is protected from reverse surges in the supply voltage. In addition, as a result of such switching on, the frequency of the signal received by the lamps doubles (up to 100 Hz).
The mains supply voltage with an effective value of 220 Volts is supplied to the circuit through the limiting capacitor C1, from which it is supplied to the rectifier bridge, and then directly to the lamp.
On a note. The simplicity of the matching device (driver) circuit allows for the possibility of repairing it yourself.
Power supply
A typical LED lamp power supply circuit is shown in the figure below.
Power module diagram with driver
This part of the lighting device is made in the form of a separate block and therefore can be freely removed from the housing (for the purpose of repairing it yourself, for example). At the input of the circuit there is a rectifying electrolyte (capacitor), after which ripples with a frequency of 100 Hertz partially disappear.
Resistor R1 is necessary to form a capacitor discharge chain when the circuit is disconnected from the power source.
Major PSU manufacturers
Theoretically, the power supply should be supplied with the lighting fixture. In practice, this does not always happen. If the power supply is not included in the package, you need to buy products from companies specializing in these products (Trion, Argos-Electron, Meanwell, etc.).
on the market since 2012, ranks third in the country in terms of production volume, 1.5 million modules sold, failure rate only 0.2%. The production of power supplies for LED lighting devices in this company is one of the main activities. Finished products are tested and tested using methods developed by in-house engineers. Quality is controlled at all stages of production.
Argos-Electron from St. Petersburg has been on the market since 2008. This is one of the leading manufacturers of components for lighting systems with LED light sources. Argos-Electron produces drivers for industrial, street and office lamps, lighting devices for housing and communal services. Finished products are tested with LED simulators, in heating cabinets and thermal chambers.
Meanwell Founded in 1982, supplies switching power supplies. Offers approximately 5 thousand standard models for LED lighting automation. Products are subject to strict control at all stages of production, starting from project development and selection of components.
The Helvar brand offers isolated and non-isolated switching power supplies, controlled and uncontrolled drivers. A wide range allows you to create simple local and large-scale LED lighting systems.
The Vossloh-Schwabe company (divisions of the Panasonic Group) produces power supplies, drivers, control systems for lamps and strips installed indoors and outdoors. The equipment is supplied complete. The production uses modern equipment and advanced technologies.
DIY repair
Aluminum profile for LED strip - a laconic solution
If a simple LED illuminator made from individual LED elements fails, you can repair it yourself. Self-repair of LED lamps and devices, the electrical circuits of which were discussed earlier, comes down to simply replacing faulty units and parts.
The body of the product can be easily disassembled after it is carefully separated from the base part. Inside the structure there is a board with working LEDs, the number of which differs for different models (see photo below).
Disassembling the LED lamp
Note! For the widely used lamp model “MR 16”, for example, the total number of LEDs is equal to 27 1.5 volt elements.
In order to gain access to the printed circuit board with the diodes placed on it, it is enough to remove the protective glass lens by carefully prying it off with a well-sharpened screwdriver.
After disassembling the housing of the LED product, you will need to take the following steps:
- Previously detected faulty (non-luminous) diodes will need to be replaced after additional testing. To assess their serviceability, you should use a measuring device (multimeter) turned on in the “Dialing” mode;
Additional Information. You can check the serviceability of the remaining elements that this electrical circuit contains by applying a voltage of 1.5 to 2.5 Volts to them (serviceable diodes should light up when this potential is applied).
- When testing with potentials of more than 5 Volts, a limiting resistor with a nominal value of about 4.7-5.1 Kom is switched on in series with the element being tested;
- If all the diodes installed on the board are working properly, but constantly flicker when lit, the cause of this may be a “breakdown” of capacitor C1.
In order to verify this, you should check its rated capacity with the same multimeter (you can find out how to do this in the instructions for use of the device). Another approach to solving this problem involves simply replacing the capacitor with another, known-good element, designed for a voltage of at least 400 Volts.
Structural assembly diagram
How an LED lamp will work directly depends on the manufacturer and price of the product. Differences can be seen if you remove the diffuser
First of all, you should pay attention to the quality of soldering of chips, as well as connecting wires. Cheap light bulbs last less than high-quality and expensive ones
Low quality Chinese light bulbs
When purchasing a light bulb for no more than $3, you should not count on a symmetrical arrangement of LEDs on the board. This suggests that the soldering was done manually and in a hurry, and the wires were selected with a minimum cross-section. There will be no reliable driver here either. Instead, a transformerless circuit with a rectifier and a capacitor is implemented.
Diagram of a Chinese light bulb.
If you have to diagnose and then repair lamps of this type, you must adhere to special safety precautions. Each element that is part of one circuit may be under voltage that is dangerous to humans. If you accidentally touch one of the live parts, you may receive an electric shock. The same thing can happen if the multimeter probe accidentally slips and causes a short circuit.
Branded LED lamps
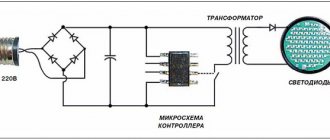
Expensive and high-quality light bulbs have a pleasant appearance, but this is not all the advantages. The quality of the element base will be significantly higher than that of a Chinese analog purchased at a low price. The installed driver is complex. One of the ways to assemble it involves installing a pulse transformer, as well as a current converter, which further stabilizes the resulting load.
High quality LED lamp.
The transformer may not be installed. The main load will be directed to the microcircuit that stabilizes the input voltage, which:
- has a negative feedback system;
- possibility of dimming;
- maintains current with a specified pulse width.
Circuit without transformer.
By choosing a high-quality 220 V LED light bulb with a current driver, the buyer receives a device protected from interference and surges in the network that meets the characteristics specified in the passport. The radiator installed here will ensure rapid heat dissipation. This light bulb will last more than 5 times longer than a cheap Chinese one.
Making your own lamp
Making an LED-based illuminator with your own hands, as they say, “from scratch” is a troublesome task and not suitable for everyone. It’s easier to do this by using an old lamp of a similar type that has already spent its life.
In this case, a homemade LED lamp will be assembled from new elements, soldered onto a board removed from the old device or repaired. If there are working diodes left on it, you will need to replace the burnt elements with new ones (preferably of the same type and design).
Note! When manufacturing branded lamps, for reasons of profitability of sales, the operating current of individual LEDs is selected with an extremely high value. When remaking such a device, it is advisable to solder a limiting resistance of about 1 Kom in series with each element.
If necessary, to make a lamp with your own hands, you can use an old board with a driver circuit, replacing all the faulty parts in it.
In the absence of the necessary boards and parts, the driver can be manufactured based on the above-mentioned circuit of the power supply combined with the converter (see the figure above). When modifying, another resistor should be added to it (let’s denote it as R3), used to discharge capacitor C2. The result will be the diagram below.
Homemade driver circuit
In addition to the resistor, two standard zener diodes (VD2, VD3) are added to it, providing its bypass when the load circuit is broken.
Additional Information. If you correctly select the stabilization voltage of the limiting diode, it will be possible to get by with one zener diode.
This driver device circuit is designed to connect 20 colorless LEDs of a certain type. If their class or total number is different, the value of capacitor C1 should be changed so that the load current in the diode circuit is at least 20 mA. Its specified value guarantees sufficient brightness of the glow of these devices.
As a rule, a unit that does not include a bulky transformer element is used as a circuit supplying the driver (this connection is called “direct”). The absence of a transformer significantly simplifies the assembly of the module and reduces its size.
Important! But in this case, there is a real threat of high voltage reaching the output of the circuit (in the event of a breakdown of a number of series-connected elements, for example). The only consolation is that this happens extremely rarely.
In the final part of the review, we note that the circuit diagrams of most of the LED products on sale are almost no different from one another. Certain differences are observed only in the type of components used in them, as well as in the method of generating the output voltage carried out by the driver.
Let's add to this that LED lamps equipped with special drivers are reliably protected from voltage fluctuations in the network, and the radiator included in their composition protects the product from overheating. The use of independently manufactured modules due to their additional modification can significantly extend the service life of lighting devices assembled on their basis.
Necessary materials and tools.
In order to assemble a homemade driver, you will need:
- Soldering iron with a power of 25-40 W. You can use more power, but this increases the risk of overheating of the elements and their failure. It is best to use a soldering iron with a ceramic heater and a non-burning tip, because... a regular copper tip oxidizes quite quickly and has to be cleaned.
- Flux for soldering (rosin, glycerin, FKET, etc.). It is advisable to use a neutral flux - unlike active fluxes (phosphoric and hydrochloric acids, zinc chloride, etc.), it does not oxidize the contacts over time and is less toxic. Regardless of the flux used, after assembling the device, it is better to wash it with alcohol. For active fluxes this procedure is mandatory, for neutral ones - to a lesser extent.
- Solder. The most common is low-melting tin-lead solder POS-61. Lead-free solders are less harmful when inhaling fumes during soldering, but have a higher melting point with lower fluidity and a tendency to degrade the weld over time.
- Small pliers for bending leads.
- Wire cutters or side cutters for cutting long ends of leads and wires.
- Installation wires are insulated. Stranded copper wires with a cross-section of 0.35 to 1 mm2 are best suited.
- Multimeter for monitoring voltage at nodal points.
- Electrical tape or heat shrink tubing.
- A small prototype board made of fiberglass. A board measuring 60x40 mm will be sufficient.
PCB breadboard for quick installation.
