- home
- Switches and sockets
When you come to a construction store, you can see 2 categories of sockets: with and without grounding. This causes some difficulties with the choice, because... a person far from electrical engineering may not know the basics of connection.
Why this is necessary and for what purposes a PE contact is needed - you will find out in this article.
First, let’s answer the question “Why do you need to ground your computer at all?”
Grounding the metal case of the system unit reduces the risk of static electricity damaging the internal components of the computer. Static electricity, as is known, can reach several kilovolts, and you don’t need to be a great specialist to understand that such a discharge can damage the electronic components of a computer and disable it.
Well, God be with them, with the elements - take care of your loved one. An ungrounded metal computer case can itself turn into a source of electric shock, and this is a direct threat to your health. In addition to the two obvious negative consequences listed above, there is one more, not immediately noticeable, but no less dangerous - electromagnetic radiation. Headaches, fatigue - this is a small list of the consequences that an ungrounded computer system unit can cause.
If the network is three-phase, then the problem is aggravated by the fact that the potential difference that occurs, for example, between office computers connected to different phases, can exceed 100 Volts. If for the human body such impacts usually pass without major negative consequences, then, for example, a modem may not withstand such a test.
By the way, not everyone knows that almost all network filters are designed for a grounded socket, that is, without grounding, these will not be filters, but simply extension cords, and they will no longer protect the computer from voltage surges. Although, to be completely objective, even with grounding, such filters often do not save the computer from voltage surges.
Is it possible to protect against leakage current
Is it possible to protect against leakage current through the body, which can appear at any moment? The worst thing is that it is impossible to predict such a situation - voltage on the device casing can appear at any second. Water spilled on a coffee maker or meat grinder, vibrations, electrical breakdown of poor-quality insulation, failure of electrical circuit elements - all this is unpredictable and at the same time deadly. There is only one way out - to create a protection system that will be constantly on alert. And such a system exists, and its name is grounding.
Household methods for checking the presence of grounding
If it is clear why grounding is needed in an outlet, then the question remains of how to find out whether it works - after all, in practice, the zero in the network is always grounded and, in fact, the connection goes through the same wire. Here you need to understand that in some cases grounding is an additional zero, but if possible with less wire resistance. It is also necessary to take into account that the wiring in the apartment can be done correctly, but if there are no separate terminals for grounding on the access panel, then the wire may be left unconnected until a separate grounding bus is installed in the house.
For the simplest test, you need a voltage indicator or tester, a test light and a screwdriver.
Visual inspection
The first thing you need to look at is the design of the sockets in the house - they may only have two holes for a plug or with additional contacts.
In the first case, it is clear that the design of the sockets themselves does not provide for grounding. The second is that connecting protection to them is possible in principle, but whether it actually exists needs to be checked additionally.
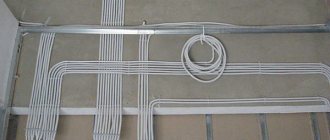
Next, the outlet itself is disassembled - here you need to look at how many wires come out of the wall and what color they are. According to standards, the phase is connected with a brown (black, gray, white) wire, zero with blue, and grounding with two-color yellow-green. In older homes, this may simply be two or three wires of one color. If only two wires are used, then this clearly indicates a lack of grounding. If three wires come out, then additional testing will be required.
Useful video on the topic
A lot of interesting information is in the video.
Leave a comment Cancel reply
Related Posts
What is a Legrand pass-through switch, features of its connection diagram.
Retro sockets - design element or functional detail? A remote controlled socket is an indispensable help at home
What features does the Legrand switch have and how can you connect it?
Rules for grounding devices
To ground devices, specially designed sockets with grounding contacts are required. Such sockets have a grounding point for the device. If the grounding wire is intended to be connected directly to the housing, the grounding designation is indicated on the devices with a special sign.
Figure No. 3. Socket with grounding contacts
A three-wire wire needs to be connected to the outlet. Modern cables used for wiring have three wires, which are marked in different colors for identification. The neutral wire is painted blue, the phase wire brown or black. The third conductor is grounding, can be yellow, green or two-color (yellow + green).
Figure No. 4. Cable with grounding conductor
With three-wire networks in an apartment, phase, neutral and ground must be taken in the distribution box related to the line of sockets. Grounding of devices, in the case where the wiring is two-wire, is done slightly differently. With two-wire networks, when there is no grounding wire, it is drawn from the electrical panel. It should be taken into account that the cross-section of the copper grounding conductor should not be less than 2.5 mm. It is strictly forbidden to use water and gas pipes, or central heating pipes as a grounding conductor.
Connecting correctly
Before installation, you need to determine what type of wiring is in the wall. This step requires removing the old outlet, which will expose the number of wires. If there are only two wires, there is no grounding, and we see only the neutral wire, as well as the phase.
For correct connection, all stages of work must be followed:
- Turn off the power supply at the panel;
- Carefully inspect the panel and make sure that the electricity is turned off;
- Next, using a special indicator (the so-called indicator screwdriver), you need to make sure that there is no phase on all 3 wires, or more precisely on their bare parts;
- Unscrew the screw on the body, loosen the tabs, remove the old product;
- If the socket box is in poor condition, it can be cleaned or replaced with a new one;
- Remove the external insulation;
- We clean the ends of the wires.
- Connect the cables to the socket and tighten the screw;
- We connect the third cable to the socket - grounding to the terminal marked as “PE” or with a special sign:
- We fix the case with screws;
- Screw on the housing cover.
How to choose the right outlet
To choose the right outlet, you need to study and evaluate a number of factors that will affect its reliability and functionality.
You should focus on the following criteria:
- Type of metal. Stainless steel parts have the best characteristics.
- Power. A good option is a two-socket 16 A device.
- Case material. It is better to choose ceramics, which are resistant to heat and corrosion.
- Type. If you install an indoor unit, you can save space. The open method saves effort and time.
When choosing, every little detail matters, including the color and design of the product.
Review of techniques
Ammeter-voltmeter method
To carry out measurement work, it is necessary to artificially assemble an electrical circuit in which current flows through the ground electrode under test and the current electrode (it is also called an auxiliary electrode). This circuit also uses a potential electrode, the purpose of which is to measure the voltage drop during the flow of electric current through the ground electrode. The potential electrode must be located equally far from the current electrode and the ground electrode being tested, in an area with zero potential.
To measure resistance using the ammeter-voltmeter method, you must use Ohm's law. So, using the formula R=U/I we find the resistance of the ground loop. This method is well suited for measurements in a private home. To obtain the required measuring current, you can use a welding transformer. Other types of transformers are also suitable, the secondary winding of which is not electrically connected to the primary.
Using special devices
Let us immediately note that even for measurements at home, a multifunctional multimeter is not very suitable. To measure the resistance of the ground loop with your own hands, use analog instruments:
- MS-08;
- M-416;
- ISZ-2016;
- F4103-M1.
Let's look at how to measure resistance with the M-416 device. First you need to make sure that the device has power. Let's check the presence of batteries. If they are not there, you need to take 3 batteries with a voltage of 1.5 V. As a result, we get 4.5 V. The device, ready for use, must be placed on a flat horizontal surface. Next, we calibrate the device. We put it in the “control” position and, holding the red button, set the arrow to the “zero” value. For measurements we will use a three-clamp circuit. We drive the auxiliary electrode and the probe rod at least half a meter into the ground. We connect the device wires to them according to the diagram.
The switch on the device is set to one of the “X1” positions. We hold down the button and turn the knob until the arrow on the dial is aligned with o. The result obtained must be multiplied by the previously selected multiplier. This will be the desired value.
The video clearly demonstrates how to measure grounding resistance with the device:
More modern digital instruments can also be used, which greatly simplify the measurement work, are more accurate and retain the latest measurement results. For example, these are devices of the MRU series - MRU200, MRU120, MRU105, etc.
Working with current clamps
Ground loop resistance can also be measured using current clamps. Their advantage is that there is no need to disconnect the grounding device and use auxiliary electrodes. Thus, they allow you to quickly monitor grounding. Let's consider the operating principle of current clamps. An alternating current flows through the grounding conductor (which in this case is the secondary winding) under the influence of the primary winding of the transformer, which is located in the measuring head of the clamp. To calculate the resistance value, it is necessary to divide the EMF value of the secondary winding by the current value measured by the clamp.
At home, you can use current clamps S.A 6412, S.A 6415 and S.A 6410. You can learn more about how to use current clamps in our article!
samelectrik.ru
Types of electrical outlets
The industry produces two types of products:
- equipped with a grounding bus;
- not having a grounding bus.
The first type of design is often called a “euro-socket”. This design fully satisfies electrical safety requirements. When changing electrical wiring, it is recommended to install sockets with grounding.
The second type of product is considered an outdated modification, but is still found in practice. Especially many outdated sockets are used in old buildings.
Both types of products are made for indoor or outdoor installation. According to the new PEB recommendations, modifications of sockets for internal installation must have bimetallic plates with a grounding contactor as part of the design.
For electrical sockets for external installation, the recommendations are the same, but in some cases of their use a two-wire interface is allowed.
Installation of the overhead option: step-by-step instructions
First, let's look at the process of connecting a surface-mounted socket to a cable hidden hidden in the baseboard box.
Step 1: In order to understand the procedure for installing a grounded socket, let's start with the simplest overhead type. Step 2: Mark on the wall the location of the future outlet, cut a hole in the baseboard for the wiring and route the cable through it. Step 3: Before installation, let's disassemble the socket into its components by unscrewing the fastening screw in the center of the front part. Step 4: Disassemble the socket into its components. In this model, the wiring mechanism is permanently attached to the mounting plate. Step 5: Prepare the wiring for connecting the outlet. We remove the general insulation from the cable, then strip the outermost 0.5 - 0.8 cm of insulation from the three wires. Step 6: Mark through the holes in the mounting plate the points through which the device will be attached to the wall. Step 7: At the marked points we drill holes into which we will install fasteners. We install plastic dowels into the concrete wall. Step 8: We install plastic devices at the drilled points to ensure reliable fixation with self-tapping screws. Socket from Schneider Electric from the Etude collection. Preparing the cable for connecting the device Disassembling electrical installation equipment. Components of the electrical installation device. Preparing the wiring for connecting the outlet. Marking the socket attachment points. Drilling holes in the wall according to the markings. Installing dowels into drilled holes
After completing the preparatory steps, we can safely begin connecting the socket mechanism to the grounded wiring.
Step 9: We fix the socket mechanism together with the mounting platform that is structurally fused with it to the wall with self-tapping screws. Step 10: We insert the edges of the wires, cleared of insulation, into the spring terminals of the socket. Grounding in the center, phase to terminal L, neutral wire to N
Step 11: Before attaching the front part of the case, we prepare it for installation by cutting out a semicircle in the side part necessary for a tight fit to the wall. Step 12: Close the device with the mechanism connected to the wiring with the front part of the case, align it and fix it with a screw. Fastening the mounting platform and mechanism. Connecting the device to the wiring. Preparing the front part for mounting. Fastening the front part of the socket body
How to ground an electrical appliance
So, you purchased a washing machine or a gas heating boiler. How to ground them? First of all, you need to find the grounding itself.
Where to find ready-made grounding
As mentioned above, almost all apartment buildings have their own outline . The main distribution board housing and, most importantly, each access distribution board are connected to this circuit. Even the residents of the ninth floor have a circuit literally under the door - a floor-level metal panel with electric meters.
If you look inside such a shield (just look, and don’t crawl around with pliers!), you will probably see a lot of wires bolted directly to the shield body. That's it, grounding! If you connect the casing of the same boiler to such a bolt, then this casing will be reliably protected from the appearance of voltage on it, which means that the operation of the device will be completely safe even if a malfunction occurs in it.
The situation is somewhat worse for owners of private houses, where there may not be a standard circuit. There are two options here - create a contour artificially or use a natural one. You read about the second type above and whether you should connect to it or not is your choice. It’s safer, of course, to make a grounding loop yourself, especially since it’s not at all difficult. But if you still decide to use natural grounding, then this photo will help you connect to it correctly:
Such a connection is only permissible if you are confident in the reliable and long-term electrical connection of the water supply to the ground
How to make grounding yourself
To make a simple outline you will need a massive metal object. This could be an old crumpled barrel, a large thick-walled pan (not enameled), a bicycle frame, scraps of reinforcement welded together, etc. First of all, a couple of meters long current conductor must be securely attached to this object, which will act as a circuit.
What is leakage current and why is it dangerous?
All electrical appliances are powered by voltage of one magnitude or another. The player, for example, runs on three volts, the car headlights on 12. Household appliances require a voltage of 220 volts . Low voltage is safe for humans, but starting from 36 volts and above it already poses a threat. Everyone knows that you shouldn’t use a plug or paper clip to get into a household socket—it can kill you. Namely, it is into this outlet that you connect almost all household electrical appliances.
If these devices are in good working order, then their operation is absolutely safe. Now imagine that due to vibration somewhere in the bowels of the washing machine, the insulation on the supply wire has frayed and the bare metal has touched the metal casing of the device. The mains voltage came into contact with this very casing. So far nothing serious has been noticed - the unit is erasing, the lights are blinking. But as soon as you touch the body of the machine, the current rushes towards you , and through you into the ground. You have come under life-threatening voltage with all the ensuing consequences. The same trouble can happen if water, which is known to conduct electric current*, accidentally gets inside an electrical appliance.
*In fact, leakage current is a broader concept. Current can “flow” not only through the human body and not necessarily into the ground. In this situation it is not important.
As soon as you touch a faulty device, current immediately begins to flow through you