A mobile phone is an excellent means of communication and a multifunctional tool that every person needs. That's why we charge our phones regularly and are afraid of being left with a dead battery. But over time, almost any owner of a mobile phone is faced with the fact that it begins to charge poorly or does not charge at all. Let's figure out how to charge the battery if the connection socket is broken.
Can the charging socket be repaired?
Yes, this is quite possible, but it is better to entrust this work to a master. In service centers, after diagnosing and identifying the cause of the breakdown, you will be offered one of the repair methods:
- Recovery. It will cost about 1,800 rubles, depending on the phone model and the complexity of the work.
- Replacement. Replacing the socket with a new one will cost about 1000 rubles. excluding the cost of new parts.
If the gadget is under warranty, then it should be taken to the service center specified in the coupon, which must repair the smartphone during the entire warranty period.
Replacing a nest at home is difficult, but possible. All details are described in detail at the end of the article.
What tools are needed
To replace the connector yourself, we will need the following tools:
- thin tweezers;
- tools for disassembling a mobile device (depending on the type and model of the gadget);
- soldering hair dryer (if the connectors will be replaced with its help);
- holder for boards of one design or another (preferably);
- head lens or tripod lens;
- soldering iron with a power of 25 W with flat thin (diameter 0.8 mm) tips.
Healthy. It is better to buy a set of tips of different shapes for a soldering iron for such work. They are inexpensive, but allow you to perform a variety of operations.
How to fix a socket by changing position?
It is worth noting that it is impossible to repair the nest in this way. This is an emergency measure in cases where you urgently need to charge your phone. Also take into account that if you use this method too often and put off going to the specialist, the situation can only get worse. Sequencing:
- Connect the charger to power and to your smartphone.
- Try moving the cord in different directions. This way you can close the contact if it becomes loose.
- If you managed to find the correct position and the gadget is charging, then try to fix it with something that you have at hand: be it a book or other heavy thing.
Before using this method, you must be sure that the problem is in the socket and not in the battery. Over time, the battery begins to hold a charge poorly or stops charging altogether. In this case, you just need to replace the battery, and not try to fix the supposedly broken socket. The charger itself may also be faulty, which can be easily checked by trying to charge the phone with another accessory.
Advice for civilized people
Let's look at the situation when you are in the city, but you do not have a cable or there is no outlet nearby, how to charge your phone without a charger in such a situation?
We are looking for helpers
- We agree with the seller at a nearby retail outlet, leaving him your iPhone for a while. In 5-10 minutes, the phone's battery is enough to charge to make 2-3 calls, or for 10 minutes of surfing the Internet. This method has its own risks - they simply may not return your iPhone, he said that this is the first time they have seen you.
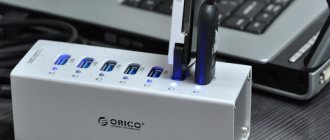
- We are looking for a special stand for charging phones; any self-respecting shopping center has similar devices. Usually on such stands you can find a cord with lighting and micro-USB connectors.
- We go to a cellular communication store and ask the seller to recharge a dead device, they will not refuse you, but they will charge you a small fee, usually no more than 50 rubles. This method has much fewer risks when compared with the first.
- We find a special kiosk where for a nominal fee (about 50 rubles per hour) you can refill the battery of your device.
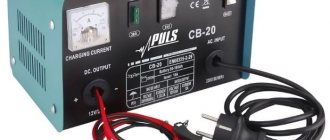
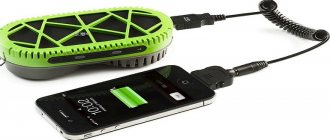
Using the universal “frog”
You can charge the battery without using a charger. There are special “frogs” - universal devices that plug into the network and are capable of charging batteries. The cost of such a device is quite high, so it will be easier and cheaper to take the smartphone for repair. But if the situation is critical, or you or your friends/neighbors have such a thing, then you can try to use it to charge your phone. But pay attention to several disadvantages of using this method:
- High cost of the device.
- While the battery is removed and charging, you will not be able to use the gadget.
- If used incorrectly or using a low-quality model, there is a possibility of damage to the battery.
Causes and temporary solutions
The reason may be contamination of the internal space of the connector - dust, leakage of dirty liquid, etc. In this case, you can try to clean the nest with a sharpened toothpick or match. You should not try to use a metal object - you may damage the contacts or plastic structural elements of the connector. Another option is to blow out the hole with compressed air (for example, from a can). You can use a vacuum cleaner, but the cleaning efficiency will be much lower.
It would not be the best option to try to wash the connector with a solvent (if it is not pure ethyl alcohol). Other compositions can dissolve not only dirt, but also plastic parts of the connector, as well as parts of the phone case if it gets on them, as well as other polymer structures inside the smartphone if they flow under the case. In addition, many solvents, after evaporation, can leave a film that disrupts contact. Therefore, this may be a last resort option when there are no alternatives left.
Another reason is a violation of the nest design.
Connector design.
It consists of a contact part and an outer shell, which is made of a fairly plastic material. This shell guides the inserted plug correctly so that the contacts of both parts of the connector match. If used incorrectly - applying excessive lateral forces - the metal is deformed (stretched), the plug fits freely into the socket, its position is not accurately fixed, and it is impossible to match the contacts of the plug and socket. Repairing the mobile phone charging socket in this case is almost impossible. It will not be possible to straighten the shape of the shell due to its small size and the need for high precision impact. Therefore, we must try to find a position where the contacts still coincide. If a position is found, it must be fixed. You may need foreign objects or tape for this. It is better not to touch the gadget until the end of charging.
How to charge your phone directly?
There is another way to charge your gadget without having to connect a charger. This method is quite complicated and even dangerous, so we do not recommend using it, especially for beginners and those who do not understand technology and how electricity works. The essence of this method is as follows:
- You need to cut off the tip of the charger and remove a couple of centimeters of insulation from the wire.
- Then you need to strip the wires and determine the “plus” and “minus”.
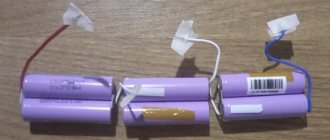
- Next, the battery is taken out and the corresponding terminals are located on it.
- The wire cores are connected to the terminals, and polarity must be taken into account.
- The charger is connected to the network.
Important! Be careful and never do this if you are alone at home, as there is a risk of electric shock.
It is also worth noting that this method has a bad effect on the battery itself, leading to depletion and breakdown.
Mr. Samodelkin
There are a lot of tips on how to charge your tablet without charging it. Some users offer the following option: in case there is neither a standard nor a car charger and there is no USB cord, you need to take any old charger that has been lying idle for a long time, and no one remembers what device it is intended for. Usually, every owner of modern mobile phones has several of these at home. You need to cut off the connector for connecting to the phone - it will not be needed, then strip the wires by removing the insulation from them. Two wires will appear - blue and red. Then you need to remove the battery from the tablet and find the plus and minus on it. Then connect the wires: the blue wire will go to positive, the red wire to negative, secure this structure with insulating tape or tape. Plug it into a power outlet, and that’s it – charging starts. In this case, you need to act carefully so as not to receive an electric shock. This method, although not very reliable in its design, is faster than charging a tablet via USB, because the current in the outlet is more powerful and, therefore, the gadget will charge much faster. But it is better to use this method only in emergency cases. And in order to prevent such problems from arising in the future at the most inopportune moment, it is better to purchase a spare battery and carry it with you.
How to charge a phone with a broken socket?
The methods described below are a last resort, and are mainly used in emergency conditions, when a person’s life or health may depend on the call. If you are at home in a calm situation, then these methods are not recommended, because it will be cheaper to take your smartphone for repair. Here are some popular methods:
- Use of force. The essence of this method is that you need to hit the battery hard against something hard, such as a stone or wall. But most likely, after such an extravagant method, the battery will have to be replaced. But you will probably still be able to make 1-2 calls.
- Application of heat. This method is no better than the previous one, because after it you will also have to replace the battery. But you will be able to make several important calls, as the smartphone will turn on for 5 minutes. You need to do the following: take a knife and heat it over the fire, then apply it to the back cover of the smartphone where the battery is located. Make sure that the battery does not swell; to do this, you need to do everything quickly and accurately.
- Hiking method. During a hike, when there is no electricity nearby, you can try using this method. You need to take iron plates, bury them in the ground and wrap them with wire. The end of the wire must be connected to the battery. Then you need to pour salt water over the plates.
Types of repairs
The following types of repairs are distinguished:
- By urgency – regular and urgent.
- By type of work - restoration, replacement of parts.
- According to the person who performs it, he is a professional master of a service company, independent.
Urgent professional repairs are the most expensive. It is cheaper to repair a mobile phone yourself or contact a private repairman.
How to fix the charging socket on a phone or tablet?
There are two ways to solve the problem:
- Take the device for repair.
- Try to fix it yourself.
The first option is the most reliable. Only professionals can properly repair the charging socket. It would be even better to contact a specialized service center, where the technicians understand the features of your brand of devices.
Self-repair at home is strictly not recommended, since this is beyond the capabilities of a beginner. But so that you know approximately what replacing a socket is all about, a brief guide is given below. To work you will need:
- Set of small screwdrivers.
- Tweezers.
- Knife (stationery or kitchen).
- Soldering iron and its accessories.
The job of replacing the socket goes like this:
- Unscrew the screws and remove the body by prying it off with a knife.
- The soldering iron must be grounded, and then solder the negative wire. We bring the second end to the body of the soldering iron. This will protect the device from static electricity shock.
- Next, you need to unsolder all the wires from the socket to prevent a short circuit.
- We remove the retaining screws from the board, thereby opening access to the USB connector.
- We take out the burnt socket and replace it with a new one.
- Now you need to assemble the gadget in reverse order.
- The final stage is to check the functionality of the phone and charging socket.
There is no guarantee that both the socket and the phone will be working properly after this method. Do not take risks if you are not confident in your abilities and if you value your gadget.
If the tracks are broken
Often the conductive paths or contact pads under the connector are broken. This can happen both during operation of the part and during dismantling. In the first case, the tracks come off in attempts to “find contact” by pulling the plug in the socket. In the second - in case of underheating (the pads break off along with the connector) or overheating (the foil simply flies off the textolite substrate).
Torn tracks and pads
Restoring broken tracks
How to be in this case? Most often, the problem can be solved using a soldering iron with a thin tip and a single-core wire with a diameter of 0.2 mm (see the “Consumables” section). We strip the installation wire and extract one core from it. We service it carefully. We install the new connector with a hairdryer or soldering iron. Then solder one end of the wire to the socket contact, and the other to the place closest to the break. Here we are lucky - there are spots nearby that are easy to solder to. If they are not there, then you will have to clean the torn tracks from the varnish, tin them and solder to them. A little more complicated, but also possible.
We wash the “Galoshes” and study our work. If everything is visually beautiful, then we strengthen the nest with compound. Apply it from a syringe and heat it with a hairdryer for a minute at 180 degrees. The compound will strengthen the entire structure, since several contacts practically do not hold onto anything, which means the connector will have play.
Strengthening connector contacts with compound
Expert opinion
Alexey Bartosh
Specialist in repair and maintenance of electrical equipment and industrial electronics.
Ask a Question
Healthy! If you need to dismantle the connector, the compound can be easily removed by heating it with the same hairdryer at a temperature of 300 degrees Celsius.
FUM tape
This material is available at plumbing supply stores and is commonly used to insulate and seal pipe joints. The cost usually does not exceed 25-40 rubles per skein. FUM tape is more convenient than electrical tape due to the following advantages:
- thin and flexible, which ensures a reliable and durable fit;
- FUM tape does not contain glue, so it is more reliable and does not dry out or crumble over time.
You can repair a damaged area using FUM tape using the simplest steps:
- find the location of the wire damage;
- cut off the required amount of tape;
- wrap with tension over the damaged area, capturing entire areas around it.
For repairs, a small layer is enough: the material sets well and reliably holds the contact area. Both electrical tape and FUM tape are temporary measures. You will subsequently need to buy a new charger.