How to properly crimp a cable lug or sleeve using a hydraulic press? Are there any rules or regulations that may affect the quality of crimping? Of course, they exist, and buying a high-quality press does not guarantee you reliable contact on a particular tip. Let's look at the main points of high-quality crimping or crimping of thick-walled tips.
Which tip to choose
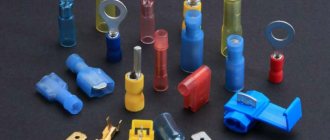
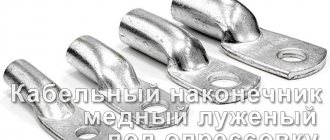
Before you begin crimping, you must select the correct tip. It is worth remembering that tips come in different types - different sleeve thicknesses, different inlet diameters. Moreover, this happens with tips of the same section, but different class=”aligncenter” width=”788″ height=”455″[/img]
Therefore, it is not always the same matrix; you can crimp 2 different lugs for a wire of the same cross-section. In addition, the number of sleeve crimps may also differ. If you want to achieve a high-quality connection that will reliably serve you for years, use the following recommendations.
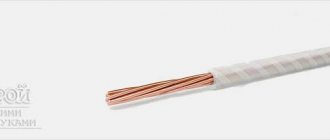
The core, stripped of insulation, must clearly correspond to the diameter of the tail part of the tip.
Backlash may be acceptable, but it should be minimal.
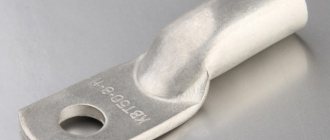
If the tip material is aluminum, then the choice is simpler. Select a tip of the same cross-section as the cross-section of the wire. You can navigate by the inscriptions on the blade of the contact part.
But if the material of the product is copper, then certain difficulties arise. But there are several solutions here too.
- ⚡
There are GOST tables that can be used to select the desired type. But this is not entirely convenient, because... you need to clearly know and distinguish between core flexibility classes, and you won’t have these tables at hand. - ⚡
measure the diameter of the core with an ordinary caliper. Then compare it with the diameter of the inner part of the tip shank. This can be done with the same caliper, or using the inscriptions on the blade.
The third number in the abbreviation TM-35-8-9 will be exactly the required diameter. That is, if the diameter of the core that you measured turned out to be 8.5 mm, then the most suitable tip would be the one marked TM-35-8-9.
Please note that the diameter of the core should be slightly smaller, but not larger than the diameter of the shank .
The material of manufacture of the tip and sleeves must be the same as the material of manufacture of the wire or cable core. Connect aluminum wires using aluminum sleeves and lugs. Copper with copper. Otherwise, corrosion processes cannot be avoided.
If you need to connect an aluminum lug to a copper contact (on a switch or switch), use an aluminum-copper lug or use aluminum-copper washers.
There are special aluminum-copper sleeves for joining copper and aluminum cable cores.
Tip design
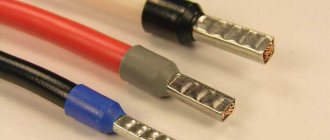
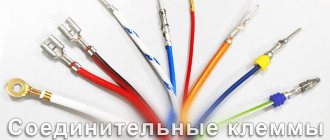
According to their design, pin tips are divided into single and double. The first are used to terminate one wire, and the second - two at once.
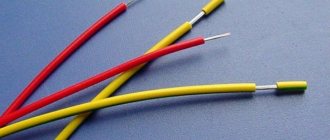
Both types of caps, NShVI and NShVI-2, are a tube of a certain diameter (corresponding to the diameter of the wire used or a pair of wires having the same cross-section), made of electrolytic copper and coated with tin, applied by galvanic tinning. On one side, this tube remains open - this part is used for its direct connection to electrical connectors, and its other side is closed with a special cuff made of dielectric plastic (polyamide).
In addition, the end, located inside the insulated part, is flared using the Easy Entry method - this allows you to quickly and easily insert stranded wires inside. After the wire (or wires) have been placed in a copper tube, they are fixed by crimping with special pliers, after which the finished terminated wire can be connected to screw connectors. Thus, the entire operation from securing the wires in the lug to their final installation takes only a few seconds.
Previously, in order to increase the survivability of connections, soldering the end of the wire was used in order to combine all its cores into one whole. This process took a lot of time, and the installation itself was not always reliable. The use of sleeve tips allows you to solve this problem literally in seconds.
As for the technical characteristics of copper tips, they are as follows:
- tube material: M1 copper;
- tube coating - galvanic tin;
- cuff material - polyamide;
- maximum permissible voltage - 690 V;
- heat resistance - up to +110 C;
- cold resistance - up to -40 C;
- internal section - available in options from 0.25 to 150 mm2.
Preparatory work with the cable
Strip the insulation from the cable cores to the required length. What is this length?
It should be equal to the depth of the tip, plus 5mm margin.
A reserve is required because the tip will be stretched and deformed during crimping (especially aluminum). Try to make the cut of the insulation even, strictly at an angle of 90 degrees to the axis of the cable itself.
If the cable cores are triangular in shape, they must be ground off with a rounding file. Otherwise, you will never achieve this density during crimping:
After removing the insulation, the bare core must be cleaned and degreased. To do this, use special contact pastes.
The procedure for crimping tips and sleeves
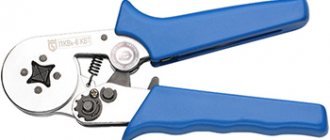
For crimping thick-walled tips and sleeves, it is best to use a hydraulic press. The press set initially includes universal dies for any tips and wires. Under no circumstances use a tool not intended for crimping (hammer, chisel, etc.). A contact pressed in this way will not last long, especially if it constantly experiences heavy loads.
The next question that arises for an ignorant user is how many times should I press the tip with a press? Once, twice or three times? This depends on 2 parameters:
- ⚡
from tip length - ⚡
and matrix width
In the operating instructions for the press that comes with the tool, there is a plate indicating the required number of crimps. Please note one thing: this table is intended for tips and sleeves made in accordance with GOST. How they differ from other brands can be found in the article Cable lugs, markings and types.
Insert the tip into the press so that the matrix cross-section markings (35-50-70, etc.) are imprinted on the front side of the tip, and not on the side or bottom.
- ⚡
The first crimping of the tip should be done closer to the blade (where the bolt is inserted) - ⚡
Perform the following crimps in order, moving from the blade to the tail of the tip - ⚡
the same rules apply for sleeves
This must be done in this sequence, because with each press the tip tends to lengthen (sometimes up to ten percent!). And if you start pressing from the end (not from the blade), during the last crimp, there is a high probability that you will have a void at the end of the sleeve. And you will not achieve the contact that was necessary.
First of all, this applies to all aluminum products. For copper this is not yet so critical.
When crimping from the side of the blade, the tip will seem to fit onto the core, tightening the connection more and more. The insulated tips even have special digital markings indicating the pressing order.
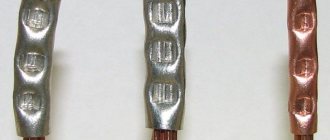
The crimping ends at the moment when the matrices close together. If you need to perform two or three crimps, step back 2-3mm from the previous crimping point and continue crimping.
When crimping, the formation of a small flash is acceptable. It can be removed or filed off. A very common mistake is the formation of large “ears” on the tip. This results from an incorrect choice of matrix.
If such “ears” do appear, you should not cut them down to the base of the sleeve . Otherwise, a gap may form in the tip and the crimp contact will become loose.
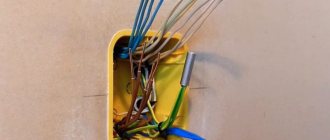
After the tip is crimped, it is advisable to insulate the area between where the shank ends and the remaining uninsulated part of the core. It is best to use heat-shrinkable tubing for this.
Scope and crimping rules
The main purpose of using pin sleeve lugs is to create a unified connection that serves to quickly and conveniently connect wires to connectors, as well as improve the quality of their contact.
In addition, NShVI type lugs also perform the function of protecting multi-core wires from damage when using screw connections. If the installation of this type of connection is carried out without the use of lugs, then there is a very high probability of squeezing and subsequent breaking off of individual wires, which ultimately can lead to sparking, overheating, burning of the wire, melting of the connector itself and other undesirable (and unsafe) problems. consequences.
The use of NShVI allows you to completely eliminate damage to the wire and ensure uniformity and reliability of contact. That is why pin lugs are very widely used in all areas of electrical engineering where connection of multi-core wires is required.
Great attention should be paid to the crimping operation of the caps, because doing it incorrectly can make even such a well-thought-out connection unreliable.
In order to securely fix the stranded wire in the ferrule, it must be crimped correctly.
The first thing to do for this is to choose the appropriate cap size (it is indicated on its body). After this, use a knife or a special tool to strip the wire so that its exposed part exactly matches the length of the uninsulated part of the copper tube.
After this, you should place the stripped area inside the bushing so that it fits entirely into it, but does not protrude outward. You should also check that all the wires are exactly inside the tube. After this, using a crimper (press pliers), it is worth performing the crimping procedure.
In this case, the entire exposed part of the copper sleeve must fit snugly against one of the working parts of the tool, otherwise the connection may become weak and the wire may eventually fall out. As for crimping double tips, the whole process is absolutely no different from crimping single ones, with the only difference being that not one wire is placed inside the tube, but two at once (it is important to note that both of them must have the same diameter).
Also, it should be remembered that the main purpose of NSHVI-2 lugs is not just connecting wires, but combining them for the purpose of subsequent connection to any connectors.
The use of terminal lugs of the NShVI type can significantly facilitate and speed up the process of installing multi-core wires, as well as making it more reliable.
