The reliability of electrical equipment depends on the quality of the connection of wires in the junction box. Switching errors lead to overheating of connection points, short circuits and fire. There are several options for connecting cables to ensure the strength and durability of wiring in residential buildings and technical buildings.
What is a junction box
When installing electrical wiring in premises, it is necessary to install special boxes for switching and routing cables. Housings made of elastic plastic or thin steel sheet are placed in the thickness of the walls.
Boxes can be mounted both in monolithic partitions and in light plasterboard partitions. From the outside, the shield is covered with a plastic cover that does not spoil the appearance of the walls.
Main functions
The box allows you to:
- observe safety precautions;
- distribute wiring indoors;
- Protect connected cables from damage.
Principle of operation
The junction box includes a power wire consisting of 2 or 3 wires (neutral, phase and optionally ground). Lines from sockets, lighting fixtures or switches are laid to the panel. Then the wires are connected in accordance with the purpose of the consumers and the developed circuit. Contacts are protected with tape, tubes or caps. When using terminals, the block body is an insulator; no additional winding is required.
The box maintains the functionality of the electrical system and allows you to disconnect circuits by breaking the contact.
How to disconnect the box
In any room there is at least one branch box, called a junction box. Sometimes an additional one can be mounted on sockets - provided that they are significantly removed from each other. Disconnecting the box is necessary for many preventive and repair work.
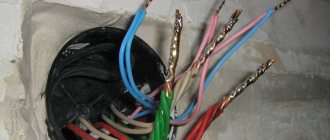
All wiring in residential and domestic buildings is laid in the floor or along the walls. Cables and wires in a garage, country house, apartment have an exit from the electrical panel, where a meter is located that takes into account electricity consumption, safety plugs or circuit breakers, and come to the location of the branching and junction boxes. Here, the conductors are twisted and connected using special clamps.
What to consider when connecting wires
When switching electrical wiring, it is necessary to take into account:
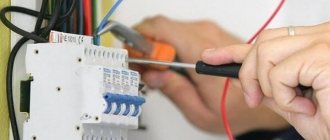
- When carrying out installation work, turn off the power using a switch in the distribution panel. When installing boxes or cables in apartment buildings, you should check the existing circuits for voltage. There have been cases where the wiring of one apartment was partially connected to the cables in the adjacent room; when the power was turned off in the panel, some of the lines remained live.
- The same connection technique must be used within the junction box. When installing terminals of different formats, overheating of the contacts is possible, leading to destruction of the insulation and subsequent short circuit.
- Direct connection of conductors made of copper and aluminum is not allowed. The metals create an electrochemical couple and react to form a film that does not conduct electricity. A decrease in the contact area leads to heating, sparking, and subsequent burnout of the cores.
- The insulation should be cut to a length appropriate to the connection method. For example, for twisting, metal cores up to 60 mm long are required, and when installing WAGO terminals, it is enough to remove the protective layer by 7-10 mm. Damage to the insulation with a knife or a heated soldering iron tip is not allowed; bare wires should not extend beyond the box.
- If the joining was carried out by twisting the cores followed by soldering or welding, then it is necessary to insulate the metal cores and put on a protective cap made of a durable dielectric that does not support combustion.
- When installing wiring, it is necessary to provide a margin of length in the box necessary for connection and subsequent installation. When attempting to join tensioned conductors, the risk of damage to the metal rods increases.
- When using technologies that require the tip of the wire to be designed in the form of a ring, you should close the loop and wind the wire onto the main core of the wire. Otherwise, the joint is easily destroyed and does not provide reliable contact.
If you need to install a switch from an existing outlet
If the outlet is already installed and connected, you can also connect a light switch to it. There are also two options here, the choice between which depends on the location of the chandelier. The difference between them lies in the distance of the lamp from the socket - if close, then the neutral core is in contact with it, if far away, then from the shield. Let's consider both methods.
Phase and neutral supply from the socket
The easiest option is when both phase and zero are connected to the switch from the outlet. It is applicable if the light bulb/lamp is located very close. To connect them, you need to do the following:
- First of all, you need to install the chandelier itself, and then, according to all the rules, connect the switch to it through wiring.
- The connection procedure must begin with a circuit break - de-energization. This can be done by turning off either the group switch (for the room, if there is one) or the common switch (for the entire apartment/house).
- Next, open the socket cover and check the current at its contacts using a special measuring device (screwdriver with a light bulb).
- A conductor leading to the switch input is connected to the contact with the phase. The output is connected to the core of the lamp itself.
- A conductor suitable for the terminal from the lighting device is attached to the zero contact.
- If there is a grounding contact, then it must also be connected to the corresponding conductor of the chandelier.
- After all the wires have been correctly twisted, the contacts are closed, the wires are laid in their intended place, and the entire assembled system is tested after applying voltage.
Connecting only phase
Now let's consider the option of how to connect a switch to an outlet if the chandelier is located in close proximity to the switchboard. To do this you need to do the following:
- As in the case described above, first of all you should break the circuit by de-energizing the work area.
- Next, remove the cover from the socket and check for voltage (for safety).
- If the phase contact cannot be established visually, it is checked using a measuring device and temporarily applying voltage.
- A conductor is attached to the phase contact of the socket and brought to the switch input.
- The core from it must be connected to the input of the lamp.
- The neutral conductor is laid either directly from the shield (which is extremely rare) or from the distribution box closest to it.
- In the same way, it is necessary to connect the grounding conductor for the light bulb.
- After twisting the wiring, reliable insulation of the contact points and applying voltage, the serviceability of the assembled system is checked.
To power the lamp, a large current is not required, and therefore the wire is taken with a thin cross-section. The socket output requires a thicker conductor - a regular phase conductor from the switching mechanism will quickly overheat and burn out. The latter circumstance can even lead to a dangerous fire situation!
Methods for connecting wires in a junction box
To connect the cores, the following methods are used:
- permanent connection by twisting the cores (with or without applying a layer of solder) or installing metal tubes with subsequent crimping;
- detachable mating using PPE caps, screw blocks or bolts, as well as terminals manufactured by WAGO.
Twisting method
One of the common methods of connecting electrical wires to each other is twisting the wires, but this method is contrary to the rules of the Electrical Installation Code. The wound cores do not provide reliable contact; when a powerful load is connected, the joint overheats. It is recommended to use twisting as a temporary option for connecting wiring.
Advanced tasks
In addition to connecting single cables, when laying electrical wiring you need:
- combine several cores made of homogeneous material into a single circuit for subsequent connection to a power circuit or ground loop;
- connect cables with cores having different cross-sections or designs.
When installing new electrical wiring in houses built before the early 2000s, it is necessary to connect copper conductors to aluminum ones. The most reliable way is to lay copper cables with the removal of aluminum cables, which are not designed for high loads and are prone to loss of strength. If you do not plan to remove the old wiring, then for switching use blocks with screws or special tubes designed for pairing dissimilar metals.
Connecting a large number of wires
To connect several wires in a box use:
- WAGO pads that provide strong contact and take up little space;
- connectors with screw contacts and the possibility of mounting on a rail in the distribution panel;
- metal sleeves, crimping requires pliers, the connection requires subsequent insulation;
- twisting into a bundle followed by soldering or welding;
- connection using a PPE cap, the technique is suitable for a limited number of cores;
- twisting the cores followed by wrapping the bundle with insulating tape or installing a shrink tube.
Cores with different sections
When installing electrical wiring in an apartment or residential building, wires with different core diameters are used (depending on the load power). For high-quality connections in junction boxes, it is better to use WAGO clamps. The manufacturer offers products designed for installation of cores made of different metals. A special coating on the contacts prevents electrochemical corrosion and destruction of the material.
Another connection method is to twist cores made of the same metal into a bundle, followed by welding or soldering.
Stranded and single-core conductors
When connecting multi-core cables, it is necessary to remove the insulator and weave the wires into a single braid. Then you should treat the surface with flux and apply solder (the technique is suitable for aluminum products). If connection is supposed to be made with WAGO terminals, then tinning of the cores is not required. To connect wires with different core diameters, it is best to use WAGO clamps with individual contacts. The difference in core sections does not affect the fixation density and contact patch, ensuring reliable operation of electrical wiring under load.
Installation
The junction box is installed on the wall with a lowering of 10–30 cm from the ceiling. Moreover, this is done in such a way that there is open access to its lid. Checking the condition of the wires should be carried out on a regular basis.
Step-by-step instruction
Installation of the junction box is carried out in four simple steps:
- Fastening the box to the wall according to the wiring diagram.
- Planting wires inside and then connecting them to each other.
- Checking the assembled electrical network.
- Closing the electrical installation product with a cover.
The junction box is secured using self-tapping screws or plaster (if it is recessed into the wall).
Arrangement of input cables in the box
Wire connection methods
According to the PUE, the electrical wires inside can be connected:
How to properly connect wires in a junction box
Twist
Twisting is the fastest and at the same time the most unreliable way to connect indoor electrical wiring. To cover the exposed wires, special plastic caps or electrical tape are used.
Twist connection method
Soldering
Soldering is done with tin on top of the pre-twisted wire. This connection is much more reliable and durable. However, such installation takes a lot of time.
Welding wires
For welding you need an inverter welding machine. This method is even more reliable and more complex, but as a result, the two connected cores actually turn into a single solid one. It is recommended to choose it only in special cases. For example, when grounding is done in a private house under a powerful load or additional pumps and uninterruptible power supplies are connected for a gas boiler.
Terminal connection
If the wires are made of different materials, then it is best to use terminals with screw or spring clamps. The terminal connection is extremely simple to make; you only need a screwdriver. The most important thing here is not to overtighten the clamp bolts.
Terminal connection of wires
Crimping
When crimping, press pliers and sleeves are used, made of the same metal as the cores, and sized to match the thickness of the wires being connected. Some craftsmen use pliers for this, but such connections are rarely reliable. It's better not to experiment.
Crimping connection method
Wiring diagrams
To avoid any confusion when connecting electrical wires, it is worth preparing in advance the wiring diagrams for all installed junction boxes. This drawing should indicate “from where and where” each core goes. In general, it is advisable to use different colored wires to avoid confusion.
Wiring diagram
Safety precautions when working in land and water
Tips for complying with safety requirements when installing wiring outside the home:
- To ensure insulation of wiring located in damp soil or under water, shrink tubes with an applied adhesive backing are used. When heated, the mastic melts and fills the cracks; to increase the tightness, it is recommended to install several tubes with overlapping edges. To ensure maximum protection, solid insulated cable should be used with connections to dry points.
- When installing the wire in the ground and using a junction box with sealed inputs, you should connect the wires with blocks, and then fill the cavity with silicone sealant. After polymerization of the composition, install the cover and pass the cable and box through the plastic pipe. The outer shell will protect the insulation from damage by rodents and increase the resistance of electrical wiring to seasonal soil heaving.
- To connect wiring located under water, you can use couplings filled with compound. After joining the cores and installing the sealing rings, a polyurethane-based composition is poured into the cavity, which, when hardened, protects the wiring from moisture and mechanical damage. An alternative technique involves using LETSAR tape, which hardens and seals the joint.
Basic wiring diagrams
There are several schemes for connecting wires in a junction box:
- for switching sockets;
- for organizing switches with one or more keys.
The box can simultaneously contain contact pairs for different consumers. When developing electrical wiring drawings, you should take into account the number of wires, the switching method and the dimensions of the connectors. In some situations, it is advisable to install several boxes, ensuring ease of connection and the availability of free space for air circulation to cool the contacts.
Connecting sockets
Proper connection of wiring in a distribution box involves organizing a separate line for each outlet, consisting of 3 wires (zero, phase and ground). When switching, the color marking of the insulation should be taken into account. For example, according to the PUE, cables with a brown sheath are used for the phase, with a blue sheath for the neutral line, and with a yellow insulator with a green stripe for grounding.
Connecting a switch with one key
To make switching in the junction box of a standard switch, it is necessary to insert a power wire and make a branch to supply the phase to the contact group. The neutral cable goes straight to the lampshade. The switch breaks the phase and ensures safe maintenance of the lighting device. Using a similar technique, you can turn off a switch installed on the surface of a wall or buried in the partition material. If the key has a control LED, then the element is included in the line by default and will start working when power is applied.
Two-gang switch
Correct connection of a switch with 2 keys requires wiring of the common phase, which goes to the contact plate. 2 wires are laid from the device to lamps or a chandelier with double switching of lamps. The zero is supplied directly to the cartridges and is not interrupted by the switch contacts. Using similar technology, you can connect devices with 3 keys or connect several switches to control a multi-tier lighting system in a room.
Is it possible to connect an outlet to the switch?
Full joint operation of the socket and switch, if the first is powered by the latter, is almost impossible. However, there are some variable methods to combine them. Let's look at them in detail.
Socket instead of switch
You can install an socket instead of an existing switch, for example, when you need to carry out a number of temporary repairs or decoration work using electrical equipment or connect a light bulb on a portable device. In this case, you need to perform the following series of actions:
- Turn off the machine - de-energize the network. Before work, you need to make sure that there is no voltage on the contacts using a test probe.
- Disassemble the switch and remove the wiring that goes to it.
- Dismantle the base of the switch, and in its place install a socket and connect its contacts to the freed wires.
- Next, you need to remove the cover of the junction box and disconnect the wires from the former switch from the wires going to the light bulb.
- Connect one of the conductors from the new outlet to the phase, the other to zero and cover them with a layer of insulation; the wires from the lamp are temporarily brought together and insulated.
- Close the distribution module cover and turn on the switch.
- Check the socket, for example, by connecting a plug with an adapter and a light bulb. If it lights up, the circuit is assembled correctly.
Connection from double switch
A two-key switch can also be connected to a power outlet to power electrical appliances, but in this case only one key will work. The algorithm of actions is as follows:
- It is necessary to de-energize the electrical network, be sure to check the contacts with a measuring probe before work.
- Install the socket and two wires connected to it.
- Next, you need to disassemble the switch and free the input and one of the two output wires.
- Connect one wire of the socket to the input contact (phase).
- Connect the second conductor of the socket (zero) to one of the output wires from the switch (the one that was previously disconnected) and insulate it.
- Having opened the cover of the junction box, it is necessary to disconnect the neutral conductor for one of the light bulbs and connect it with the same conductor that was disconnected at the output of the switch and twisted with the neutral conductor of the socket.
- All contact connections are insulated, and the covers on the switch, socket and distribution module are closed.
- The switch is turned on and the operation of the circuit is checked.
Checking the correct connection of conductors in junction boxes
After completing the installation work, the machines in the panel are turned on. If the fuse trips, check that the cables are connected correctly. Otherwise, the maximum load is connected to the line for 2-3 hours. The test allows you to determine poor-quality connections; when operating the test equipment, an increase in the temperature of the joints or the appearance of the smell of overheated wiring is not allowed. After completing the test, interrupt the current supply to the room, check the integrity of the insulation and close the boxes with standard lids.
How to connect a single-key
To work, you will need the selected switch, junction box and lamp to which the connection will be made. Directly connecting a one-button model is very simple. How to connect a single-key light switch to one light bulb:
- The phase wire of the power supply must be connected only through the contacts of the switching device, otherwise the lamp will always be energized, which is very dangerous. The phase is always connected to the break. Very often, home craftsmen install a break connection on the neutral wire, which can cause a short circuit or even a fire;
- Next, connect the wires of the wall light switch and the lighting fixture in series with the power supply. Power phase - to the switch, lamp zero to phase zero, lamp phase to switch zero.
Photo - connecting a single-key player
It is more difficult to establish a connection for several lamps. There you need to take into account the phase wires of several consumers at once. Just be careful and strictly follow the announced scheme. It works as follows: when the light switch is turned on (up position), electric current begins to flow to the lamp. If the key is lowered, the chain breaks and the flow of directed particles stops.