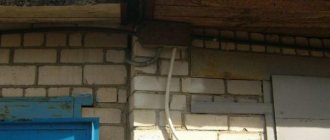
During electrical installation work, electrical wiring is sometimes performed in an open manner. The cable must be protected from thermal and mechanical influence. It is important to ensure aesthetics and create a neat appearance of electrical networks. For these purposes, a corrugated tube is used. In professional language, this material is “corrugation”.
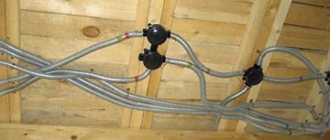
Corrugated wiring on the ceiling Source 5watt.ua
Errors and rules for cable installation
The most common mistakes made by electricians when laying cable networks stretched inside the corrugation are:
- Creating sharp corners.
It is necessary to lay the routes in such a way that the corner transitions are flexible. Sharp corners should not be allowed when turning.
- No special components are used to increase the length.
When you need to make an entire section of wiring longer, you need to use tees, transit boxes, and couplings.
- The corrugation is connected using electrical tape.
According to the PUE, it is unacceptable to connect 2 corrugated pipes with each other using insulating tape. There are connecting components for this. This applies to turns, corners, and the middle of a long section.
- One corrugation has been laid, into which several lines of power cables are stretched.
This is a very serious mistake made by electricians. According to the PUE, it is correct when each cable power line is pulled into a separate corrugated pipe. It is unacceptable to lay several conductors in a corrugated cable at once.
Wiring output Source arte.net.ua
About junction boxes
Junction boxes (or distribution boxes) are necessary for switching (connecting) wires in them and branching lines, for example, for a switch.
Today, professional electricians will tell you that there is no need to install junction boxes in existing apartments! They can play a cruel joke on your wiring. In the event of a short circuit, tearing, flooded neighbors, etc., you will need access to this very junction box. It’s easy to give up junction boxes - do all the switching in the socket boxes! To do this, you need DEEP socket boxes, in which all switching for lighting will take place. Typically, deep socket boxes are made for light switches, but if switching is needed to branch out socket lines, then deep socket boxes are also installed under the sockets.
Laying corrugated cable
The finished corrugated pipe is laid along the ceiling using special clips. The diameter of this part is selected taking into account the cross-section of the selected material. This option for attaching a corrugated pipe to the ceiling looks more aesthetically pleasing. For invisible, internal places, special metal brackets are mainly used. These parts are secured using electrical dowels.
To connect 2 corrugated pipes, couplings are used. They are cheap. In the case where in this section an integral cable line that does not have connections is stretched inside the corrugated protection, according to the PUE, those sections where the pipe is attached to the coupling are allowed to be sealed with a sealant. Otherwise, you need to choose other insulation methods that are considered the most reliable. When laying, do not bend the corrugated pipe too much. The acceptable parameter is printed by the manufacturer on the packaging box of the material.
Corrugation in section Source media2.24aul.ru
Electrical markings
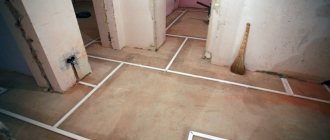
Any quality work begins with accurate markings. Most often, professionals use laser levels and axle builders for this.
With their help, you can quickly and accurately mark the centers for all the sockets in the room. It would seem that a couple of millimeters will not play a decisive role here. What's wrong with one block at the beginning of the room being slightly higher than the other at the end.
However, very often in apartments you come across wallpaper with horizontal or vertical stripes. And these stripes will clearly show when the socket box is not installed level.
The same can be said about the seams on the tiles.
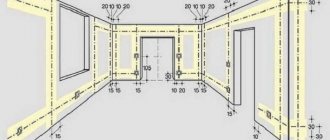
Therefore, place all socket boxes in the room in the same plane. The recommended distances are as follows:
for sockets – 30cm from the floor
for light switches – 60-90cm
everything above the countertop, in the bathroom or kitchen – 110cm
After all the centers of the socket boxes have been marked, then proceed to marking the mounting points for the lamps, both on the walls and on the ceiling.
At the same time, you can mark out places for hanging plasterboard structures. Since in the future, when all the cables and corrugations are on the ceiling, marking the fasteners for drywall will not be very convenient.
But it’s worth bothering with all this if you will also be installing the structures.
After all this, proceed to making marks for the corrugation fasteners. The most important thing is that they do not interfere with each other.
Usually, competent marking, even with the use of modern measuring instruments, takes a full day of work. Prepare yourself in advance for exactly this period. If you are in a hurry, it will definitely backfire on you during further installation.
Laying cable lines in a protective corrugation: errors and misconceptions
When performing electrical installation work, regardless of the chosen method, there is a universal requirement regarding:
- soldering process;
- terminal installations;
- crimping wires at joints.
Access should be provided for inspection of contact sections of cable lines. Therefore, when installing a corrugated pipe with a cable, distribution boxes are installed for installing joints.
According to the PUE, it is necessary to separate the main cable line from the backup one. For this purpose, they use different corrugated pipes. This also applies to working and emergency lighting cores. Corrugations with such wires are necessarily separated geographically.
Plastic corrugation does not belong to the category of fireproof products. They can be laid inside a brick or concrete wall (they need to be tapped).
In any case, for example, when passing hidden wiring through wood (if the house is wooden), you need to use fireproof gaskets:
- plastered;
- cement;
- asbestos.
An example of correct wiring Source stroypomochnik.ru
The spacer layer will allow you to separate the corrugation from the wall surface by about 10 mm (less than that is not allowed according to the PUE). If you choose a plastic corrugated pipe for laying a line on a fireproof surface, you must ensure a distance from combustible places of no less than 10 cm.
Preparing the circuit
To form a future electrical circuit, it is not necessary to follow the drawing rules. It is necessary to clearly reflect the electrical wiring throughout the room, as well as the connection points of individual components. The location of lamps, sockets and switches is also displayed.
If desired, you can draw a rectangle of any shape, which will indicate the junction box. Draw the wires in the form of a simple line, and mark the places where they connect and connect with a dot. It is advisable to use two colors. Select the phase wire for one and the neutral wire for the other. You can also immediately number all sections of the future circuit by transferring the markings to the prepared cables. This will help facilitate the installation process and minimize the likelihood of errors.
Ceiling wiring diagram
It is recommended to save the completed diagram. If there is a need to eliminate any shortcoming, you can use it to quickly determine the required actions.
How to quickly pull a cable into a corrugated pipe?
To work you will need:
- strong, long rope (thread) from any material;
- a piece of fabric or rag;
- vacuum cleaner.
To pull the cable inside the corrugated pipe, take a rope or piece of fabric. Both elements are tied together in such a way that the rag is not squeezed. It is best to tie the fabric to the middle of the corrugated material.
Next, a vacuum cleaner is connected to one end. If the corrugated pipe is very thin, you can make an adapter from scrap materials. Now you can turn on the vacuum cleaner and bring a rag tied to a rope to the other edge. Due to the pressure of the vacuum cleaner, the fabric will enter the pipe. The thread is then unwound to ensure that it follows the rag. This must be done until the rag reaches the vacuum cleaner, passing through the entire corrugation.
At the next stage, the cable is threaded inside the corrugated pipe. To do this, its end is tied to a rope, then stretched along the entire length of the material.
This method is used at home to pull a cable through a corrugated pipe of small diameter.
Watch the process in the video:
DIY wiring
Nowadays, hidden wiring is mostly used, and this is not at all surprising, since modern trends in the design of residential premises simply do not allow the use of open wiring. Hidden wiring is technically easy to organize, both on brick and wood walls. If the walls are brick, then grooves (grooves) are made in them, into which the wires are laid, and then they are covered with mortar or putty. If you use drywall, grooves are not needed, but then you will have to use corrugated sleeves that are attached to the wall using clamps. If the house is made of wood, then you can do the same, covering all the “art” with finishing material.
How should internal wiring be laid? In a private home, when installing it yourself, you must follow all the rules
In any case, it is necessary to adhere to a number of requirements that are aimed at the reliable and safe operation of electrical wiring. These rules include:
- The wires are laid either strictly vertically or strictly horizontally, without beveled or rounded corners.
- All connection points must be located in junction boxes.
- Horizontal wiring should be at a height of 2.5 meters from the floor level. Vertical wiring should run along the line of sockets and switches.
Such rules, as well as a saved diagram of the electrical wiring of the house, can help in the future if repairs are required. Then, even without a diagram, you can easily determine where and how the wires go and how they fit into sockets, switches and other devices. Secondly, such a scheme will help you avoid getting caught in the wires if you have to drill holes in order to mount some decorative element or some piece of furniture on the wall.
How to connect wires correctly
A fairly common problem that arises with unreliable electrical wiring is related to poor contacts resulting from poor wire connections. Wires are connected:
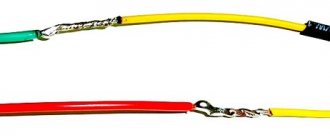
Using twists. As a rule, this connection method is not used when connecting copper and aluminum wires. To make a connection, the ends of all wires are stripped of 4 cm of insulation, after which the required ends are securely twisted. After this, the twisted areas are insulated using electrical tape or heat-shrink tubing. Although such a connection is considered unreliable, this connection method is used quite often. This is not surprising, since this type of connection has a number of advantages.
Using terminal connections. To do this, you need to use special distribution boxes that have metal terminals. Wires are clamped with screws
This connection method is considered more reliable, and the terminals allow you to connect copper and aluminum wires, which is very important. Using pads with springs
Reliable contact is ensured by a spring
Using pads with springs. Reliable contact is ensured by a spring
To make such a connection, it is enough to strip the end of the wire about 1 cm and insert it into the socket.
Despite these methods of connecting electrical wires, soldering and welding are considered the most reliable, although it is not always possible to do this, especially when it comes to welding.
THE MOST RELIABLE WIRE CONNECTION. All types of wire connections. How to connect the wire.
Watch this video on YouTube
Whatever type of connection is used, the main task is to fulfill the basic requirements, which is the key to reliable and safe, in all respects, operation of DIY electrical wiring.
An equally important stage is checking the correctness of all connections, as well as checking for short circuits and insulation integrity. Often, uncertified products of dubious quality are sold, which is impossible to determine visually. As a rule, low-quality products will ultimately cause various emergency situations. Commissioning is possible only if the electrical wiring is checked by specialists from the electrical laboratory, who, after checking, will issue a test report with signatures and seals indicating that the electrical wiring in the house can be used.
How to attach the corrugation to the ceiling?
To fasten corrugations with a cross-section from 16 to 25 mm, special clips are used. They come in 2 types:
- Open.
This type of clip looks like curved flat horns. The part holds the corrugated pipe due to its elasticity. On the side, the clips are equipped with couplings that allow you to connect them to each other. This makes installation and further maintenance of the electrical network easier.
Models with latches are used for corrugations with a diameter of more than 40 mm, as well as when installing cables along the ceiling.
- Closed.
This type of clip is similar to a simple clamp. The part presses the corrugated pipe to the surface to which it is attached. The process can be mechanized using a mounting gun. A clip of clips is placed there, then the electrician “shoots” the corrugation to the ceiling.
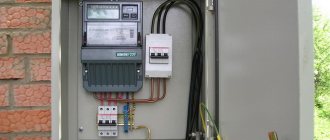
Electrical panel Source verchinskiy.ru
How to conduct electrical wiring under a cassette structure yourself
Unimpeded access to the rough part is the main advantage that distinguishes this option from others. Therefore, there is no need to move the boxes outside the structure. Decorative trim is often used to hide everything.
The pipes are fixed to the base with brackets or clamps if the open option is selected.
It is important to adhere to the following rules when talking about a closed version.
- For metal or reinforced concrete bases, preference is given to metal, corrugated pipes.
- If the ceiling is made of wood, then wooden products are more suitable.
Basic rules for installing ceiling wiring
Installation work is carried out on the basis of a pre-developed plan. During its preparation it is necessary:
- determine the location of the local network connection to electricity;
- highlight points of electricity consumption;
- select a location for installing protective equipment.
- draw up a diagram of laying a cable line from the connection point to electricity consumers.
At the preliminary stage, the brand, section of corrugation and cable are selected. For these purposes, there is a special table that makes selection easier.
Connecting sockets
The wires must not be bent.
The sockets must be connected when the electricity is turned off at the input panel.
The sequence of actions is as follows:
- Prepare the socket box and thread the cable through it.
- Lubricate the glass with putty and insert it into the hole.
- Strip the ends of the wires and connect them to the contacts.
- Secure the housing in the socket box.
- Attach the cover.
Finally, you need to check the strength of the connection using the plug.
Violations committed when pulling a cable line along the ceiling surface
To ensure an aesthetic appearance of the ceiling covering when stretching corrugated protection with a cable inside, you need to buy the material, laid in strands, not tightly twisted. When choosing products, the following mistakes are often made:
- Purchased orange or black type of corrugation.
A hazardous material was selected because it supports combustion. It is recommended to use only gray PVC corrugation.
- The corrugation is laid along the combustible base behind the suspended ceiling.
In case of short circuits, corrugated protection for the power line will not save it. It is necessary to install cable wiring in steel materials.
- More than one 90 degree rotation of the corrugation has been made.
Access for maintenance becomes more difficult. We must try to avoid such turns.
Installation of ceiling wiring in a house Source mos-elektrika.ru
Disconnection - the final stage
Three-phase residual current device (RCD)
It is important not to forget about disconnection. Using a previously prepared diagram, the wires are insulated and twisted into junction boxes. Next, automatic machines, RCDs, switches and sockets are connected to the network. If a suspended ceiling is installed, you must first insert soffits and lamps into the prepared holes.
When performing all activities, the operability of the network is checked; there should be no short circuit.
Which cable option requires corrugated protection?
The choice of corrugation is either determined by existing standards, or is simply selected according to expediency:
- Open installation of electrical wiring indoors.
The method is used for laying material on concrete and brick surfaces. They are considered non-flammable. If the ceiling is wooden, you will need a special non-flammable substrate or use corrugation made of metal.
- Installation of electrical routes with a high probability of causing damage to cable lines.
- When laying cables and then pouring them with concrete, it is recommended to provide additional protection. For this purpose, corrugated material is used.
- If the surface is made of a combustible base, then installing a cable line from VVGNG without corrugated protection is allowed only when choosing an open method.
In this case, the wiring is performed on insulators, using plastic boxes or special plinths.
- If you plan to replace the cable later.
To facilitate the process of replacing the cable line, it is better to use corrugated material one size larger.
Wiring methods depending on the type of surface
The choice of channel materials for future wiring depends on the ceiling material. Let's go through each one separately and talk about the most preferred materials for wiring channels:
- Tree. Wooden ceilings are the lot of low-rise construction and old apartment buildings. The problem with laying electrical wiring is that in the event of a short circuit, a spark can cause a fire, and given the hidden method of installation, it will be almost impossible to extinguish the flame. Therefore, in order to prevent even the slightest possibility of fire, you need to use metal pipes and metal distribution boxes.
- Metal. Metal is practically not affected by sparks, so it is not afraid of short circuits. But metal structures have significant weight and additional impact leads to unpleasant consequences. Therefore, plastic or corrugation is chosen for channels with such a ceiling. Any fastenings are suitable: metal, plastic, corrugated.
- Reinforced concrete. Reinforced concrete is the last possible option. At first glance, it seems that a channel for wiring in or through a reinforced concrete slab is not needed at all. But it is not so. Firstly, you can’t just go deep into a reinforced concrete slab, so in old houses they most often lay slabs along the top. Why? If you go deep into the slab, you can snag the reinforcing rod, and the passage of a spark through the reinforcement is fraught with deterioration of the integrity of the concrete properties. Therefore, they are laid either on the surface of the slab in small grooves along the slab, or through cavities in the slab. In modern slabs, pipes for wiring are even provided in advance; all that remains is to find and use the already laid passage.
Reinforced concrete ceiling with channels for wiring
The most common violations of the PUE requirements
The most serious mistake made at home during the installation of a power line is when the electrical network is laid without paying attention to the locations of various communication pipelines taking into account the perspective. This applies to the location of cable wiring, interior accessories located on the ceiling.
Other errors:
- laying telephone and television cables inside one corrugation along with a power cable line;
- the electrical wiring project involves calculating the load for each room without taking into account the simultaneous inclusion of electrical appliances;
- electrical wiring is calculated without reserve;
- a cable or corrugation of insufficient cross-section has been selected.
To create a reliable, safe cable line on the ceiling, it is better to avoid such mistakes.
Electrical installation with wiring along the ceiling Source profi220.ru
Quality of components
The use of low-quality Chinese components is the second serious mistake. Such electrical wiring elements are not able to cope with rated loads. They quickly fail, heat up, melt (since they are not made of heat-resistant plastics) and create a fire hazard.
On the Internet you can find a wide selection of power cables of various sections, panels, protection and automation devices, as well as other components that will help you properly organize a modern electrical network. We recommend checking out this website for the sale of cables and electrical equipment.
If your task is to organize truly reliable wiring that can cope with any load, then the quality of the power supply elements must be uncompromisingly high.
Electrical wiring on the ceiling: pros and cons
Advantages of electrical wiring on the ceiling:
- Installation is simplified, since a screed has already been made on the ceiling surface of the room, suitable in terms of parameters for corrugated material.
- You can immediately lay the cable line, since there is no need to re-fill the ceiling.
This refers to a situation where the quality of the coating is at an acceptable level.
- The perspective is taken into account, since then suspended or plasterboard ceilings can be made.
Preparatory work
At the initial stage, you will need to prepare the room for electrical wiring:
- Clean the walls and ceiling surfaces from old facing material, with the exception of the plaster layer.
- Take precautions to ensure safety from electric shock. To do this, disconnect the power cables directly from the machine in the electrical panel. If there is a need to break the seal on the electricity meter, it is recommended to contact the supply company in advance to fill out an application.
- Perform temporary wiring from the circuit breaker in the electrical panel to create lighting and use electrical tools.
- Dismantle the elements of the old wiring.
Dismantling old electrical wiring
Note! Before disconnecting the wires in the electrical panel from the power supply, as well as before dismantling the old wiring, be sure to check that there is no voltage using a voltage indicator.
