The light switch has stopped turning off the light (that is, whether it is on or off, the light remains on). According to the advice, I replaced the switch (or switch) with a new one and stripped the wires. The problem remains the same - the light just stays on! Help - what could be the next question?
24 comments
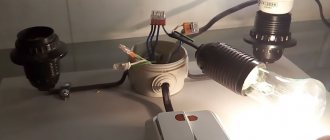
Need more information on this issue. Did the switch work, and then suddenly stopped, or after replacing the wiring and installing it, did it stop performing its functions due to improper connection of the junction box. Maybe you have a chandelier with a remote control and the relay unit is simply soldered?
Good afternoon I came home and the light is on in the bathroom, although I remember exactly that I turned it off, and when I flip the switch it doesn’t go out, tell me what could be the reason?
The key on the switch works but the contact is not disconnected, it is stuck, this has happened before. The key can turn off, but the contacts have not opened.
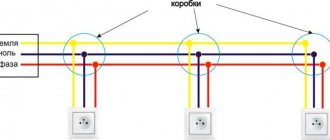
You need to inspect the wires in the distribution box. Perhaps they are stuck to each other.
What if after replacing the switch nothing has changed? Is the light still on?
You need to inspect the wires in the distribution box. They stick to each other over time.
Good evening! Yesterday I turned on the switch (light), but could not turn it off! I had to unscrew the light bulbs, but the switch remained on! What should I do?
Disassemble the switch and see what’s wrong with it, and repair if possible. Or just replace it.
Tell me this is the problem, I changed the spotlight, mistakenly set it to 12 V instead of 220 V, when I turned it on, the lamp exploded, and the switch is always on. and the light from the switch does not turn off. (When pressed, it returns back to on). How to treat?!)
Good afternoon! My daughters were playing with a parrot, suddenly everything went out.. The plugs were knocked out.. We turned on everything, but the light in the children's room does not turn on.. Tell me how to fix it!
Hello! You need to disassemble the switch, look at its contacts, maybe they are stuck. As a last resort, replace it with a new one. You can start by deliberately removing the switch in another room, replacing it with the one with the problem, and if the problem is solved, then buy a new light switch.
Kind. Single-key switch in the bathroom with indicator. 4 ice lamps and a fan are connected. It worked for a year without problems. But one day I unintentionally hit the switch with static electricity with my hand. And that's it, the 4 ice lamps are on constantly, and the fan is on only when this switch is turned on. What about him? Thank you.
I have a similar problem. When the light was turned on, something banged. The light went out, the shield on the distributor was knocked out. I looked at the light bulb - it was burned out. I tried to change it - it was on, but now the light does not turn off. I don’t understand what the problem is, something with the wiring or the switch. I'm afraid that the walls won't have to be hammered, only the renovations have been done, the wiring is all new.
First, try removing the wires from the switch - the light will go out, which means the switch is stuck in the on position - it needs to be replaced.
Expert opinion
Viktor Pavlovich Strebizh, lighting and electrical expert
Any questions ask me, I will help!
For those who have never installed switches or done electrical work, it is recommended that you carefully consider your actions. If there is something you don’t understand, write to me!
Preparing for work
Before you begin repairing a broken switch, you need to stock up on the following tools and accessories:
Read also: Windshield cracked
- Multimeter or indicator screwdriver.
- Slotted screwdriver of the correct size.
- Marker.
- Fine-grained sandpaper.
It is advisable to photograph the results of each stage of disassembly while working - this will help you avoid confusion when you assemble the structure in reverse order. Therefore, you will also need a camera or a mobile phone with a camera.
Errors when connecting a two-key switch
The first mistake that an illiterate specialist can make is to connect not a phase to the switch, but a zero.
Remember: the switch must always break the phase conductor, and in no case the zero conductor.
In the opposite situation, the phase will constantly be on duty on the base of the chandelier. And simply replacing a light bulb can end very tragically.
By the way, there is another nuance due to which even experienced electricians can break their heads. For example, you wanted to check directly at the contacts of a chandelier whether the phase arrives there through a switch or zero. You turn off the two-key switch, touch the contact on the chandelier with a Chinese sensitive indicator - and it lights up! Although you assembled the circuit correctly.
What can be wrong? And the reason lies in the backlight, which is increasingly included with switches.
A small current, even when turned off, still flows through the LED, applying potential to the lamp contacts.
By the way, this is one of the reasons why LED lamps blink when turned off. How to deal with this can be found in the article “6 ways to solve the problem of flashing LED lamps.” To avoid such a mistake, you need to use not a Chinese indicator, but a multimeter in voltage measurement mode.
The second error is when the phase supply conductor is connected not to the common contact of the switch, but to one of the outgoing ones. In this case, the circuit will not work as expected. All lights will light only if you press two keys at the same time. But if you press only the key to which the phase does not come initially, the chandelier will not light up at all.
If you moved into a new apartment, where you were not the one who connected the chandelier, and it behaves in such a strange way, that is, it does not react as expected to the two-key switches, then the problem is most likely due to such an erroneous installation of the supply wires. Feel free to disassemble the switch and check the common contact.
If you have an illuminated switch, an indirect sign of such an incorrect connection may be the neon bulb not working properly. Why indirect? Since here everything depends on which key you start the phase on.
The third common mistake is connecting the neutral wire on the chandelier not to the common zero in the junction box, but to one of the phase wires. To avoid this, use and follow the color coding of the wires, and even better, if you don’t trust the colors, check the voltage supply using a high-quality indicator or multimeter before turning on the lamp.
General progress of repair work
If a switch with two buttons is closed, then mark with a felt-tip pen the wire that supplies electricity and is common to both switching modes.
Location of switch screws 5.
Removing mounting screws 6. 7. 8.
Reinstalling the switch
Kinds
Two-key switches are available in several versions:
- with backlit keys;
- combined with a socket;
- designed as a pass-through switch.
By design, switches are available for outdoor or indoor installation. Connecting a two-button light switch depends on the specific situation. It is necessary to decide where the switch for two chandeliers will be used and decide which option is needed.
There are options for two-gang switches that have four contacts instead of the standard three. They are two isolated single-key switches combined in one housing. They are called modular.
For indoor installation
This device is the most common. It is used in office and residential buildings. Installed in a mounting box, which is mounted in a plasterboard or concrete/brick wall. Due to the fact that the switch is hidden in the wall, it is also called “recessed”. The wires are supplied to it in special grooves called grooves. If the switch is fixed in a framed plasterboard wall, then the cable to the switch is laid in a corrugated pipe.
For outdoor installation
When installing open-type wiring, outdoor switches are used. They are mounted on a non-flammable base, and the wires are connected to them in cable ducts, metal hoses, corrugated plastic pipes or on top of the wall on porcelain insulators. Most often, the connection diagram for a two-button switch for two open-type light bulbs is used in wooden houses of gardening partnerships. Outdoor installation is also used in sheds, garages, basements and other utility rooms.
Assembly and installation of the switch
Assembling and installing the switch is done in the reverse order. It is important that all wires are connected correctly.
Installation is carried out in the following order:
- Connecting wires and securing them in the housing;
- Installation and position adjustment, fixation with clips in the socket box;
- Installation of decorative trim;
- Key mount;
- Turn on the voltage and check the functionality of the device.
See below for how to replace the video switch:
Read also: Zucchini casserole in the oven
Mechanical repair
If something breaks in the mechanics, the problem can only be corrected by replacing the unit. But spare parts for switches are not sold separately. In this case, the donor device will help out. The same applies to the electrical part - the design of the terminals does not always allow cleaning, and in some cases they will need to be replaced. Also, movable and fixed contacts may need to be replaced (in case of melting or serious burning).
The donor device is a source of spare parts for repairs.
In many cases, two faulty switching elements can be made into one.
The device is assembled in the reverse order. Before installation, you must once again check that there is no voltage on the supply wires (it may appear due to unauthorized switching on by others).
Basic troubleshooting methods
Most often, when the device is turned on, the contacts burn out, and here it is recommended to simply clean the contact groups. It is better to do this with a small piece of sandpaper. Sometimes the switch does not work due to loose wire clamping, so it is necessary to check the functionality of the fixing screw.
The heavy operation of the switch, especially with the sliding type of contacts, is due to the fact that there is no lubrication, because of this the contact does not turn on the chain. The presence of melted plastic or crumbled ceramic housing means that the device is completely broken and must be permanently replaced.
Why should a light switch break a phase, and not a zero?
At first glance, there is no difference, both circuits work the same way, because even if the zero is broken by the switch, the light will go out in the same way as with a phase break.
To better understand this, let's, for clarity, look at a switch connection diagram in which a neutral conductor (zero) is connected to it.
As you can see, with such a circuit for connecting the switch, there is always voltage on the lamp, this is the main drawback that can cause serious problems and inconvenience in the operation and maintenance of light sources.
First of all, the main danger of this connection method is that you can be “shocked”, for example, when replacing lamps, when you accidentally touch the conductive contacts.
In addition, if the insulation of the supply cable is broken or the electrical connection inside the lamp is damaged, the phase conductor may short-circuit to the housing. And then, with a simple touch of a chandelier or sconce, you yourself will become a conductor, part of the electrical network, you will feel a serious electric discharge, and, under certain conditions, electric shock can even be fatal.
This becomes especially relevant because for lighting groups, in the same PUE, it is allowed not to install differential protection, for example, an RCD, so you will learn about the voltage on the housing only when you feel the discharge, while the lamp may not even be turned on.
Another less dangerous, but no less unpleasant problem is the flickering of lamps when the lights are off. Modern energy-efficient lamps - energy-saving (fluorescent) or LED, can respond to even minor fluctuations in the electrical network; even ultra-low currents can trigger them. Therefore, even when the light switch is turned off, such lamps can flicker, and this reduces both the life of the lamps and simply irritates many.
Therefore, in order to avoid these and some other problems, it is correct to make sure that the switch breaks the phase and not the zero.
Unfortunately, most often, people wonder whether phase or zero should be in the switch in the case when they are already faced with incorrect wiring, having zero in the switch and all the problems described above. What to do in this case?
How to fix a switch: types of devices
If you find out that your switch is not working and decide to fix it, then the device must be disassembled. Before this can be done, the power to the network is completely cut off. To do this, turn off the power at the switchboard automatically, and then check the voltage status at the output.
If you were unable to de-energize the line you needed, then it is best to disconnect the entire apartment from power. Only after this can you begin repairing the switch. But that is not all. Before removing the switch, it is necessary to determine its type.
What could the switch be:
- Single-key;
- Two-key;
- Pass-through, or three-key;
- Spinning;
- Dimmer – switch;
- Touch switch.
Today there is a wide variety of switch models on the market, but most users have conventional key devices.
LED backlit switch as the reason for the lamps blinking
If there are no other ways to get rid of the flickering lamp lamp, you will need to completely turn off the LED or neon lighting on the switch. Let's look at how to do it yourself and what are the main stages of this procedure.
Preparatory stage
For those who have never installed switches or done electrical work, it is recommended that you carefully consider your actions. Pre-requisite:
- Disconnect the general power supply in the apartment/house from the switchboard switch (by checking its absence with an electrical probe or an indicator screwdriver).
- Prepare a set of necessary tools (mostly a flat-tip screwdriver).
Advice! The switch with the LED is energized at 220 V. Therefore, before starting work, you need to turn off the power to the network. Many circuits still have plug fuses. You can turn them off by unscrewing them from the shield.
Operating principle of the lighting device
What turns on the light
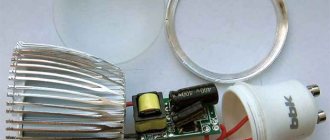
All LEDs and fluorescent lamps operate on direct current. Therefore, at the beginning of their case, a special driver is installed, which includes two required elements:
Step-by-step instructions for disabling
Instructions on how to turn off the LED in a household switch consist of the following steps:
- Dismantle the switch or remove the top panel with keys.
- Having understood the circuit, find the LED and conductors connected to the contacts.
- Disconnect the indicator from the terminals, using wire cutters if necessary.
- After making sure that the main conductors and contact points are in good condition, reassemble the switch in the reverse order.
Disassembling and cleaning contacts
If you find that the light switch still works, but is unstable, then, often, the cause of the breakdown is burnt contacts in it. In this case, you should be guided by the following sequence of actions:
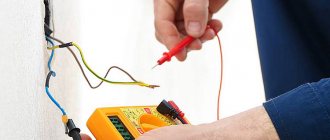
- After turning off the power supply at the breakdown site, you should carefully check the switch a couple of times for the presence/absence of current supply using a multimeter or an indicator screwdriver.
- After making sure that the mechanism is de-energized, you should carefully disassemble the switch. To do this, first use a screwdriver or other tool to pry the buttons of the mechanism and remove them.
- Remove the plastic rim of the switch housing and put it away.
- Check the terminals of the device being dismantled for the presence of current using an indicator screwdriver.
- In the case of disassembling a two-key switch, you need to use a marker to identify the wire that is common for two types of switching.
- Next, using a regular screwdriver, you need to loosen the 2 bolts that are located at the edges of the mechanism body, and then remove them from the plastic socket.
- After this, the bare wires supplying current to the device are cleaned using previously prepared fine-grained sandpaper and wrapped with insulating tape.
- This completes the repair process.
It is worth noting that if you are not well versed in the repair business, or if this is the first time in your life that you have decided to repair a light switch, arrange the parts of the device during dismantling in the order in which they were disassembled. Or, as an option, take a photo of the step-by-step disassembly of the device, so that after solving the problem, you can calmly and without any hesitation assemble it as needed.
The light in the room does not turn on or off: what to do
If you notice that the light switch is working somehow wrong (it turns on unstable or by itself), then you can assume that the cause of the breakdown lies in burnt out contacts. In this case, after turning off the power supply, it is necessary to check the switch a couple more times at the breakdown site for lack of electricity supply and get to work.
After making sure that the network is de-energized, you should slowly disassemble the switch. To do this, use a screwdriver to pry the keys of the mechanism and remove them. If you have a Soviet switch, then simply unscrew the bolt and remove the box.
Modern switches exist with one, two or even three keys. If they are not removed, the device cannot be disassembled. All elements and fastenings are hidden inside the device. All keys are removed in order of priority. Then, prying it by the edge, we remove the decorative frame pressed against the mechanism and held in place by the latches.
Stages of dismantling the light switch:
- We check whether we have actually turned off the power supply;
- Use a screwdriver to pry up the edge of the button and remove the housing;
- Remove the lid trim;
- Using an indicator, we check that there is no current in the terminals;
- If the switch has two or more buttons, then the common wire should be marked with a marker;
- Unscrew the screws and remove them from the socket box;
- We insulate exposed wires;
- We clean the contacts on which carbon deposits have formed;
- We assemble the device in reverse order.
Our switch has been repaired. Connect everything in the reverse order, turn on the machines and check the operation of the device. When assembling a switch, it sometimes happens that the cover does not want to sit on the base of the switch in any way. In this situation, you need to loosen the bolts that hold the housing a few turns and press the cover tightly into place. Then you should tighten the bolts. If this manipulation does not help, then it is best to simply replace the device. In order not to get confused at the sight of a huge assortment of products in the store, take an old device with you from home.
Many people, faced with such a breakdown, do not hesitate to run to an electrician, since they are completely unfamiliar with the structure of this mechanism and do not know what to do with it and how to fix it. The light switch is actually easy to fix. You just need to get down to business once and figure it out a little. Why does the switch break?
The most common cause of failure is poor contact in the automatic switch assembly, which contains plates that become coated over time due to constant sparking. To return the switch to functionality, just clean the switch contacts. Before you fix the light switch yourself, we recommend reading this article.
Troubleshooting procedure and safety measures
Before you begin repairing light switches in your apartment, it is advisable to thoroughly prepare for this procedure. First of all, you need to stock up on working tools that can be used to repair products of this class. The set includes the following items:
- indicator screwdriver;
- tester (multimeter);
- regular screwdriver;
- side cutters or platypuses.
Disassembling and cleaning contacts
Before you repair the light switch, you will definitely have to disassemble it to the point where the fault is clearly visible. It is recommended to start repairing a broken device in the following order:
- Completely remove the voltage from the linear branch of the supply line or from the entire apartment at once.
- Disassemble the switch, for which you first need to remove all the keys.
- After removing them, the switching mechanism with the rocker arm will be “exposed”, the condition of which is used to judge the nature of the breakdown.
If, even before completely disassembling the device, loose contacts were found in the places where phase conductors are supplied and discharged, they should be tightened firmly, first installing the locknuts.
If at this stage of dismantling it is not possible to detect traces of a malfunction or the damage is too serious, it is best to completely dismantle the device from its installation location.
Before repairing a faulty switch, you will have to unscrew the mounting screws and pull the box with it out as far as the length of the conductors allows. If they are short, the fastening is loosened, and the device itself is taken out of the plastic case (first you remember which of the conductors was connected where).
After removing the device from its installation site and removing it from the box, it will be more convenient to inspect it for damage. During inspection, several types of faults may be detected:
- the axis of fastening the rocker arm has fallen out, which returns to its place and is slightly flattened along the edges with side cutters; after this the key will be pressed normally, without jamming;
- the contacts of the changeover element are slightly burnt from frequent switching, which can be corrected with the help of sandpaper;
- if the contacts are badly burnt out, the moving part of the mechanism will have to be replaced with a new part (from a spare working switch);
- if there is nothing to replace this part with, you will have to buy and install a new device.
After eliminating all detected faults, they begin assembling the repaired device.
Switch assembly
To assemble the switch and install it in its original place, first its body is secured in the mounting box. After this, the dismantled conductors are carefully connected to the contacts, and the screws securing them are tightened with force. Then the plastic cup is installed back into the niche and fixed there with spacer screws. Next, all that remains is to return the decorative panel to its place and install the switch key back.
Repairing 3-key switches or their two-key analogues is no different from the process already described for a single-key switch. In this case, everything will repeat itself, only perhaps on a larger scale. After installation, the device is checked for functionality.
Restoring rotary and touch models
In rotary-type devices, characteristic malfunctions have approximately the same causes and manifestations as in keyboard analogues. In their working mechanism, the closing and breaking contacts also burn out and completely wear out, which is explained by their intensive use. In addition, by analogy with the samples already considered, it is also possible for them to loosen the contacts at the points where the phase conductors are connected.
Practical advice
- If an old-style switch breaks, you can of course fix it, but there is no point in doing so, because... Every part wears out over time, and in electrical work it is very dangerous to use old switches and sockets, especially if they often break down. Today, even such leading companies as Legrand have inexpensive but reliable products, even with lighting, a chain (cord) or a dimmer.
- The reason why the contacts on the key switch burn out quickly is because the light bulbs are too powerful. We recommend replacing incandescent lamps with more efficient and at the same time less powerful light sources - LED lamps. In this case, you can forget about repairing the switch for a long time.
- Before proceeding with complete disassembly of the case, check how well the wires are tightened with screws. You may be able to fix the switch simply by tightening the screws with a screwdriver.
- In order not to confuse the order of assembly of spare parts of a disassembled case, we recommend using a camera: take photographs of each of the disassembly stages one by one and, if necessary, assemble the structure from the photo.
That's all I wanted to tell you about how to fix a light switch with your own hands. We hope that the provided instructions and photo examples will help you repair a switch that does not turn off or turn on the lighting in the house!
Also read:
- How to disassemble a light switch?
- What is the danger of a broken neutral wire?
- What tools should an electrician have?
Video instructions for assembling the case
Causes of breakdowns
A faulty switch can be determined by the following signs:
- when you press a key or turn a toggle switch, knob, or other actions, the light does not turn on;
- turning on or off operations require multiple repetitions, keys or other elements work with jamming;
- an increase in the temperature of the light switching device housing is felt;
- after the circuit is closed, a crackling sound is heard or the lamp flickers;
- frequent burnout of light bulbs, regardless of their type (incandescent, LED, halogen, etc.);
- when the contacts in the switch close, a crackling sound is produced;
- The device does not connect to the network.
These problems may occur due to the following faults:
- Destruction of individual elements of the switch or melting of contacts.
- Violation of integrity and contact in the place of fixation of electrical wiring or terminals.
- The housing in the contact group is destroyed.
- The contact group is worn out.
The basic principle of operation of any type of switch is that it closes to turn on the light and opens the contacts to turn it off. However, often in more complex switch configurations, breakdowns can be even minor, which will prevent the luminaire circuit from closing.
Repair of halogen chandeliers
Lighting devices with remote controls often break down. The main signs of failure of such chandeliers:
- despite transmitting a signal from the remote control, the lamps do not light up;
- Some modes do not function, the chandelier switches off spontaneously;
- the same modes do not work when controlled from the remote control, but function when switched manually;
- flickering occurs that is not caused by any human action, and spontaneous switching between modes occurs.
The listed problems are the most common, but a combination of several of them is rare. Typically 1 or 2 components of a remote control chandelier need to be replaced.
The search for a problem in a lamp with a remote control begins with checking the batteries. If new ones are installed, but the chandelier still does not work, the next possible cause of the malfunction is the controller.
Different groups of lamps are most often connected in separate blocks. These elements are connected using a controller. A common situation is that it launches only some modules of the device. In this case, it will need to be replaced.
It happens that the light does not turn on either using the remote control or when pressing the switch. In this case, you should pay attention to the number of non-working components. One lamp may burn out. However, when all the bulbs do not work, the likely problem is in the electronic transformer. This element is replaced with a new one, while working with clean gloves.
Restoring rotary and touch models
Touch switches must be repaired in specialized workshops. In rotary-type devices, characteristic malfunctions have approximately the same causes and manifestations as in keyboard analogues. In their working mechanism, the closing and breaking contacts also burn out and completely wear out, which is explained by their intensive use. In addition, by analogy with the samples already considered, it is also possible for them to loosen the contacts at the points where the phase conductors are connected.
Restoring switches of this class is similar to the approach already discussed for key products. Difficulties arise when the cam mechanism breaks down, which is unlikely to be repaired manually. In this case, experts advise completely replacing the device with a new product.
Touch switches at home cannot be repaired. Due to the complexity of the design of the dimmer device, their restoration is possible only in specialized workshops.
From theory to practice
If the light went out in one of the rooms, the circuit breaker did not work, i.e. there was no short circuit, you need to take a probe and see what is happening in the sockets or switches, and if two phases are observed there, then you need to look for a zero break.
Reasons for missing zero
Zero can disappear for many reasons, the most common are listed below:
- The old wiring could not withstand the load from modern electrical appliances. This is especially true for apartments where there are still traffic jams, and not modern electrical panels with circuit breakers and zero buses. If, for example, only the zero plug is knocked out, then the appearance of two phases in the sockets is guaranteed;
- A short, small circuit leading to an open circuit. In this case, the circuit breaker may not react (as in our situation).
- Oxidation and burning of contacts (as a result of the same short circuit) at the joints;
- Electrochemical corrosion of copper and aluminum wires. For example, there may be such a situation, a copper neutral wire comes from the shield, and an aluminum one already approaches the socket. Considering that the wires can go directly into the room bypassing the junction box, we can assume that they are connected somewhere in the wall. If they are connected incorrectly, the contact between them could disappear, which will lead to a break in the zero;
- Repair work without taking into account the location of wires in the apartment. Such work is unacceptable. Any drilling in the wall can lead to a break in both the neutral and phase wires, so it is important to use hidden wiring detectors to roughly draw up a diagram of its location.
- Other reasons, for example, rodents chewing wires in old houses, etc.
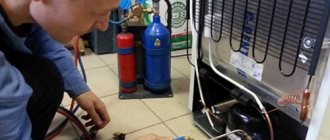
Repairing a switch in a refrigerator
There can be many reasons why the light in the refrigerator does not light:
- Failure of the thermostat that supplies a special contact to the light bulb. This device cannot be repaired, so it will have to be replaced with a new one.
- The button that is moved to the on position by pressing the refrigerator door does not work or “sinks.” It is necessary to check its operation and the possibility of repair.
- It is also necessary to check whether the light bulb has burnt out. It may not be installed tightly enough, or it may be inserted in such a way that its contacts periodically move away. At one time I was unable to go to college due to health reasons, then I got tired of it and never received any specialty. But I really want to succeed in this life, build a career and develop in the profession, so I started looking for where to get a diploma in Moscow without risk. Having found the company, I was a little confused and doubtful. But after talking with the managers, all fears disappeared. They guaranteed complete anonymity and assured that the diploma was identical to the original. After collaborating with them, I was convinced of this. In order to make sure of this, you just need to swing the light bulb in different directions and if it starts to flicker, you just need to replace the socket.
- It would be a good idea to make sure that the refrigerator is working at all, whether it is connected to the mains or has simply broken down for various reasons.
The reason may also be due to other breakdowns:
- electronics fail;
- The magnetic switch does not work;
- any problems with the wiring inside the device.
Wiring problems can occur when water gets into the light bulb socket, often causing the wires to burn out. Often, increased condensation formation can damage the entire wiring. This “disease” mainly affects inexpensive models from little-known manufacturers.
Lever-type switch, used in most modern models of refrigerators of famous brands
If it is discovered that the problem lies with the switch, you need to find it inside the refrigeration unit. As a rule, in most models the switch is located in the upper inner part of the case and looks like an elongated lever pressed by the door. There is a corresponding protrusion on the door for reliable pressing.
If the switch malfunctions, the most that can be done on your own is to alternately press and release the button several times.
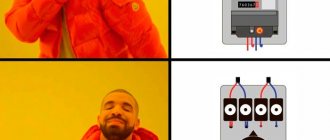
Illuminated switch
The most common reason for a lamp to glow after being turned off is backlit switches.
Inside such a switch there is an LED with a current-limiting resistor. The LED lamp glows dimly when the light is turned off, because even when the main contact is turned off, voltage continues to flow through them.
Why does an LED lamp burn at full heat and not at full power ? Thanks to the limiting resistor, the current flowing through the electrical circuit is extremely insignificant and insufficient to light an incandescent electric lamp or ignite fluorescent lamps.
The power consumption of LEDs is tens of times lower than the same parameters of an ordinary incandescent lamp. But even a small current flowing through the backlight diode is sufficient for the LEDs in the lamp to glow weakly.
There can be two lighting options. Either the LED lamp lights up continuously after turning off, which means that sufficient current flows through the LED backlight of the switch, or the light flashes periodically. This usually happens if the current flowing through the circuit is too small to cause a constant glow, but it recharges the smoothing capacitor in the power supply circuit.
When sufficient voltage gradually accumulates on the capacitor, the stabilizer chip is triggered and the lamp flashes for a moment. Such blinking must be definitely combated, no matter where the lamp is located.
In this operating mode, the lifespan of the power board components will be significantly reduced, since even the microcircuit does not have an infinite number of operation cycles.
There are several ways to eliminate the situation when the LED light is on when the switch is off.
The simplest is to remove it from the backlight switch. To do this, we disassemble the housing and unscrew or bite off with wire cutters the wire going to the resistor and LED. You can replace the switch with another one, but without such a useful function.
Another option would be to solder a shunt resistor in parallel with the lamp. According to the parameters, it should be designed for 2-4 W and have a resistance of no more than 50 kOhm. Then the current will flow through it, and not through the power driver of the lamp itself.
You can purchase such a resistor at any radio store. Installing the resistor is not difficult. It is enough to remove the lampshade and fix the resistance legs in the terminal block for connecting the network wires.
If you are not particularly friendly with electricians and are afraid to “interfere” with the wiring yourself, another way to “fight” backlit switches can be to install a regular incandescent lamp in the chandelier. When turned off, its spiral will act as a shunt resistor. But this method is only possible if the chandelier has several sockets.
Expert opinion
Viktor Pavlovich Strebizh, lighting and electrical expert
Any questions ask me, I will help!
But if the presence of lighting is important and there is a pass-through switch in the pantry, then you can eliminate the flickering of the lamp with its help. If there is something you don’t understand, write to me!
Repair of other types of switches
The dismantling and repair of a switch with two keys is discussed above. Single-key and three-key devices have a similar structure, so after reading the step-by-step instructions, there should be no problems with their restoration. It can be seen that the one-key switch shown in the figure differs from the two-key switch only in the combined (rather than separate) movable strip for attaching decorative overlays. And he understands it exactly the same way.
Single-key device design.
You just need to keep in mind that the design of the devices may differ slightly from manufacturer to manufacturer. But there are other types of household switching elements.
Repair of a chandelier with a remote control: breakdowns and their repair
- The maximum permissible voltage must be at least twice the value in the network, that is, 440 V. 630 V capacitors are suitable for these purposes.
- If this could not be found, a 400 V capacitance will also do, but it should be connected according to a circuit with one series and additional shunt resistance in accordance with the following circuit.
Useful tips Connection diagrams Principles of operation of devices Main concepts Meters from Energomer Precautions Incandescent lamps Video instructions for the master Testing with a multimeter
Batch switch repair
In rooms with lighting from many lamps it is difficult to use key switches. Package devices that connect lighting in parts are designed for this purpose. Due to the load, devices break down and require replacement, but more often you can repair or install spare parts.
Batch switch repair stages:
- Turn off the power to the lighting board.
- Use a tester to check the absence of voltage on the cable cores.
- Disconnect the wires, remove damage, and isolate exposed areas.
- Remove the package switch housing, check the contacts, clean carbon deposits and oxides.
- Replace damaged springs, fixing petals and handles with new ones.
- Measure the moving contacts; if the thickness is less than 20% of the initial thickness, replace them.
- Mount the packet switch in the reverse order and connect to the wires.
After completing the repair, check the resistance between the live wire and the device body with an ohmmeter; a value of 50 MOhm is allowed. Check the fixation of the handle by moving it to the appropriate positions.
If you do the work yourself at least once, you can gain experience on how to repair a light switch if it fails. To facilitate assembly, photograph the dismantling stages and mark the contact wires and clamps with a colored marker.
Video
Video about the procedure for disassembling the switch and its internal structure:
If at one point you notice that the light switch in the room does not work or turns off the lighting every once in a while, you should not immediately go and buy a new one. The design of the product is not complicated and most often the cause of failure is burnt contacts that just need to be cleaned. Next, we will look in detail at how to repair a light switch with your own hands, and also tell you why this type of breakdown can occur.
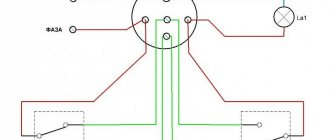
Connection diagrams for a two-key switch
When connecting the switch, remember that the phase that comes from the panel is supplied to its input. This is the basic rule. This is the only way the connection will be correct. The phase is taken in the distribution box, which is usually located above the switch (sometimes, with lower wiring, below it) in the distribution box.
Please note that work is carried out with the voltage turned off. If there is a circuit breaker through which the lighting is powered, turn it off
If the wiring is old, unscrew the plugs. Before work, make sure that there is no voltage on the wires (touch all with an indicator screwdriver).