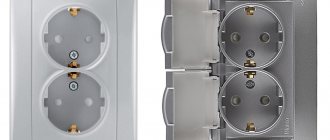
A socket is not only a mandatory functional element of electrical wiring, used to connect electrical household appliances, but also a significant interior detail.
The trouble-free operation of the outlet, as well as its neat appearance, depend to a large extent on how well the installation is done, right? To make the correct installation, it is necessary to take into account a number of nuances that are present in this work, one of which is the correct installation of socket boxes.
Have you never installed a socket box and are afraid of making mistakes? We will help you understand all the features - the article discusses in detail the types of installation boxes and the intricacies of installing each of them.
Attention is also paid to the installation of socket boxes in common types of bases - concrete, plasterboard, tiled wall. The material is supplemented with visual photos and useful videos.
Basic rules for installing socket boxes
Before installing the socket box, you must select the location for its installation. But since the socket is a source of increased danger, its placement in some rooms is subject to special requirements specified in the “Rules for Electrical Installations” (PUE).
According to the PUE:
- there must be a distance of at least 50 cm from the electrical outlet to the pipe through which the gas passes;
- sockets in the bathroom can be installed at a distance of at least 60 cm from the source of splashes (sink, shower, bath);
- It is recommended to install switches on the side where the door handle is located, and the distance from the device to the floor should be up to 100 cm;
- You cannot install sockets in saunas, baths, or rooms where laundry is done.
There are no special rules for other premises. Sockets should be placed in such a way that their use is convenient for all family members.
It is also necessary to follow safety requirements and install devices taking into account the location of electrical appliances in the house so that their cords reach the outlets without the use of extension cords.
You may also be interested in information about the nuances of installing an outlet for a washing machine or an outlet for an electric stove.
Recommended installation locations for sockets and switches in the room from the point of view of practicality and convenience
Video description
For a clear overview of electrical wiring in a wooden house, watch the video: A separate point of electrical installation work is the arrangement of grounding. Moreover, it is necessary to ground not only the sockets, but also the pipes through which the wires are laid
This is why it is so important to make a reliable connection at the junctions of the pipes and cups - they are often additionally connected with wires
Grounding the electrical network is a prerequisite for ensuring fire safety - not a single new electrical wiring project that does not provide for grounding will be accepted by regulatory authorities.
All pipes must be grounded Source zgbox.ru
Soldering is the most reliable and high-quality option for connecting cups with supply pipes of all possible. This type of fastening provides safe, resistant to mechanical damage and anti-corrosion contact.
Flaring of the ends of the pipes that are in the cup is carried out if they are made of copper. When steel pipes are used, a nut connection is used. To do this, threads are cut at the ends of the pipes. The nuts are tightly tightened, fixed and treated with an anti-corrosion agent.
The protection class of the distribution cups must correspond to values not lower than IP-54, which ensures the prevention of any type of dust and water droplets from entering it.
Installing a box in hollow walls
Socket boxes designed for walls made of composite materials, in particular plasterboard, have a slightly different design than installation boxes for concrete and brick bases.
Fixing the glass in the wall is done without gypsum mortar, which makes installing the socket box into plasterboard much faster and easier.
To make holes, it is better to use a wood crown, as they are smooth and neat, which makes the process of installing the socket box easier.
At the top of the glass there are four screws arranged in pairs. Two of them protrude slightly outward and are intended for attaching a switch or socket.
The other two are slightly recessed into the socket body. On the bottom of each screw there is a metal or plastic tab, which, when the screw is turned, moves and fixes the box in the drywall.
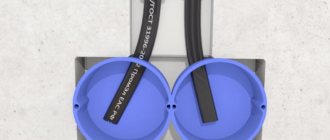
Before inserting the glass into the wall, run the electrical wire through the pre-made hole in the back of the box
Before installing the socket box, make markings as described above. Making a hole in drywall is much easier than making a hole in a concrete wall. You can simply cut a circle with a knife or drill along the contour with a drill, and then cut it with the same knife.
However, when using these methods, the edges are not very smooth. In addition, drywall is a rather fragile material and can break.
It is best to do the job using a wood crown. After the hole is prepared, bring the wire out into it and insert the socket so that the screws are positioned horizontally. Secure the cup into the drywall by tightening the two recessed screws clockwise.
Image gallery
Photo from
Preparing a socket box for drywall
Features of mounting mounting cups
Rules for tightening clamping screws
Forming holes for wiring entry
What to do if, while drilling, a drill or bit gets into the reinforcement?
There are several ways to remove rebar. One of the fastest and most painless is knocking out the reinforcement with a chisel - an attachment for a hammer drill. If the crown gets into the reinforcement (an indirect sign of it getting into the reinforcement is sparks or a clear slowdown in the drilling process), it is better to remove this reinforcement, otherwise you will ruin the crown.
The second less convenient way is to use an old crown. It doesn’t matter which way you do it, with a diamond or a drill bit, in both cases we simply drill out the reinforcement. The reinforcement metal is very soft and can be easily broken through with a hammer drill. And the third, dirty way, is to simply drill out the reinforcement using a grinder with a diamond disc on the stone.
Installation of socket boxes in ceramic tiles
If it is necessary to install a socket or switch in a wall that is supposed to be tiled, marking and making holes in the concrete should be done before finishing work begins. Electrical wires are laid in advance in the resulting recesses.
After laying the tiles, markings are made again and holes of the required depth are drilled in it. It is best to drill the tile with a diamond core bit, periodically cooling it with water.
A gypsum solution is placed in the recesses, it is also applied to the back of the socket box, and then the box is pressed into the hole and leveled.
To install several sockets, a template is made in advance, according to which the wall is first marked, and then after facing it is applied to the tile, and holes are drilled along it
Hole cutting
After marking, in the marked centers of the circle it is necessary to make a hole using a drill with a slightly larger diameter than the crown drill (for example, an 8-10mm drill). We drill a hole with a margin, taking into account the length of the drill bit of the crown itself (but do not forget about neighbors and thin walls). This method is also suitable when working with a diamond core bit in drilling mode.
The process of gating. After drilling holes in the center of the future circle, you need to use a crown to go deeper into the wall a few millimeters (this only applies to the method of working with a hammer drill!). Along the intended circle, you need to drill the maximum possible number of holes to make it easier for the crown to “gnaw” the concrete.
With a diamond crown, you just need to drill - without chiselling, periodically letting the crown cool. It is worth noting that if a diamond bit gets on the reinforcement, its service life is significantly reduced.
When working with an angle grinder, the whole task comes down to making cuts in the wall to the required depth and hollowing out the area where the socket boxes will be located.
The nuances of installing a multibox on a plinth
What should you do if your house has already undergone high-quality repairs, but you need another point to connect electrical household appliances?
In this case, it is not at all necessary to rip off the new wallpaper and ditch the wall; you can make a socket directly on the baseboard.
Multiboxes fit all types of standard single sockets. They can accommodate not only electrical, but also telephone sockets, as well as Internet cable connectors.
However, it should be noted that this method can only be used on collapsible plastic skirting boards with a cable channel. Before installing the socket box, it is necessary to lay the wire inside the baseboard.
To do this, remove the cover from the part where the socket will be located. This operation is performed from a corner or from a nearby plug; simply pry the cover with a screwdriver and carefully remove it.
Cut the baseboard so that there is a gap the width of which matches the size of the plastic trim. Insert the multibox into it, thread the wire through the hole in its body, and secure the socket box with dowels.
How to choose the right one
Before purchasing this or that model, you need to decide on some features. Firstly, in which wall you plan to install it:
- Solid walls (concrete, brick, gas, foam blocks). For such floors, the most ordinary concrete socket box is suitable, without any additions.
- Hollow walls (plasterboard, chipboard, plywood, etc.). They will require socket boxes with special clamping claws.
There are also universal models that, if necessary, can be used for any walls.
Secondly, you need to calculate how many sockets will need to be installed at one point. In addition to single socket boxes, you can buy double, triple, etc.
Third, choose the desired shape and size. The standard shape is round, but square ones are also available. You need to know the following about sizes:
- Diameter of the outer part. There are 60 and 68 mm.
- Installation depth. There are also two types - 40 and 45 mm.
The most popular dimensions are 68x45. They accommodate most manufactured sockets and switches.
Rules for mounting sockets with subsequent connection
When creating moisture-resistant sockets, the necessary standards regarding the safety of use indoors or outdoors and direct interaction with water were taken into account. Installation also requires special safety measures.
Today, there are a number of requirements that must be taken into account before installing these devices:
- When choosing locations for waterproof sockets, it should be taken into account that the optimal distance to the water source should be 60 cm.
- For any location of waterproof sockets with a cover, you should use hidden wiring that will protect the cables from moisture.
- The connection point between the main wiring and the outlet must have high-quality insulation.
- Grounding is required, so there must be a third terminal in the socket.
- Sockets must be equipped with special rubber seals and a cover.
- Devices must have a separate group and their own cable.
- Before installation, you need to provide the entire line with its own automatic circuit breaker, which will ensure safety in the event of an emergency shutdown.
- In damp, unrepaired rooms, a separate cable is required during installation, which will be connected to the distribution panel via an automatic machine.
- When using non-sealed products, maintain a height of up to 1 m from the washbasin.
When sockets are located outdoors, it should be taken into account that their height from the ground must be at least 75 cm, and the wiring must be placed strictly below so that draining water does not get inside the equipment. Inside such sockets there must be protective membranes, and the contact group must be made of copper alloy.
Outdoor waterproof sockets should be placed in separate bags to protect the rest of the electrical wiring in the event of a malfunction.
Mounting sockets is quite simple and includes only a few steps:
- Prepare round holes in the wall (with grooves for electrical wires), the size of which will correspond to the diameter of the socket box.
- Install the socket box, sealing it with alabaster.
- Lead the cable out of the bathroom through the groove to the point of direct connection, secured with alabaster.
- Drill holes for the dowels on which the device will be mounted. A drill with an impact drilling mode will help you do this.
- Prepare the wires by removing insulation from the ends with a special tool.
- Install dowels into the prepared holes and connect the wires to the outlet. Before connecting, pass the wires through the rubber plugs.
- Bolt the socket body to the wall.
The final stage is to check the operation of the device when electric current is supplied.
Selection order
When considering the criteria that guide the selection of rectangular socket boxes, special attention is paid to solving the following issues:
- For what specific purposes are they used?
- How to decide on the type of sockets needed to suit the interior of a given room.
- Which is better: modular or multi-place open products.
When choosing, the method of fixing the purchased devices is also taken into account.
Stated Goals
Taitong socket
To install smart sockets and other elements of smart equipment, it is most convenient to use square socket boxes from Taitong. They are presented for open sale in models with the following performance characteristics:
- landing dimensions: 86x86x34 mm;
- body material – PVC plastic.
The design has two built-in nuts that are necessary for attaching smart sockets.
Appearance (design)
When assessing the appearance of products suitable for the interior of the room, we proceed from the possibility of selecting them by color, shape or design features.
The domestic industry produces special socket boxes designed in “retro” style. They are made as antique-style elements of electrical wiring, consisting of a pair of colored twisted conductors. When designing it, individual cores are fixed on special rollers, also made in “retro” style. In the usual version, when choosing a form, they proceed from the requirements of compliance with the design of the room.
Modular or multi-seat
Mounting box with socket boxes
When choosing the number of places on socket boxes and their design, they are usually based on the following considerations:
- If you plan to install several electrical devices at once on a mounting location, it is wiser to choose a multi-place socket box specifically designed for these purposes.
- In a situation where in the future it is possible to expand the total number of electrical installation products, preference is given to modular designs.
Choosing the right socket box suitable for interiors is a responsible matter. Only taking into account all the factors mentioned will allow you to make the only right decision and select the right copy.
How to choose the right living room
Before you start purchasing the contents of the room (furniture), it is important to carefully plan the entire interior in the smallest detail. This process takes a lot of time and effort, especially for non-professionals, so to get rid of the hassle, it is better to contact a design company.
The first stage of planning will be to determine the functionality of the room. To do this, you need to draw on paper a detailed plan of the room, taking into account all window and door openings, niches, bay windows and similar elements. Then determine the purpose of the living room: will it be just a relaxation area, a study or a room for holding parties.
The filling of the room directly depends on this point, for example, for an office you will need a computer desk or a multifunctional bureau, a comfortable chair and several shelves for books and documents. Zoning of space is also quite popular in the design of the living room.
Most often, this technique is carried out by contrasting painting the walls in colors that are radically different from each other, or by light separation. It is worth noting that this technique is often used in the design of small spaces.
Understanding the types and types
Socket boxes are classified according to many criteria, but the main one is their division according to the material of manufacture. So, the following models are found:
Plastic, which are the most convenient and practical, since the base is made of non-flammable material, which increases the safety of the wiring and makes it possible to use it on wooden surfaces.
Metal boxes are more durable, but due to their ability to heat up and conduct electricity, they fade into the background, giving way to safer and more practical options. However, these models have not been discontinued, since the installation of hidden sockets in wooden houses is only possible with a metal socket box.
Wooden pads were previously often used when setting up open-type wiring, providing a convenient intermediate base for attaching an outlet directly to the wall. Nowadays they practically never occur, only when installing homemade wiring in bathhouses, garages and other outbuildings.
Models also differ in design features:
- The presence or absence of fixing tabs (in hollow plaster walls they are necessary, and socket boxes for plasterboard, concrete, brick and aerated concrete are secured with a layer of alabaster).
- Open or hidden.
- Single and composite (composite ones have special fastenings that allow you to assemble up to five glasses into one block).
- Standard and advanced.
The sizes of socket boxes may also vary. A round model with a diameter of 65 cm and a depth of 40 cm is considered standard, but there are narrow options with a height of 25 mm or recessed by 80 mm. The dimensions of square boxes are most often 70 by 70 mm, but there are also deviations from the standards.
Design Features
Domestic and foreign manufacturers produce various types of mounting boxes designed for installation in wooden houses. These companies are constantly modernizing and improving electrical installation products.
Modern socket boxes for wooden houses are distinguished by a specific yellow color and an elastic membrane installed on the cable entry. The membrane is made of rubber material, and the plastic for the body is made using the double casting method and is non-flammable. Additional changes and improvements have been made to the design of the mounting box:
- The ears in contact with the bearing surface are made wider.
- Single socket boxes can be docked into a common block, while the tightness is ensured by membrane partitions. The membranes themselves are suitable for different diameters of cables and pipes.
- The base of the product is marked with a cone-shaped marker, with the help of which the location for the future hole is determined on the bearing surface.
- To securely fix the box, special threaded hardware products are provided.
- The paws are made of plastic, not metal, as was previously the case. This significantly increased the reliability of the fastening and reduced the number of slips from the seat.
Individual models differ in diameter and depth. The diameter range is the same as for conventional boxes, and the depth is 35, 40, 45, 50, 60 and 70 mm. The choice of the second parameter is determined by the thickness of the walls, the number of wires and cables connecting in the box and other factors in the form of terminal blocks, relays, sensors, etc.
Typical sizes
Well, the last thing I would like to talk about is what sizes the socket boxes are. Standard dimensions are 68 by 45 cm, but keep in mind that the internal diameter will be 65 cm and the depth will be 40. Narrow mounting boxes can have a depth of 25 mm, but the dimensions of recessed products can reach 80 mm. The diameter can also vary and be not 65, but 60 mm, which is in demand in some cases.
The dimensions of square socket boxes vary depending on the manufacturer. The most commonly used size is 70*70 mm, but it can also be 60*60, as shown in the photo below:
Finally, we recommend watching a useful video on the topic:
So we looked at what types and sizes of socket boxes there are. As you can see, for your own conditions you can choose the appropriate option from a wide range of products!
Related materials:
- Dimensions and types of cable channels
- Why does the socket fall out of the wall?
- What types of terminal blocks are there?
When starting to work with electricians, one of the most common questions is: what size are the socket boxes, and at what distance should I drill holes for them?


