Don't know where to start learning Arduino? The Fun Robotics project presents the Arduino for Beginners training course. The series consists of 10 lessons, as well as additional material. Lessons include text instructions, photos and instructional videos. In each lesson you will find a list of required components, a program listing and a connection diagram. Once you've completed these 10 basic lessons, you'll be able to move on to more interesting models and building of Arduino-based robots. The course is aimed at beginners; no additional information from electrical engineering or robotics is required to begin it.
Brief information about Arduino
What is Arduino?
Arduino (Arduino) is a hardware computing platform, the main components of which are an input-output board and a development environment. Arduino can be used to create stand-alone interactive objects, or connect to software running on a computer. Arduino, like Raspberry Pi, is a single-board computer.
How are Arduino and robots connected?
The answer is very simple - Arduino is often used as the brain of a robot.
The advantage of Arduino boards over similar platforms is their relatively low price and almost widespread distribution among amateurs and professionals in robotics and electrical engineering. Once you get into Arduino, you will find support in any language and like-minded people who will answer your questions and discuss your developments with.
Read more about Arduino in our publication “Arduino: 10 years together.”
How to set up Arduino?
One of the main advantages of the designer is its safety regarding user settings. Key settings that are potentially harmful to the Arduino are protected and will not be accessible.
Therefore, even an inexperienced programmer can safely experiment and change various options to achieve the desired result. But just in case, we highly recommend reading three important materials on how not to damage the board:
- How to protect Arduino and other boards from crooked hands
- 10 ways to “kill” an Arduino microcontroller
- How to safely connect external devices to a microcontroller?
The classic Arduino program setup algorithm looks like this:
- IDE installation, which can be downloaded below or here or from the manufacturer’s website;
- installing software on the PC you are using;
- launch Arduino file;
- entering the developed program into the code window and transferring it to the board (using a USB cable);
- in the IDE section you need to select the type of constructor that will be used. This can be done in the “tools” - “boards” window;
- check the code and click “Next”, after which the download to Arduino will begin.
| 1.8.7 | Windows Windows Installer | MAC OS X | Linux 32 Bit Linux 64 Bit Linux ARM | Code on Github |
| 1.8.6 | Windows Windows Installer | MAC OS X | Linux 32 Bit Linux 64 Bit Linux ARM | Code on Github |
| 1.8.5 | Windows Windows Installer | MAC OS X | Linux 32 Bit Linux 64 Bit Linux ARM | Code on Github |
| 1.8.4 | Windows Windows Installer | MAC OS X | Linux 32 Bit Linux 64 Bit Linux ARM | Code on Github |
| 1.8.3 | Windows Windows Installer | MAC OS X | Linux 32 Bit Linux 64 Bit Linux ARM | Code on Github |
| 1.8.2 | Windows Windows Installer | MAC OS X | Linux 32 Bit Linux 64 Bit Linux ARM | Code on Github |
| 1.8.1 | Windows Windows Installer | MAC OS X | Linux 32 Bit Linux 64 Bit Linux ARM | Code on Github |
| 1.8.0 | Windows Windows Installer | MAC OS X | Linux 32 Bit Linux 64 Bit Linux ARM | Code on Github |
| 1.6.13 | Windows Windows Installer | MAC OS X | Linux 32 Bit Linux 64 Bit Linux ARM | Code on Github |
| 1.6.12 | Windows Windows Installer | MAC OS X | Linux 32 Bit Linux 64 Bit Linux ARM | Code on Github |
| 1.6.11 | Windows Windows Installer | MAC OS X | Linux 32 Bit Linux 64 Bit Linux ARM | Code on Github |
| 1.6.10 | Windows Windows Installer | MAC OS X | Linux 32 Bit Linux 64 Bit Linux ARM | Code on Github |
| 1.6.9 | Windows Windows Installer | MAC OS X | Linux 32 Bit Linux 64 Bit Linux ARM | Code on Github |
| 1.6.8 | Windows Windows Installer | MAC OS X | Linux 32 Bit Linux 64 Bit | Code on Github |
| 1.6.7 | Windows Windows Installer | MAC OS X | Linux 32 Bit Linux 64 Bit | Code on Github |
| 1.6.6 | Windows Windows Installer | MAC OS X | Linux 32 Bit Linux 64 Bit | Code on Github |
| 1.6.5 | Windows Windows Installer | MAC OS X | Linux 32 Bit Linux 64 Bit | Code on Github |
| 1.6.4 | Windows Windows Installer | MAC OS X | Linux 32 Bit Linux 64 Bit | Code on Github |
| 1.6.3 | Windows Windows Installer | MAC OS X | Linux 32 Bit Linux 64 Bit | Code on Github |
| 1.6.2 | Windows Windows Installer | MAC OS X | Linux 32 Bit Linux 64 Bit | Code on Github |
| 1.6.1 | Windows Windows Installer | MAC OS X MAC OS X Java 7+ | Linux 32 Bit Linux 64 Bit | Code on Github |
| 1.6.0 | Windows Windows Installer | MAC OS X MAC OS X Java 7 | Linux 32 Bit Linux 64 Bit | Code on Github |
| 1.5.8 BETA | Windows Windows Installer | MAC OS X MAC OS X Java 7 | Linux 32 Bit Linux 64 Bit | Code on Github |
| 1.5.7 BETA | Windows Windows Installer | MAC OS X MAC OS X Java 7 | Linux 32 Bit Linux 64 Bit | Code on Github |
| 1.5.6-r2 BETA | Windows Windows Installer | MAC OS X | Linux 32 Bit Linux 64 Bit | Code on Github |
| 1.5.5 BETA | Windows Windows Installer | MAC OS X | Linux 32 Bit Linux 64 Bit | Code on Github |
| 1.5.4 BETA | Windows Windows Installer | MAC OS X | Linux 32 Bit Linux 64 Bit | Code on Github |
| 1.5.3 BETA | Windows Windows Installer | MAC OS X | Linux 32 Bit Linux 64 Bit | Code on Github |
| 1.5.2 BETA | Windows | MAC OS X | Linux 32 Bit Linux 64 Bit | Code on Github |
| 1.5.1 BETA | Windows | MAC OS X | Linux 32 Bit Linux 64 Bit | Code on Github |
| 1.5 BETA | Windows | MAC OS X | Linux 32 Bit Linux 64 Bit | Code on Github |
Lesson 1. Flashing LED on Arduino
In the first lesson you will learn how to connect an LED to an Arduino and control it to blink. This is the simplest and most basic model.
An LED is a semiconductor device that produces optical radiation when electric current is passed through it in the forward direction.
Text and video of the lesson “Blinking LED”.
Lesson 3. Connecting a potentiometer on Arduino
In this tutorial you will learn how to connect a potentiometer to Arduino.
A potentiometer is a resistor with adjustable resistance. Potentiometers are used as regulators of various parameters - sound volume, power, voltage, etc. This is also one of the basic schemes. In our model, the brightness of the LED will depend on the rotation of the potentiometer knob.
Text and video of the lesson “Potentiometer”.
Lesson 7. Photoresistor on Arduino
In this lesson of our course you will learn how to connect a photoresistor to Arduino.
A photoresistor is a resistor whose resistance depends on the brightness of the light falling on it.
In our model, the LED lights up only if the brightness of the light above the photoresistor is less than a certain one; this brightness can be adjusted in the program.
Text and video of the lesson “Photoresistor”.
Programming
Arduino programming is easy: you first use the IDE's code editor to write a program, then compile and upload it with one click.
The Arduino program includes two main functions:
- setup()
- loop()
You can use the setup() function to initialize the board settings. This function is performed only once, when the board is turned on.
The loop() function runs after the setup() function completes, and unlike the setup() function, it runs continuously.
Lesson 8. Motion sensor (PIR) on Arduino. Automatic sending of E-mail
In this lesson of our course you will learn how to connect a motion sensor (PIR) to Arduino, as well as organize automatic sending of e-mail.
Motion Sensor (PIR) - An infrared sensor for detecting the movement or presence of people or animals.
In our model, when receiving a signal about human movement from a PIR sensor, Arduino sends a command to the computer to send an E-mail and the letter is sent automatically.
Text of the lesson “Motion sensor (PIR). Automatic sending of E-mail."
Let's train our hand
In order to confidently implement complex ideas, use the software environment and Arduino, beginners need to get their hands on it. To do this, it is recommended to master easier tasks and projects first.
The simplest project you can do is to make the LED, which is located on the Arduino board opposite the port, blink every second.
To do this you need:
- connect the designer to the PC,
- open the program, in the “service” section we look for the “serial port” block
- select the required interval
- after which you need to add the code that is in the Arduino IDE in the “Examples” section.
The first projects in Arduino for beginners can be:
- flashing LED;
- connecting and controlling a temperature sensor;
- connecting and controlling a motion sensor;
- connecting a photoresistor;
- servo drive control.
Lesson 9. Connecting a temperature and humidity sensor DHT11 or DHT22
In this lesson of ours, you will learn how to connect a DHT11 or DHT22 temperature and humidity sensor to an Arduino, and also become familiar with the differences in their characteristics.
The temperature and humidity sensor is a composite digital sensor consisting of a capacitive humidity sensor and a thermistor to measure temperature.
In our model, Arduino reads the sensor readings and displays the readings on the computer screen.
Text of the lesson “Connecting a DHT temperature and humidity sensor.”
Program functions
Below is a list of the most commonly used functions when programming Arduino:
- pinMode – sets the pin to input or output mode;
- analogRead – reads the analog voltage at the analog input pin;
- analogWrite – writes analog voltage to the analog output pin;
- digitalRead – reads the value of a digital input pin;
- digitalWrite – sets the value of the digital output pin to high or low;
- Serial.print – writes data to the serial port in human-readable ASCII text.
Lesson 11. Connecting the DS3231 real-time clock module
In the last lesson of our course, you will learn how to connect a real-time clock module from the DS family to an Arduino board, and also get acquainted with various interesting circuits.
A real-time clock module is an electronic circuit designed to record chronometric data (current time, date, day of the week, etc.), and is a system consisting of an autonomous power source and a recording device.
Text and video of the lesson “Connecting the DS3231 real-time clock module.”
Application. Ready-made frames and Arduino robots
You can start learning Arduino not only from the board itself, but also by purchasing a ready-made, full-fledged robot based on this board - a spider robot, a robot car, a turtle robot, etc. This method is also suitable for those who are not particularly attracted to electrical circuits.
By purchasing a working robot model, i.e. in fact, a ready-made high-tech toy can awaken interest in independent design and robotics. The openness of the Arduino platform allows you to make new toys from the same components.
Review of ready-made Arduino robot toys.
Another review of ready-made Arduino robots.
Another option is to purchase a robot frame or body: a platform on wheels or a track, a humanoid, a spider, etc. In this case, you will have to do the stuffing of the robot yourself.
Review of frames for Arduino robots and other boards.
First project
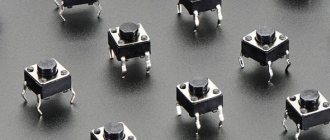
Now we have reached our first project. Let's connect Arduino, LED and button. This project is perfect for beginners.
Our scheme will be like this:
The LED will light up after pressing the button, and will go off after the next press. The sketch or program for Arduino itself will be like this:
// pins of connected devices int switchPin = 8; int ledPin = 11; // variables to store the state of the button and LED boolean lastButton = LOW; boolean currentButton = LOW; boolean ledOn = false; void setup() { pinMode(switchPin, INPUT); pinMode(ledPin, OUTPUT); } // function for debouncing boolean debounse(boolean last) { boolean current = digitalRead(switchPin); if(last != current) { delay(5); current = digitalRead(switchPin); } return current; } void loop() { currentButton = debounse(lastButton); if(lastButton == LOW && currentButton == HIGH) { ledOn = !ledOn; } lastButton = currentButton; digitalWrite(ledPin, ledOn); }
You may have noticed the debounse function, which we haven't written about yet. It is needed to suppress contact bounce.
After you have mastered the initial skills of working with a board, you can begin to implement more complex and multifaceted tasks. The designer allows you to create an RC car, a controllable helicopter, create your own phone, a controllable boat, create a “smart home” system, etc.
To speed up your mastering of working with the Arduino board, we recommend that you start making devices from our Lessons section, where the processes of creating the most interesting devices and gadgets are described step by step.