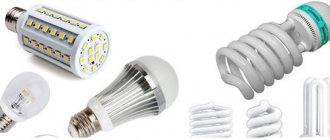
Lighting devices of the XXI century. practical and economical. Instead of incandescent lamps, LED technology is used indoors and outdoors. High-quality products do not cause problems for consumers, but owners of low-quality products may experience the LED lamp blinking.
At the beginning of its appearance, the “LED” was called a “smart lamp”. The product is economical, durable and environmentally friendly. The light bulb is an autonomous mechanism that regulates the lighting process itself.
The base part of the light bulb is screwed into the lamp socket. The base is made of brass with a nickel coating, which ensures contact and protection against corrosion. In the base part there is a polymer base that protects the case from electrical penetration.
The driver provides a stable voltage and prevents the LED lamp from blinking. The device operates according to the circuit of a pulse-width galvanic modulator of a current stabilizer.
The heatsink is made of anodized aluminum alloy and prevents the device from overheating. And the chips are the luminous elements of a smart lamp. The diffuser allows the light to disperse in different directions in the desired concentration.
The operating principle of the LED device is that when turned on, the current flows from the base through the converter to the LEDs, which are connected in series. The driver helps equalize the voltage, which helps to avoid device malfunctions, and is installed in medium- and high-cost products.
What kind of lighting do you prefer?
Built-in Chandelier
In Chinese cheap versions of smart lamps, instead of a driver, they install a quenching capacitor and a diode bridge with a capacitive filter. Being in the base, where the driver should be located, the power supply does not withstand the influence of external factors, which negatively affects the operation of LED products, and functions normally only at 220 V mains voltage.
The light in the apartment is flickering: the reasons for the flickering in all rooms, why the light bulb blinks when it is on, where to go if the problem is observed throughout the house?
It must be borne in mind that some household appliances are not designed to work with low voltage, which may also affect their operating condition.
Expert opinion
Viktor Pavlovich Strebizh, lighting and electrical expert
Any questions ask me, I will help!
Quite rarely, but damage to the electrical wiring itself still happens, especially if it consists of aluminum wires, which are very fragile and easily break at the bend. If there is something you don’t understand, write to me!
Reasons for blinking when the lights are off
For low-quality smart lamps, the main problem during operation is blinking both when the light is on and off. High-quality devices begin to flicker in the dark at a set frequency in rare cases. There may be several reasons for this, and the most common ones are:
Experts note that when the LED lamp blinks, you need to look at how things are going with the wiring and the correct connection of the wires in the “keyboard”. The phase must come to the contact of the switch, but if the connection looks different, then the starting circuit is under potential and it will be more difficult to eliminate the cause.
It happens that another power connection is laid next to the switch wire. In this case, only rewiring the wires in the room will eliminate the blinking.
In most cases, the reason for the “winking” of switched-off light bulbs at night is the backlight of the switch. Blinking occurs because the microcurrent, which provides a weak glow of the “keyboard”, passes through the indicator, which has enough power for a short one-time flash.
The influence of product quality on whether an LED lamp blinks when turned off or not was discussed above. If the lamp begins to behave strangely, you need to disassemble it and see what device the manufacturer placed in its base.
How to remove the flickering of a budget LED lamp with your own hands: 3 schemes
Above in the text, I tried to focus your attention on the fact that you should not purchase cheap LED lamps. But, if they have already been purchased, then you can try to improve their performance.
Method No. 1. Increasing the capacity of the equalizing capacitor
A simple power supply for an LED lamp after a voltage divider or input transformer rectifies the alternating signal with an electrolytic capacitor C, which smoothes out ripples.
Their influence on the quality of the equalized signal can be reduced by increasing its capacitance. To do this, it is permissible to connect an additional capacitor C1 in parallel with the windings C.
The second option is to replace capacitor C with another one of higher capacity. The principle here is: the more, the better. But, without fanaticism. The fact is that all this electronic equipment is located in the lamp base, and the dimensions there are limited.
You can, of course, try to bring the additional capacitor out with wires, as a separate module. But how convenient will such a design be during operation?
I showed this solution on the diagram with dotted lines and highlighted the added elements in lilac.
Here I also indicated a place to connect an additional resistor R1.
Method No. 2. Limiting the current through the LEDs with a current suppression resistor
Connecting additional resistance R1 in a series circuit with LEDs reduces power consumption, load current and reduces their glow, and at the same time ripple.
It is quite enough to reduce the current through the HL1-HLn chain by 25-30 percent. You will need to measure the voltage drop across it with a multimeter in a real circuit and then make a calculation.
Knowing the voltage and resistance R=1 kOhm, the current flowing through all LEDs is calculated using Ohm's law. In principle, you can also measure it, or use an online calculator.
Next, we simply reduce the current value by about a quarter and calculate the total resistance. From it we subtract the value of resistor R and get the value of R1.
Do not forget to select it according to the permissible power. Otherwise, it may overheat and disrupt the temperature regime of the entire ice structure or even burn out.
Both methods of using an additional capacitor and resistor do not radically eliminate the blinking of the LED lamp, but significantly limit it. Such modified lamps can be installed in utility rooms, where they will work quite reliably.
The owner of Master Bobrov shows options for the technical implementation of these two methods in his video. You may also benefit from reading the comments below the video.
Method number 3. Connecting homemade filters
I think this method is more effective than those discussed above. I have already explained the principle of its operation earlier, looking at the circuits of switching power supplies.
The connection of chokes and capacitors should suppress high-frequency interference that comes from the network to the power supply of the LED lamp. For the simplest drivers this is quite enough.
Such a filter can be assembled as a separate module and turned on directly in front of the lamp. It does not have to be built into the light bulb base. It will not create problems with the design of a small-sized structure.
The filter is made in a dielectric housing and is mounted anywhere in the apartment, but preferably in front of the cartridge.
This is, in principle, the whole explanation of why LED lamps blink when they are on. Now I will briefly touch on a similar issue when the voltage is turned off by the switching device.
Why might the light blink?
There are many reasons why the light may blink. Here are some of them:
- There is unstable power supply from the transformer substation
- Neighbors use powerful electricity consumers, for example, a welding machine
- At the connection point of plugs, meters, machines, on sockets, sockets, switches, etc., there are unreliable contacts
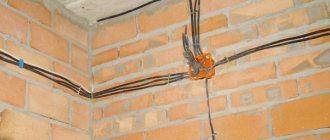
- Junction boxes hidden inside walls may also have loose connections.
- The electrical wiring of the room is so outdated that it does not correspond to the number of household appliances in the house (in this case, turning on, for example, an electric kettle, can lead to a short-term decrease in the brightness of the lighting fixtures)
Conclusions.
Thus, almost any flicker can be eliminated. Although it is more practical to prevent its occurrence in advance. An important factor in this case is the choice of high-quality light sources and control equipment. In this case, the possibility of humming and flashing is minimal.
- Related Posts
- Relevance of LED lighting in 2022: efficiency, pros and cons
- Design and features of a CFL lamp
- Let's talk about different types of pool lighting and its beautiful implementation
Reasons for flickering of branded lighting devices
At low mains voltage, even if the light source is equipped with a capacitor of sufficient capacity, blinking may occur, since as a result of a decrease in amplitude, the capacitor will not have time to recharge. Such power surges occur periodically, but if they cause discomfort, you can additionally use a voltage stabilizer.
If the problems are completely corrected, but the LED elements continue to flicker when the lighting equipment is turned on, it is worth checking the quality of the contact connections on the switch or socket. Perhaps the contacts have oxidized.
It is important to understand! The blinking of LED lighting fixtures with a low frequency, which can be detected visually, is detected instantly. It is enough just to determine why this is happening.
Expert opinion
Viktor Pavlovich Strebizh, lighting and electrical expert
Any questions ask me, I will help!
Nowadays, electricity is quite expensive, so people have begun to think more often about how to save their money and reduce energy consumption. If there is something you don’t understand, write to me!
What happens if you don't change a blinking light bulb?
If you are not annoyed by the constant flickering of lights in the room, here is another argument in favor of eliminating the problem as soon as possible. Back in the 60s of the last century, scientists proved the negative effect of light pulsation on the body. They analyzed the physiological and psychological state of schoolchildren studying in rooms with normal and flickering lighting. By the end of the day, children from the second group more often complained of dry eyes, headaches, and experienced an inexplicable loss of strength. After replacing the pulsating lamps with normal ones, the children got rid of the unpleasant sensations. So the flickering of light bulbs affects our health, even if we don’t notice it.
Reasons for flickering of an LED lighting device when turned on
The main reason why LED equipment may flicker is the poor quality of the LED matrix. Ripple in the output voltage of even a classic power supply circuit is inevitable. In high-quality diodes, the luminescence saturation in the established voltage range is almost identical, due to which any ripple is prevented.
In the case of a low-quality matrix, even if the voltage drops by 0.5, a change in the brightness of the light flux already occurs. In some cases, this situation can be corrected by installing a capacitor with a larger capacity. But such a lighting source is not recommended for living rooms.
Recommendation! When detecting the blinking of an LED chandelier, you should not ignore this phenomenon. This can lead to vision problems over time. You should definitely take the time to fix the problem, and if possible, return the low-quality light bulb to the seller.
Useful tips Connection diagrams Principles of operation of devices Main concepts Meters from Energomer Precautions Incandescent lamps Video instructions for the master Testing with a multimeter
How the housekeeper works
Compact fluorescent ESLs cannot be connected directly to a 220 V network, so an electronic ballast circuit is located in their housing. The operating principle of this circuit is as follows:
The voltage from the 220 V network is supplied through a fuse to the diode bridge, after which it becomes rectified with a ripple of 100 Hz.
Further along the circuit there is an electrolytic capacitor that smoothes out ripples. Its capacity can vary depending on the power, it should be approximately equal to 1 µF per 1 W of lamp power. Next, the voltage is supplied to the self-oscillator circuit using two transistors, which contains:
- Dinistor DB3 with a switching voltage of about 30 V.
- A transformer with three windings (primary - with the largest number of turns and two base - a pair of turns each). It is wound on a ferrite ring with an internal diameter of about 3–5 mm.
- Two transistors type MJE13001–13003.
This circuit operates at a frequency of several tens of kilohertz.
The output part consists of a pair of capacitors and a power choke, usually wound on an W-shaped ferrite core.
The output circuits of the circuit are connected to the lamp coils.
The light-emitting bulb itself is a glass tube. It is filled with mercury vapor and coated on the inside with a phosphor.
Scheme of operation of an energy-saving lamp
The switch has an LED indicator
This indicator is designed to make the switch visible in the dark. The indicator is usually a red LED. Conventional neon lighting can also be used as an indicator.
The indicator in the switch is connected in parallel.
A resistor of 100-1000 kOhm and a power of 0.5-1 W is connected in series with the indicator.
Why does an energy-saving lamp blink? When the switch is turned off (part of the circuit is open), a small current flows through the resistance and indicator, and then enters the capacitance. Once the capacitor is charged, it tries to start the lamp switching circuit. The lamp turns on and immediately goes out, and the capacitor is completely discharged. The flickering continues continuously in a cycle. How to eliminate the blinking of an energy-saving lamp?
see also
Comments 94
Dude, the voltage on your 78l05 stabilizer at the input does not rise, the resistor at the input is open
I fixed it 2 years ago, but thanks)
My light bulbs keep burning out...
The same nonsense, you need to take 12-volt chandeliers, there is a stabilizer there. In the kitchen I installed halogen lights in the ceiling through a 12V stabilizer, in 2 years I changed only one light bulb
Denis, it’s clear how he did it.
No. Any specialty store sells stabilizers for halogen lights + smooth switching, so they last longer
The same nonsense, you need to take 12-volt chandeliers, there is a stabilizer there. In the kitchen I installed halogen lights in the ceiling through a 12V stabilizer, in 2 years I changed only one light bulb
Help me resolve this issue, otherwise the chandelier has been scrapped...
You need to see if there is a place in the chandelier for a stabilizer, go to a specialized store, they will show you the stabilizer, and if you understand at least a little about this, you will understand, in the store they will show you everything
Motherfucking China, what can I say)))
He might as well not have said anything.
I could have, but I couldn’t restrain myself))), but seriously, two questions: 1) backlit switch? 2) and if off. with backlight, before this there was no slight winking of the light bulbs?
Does the view show what kind of switch it is, or not? It is without backlight.
In the video it seemed to me that it was backlit, in the upper left corner there was a dot like a diode, that’s why I asked. Take care of your nerves, you asked for advice, but in response you were rude, even the desire was gone. Good luck.
Poor quality wiring and contact bounce
I have already written a separate article on how to carry out electrical installation work in an apartment and a private house. Electrical loads must be reliably transmitted and not cause overheating of current-carrying conductors and damage to the insulation.
The quality of electrical wiring is influenced by the methods of connecting wires to each other and to switching devices. Contacts of switches, terminal blocks, connectors must be selected according to the switching power.
Any violation of the transient electrical resistance affects the quality of the supply voltage, and it can affect the flickering of sensitive LEDs.
If the lamp has a well-functioning, expensive driver, it will cope with such interference. But simplified models with simple signal conversion can fail.
I will specifically focus on contact bounce. It is typical for almost all mechanical switches and switches, including relay devices.
Their power switching, especially breaks in current-carrying circuits under load, occurs as quickly as possible under the influence of the forces of tripping springs or electromagnets.
Closing of contacts is accompanied by a blow from the metal part of the movable contact to a permanently fixed base. This creates a counterforce, under the influence of which the contact bounces, like a ball or a hammer hitting an anvil.
The spring presses the contact onto the base, overcoming the fading resistance force. During the short-term occurrence of these opposite processes, the current changes in magnitude. Transient processes also have an impact.
High-quality wiring and well-selected and adjusted switching devices do not create problems for the apartment owner, and all sorts of violations and simplifications are quite capable of deteriorating performance characteristics and leading to blinking LEDs.
High quality energy saving lamps
When buying energy-saving lamps, make it a rule to pay attention to who the manufacturer is. There is no doubt about the quality of the lamps, from such a well-known manufacturer as Philips. These lamps have good characteristics:
- heat generation is insignificant;
- lasts a long time;
- saves energy by 80%;
- turns on without blinking;
- provides luminous flux of 85%.
Another leader in the production of lighting equipment is the German company Osram. This brand is very popular, and lamps from the OSRAM DULUX SUPERSTAR and OSRAM DULUXSTAR series are distinguished by:
- warm, pleasant light, like incandescent light;
- almost instantaneous achievement of the planned luminous flux;
- excellent light output;
- long service life - 15 thousand hours;
- compact attractive design.
Malfunctions of energy-saving lamps
Let's look at what malfunctions of energy-saving lamps happen and how to eliminate them using the example of PHILIPS 6yr 23W ECONOMY.
Disassembling energy-saving lamps
We disassemble the housing of the energy-saving lamp in the following sequence:
- take a flat-head screwdriver and, moving carefully around the perimeter, push back the latches;
- disconnect the lamp cylinder by unscrewing the 4 wires with which it is connected to the electronic unit;
- We unsolder the wires connecting the base and the board. The block will remain in your hands. It is now possible to determine the fault.
Common faults:
- If there is increased voltage in the network, the capacitor will swell and leak, and the lamp will stop lighting. Here it is necessary to replace the CD and test all semiconductors.
- For the same reason, a malfunction such as breakdown of capacitor C5 occurs. The lamp glows only where the filaments are located. We change the capacitor.
- The reason for the incomplete glow of the lamp may be a rather long operation. In this case, the sealing of the flask is partially broken, and thermionic emission is reduced. We throw away the lamp.
- When one of the filaments burns out, the lamp stops burning. In this case, we check the serviceability of capacitor C5. Where the filament is broken, we unsolder the diode, and in its place we insert a 10 Ohm resistor.
- Another reason for the failure of an energy-saving lamp is a faulty diode thyristor (dinistor). This reason is detected by eliminating the malfunction of semiconductors, capacitors, inductor windings, and filaments. The solution is to replace the faulty element.
- If, by calling resistors and semiconductors, you see that they are out of order, then the parts, of course, must be replaced. But think about whether it’s worth doing this, because such repairs will be expensive. It's easier to buy a new lamp.
Watch how the author of this video eliminates the flickering of an energy-saving lamp:
The cost of electricity and its widespread use leads to the introduction of energy-saving technologies. Among which, replacing classic incandescent lamps with housekeepers is a fairly simple and effective solution. Alas, it is not uncommon for an energy-saving lamp to blink in an apartment when the lights are off.
How to eliminate the cause of the indicator
1. Remove the indicator. To do this, you need to disconnect the indicator from the switch circuit according to the diagram. In the off state, the current that charges the capacitor in the energy-saving lamp does not flow into the lamp, since the circuit is broken.
2. Insert a low-power lamp with an incandescent filament, for example, 30 W, together with an energy-saving one. When installing this lamp, a small part of the current is spent on heating the filament and the capacitor, which acts as a voltage ripple filter, is not charged. If a chandelier is designed for only one light bulb, what to do in this case?
3. Install an additional resistor. It is necessary to install a 2 W 50 kOhm resistor parallel to the lamp in the electrical circuit, which acts as an incandescent lamp.
4. Buy a switch that does not have an indicator and install it.