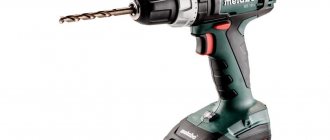
Cordless screwdrivers are powered by a battery, the service life of which is shorter than the life of the tool itself and the charger. If the battery is not charged to the rated voltage, the current output drops sharply, it does not hold the load, the engine stops working, and the tool does not turn on. The battery is the most expensive and important part. When an electric storage device fails, you should not rush to buy a new device; you can try to restore or replace it. Many users want to know how to replace batteries in a screwdriver with their own hands.
Sequence of work for installing lithium batteries in a screwdriver
First, we disassemble the battery pack, remove the cadmium batteries from it and mercilessly bite them off the connector. In addition, we remove the temperature sensor, which is designed to protect the cans from overheating. Next, replacing cadmium batteries in a screwdriver with lithium power supplies is performed as follows:
- We select a controller that will automatically cut off the current supply when the voltage reaches 4.2 V. Or signal the need for charging if it drops to 2.7 V. Buy a controller with a thermocouple, which will additionally eliminate the risk of overheating.
- We connect the batteries in series with each other.
- We connect the controller to the resulting assembly and connect the balancing points to a special connector.
- Solder the positive and negative terminals.
- We place the batteries in the battery pack.
As you can see, the procedure is quite simple and, if you have experience, takes no more than 1-2 hours. If this is your first time deciding to delve into modern electronics, the following tips on connecting batteries to each other will be very useful:
- The assembly is made using thin metal strips. Without further ado, you can simply cut them out of an ordinary tin can.
- The surface of the connecting strip and the battery is treated with alcohol to ensure good contact in the future.
- The connection of cans to a metal strip is carried out by resistance welding. The thing is that Li-ion batteries may react inadequately to prolonged heat exposure from a soldering iron and simply explode. When resistance welding, heating lasts only a few seconds, so such problems are completely eliminated.
- To prevent the plate from falling off from the slightest mechanical impact, several point connections will be required.
- The welding pulse must be set in such a way as to prevent overheating of the batteries.
- The resulting set must be firmly connected with electrical tape or tape.
Finally, do not forget to strictly observe the polarity of the batteries connected to each other. Errors are unlikely to cause an emergency, but the assembly will definitely not charge.
Technology for replacing Ni-Cd with Li-ion in a screwdriver
Lithium elements are durable, so many screwdriver owners are thinking about replacing nickel-cadmium products with them.
The replacement technology includes several steps that must be followed.
Determining the number of Li-ion batteries
Basically, the battery parameters are marked on the battery itself or on a screwdriver. To determine the number of required elements, you need to divide the voltage indicated on the tool by 1.2V (this is the nominal voltage of one nickel can).
To find out how many lithium parts will be required for replacement, the division is carried out by 3.7 V - this is a normal indicator for this type of cans.
It is recommended to round up the result obtained; this will not have a negative effect on the instrument, but will simply increase its power a little.
It is necessary to correctly select all the necessary elements for replacement
Selecting a Li-ion battery
Manufacturers offer lithium-ion and lithium-polymer cells. The latter are smaller and safer, but they are more expensive. However, they are not capable of delivering large currents. Therefore, experts recommend using regular lithium-ion banks.
It is better if the element has welded flexible bends, because such parts do not like elevated temperatures and unnecessary soldering. It is recommended to look at several options in stores to choose the most suitable model.
How does the battery voltage affect the operating time of a screwdriver?
The question of how the battery voltage affects the operating time of the product is of interest to many. To understand how much power a product has, you need to multiply the voltage by the battery capacity.
For reference! For example, a screwdriver with a 14.4 V battery with a capacity of 1.5 Ah will have a power of 21.6 W.
Ready-made 18650 battery assemblies
As a replacement, it is better to purchase ready-made 18650 battery assemblies. You can do this on Chinese online trading platforms or in other online stores.
BMS Protection Board Selection
Lithium-ion batteries require careful handling and compliance with certain requirements. The role of protection is performed by the BMS board. It is this element that does not allow the voltage to exceed more than 4.2 V and decrease below 2.55 V per battery during charging. In addition, the element keeps the maximum permissible current under control and maintains the necessary balance between the batteries.
The main parameters when choosing are the number of elements connected in series. On the Internet you can look at a table that shows all the necessary parameters and use it to select a suitable board.
You can make a replacement even at home, the main thing is to follow the sequence
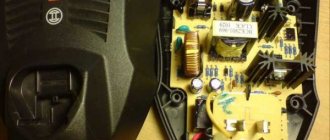
Power supply for charging
For lithium-ion batteries, chargers are selected based on the number of batteries connected in series in the battery. The more there are, the higher the output voltage should be.
Charging batteries with a standard charger from a screwdriver
If desired, you can purchase a special universal board for a lithium battery. It is installed in the original charger. However, experts recommend using suitable chargers for this type of battery rather than modifications.
Lithium battery capacity indicator
Indicators are LED and digital. The latter are cheaper, but not convenient to use. It is better to choose LED options based on the number of batteries connected in series.
18650 battery holder
It is also better to purchase ready-made holders for 18650 batteries. If you wish, you can find good options at reasonable prices in online stores.
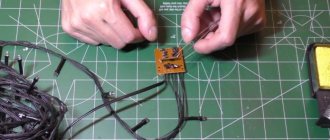
How to disassemble the battery
Battery packs for home tools are almost the same in design, regardless of the model of the tool (Bosch, Makita, Hitachi). They are packaged in a plastic case consisting of two parts. The number of batteries may vary depending on the output voltage of the tool used. All elements are soldered in a certain sequence. The lead ends or terminals at which the battery voltage is usually measured are brought out.
Most screwdriver or drill battery packs are designed so that they are very easy to disassemble, regardless of whether we are repairing the battery of an Interskol screwdriver or another model. Several mounting screws need to be removed using a regular screwdriver. There are batteries that are difficult to disassemble, but can be disassembled with a screwdriver and a penknife. The adhesive layer is removed with a knife, and the two mating surfaces are moved apart with a sharp self-tapping screw.
The difference between screwdriver batteries and each other may lie in the presence or absence of a temperature sensor, which automatically turns off the battery under critical heating conditions (above 50°C). The sensor constantly monitors the temperature not only under load, but also under the conditions of the current battery charge. The controller reads all the data and processes it, “remembers” the capacity and other indicators. As soon as the capacity reaches 80-90% and the voltage reaches 14 V, the control unit turns everything off. Such batteries last for years without losing their technical characteristics.
There are a large number of inexpensive screwdriver models on the market. Cheaper devices do not have such technical devices, and you need to monitor all processes yourself.
How to determine if repair is possible
If the screwdriver does not work due to the battery, you need to find out whether it can be repaired. First, the body, consisting of two halves, is disassembled. These parts, depending on the model, can be connected with adhesive or screws . In the second case, it is easy to unscrew them. The glued halves are separated by carefully inserting a sharp knife into the joint and screwing a self-tapping screw into it. With care, so as not to damage the parts, the knife is drawn along the joint and the parts of the body will separate.
Among the cans inside, you need to find the faulty one. To do this, take them out and lay them out on the table. This way you can freely approach the necessary contacts. Using a tester, the voltage of each element is measured. Experts advise recording the received data on paper or on a case. After measuring, the cans are again installed in the housing. The screwdriver is turned on and started to work until the power is lost. Then the tool is again disassembled, the voltages are measured and recorded. Cells in which these values after full charging are very low will show a significant drop. A difference of 0.5-0.7 V is considered very significant . In the near future, these elements will become completely weak and stop working. Therefore they need to be restored or replaced.
If you have a 12-volt tool, it’s easier to find faults; you don’t need to disassemble and reassemble twice. First, the voltage of fully charged cells is measured and the values are recorded. A 12 V light bulb is connected to the jars laid out on the table as a load, which will discharge the battery. Then they measure the voltage again. The area where its performance is lowest is faulty.
Sometimes, due to overheating, distilled water evaporates ; it is topped up using a syringe. In advance, a 1 mm hole is made with a drill in the upper or lower part of the non-working element. Fill the battery completely and leave it for a day. Charge after the parts are assembled into a bundle of 3-4 pieces. And do not touch for 7 days.
In some cases, the battery can be restored
Battery types
Based on design features, batteries are distinguished in the form of sliders and clips.
Screwdriver battery in the form of a slider
But these are minor differences compared to battery types. Both the slider and the clip are used in different types of batteries.
Screwdriver battery in the form of a clip
There are three types of batteries for screwdrivers:
- Nickel - cadmium (Ni-Cd).
- Nickel - metal hydride (Ni-Mh).
- Lithium - ion (Li-Ion).
Lithium polymer batteries (Li-Pol) are not produced for screwdrivers. Their main areas of application: smartphones, cell phones, tablets, laptops, radio-controlled devices, electric vehicles.
Nickel - cadmium batteries are the cheapest, charge quickly, and have more than a thousand charging cycles. The batteries are resistant to operation at low temperatures. But they have a memory effect. That is, they can be charged only after they are completely discharged, otherwise the capacity will drop. They have a high self-discharge current. They are made from toxic materials and are difficult to dispose of. These batteries are in greatest demand.
Nickel - metal hydride batteries are more expensive, non-toxic, and have a low memory effect. The self-discharge current is higher than nickel-cadmium. The capacity is higher, the charge cycle is more than five hundred. These batteries are less resistant to high discharge rates. They are less suitable for maximizing the power of the tool. They need to be constantly recharged.
Lithium ion batteries are more expensive, more powerful, and charge quickly. They have no memory effect. Low self-discharge current. The voltage of the battery cells is higher, so their number is smaller. Consequently, the dimensions and weight of such batteries are smaller than those of nickel ones. But they cannot be completely discharged, otherwise after several such cycles you will have to buy a new one. To improve the quality of lithium-ion batteries, manufacturers install a microcircuit in the case of the battery or screwdriver that controls the operation of the battery. A multi-level multi-stage protection is formed:
- From high temperature.
- From full discharge. These batteries are afraid of being completely discharged and cannot recover if the discharge is below the permissible norm.
- From short circuit.
- From overcharging, as an explosion may occur.
- From overload currents.
A control board installed in the battery case is more efficient. When the battery is kept separate from the screwdriver and is not in use, the microcircuit monitors its condition and, in case of any problems, opens the circuit. The battery is completely protected.
Complete replacement and erasing of battery “memory”
In rare cases, for example, if the battery is too old, then all the elements fail. Buying a new battery will still be more expensive than replacing all the batteries. Therefore, it makes sense to order separate power supplies via the Internet, solder them into the battery, and then place them in the old case.
There is a little secret to extending the life of new power supplies. To do this, you need to remove the factory settings from the cans, which are set by several charge/discharge cycles. The operation to extend the lifespan should be carried out only on new elements, and in the future they should be charged correctly.
A new battery bank is discharged to a voltage of 1 V. It is important to monitor this parameter, since below one volt the battery may become unusable, after which it will be impossible to restore it. For discharge, it is best to use an adjustable load, on which the current is set to 1 A.
After complete discharge, all cells must be recharged using the rated current and voltage. After a full charge, you can solder the power supplies into the battery and install them on a screwdriver.
Battery repair methods
Quite often, the battery is not fully charged, and its service life is short. This may not be due to a faulty battery, but because the contact plates on the battery or charger have sagged or oxidized.
How to revive a screwdriver battery: first, check the condition of the contact springs on the battery and on the charger
In this case, it is easy to restore the screwdriver battery. First of all, we check the condition of the plates. We clean them from plaque, dirt, oxides, and rub them until they shine. If the plates are bent, we return them to their former shape. We carry out similar manipulations with the contact plates on the charger (be sure to unplug it from the network). Then we check whether it helped or not. No, let's move on.
DIY repair and replacement
When all restoration methods have not brought success, and the rejected elements have disappeared into oblivion, it is necessary to find a replacement for them. The ideal replacement would be a new cell or set of cells, but due to the lack of such, you can select a live cell from another used battery. You can select it using the same method as selecting an element from a battery.
Replacing with a used item is not as unreasonable as it seems. If you take a new element, its qualities may be lost against the background of the old battery, but the old living element will work in equal conditions.
Sequencing
- We completely discharge the battery.
- We remove it from the screwdriver socket and open it using a straight screwdriver.
- We remove all the old cans and remove the connecting plates using the desoldering method.
- We solder a new electrical circuit based on new elements.
- We perform several cycles of charging and discharging the battery.
The first three stages should not cause any particular difficulties, so there is no point in describing them in detail. The most important point is to maintain the order of polarity of the circuit elements when soldering again.
Read here how to repair a screwdriver.
In this article you will learn about jigsaws.
Here we mean the type of connection; it is serial, implying the connection of elements from the negative to the positive pole.
Using the previous "plate" terminals, begin assembling the circuit, following the existing configuration for the form factor of your battery. Otherwise, it will be difficult to insert the entire power unit back into its housing.
The procedure for charging and discharging the battery should be carried out several times with a break, and then let it sit for about a day.
During the charging process, it is important to measure the voltage on each bank using a multimeter; it should be 1.3 V
Expert advice: soldering is carried out at maximum heating of the soldering iron, so avoid overexposing the contacts of the cans to avoid their premature burnout.
The process of replacing cans significantly reduces the cost of purchasing a new battery, and domestic instruments are no exception. For example, a well-known tool from the Russian manufacturer Interskol will not cost less than its foreign counterparts.
But it has a small advantage - a wide network of service centers that can save you from replacing the screwdriver battery elements yourself.
You will learn how to disassemble a screwdriver from this video:
We invite you to watch a video on how to repair a power tool battery:
Restoration with distilled water - fact or fiction?
Many craftsmen who are capable of restoring power tools claim that dried-out power sources cannot be “reincarnated.” Others say that it is possible to restore batteries; all you need is distilled water, a tool and 30-40 minutes of free time.
The sequence for restoring batteries with distilled water is:
- Using a thin bit and drill, make a small hole in the top of the battery can. If you drill into the middle of the element or the bottom, you can damage the power source. It will be impossible to restore it later.
- Using a syringe, fill the battery with distilled water to the maximum.
- Leave the battery in a clean and warm place for 1-2 days, do not cover the hole.
- Connect the cells filled with distilled water into one battery.
- Place the battery on charge until capacity is fully restored. After charging, check the voltage on each jar and, if necessary, add distilled water.
- After checking, close the holes with a glue gun. It is strictly forbidden to solder the holes - this can damage the battery cell.
- Place the battery back into the case, close the lid and recharge.
The home method with electrolyte works, but not always. Sometimes the internal structure of the battery is so damaged that even distilled water does not give a positive result.
How to replace power supplies?
The most effective way to repair a battery is to replace a broken battery. You can purchase a new battery at any electrical store or remove it from another device.
Replacing a damaged can: step-by-step instructions
Step one: it is necessary to disconnect the faulty segment from the general chain. Since they are fixed together with a metal plate, it is better to use metal cutters for such purposes. In this case, it is necessary to leave a tape of the optimal length on each side in order to connect it with a soldering iron without any problems.
The plates on the non-working segment must be cut off near the base
Step two: now, at the optimal distance from other elements, you need to attach the new can to the chain. For such purposes you will need a soldering iron. Just keep in mind that the “minus” is connected next to the “plus” and so on throughout the chain. If the plate is not enough to connect the segments, then it is replaced with copper wire.
You must use a soldering iron to connect the battery parts.
Step three: Now all that remains is to assemble all the parts of the battery according to the same principle as they were located earlier.
Upon completion of the repair, the battery is again placed in a plastic battery box and closed with a lid. You should be careful when working with a soldering iron, because the cans must not be overheated
In exactly the same way, you can repair a lithium-ion battery. In this case, the process is complicated only by the presence of an additional board, which is disconnected before starting the process. Here it is no longer possible to restore faulty banks, so they are replaced.
Diagnostics
Failure of power blocks occurs when screwdrivers are often used as a drill. Active overload can cause the electrolyte inside the batteries to boil. This is fraught with swelling of their bodies and leakage of electrolyte.
In order not to recklessly spend money on purchasing new batteries, you need to diagnose old batteries. Everything can be done only by repairing the charging elements. The battery is checked in the following order:
- The battery is connected to the charger.
- After half an hour, the voltage is measured. The voltage is usually 13 volts. After 2 hours, the voltage at the battery terminals will be 14V. Finally the battery will show 17V.
- If, after 60 minutes after the start of the charging process, the current is 1 A or more, then the battery is fully operational.
- Next, check the battery under load. Usually they connect a 40-watt lamp or take a 12-volt car headlight bulb with a power of 35 watts.
- If after three minutes the voltage at the box terminals is less than 12.4 V, then one of the cans or several at once requires replacement.
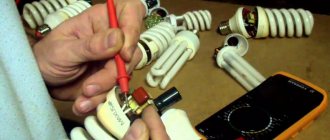
Battery voltage measurement
Battery restoration by replacing several elements
Restoring a screwdriver battery by replacing several elements can be successful for all types of batteries. It also does not pose any risk to them, as does manipulation with distilled water, provided that care is taken during soldering.
First, the output voltage of each “can” is measured using a multimeter, which in total should be 12-14 V. Accordingly, the voltage of one “can” should be 1.2-1.4 V. The U indicators are compared with each other, the most weak elements. Read more about how to check a screwdriver battery with a multimeter →
It is recommended to solder the battery chain using spot welding, but if this is not available, there is nothing left to do but use a regular soldering iron and do everything as quickly and accurately as possible, in order, if possible, to prevent the battery from overheating.
After soldering is completed, insert the battery back into the screwdriver and carry out 2-3 complete charge-discharge cycles to equalize the energy potential of all batteries. In order for the updated battery to last longer, it should carry out such training 2-3 times a month. How to quickly and completely discharge a screwdriver battery →
Re-flashing the capacity of battery cells
How to change elements in a screwdriver battery? Rechargeable batteries with Ni-Cd cells, if the recommended charging mode is violated, begin to lose capacity, but this loss is reversible. This can be done by flashing these elements . Thanks to this method, approximately 80% of the original capacity can be restored. The essence of flashing is to supply current with a voltage 3 times higher than the nominal value. Before starting work, the battery is disassembled into elements. Using pliers, tear off the nickel tape from the poles of the cans. On a high-power charger (you can take a car battery), the pulse mode to 3.6 V. The terminals of the device are placed against the same poles of the non-working cans for 3-5 seconds. Then all elements are measured with a multimeter. If the values exceed 1.4 V, they are restored. Banks in which the voltage indicators have not changed or have not reached the required value are replaced.
Restoring the Makita screwdriver battery
Before you restore the battery of a Makita screwdriver, you first need to disassemble its housing. It consists of 2 halves connected with glue. If you gently tap the battery case with a rubber hammer, the glue will come off. In some places there may be problems with disassembly. Additional hand tools may be needed there. Next, you should separate the halves of the case, holding the terminals with a screwdriver.
In terms of performance characteristics, the Makita drill-driver is close to a network tool. Autonomous power supply is provided by 2 replaceable Li-Ion batteries. Computer charging technology allows them to be restored in just 22 minutes. At the same time, battery life is significantly increased.
Faulty banks must be replaced with similar new models. If they are difficult to find on sale, you will have to assemble one from two batteries. Factory welding can be contact welding, but during repairs you will have to create a connection by soldering.
Replacing batteries with lithium ones
Replacing screwdriver batteries with lithium ones is done by calculating their number, based on 3.7 V per element. If you use a 14.4 V screwdriver, you will need four Li-Ion banks of the 18650 standard.
The sizes are different compared to Ni-Cd banks. You will need to install a charge-discharge controller into the case with the banks, which will need to be purchased separately. The charger may not be suitable for charging. You may need a different battery.
When using a screwdriver, if its operating time decreases, do not rush to dispose of the battery. Try to repair it. Read about repairing a charger for a screwdriver in this article.
Troubleshooting
The most common cause of failure is the failure of only one element. They are connected in series, which means that even a drop in capacity on one battery will lead to a complete malfunction of the entire battery. In this case we will need:
- Screwdriver. Usually the body is connected with Phillips screws. Some models have foolproof protection and may have stars with an anti-vandal system, triangles or even spanners.
- Multimeter. Any model is enough, even the cheapest DT-830. Since measurements are carried out in millivolts, Soviet pointer voltmeters will not be suitable.
Next you need to follow the instructions:
- The battery is disconnected from the screwdriver. It must be fully charged.
- The body is disassembled.
- Now you need to remove all the cans. There are more of them in Ni-Kd, since the rated voltage of one section is less.
- The voltage is measured at each bank. For nickel-cadmium - the nominal is 1.2 volts. For lithium ones, the normal voltage is in the range of 3.6-3.8 volts.
- After the measurement, you need to see which banks have the voltage reduced. For example, if two lithium batteries have a voltage of 3.8, and one has a voltage of 3.5, then it is the one that is defective.
- The battery is assembled and installed in the tool. Now it needs to be set to zero.
- The battery is disassembled and the voltage is measured again. If the voltage on the proposed element is significantly lower than on the others, it means it needs to be replaced or repaired.
Diagnosis of a faulty battery
Before you repair a screwdriver battery at home, you need to find out the cause of its breakdown. Correct diagnosis is 80% of the work done. And this process is not always simple and clear.
Diagnosis of battery faults involves identifying one or more batteries that have failed. The simultaneous breakdown of all batteries is nonsense, occurring once in a century.
Fault detection sequence:
- Fully charge the screwdriver battery pack. A portable power tool is supplied with a special charging socket. In which you need to install the removed battery and give it several hours to fully charge. The end of the charge cycle is indicated by the green indicator on the case lighting up.
Important! The NiCd or NiMH power supply must be completely discharged before charging. Lithium-ion batteries can be charged regardless of the percentage of their capacity.
- Remove the protective battery cover. There are no permanent housings: some manufacturers make bolted fastenings, others use adhesive fastenings. The bolts are easier to deal with - just unscrew them and remove the cover. The glued surface can be carefully cut off with a fitter's knife.
- Carry out a visual inspection. When a battery fails, it usually swells - this is clearly visible to the naked eye. The cause of low capacity may be a burnt wire or jumper between elements.
- Measure the voltage on each bank. Before starting measurements, the multimeter should be turned on to the “Constant Voltage” mode and touch the leads of each element with the probes. There is no need to solder each element.
- Using small cross-section wires, connect a simple 12 V or 24 V car lamp to the screwdriver power source (depending on the rated voltage of the screwdriver battery). Leave the lamp on for 30-40 seconds.
- Disconnect the car lamp from the battery and re-measure the potential difference of each element.
- Determine the element with the maximum drop in capacity and replace it.
- Reassemble the battery in reverse order.
Repairing or diagnosing batteries for a screwdriver can be done with your own hands without much difficulty. This is clearly seen from the above sequence. You just need to have a tool, a minimum amount of knowledge, free time and the desire to do something with your own hands.
Elimination of memory effect
Restoring a screwdriver battery does not always require some radical action. Often, alternating full charging (until the charging light goes out) and completely discharging the battery helps restore battery capacity. This method is also called “boosting the battery.”
How to erase battery memory effect
It is associated with the so-called “memory effect” and is characteristic of nickel-based screwdriver batteries. And it is especially pronounced in nickel-cadmium. It occurs when a battery that has been discharged to zero is not fully charged and begins to be used, or vice versa. This leads to enlargement of the crystals of the active substance, which reduces the area of its active surface.
Follow the manufacturer's recommendations for charging and discharging modes.
The so-called “training” of the battery helps to remove this effect or significantly reduce it. It consists of repeating cycles of full charge and discharge.
To do this, the recoverable battery is completely discharged using, for example, a light bulb. Then it is fully charged and discharged again. Repeat the process 5 times and if the individual battery elements are working properly, the characteristics will return to normal or close to it.
Element recovery is a reality
The “memory” effect of a battery has many interpretations, but the meaning of this phenomenon is that the cell reduces its charge capacity with each charge. Restoring an individual battery means restoring the functionality of the entire battery.
Recovery methods are different, but not all give results. A repeated charge-discharge cycle often helps. A separate element is charged and then discharged into a light bulb. After complete discharge, repeat the charge. This manipulation is performed until the element begins to gain sufficient charge capacity. If this does not happen, it is recycled, or, more simply, thrown away.
Sometimes specialists use the shock charging method. A hopeless element that has not responded to restoration measures is supplied not with 1.2 V, but with all 12 V. Such a shock shake sometimes brings results. This is one more try before the final release.
Recovery methods for non-specialists are interesting. They, of course, are similar to shamanism, but they also exist. They apply only to Ni-Cd samples. It is suggested to put the element in the freezer for 1 hour, and then put it in a plastic bag and simply tap it with some object. If you feel bad throwing it away, try it.
How to disassemble a screwdriver battery
In general, the batteries of many power tools are built the same way. The voltage and charging currents are different, but the device itself is similar. Battery banks are packed in a detachable plastic case. The body is held together with several screws, with additional fixation using plastic latches.
After unscrewing the screws (special forms of screwdrivers may be required), the battery does not immediately fall apart. It is held in place by the latches. We carefully examine it, determining their location. We found the latches, lightly pressed the plastic in that place, and pulled the second part towards ourselves. No extra effort, the latches are plastic and fragile.
How to restore a screwdriver battery: what’s in the case
Some screwdriver bodies are of the “one-piece” type; they are connected with silicone or glued. We carefully remove it, and then repeat the manipulations of disconnecting the housing. The refurbished battery can be glued back together or electrical tape can be used.
Checking the battery after repair
After replacing battery elements, it is necessary to equalize the potentials of all battery elements. To do this, leave the latter to charge for a long time. Then, after charging the battery of the screwdriver, you need to leave it for about a day to recover.
You can discharge the battery by using a screwdriver until it is completely discharged or by connecting a load to it. For example, an incandescent lamp designed for the appropriate voltage. To equalize the battery charge, the charge and discharge cycle should be repeated twice.
Problems with the screwdriver
Despite the variety of power sources for batteries, they all have a similar structure, which means they have the same faults:
- breaking the chain connecting the banks;
- loss of charge capacity (one or more);
- evaporation of electrolyte;
- lithium decomposition (only in some batteries).
The main reasons for tool failure
Reduced battery cell capacity is a common problem that occurs even with short-term use of the device. The problem is caused by the fact that even when a single charge loses its capacity, the remaining banks can no longer be fully charged. As a result, the time of continuous use of the screwdriver is reduced.
The cause of such a breakdown is the “memory effect” or evaporation of the electrolyte in the batteries, which occurs when they are very hot. However, even such troubles can be dealt with at home, without turning to specialists.
Non-functional elements are restored or replaced with new ones. The second case is relevant for lithium-ion batteries in which lithium has decomposed - in this case, all that remains is to buy a new power source.
It is necessary to detect the faulty battery element, then repair it or buy a new one
Disassembling the battery
Before disassembling, the battery must be charged as much as possible. This is necessary for subsequent diagnostics. If this fails, you will need to charge the elements separately. To do this you will need a regulated power supply.
Next you need to disassemble the housing of the battery pack. The process depends on the design - in some places you will need to unscrew the screws, in others you will need to press out the latches. If the body is connected with glue, the process will be more labor-intensive, but the result is still achievable.
Disassembling the battery case.
As a result, you will need to remove the battery cells connected in series. There is no need to separate them unnecessarily.
Extracted cells.
Features of batteries in screwdrivers
Opening the case, you can see a cassette of elements that provides the necessary voltage. Batteries are called "banks" and are usually of a standard size and voltage. The only difference between them is the capacity, which is indicated on the battery cylinder. The higher the battery capacity, the longer it will work.
It is better to have two batteries so that you can charge the second while working with one.
Lithium-ion batteries contain a control board, and the cells are protected by a case or film. If lithium decomposition occurs, such batteries cannot be restored.
Some nickel batteries have a temperature sensor. Nickel-cadmium batteries can be restored.
The screwdriver battery is disconnected and the fault is determined. An effective method of battery repair is to replace faulty elements or “cans”.
The operating instructions do not recommend disassembling and changing the screwdriver battery. But the price of the battery is more than half the cost of the tool. Not everyone can afford to buy a new tool, so some craftsmen disassemble, repair, restore and replace the main elements of the battery.
Useful articles, news and reviews on our Yandex Zen channel
General recommendations for repairs
Regarding nickel-cadmium batteries, the following features are distinguished:
- Such elements have an element of memory. According to the classical scheme, they need to be charged three times and discharged the same number of times. For a new part the rules are exactly the same.
- An absolutely similar one is chosen as a replacement so as not to disrupt the operation of the entire device.
You need to prepare the necessary tools.
Regarding lithium batteries, there are also certain rules that need to be taken into account:
- Soldering must not be used. Such parts cannot withstand high temperatures and quickly fail. It is permissible to use only a very powerful soldering iron, but at the same time you need to work very quickly.
- It is easier to select such elements, because there are both foreign and domestic products on the market, the batteries of which are the same.
Screwdriver battery discharge current
It is also necessary to monitor such a parameter as the current strength that the battery can deliver. This parameter is called discharge speed or discharge current. Sometimes (with good parameters) it is indicated in amperes, sometimes it is indicated by the letter “C” with a number behind it. To convert the marking into ampere/hours, we multiply the figure by the amperage of the battery and get the maximum discharge current of the battery.
For example, for 1500 mAh batteries with C 3, the maximum discharge current is 3 * 1.5 A = 4.5 A, for batteries with C 12 there will be 1.5 A * 12 = 18 A. If the battery capacity is 3200 mAh, then you need to multiply by 3.2 A, that is, with the same C 3 and C12 we have 9.6 A and 38.4 A, respectively. The principle of calculation is clear.
An example of a description of batteries from one of the sites
What is the effect of battery discharge current? How much power your tool can develop. If the maximum current consumption of a screwdriver is, for example, 15 A, and the battery can supply only 5 A, then your tool simply will not be able to achieve the declared power. So choose battery banks with a discharge current no less than the maximum current consumption of your screwdriver.
Number of charge/discharge cycles
Another minor parameter that is worth paying attention to is the number of charges and discharges. It is indicated in cycles
Displays the “life” of the battery and indicates how many times the can can be charged/discharged without changing its properties.
Lithium-ion is more compact
It’s clear that the more cycles, the better. But the more cycles, the more expensive. In general, once again we will have to look for a compromise.
With or without plates
If you have already disassembled your battery, then you have seen that the banks are connected to each other by contact plates. When disassembling the battery, do not bite the plates, but try to keep them intact. They can be cleaned and reused.
Sometimes you can find batteries with the plates already soldered. Then you don’t have to worry about careful disassembly. Everything would be fine, but if this is AliExpress, then the quality of the plates themselves and their soldering is rarely normal. Often batteries do not hold a charge or are poorly charged precisely because of the poor quality of the plates and the batteries themselves.
You can solder the plates yourself
You can try to solder the plates yourself. But keep in mind that if the jars overheat, they will fail. You need to solder quickly, using a powerful 100 watt soldering iron and good solder and flux. First clean the contact pad and the soldering area on the plate, treat it with flux, then quickly solder it.
List of required tools
Repairing or diagnosing a screwdriver battery is impossible without certain tools and measuring instruments. To restore a battery, you don’t have to buy expensive tools; budget manufacturers are quite suitable.
List of tools required to repair the screwdriver battery:
- Multimeter. A measuring device that allows you to determine direct and alternating voltage, resistance, current, or test a circuit for an open circuit. More expensive models are capable of measuring the capacity of elements, but they are not useful to the home craftsman.
- Flat and figured screwdrivers. An indispensable tool that will come in handy more than once in the future.
- Fitter knife with replaceable blades.
- Soldering iron. A power of 40 W will be quite enough. More powerful models are more expensive, and if handled incorrectly, the element can be damaged.
- Tin and solder. Inexpensive consumables.
Consumables will also come in handy, for example, electrical tape or heat-shrink tubing, household glue, and small pieces of wire.
Types of batteries used in screwdrivers and their differences
Cordless tools use nickel or lithium based power sources. The can is equipped with a waterproof case made of impact-resistant plastic; inside there are batteries connected in a common circuit.
Nickel metal hydride
They are distinguished by an increased density of stored energy, but in terms of the maximum current in the circuit they are inferior to cadmium batteries. The products have a reduced self-discharge rate; during normal operation, a slight decrease in voltage is observed. The materials used in the design are environmentally friendly; to restore the battery, a current strength of no more than 30% of the rated capacity is required.
Nickel-cadmium
The battery of the screwdriver is based on Ni-Cd batteries.
These elements are most often used to drive tool motors. Each section has an operating voltage of 1.2 V, the parts are collected in common banks.
The advantage of batteries is the ability to deliver a higher rated current, but when partially discharged, a drop in capacity is observed.
This process is reversible and requires successive periods of discharging and charging to recover. The resource of the cadmium type power supply is up to 1000 cycles.
Lithium-ion
They are characterized by reduced self-discharge and increased capacity (without increasing dimensions). No maintenance required during operation. Special devices are used for charging, since if the procedure is violated, the element may ignite or explode. Mechanical defects negatively affect the stability of the battery, which breaks down or catches fire when attempting to charge.
Lithium-ion batteries are equipped with protective mechanisms that are triggered at the moment of discharge by increased current. To reduce the likelihood of an explosion, an anode made of graphite was introduced into the design.
But the tendency to self-ignition when storage and operating conditions are violated remains. Power supplies cannot tolerate deep discharge; increasing the voltage in the charging circuit leads to an irreversible drop in capacity.
Lithium polymer
The lithium polymer power supply features reduced voltage drop as the terminal voltage decreases. Operation is allowed at air temperatures from -20°C. The polymer material allows you to make thin and flexible batteries (thickness from 1 mm).
Li-Po batteries, unlike other types, are more compact, which makes them somewhat more difficult to repair.
But the batteries retained a high fire hazard if operating conditions were violated. The design of the can contains an electronic protective board that limits the maximum current in the circuit. To restore capacity, you need to use a special charger; the power source can withstand up to 900 operating cycles.
Do not allow deep discharge; if stored for a long time, the product will fail. To reduce natural wear, special inhibitors are introduced into the electrolyte.
Common faults
Despite the fact that a screwdriver is a very convenient and functional device that is in the arsenal of many craftsmen (both home and professional), it can still break. No equipment is immune from such problems. Often the source of a screwdriver problem is a faulty battery. Let's take a look at the list of the most common problems associated with the battery of this tool.
- In many cases, there is a loss of capacity of the screwdriver battery. Moreover, we can talk not only about one, but also about several batteries.
- There may be mechanical defects in the chain of the battery pack itself. Such troubles are usually caused by the detachment of the plates that connect the jars to each other, or connect them to the terminals.
- Battery failure can be caused by oxidation of the electrolyte - this is another common problem that many owners of screwdrivers encounter.
- Lithium can degrade into lithium-ion components.
If you choose the most common defect in a screwdriver battery, then it can be attributed to the problem of loss of capacity. The point here lies in the fact that the loss of capacity of at least one element simply does not allow the remaining jars to be charged normally and completely. As a result of receiving an inadequate charge, the battery begins to discharge quite quickly and inevitably (does not hold a charge). Such a malfunction may be a consequence of the memory effect or drying out of the electrolyte in the banks due to the fact that they were very hot during charging or worked under heavy loads.
Diagnosis of battery faults
You should not immediately suspect a malfunction of the screwdriver battery or restore it, but first try to replace it with the second one from the kit, first charging it properly. If the screwdriver rotates poorly, this may be caused by a breakdown in its mechanics (motor or gearbox). If in doubt, replace the power supply if possible. If everything points to the battery, then you can begin to diagnose and restore it.
First of all, you need to find out the type of battery. This is written on its body and the possibility of restoration depends on it. The rated voltage must also be indicated. It usually lies within the range of 14 ... 19 V. Then, without disassembling the body of the battery pack, it is checked. To do this, you can use two methods:
- Check with a multimeter;
- Load test.
Multimeter method
The multimeter can be used in two modes: voltage measurement and current measurement. If there are two devices, then this is even better; you won’t need to make unnecessary switches.
The measurement setup is shown below: One multimeter switches to voltage measurement mode (voltmeter), the other switches to current measurement mode (ammeter). If there is only one device, then instead of an ammeter you will have to use just a wire. The wires from the battery to the voltmeter can be thin, and the wires from the power source to the battery can be thicker, but don’t get carried away too much; in the end, wires with a cross-section of 0.5 mm2 are suitable for the entire circuit.
If the voltage on the battery is normal, but the charging current is small, significantly less than one ampere, then for a Ni-Cd battery this may mean a malfunction of one of the battery elements. Restoring the screwdriver battery is canceled here; repairs are needed. For Li-ion, this means that either it is normal, or one of the elements is also faulty.
Let the Ni-Cd battery have a nominal voltage of 18 Volts. Then it’s easy to find out how many elements are inside without opening the case. Knowing the nominal voltage of Ni-Cd 1.2 V, divide: 18/1.2 = 15. This means there are 15 elements in the case. If the voltmeter shows an idle voltage of 16.8 V, then this may mean that one of the banks is short-circuited, or simply a discharge of a normal battery. Such a battery gives 15 V when discharged. If the charged one shows 16.8 V or so, then one of the cells is short-circuited. It won't be possible to restore either, you will have to replace it.
If the battery passes a current of more than one ampere when charging, and the voltage gradually increases, increasing by 0.1 V every 5-10 minutes, and at the end of the charge the voltage is slightly higher than the nominal value, then the battery is in order and no restoration is required.
Load method
This method is similar to the previous one and is perhaps simpler. No need to disassemble the charger, or use a laboratory power supply. All you need is:
- Automotive light bulbs;
- Multimeter;
- Pieces of wire;
- Soldering iron with solder and flux.
Check scheme:
If the battery supplies the rated current for several minutes, the voltmeter shows a voltage slightly below the rated value, and the lights do not dim, then the battery is working. However, it may happen that for Ni-Cd the current will soon begin to weaken. This is a manifestation of “memory”. In this case, you need to carry out a restoration. Lithium-ion batteries do not have a memory effect, although in theory it exists, in practice it is believed that it simply does not exist.