It's no secret that every woman wants to be unique and attractive. There are many different ways to do this, for example, cosmetics, various skin treatments, manipulation of eyelashes and nails. Nothing makes a woman more special than her hair. And for this there are many devices and devices. One of these beauty tools is an electric curling iron.
It is mainly intended for straightening hair and also helps to cope with unruly curls when forming bangs.
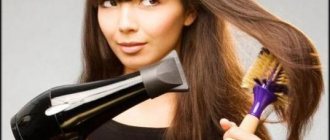
Rice. 1. Repairable hair curler
The working principle of a curling iron.
Slightly damp hair is clamped between two heating elements. When moving the elements along the entire length, the hair dries and becomes even. Thus, unruly “curls” can be turned into a perfectly even, straight hairstyle.
You can use a curling iron not only with wet hair; dry hair can also be straightened, but not as effectively as the former.
How the device works
Modern curling irons on the market are distinguished by a variety of shapes and a range of functions.
But, regardless of the brand or model, they are all similar in design. The basis of the device is a round body with a heating element inside and a triangular flexible leg-stand. A power cord with a plug is connected to the handle. A metal clamp is hinged. Unfortunately, the simple design of the styler does not guarantee its reliability and trouble-free operation. Even the cheapest models of the most popular brands fail.
If you repair your hair curling iron yourself, you can save money and time that you would spend on visiting a specialist. The main thing is to correctly disassemble the device and determine the cause of the malfunction.
P O P U L A R N O E:
- DIY incubator.
What to do if the hen does not arrive in time? And the number of young animals produced is not always satisfactory, and serial incubators are a bit expensive.
There is only one way out: try to mount it yourself.
The chamber for a simplified model of an incubator can be ordinary cardboard boxes, pasted inside and outside with layers of thick paper, wooden frames, sheathed on both sides with plywood or plastic, filled inside and between the walls with glass wool, dry sawdust, and foam. Read more…
OSCILLOGRAPHIC ATTACHMENT FOR TV
Descriptions of oscillographic TV attachments have already been published on the pages of the magazine (Radio, 1959, No. 1; 1965, No. 8, etc.). However, unlike them, the proposed set-top box does not require intervention in the TV circuit (it is connected to the TV antenna socket). Together with a sweep frequency generator, it can be used to set up IF amplifiers for radio receivers. Read more…
Device for checking the voltage limits of radio components
When repairing, setting up, or creating new circuit diagrams, you may need a device to check the values of permissible voltages and leakage voltages of transistors, diodes, capacitors and other radio components.
The article below presents a diagram of such a device based on a converter based on MS 1211EU1.
Read more…
Popularity: 5,965 views.
DIY repair
Repairing a hair curler does not take much time. To repair the styler, you will need two screwdrivers (Phillips and flat head for removing plugs), a piece of electrical wire, a multimeter, and insulating or adhesive tape.
When the moving contact oxidizes, the parts must be separated. Then carefully sand both elements with very fine sandpaper.
Just in case, check the cord with a multimeter. This way you will know if there are any breaks or pinches. If such damage is found, be sure to replace the wire.
When the curling iron begins to press the hair worse, it is necessary to straighten the spring. To do this, you need to remove the retractable stand and carefully unscrew the fasteners.
Sometimes it is enough to pry the spring with a flat screwdriver or your finger - and it easily falls into place. But it also happens that you have to remove it from the body and return it to the desired position separately from the device.
After carrying out these manipulations, put the clamp in place, secure it tightly with bolts and install the lower retractable bracket-stand.
As you can see, the design of this electrical appliance is so simple that repairing it at home is not at all difficult. However, before you start repairing, you need to learn how to properly disassemble the curling iron.
Disassembly
To understand what exactly caused the curling iron to fail, you need to disassemble the device.
Models from different brands are designed approximately the same. Having learned how to repair one styler, you will successfully cope with the repair of any other device for styling curls. All tongs consist of two halves. They need to be sorted in this order:
After establishing the exact cause of the malfunction, you can proceed directly to repairing the device. Don't forget to grab the tools mentioned above right away.
Fault options
There are many reasons for a curling iron to break. However, there are a few that are most common. Let's look at the most common types of faults.
It is recommended to watch a video on how to troubleshoot a curling iron. A visual example will help you navigate faster.
| What's happened | Cause | Troubleshooting method |
| There is no power to the temperature controller board. | Wire fault. | Disassemble and carefully inspect the curling iron. Check the soldering of the cord to the board. If it is torn off, you need to cut off the damaged part and solder the wire in place. A broken connector is quite difficult to repair. It is recommended to exclude it from the circuit by soldering the cord directly. |
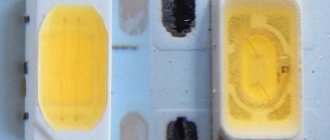
| Of the two halves of the tongs, only one works. | Soldering errors or broken heating element. | Disassemble the heating element. These are 2 plates with a resistor between them. Be especially careful with the conductive layer. We must not allow it to be erased. The malfunction is eliminated by ensuring contact of the wire with the heater plate. |
| The device does not heat up when full power is supplied to the board. | Poor soldering or burnt part. | Inspect the board. If nothing suspicious is observed, “ring” all the elements in turn. Start with the fuse. Most often, diodes and a quenching resistor are responsible for blowout. Don't forget to pay attention to the capacitor and variable resistor (if you see the latter in the diagram). |
Have you completed all the manipulations, but the device still does not work? Then it’s better to contact a specialist. Repairs may require special skills or tools.
Repairing the swivel
The purpose of the swivel is to rotate the styler. If used improperly, the wire may become severely twisted. As a result, a break occurs at the point where it is attached to the body.
You can repair the cord by insulating the exposed part. However, such repairs will be short-term. Often he threatens with electric shock in the future.
To properly repair a swivel, you need to do the following:
If you did everything correctly, the styler will function as before. If suddenly it doesn’t work out, it’s okay. Take the curling iron to a workshop and let an experienced specialist handle it.
Replacing the heating element
If your styler suddenly stops working, immediately check to see if the wire is damaged. The curling iron turns on normally (the indicator light comes on), but does not heat? Apparently, the heating element is to blame, which most likely burned out.
Here's what you need to do to replace a damaged part:
Assemble the styler step by step and plug it into the network. If you managed to replace the heating element successfully, the device will fully restore its functionality.
If the electric motor is faulty, when should it be replaced?
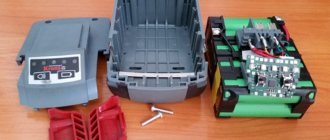
The commutator-type electric motor on a drill and any other tool is the heart of the equipment, which costs 60% of the total cost of the device. If the malfunction is related to the electric motor, then there are two ways to repair the drill malfunction - replace the entire motor or carry out diagnostics, identify the malfunction and eliminate it. It should be noted right away that you can do the diagnostics yourself, but you won’t be able to fix the faults yourself. Here you will need to take the faulty unit to a specialized workshop, but practice shows that it is easier to buy a new rotor or stator than to repair them.
This is interesting!
It is also rational to take the engine in for repair when it is impossible to find spare parts for it.
Let's consider the principle of checking the serviceability of the stator and rotor of an electric drill motor with your own hands:
- Using a multimeter in resistance measurement mode, the value between the armature windings and the metal core is measured. The presence of resistance indicates a violation of the integrity of the insulation
- We use a marker to indicate the plate from which the check begins. Use the probes of the tool to touch the plates one by one and record the resistance value. In this case, the value between the plates should be approximately the same. A resistance difference of more than 10% is unacceptable and indicates the presence of a break
- Checking interturn short circuit. A special device can be used to measure the presence of an interturn short circuit. It makes no sense to buy such a device specifically, since if there is no breakdown of the insulation on the body or a short circuit between the plates, then with a high degree of probability it can be assumed that the armature is working
- After this, you should check the serviceability of the rotor. Similarly, the absence of resistance between the winding and the core is checked
- Check the resistance between the windings. The absence of resistance indicates complete damage to the winding, and if its value is large, a breakdown can be assumed. The video description below describes in detail how a step-by-step check of the serviceability of the commutator motor is carried out.
https://youtube.com/watch?v=9iy0lqpMrsU%3F
Malfunctions of the stator are less common than the rotor, but in any case, if the drill has recently been operating under high load, then the motor will fail. If it is determined that the motor on a drill is faulty, then it is easier to replace it than to repair it, and sometimes it is better to buy a new drill. The video below describes in detail how to find and fix electrical problems with a drill.
Rating of the best curling irons
Knowing how to disassemble your curling iron and repair it yourself will extend the life of the device. And this is certainly a positive thing. However, in order to avoid repair work or at least minimize it, you should initially try to choose a high-quality styler.
Today, the beauty device market is replete with a huge number of models that can give curls a wide variety of shapes. Small and large curls, Hollywood curls, corrugations - this is not a complete list of styling.
There are also curling irons on sale that do the gripping and twisting of the strands themselves. Technological progress does not stand still. Manufacturers are doing everything possible to improve the convenience and modernize the functionality of stylers.
When choosing a device, first of all you need to pay attention to the brand. This is the most important criterion. The more serious and well-known the company, the longer the purchased curling iron will last and the better the curl will be.
Among the leaders in the rating are the following brands:
Stylers from the listed manufacturers can probably be seen in any home appliance store. They cannot be considered cheap. And yet they are in high demand.
In addition to the brands mentioned above, there are also professional curling irons that are sold only in specialized outlets. If you believe the reviews, the best among them are:
Of course, the latest devices are more expensive. True, they compensate for the costs with their endurance and long service life.
Tips for caring for your iron
The electrical appliance will work for a long time and without interruption if you care for it carefully and regularly.
- When cleaning, do not use various abrasives that can damage or scratch the heating plates.
- Even with a soft terry towel, you should not rub the plates with force . This can damage their integrity and pose a danger to the hair.
- In addition to the plates themselves, you need to thoroughly clean the areas around them.
Regular maintenance will keep the device clean and help it work for a long time.
Read also: Color de, Chocolate, Chocolate.
It seems like nothing complicated, right? I don’t want to lose my iron, I’ll clean it!
Let's sum it up
To prevent suddenly broken curling irons from ruining your hairstyle and mood, you need to take the choice of this device very seriously. But since purchasing even the most expensive styler does not guarantee its eternal operation, it is better to immediately acquire the tools necessary for repairs.
Do not try to disassemble the iron after purchase. Firstly, it will still be under warranty. And secondly, there is a risk that you will not put it back together. And instead of a brand new device, you will receive a non-functional set of parts. It’s another matter if the styler is already broken - in this case, you definitely have nothing to lose.
If you cannot repair the tongs yourself, do not hesitate to seek help from a specialist. After all, the main thing is a functioning device, and not who repaired it.
Source
Little tricks
There are standard requirements for the safe operation of an electric hair dryer, which can push the boundaries of trouble-free operation of the device, without contacting service centers:
- There is no need to wrap the electrical wire around the handle of the device and generally try to avoid twists and loops on the wire;
- Use only those attachments that were supplied with the device;
- Do not use the device in rooms with high humidity to prevent water from entering the hair dryer body;
- If the distance to the outlet is too large, only factory extension cords can be used;
- It would be a good idea to protect the air intake area with a fine-mesh filter to prevent dust particles and hair from getting inside the device;
- Do not carry the hair dryer, holding it suspended by holding it with your hand by the cord;
- If even minor interruptions occur, further operation of the device is prohibited;
- Avoid excessive overheating of the product;
- After work, you need to let the device cool down and only then put it away for storage;
- The electric hair dryer must be stored in a dry and ventilated area;
- Follow basic safety rules when repairing electrical appliances;
- Repairing a hair dryer requires electrical skills. If they are not there, it is better to entrust the work to professionals in specialized workshops.
Let us repeat once again - independent repairs are possible if all work is carried out especially carefully. This is always true for electrical appliances.
The hair curler does not heat up, what should I do?
_________________ Don’t interfere! WITH." Why doesn’t the Lord give us a helping hand for so long? And the worst thing is: maybe he’s holding out, but we don’t notice it longer and longer?”
Register and receive two coupons for $5 each: https://jlcpcb.com/cwc
| Chainik |
| jib |
| We invite everyone to attend a webinar on Fanso lithium power sources (EVE) on November 30th. You will learn about the features of using lithium power supplies and how they are affected by operating mode and operating conditions. We will tell you what parameters are important to consider when choosing a lithium HIT, consider the pitfalls that you may encounter if you make the wrong choice, and discuss how to properly conduct tests to ensure the reliability of the final solution. You will be able to ask questions to manufacturer representatives who will participate in the webinar. | ||
| Chainik | Analogue temperature sensor KTY83/110.153 (NXP) DO-34 We invite everyone to attend a webinar dedicated to Ethernet technology and its new 10BASE-T1S/L standard. The 802.3cg standard describes data transmission at speeds of up to 10 Mbit per second over a single twisted pair cable. The webinar will also discuss other innovations that have recently entered the Ethernet family of technologies: Synchronous Ethernet (SyncE), Precision Time Protocol (PTP), Time Sensitive Networking (TSN). High-speed 25G+ Ethernet from Microchip will not be left out either. |
| jib |
| Page 1 of 1 | [Posts: 6] |
Time zone: UTC + 3 hours
Who's on the forum now?
This forum is currently viewed by: no registered users and guests: 5
Source
DIY hair straightener repair
Before you disassemble your hair straightener, you need to carefully weigh your options. Despite the apparent simplicity of the device, this operation can lead to the complete unsuitability of the curling iron for further use. To repair a straightener designed for hair styling , you must be able to use a screwdriver and side cutters, have your own soldering iron and tester. Knowledge of radio engineering and plumbing will be useful.
Design and principle of operation of the device
A hair straightener is a heating clip-style device that allows you to straighten stubborn curls. Leveling is ensured by a temperature of 120º to 210ºC, which is formed between two tightly adjacent, smooth plates. They press strands of hair under the influence of a spring.
Despite the wide variety of brands and models of curling irons, they are all basically similar in layout. The hair straightener circuit includes:
Unfortunately, the simplicity of the device design does not lead to its reliability. Even models from well-known manufacturers often fail. Repairing your hair straightener yourself can save you money and time spent going to a hair repair shop.
Reviews
Most customers are delighted with Bosch irons. The devices perfectly straighten hair and create natural and beautiful curls.
The devices heat up quickly, are easy to use, and have a stylish design. Girls are pleased with both gentle heating modes and additional options.
Some customers talk about the unpleasant odor emanating from the device during operation. However, not everyone knows that all devices with an ionization function have this characteristic “aroma”. This momentary inconvenience gives the strands a well-groomed appearance, removes static from the hair and gives it a special shine.
There are also reviews on the Internet that after daily use of the iron, the condition of the hair has noticeably worsened. Such young ladies should be advised to regularly carry out caring procedures (masks, oils), and also choose models of straighteners with ionization. The latter especially applies to ceramic plates, which without this function can actually dry out your hair slightly.
It is also important to remember to clean the plates of styling products after each use. To do this, you can use a cotton pad with regular lotion.
To learn how to choose the right hair straightening iron, as well as other medical recommendations, see the following video.
Do-it-yourself troubleshooting
Hair straightener failure may result in partial or complete loss of heat or mechanical failure. Before disassembling the iron, you should carefully inspect it for integrity.
The most common problem with these devices is a broken power cord. In models with a detachable wire, the fault lies in poor contact of the connector.
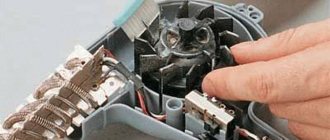
Disassembly begins with separating the halves of the iron. To do this, remove the decorative plugs on the sides of the device and unscrew the tightening screw.
Attention: This operation must be carried out carefully, since there is a spring on the axis connecting the parts of the curling iron. Before removing, you need to note its exact location so as not to waste time and nerves during assembly.
When the halves are separated, access will be made to the remaining screws securing the covers that cover the shadows and controls. Having gained access to the temperature regulator, you can begin to inspect and test the parts.
Disassembling the case
First, using a Phillips screwdriver, unscrew all the fastening screws around the perimeter of the styler attachment.
Some screws are deep-set so that not all screwdrivers fit into the diameter of the hole. For such places you need to choose a suitable tool - a thin screwdriver.
We do the same with the two screws securing the contact socket at the end. After this, carefully lift the plastic side of the case.
Now you can see the bottom heater of the styler and the wires going to it.Remove the upper part of the body. This releases the upper heater and provides access to the spring and other parts of the hair curling iron.
Who can repair their hair curling iron themselves?
First, it should be noted that fixing a curling iron is quite a serious matter, requiring skills in repairing electrical appliances. If you basically understand the repair of electrical equipment, have experience in such repairs and have the necessary tools - an electrical tester and a soldering iron, at a minimum - then you can cope with this. You won't find anything super complicated or super specific here.
But if you do not have the necessary skills and do not have the necessary equipment, it is better not to get into the inside of the iron, because you may not only not achieve results, but also create new problems, further complicating future repairs for those who will do it.
P O P U L A R N O E:
Turning on the computer
There are a lot of solutions for controlling a computer from a remote control, for example, IR receivers from Microsoft, GotView, etc. Existing auxiliary software allows you to flexibly configure the control of application programs from the remote control, such as video or audio players, almost turning the computer into a multimedia center. Unfortunately, only “almost”. For the most part, IR receivers are deprived of one very important function - they do not allow you to turn on the computer remotely - from the remote control. Read more…
Which TV is better?
Televisions, like all household appliances, are constantly being improved; technical innovations appear that you can’t keep up with. If you bought your TV five years ago, then you can already say that you are behind the times. After all, modern TV really has fundamentally different qualities in many respects.
In the article below, let's discuss what requirements a modern TV must meet.
What exactly breaks in a hair straightener - and how to fix it?
The main symptom is a complete loss of heat; the iron does not respond to your actions at all. Generally speaking, this is probably the most common problem that occurs with hairdressing electrical equipment. And with basic skills and equipment, it’s the easiest to fix.
In any case, the iron will most likely have to be disassembled, for which you first need to remove the decorative plugs, then unscrew the main tightening screw between the halves - be careful, watch how the spring is installed when unscrewing it, so that you can return it to its place without any problems. Then calmly unscrew the halves and look where the cord is connected.
A very common option is that the cord is basically fine, but the problem arises at the soldering point to the board. If the tester shows that there is current on the cord, but not in the curling iron, try re-soldering the cord.
There is also the possibility that the cord is damaged somewhere along the length. It is necessary to ring the cord with a tester and find the break point. The damaged part is cut off, and the working part is soldered back.
This problem is the most common. But it is also possible that one half of the curling iron heats up, but the other half does not. In this case, it also makes sense to first ring the elements of the curling iron with a tester and check the soldering. It is necessary to restore contact between the electrical wire and the heating element.
The internal elements of the curling iron can also burn out - often these are diodes or a quenching resistor. If the power supply is checked and everything is absolutely fine with it, but the curling iron, nevertheless, does not work, it makes sense to sequentially check all the internal elements of the circuit, starting from the fuse, and find the element that requires replacement.
Of course, I would like there to be as few problems as possible with the curling iron, so that it does not break for as long as possible. Anything can happen, of course, but it largely depends on the quality of the elements of the curling iron and the quality of its assembly. If your current curling iron does not suit you with its performance, often breaks or does not perform its functions well, pay attention to professional-grade curling irons from Mustang, which you can choose from our catalog.
Model overview
PHS5947
Model PHS5947 is an easy-to-use device for giving your hair perfect smoothness. The device is suitable for hairstyles of any length.
The straightener heats up in 30 seconds. You can independently adjust the temperature level of the tongs. Having chosen the mode that suits you, you can lock the adjustment button so as not to accidentally reset the settings.
The model belongs to the “KeratinAdvance Protect” series. This means that it protects curls from the harmful effects of high temperatures and the possibility of drying them out. Also, the “Keratin” option prevents the destruction of the hair structure.
A special cooling zone takes care of the strength and health of the strands, preserving their color and shine. Diamond-coated floating plates provide gentle yet effective styling.
The developers tried to make the device as safe as possible. 70 minutes after starting work, the tongs automatically turn off. This option is designed for the event that for some reason you forget to turn off the rectifier.
PHS5263
This anodized device guarantees gentle hair straightening, impeccable smoothness and shine.
Four-channel ionization protects the structure of each hair, retaining moisture and creating a visual effect of 3-dimensional shine. The temperature regulator allows you to customize the device taking into account your hair type and individual characteristics.
Increased width plates speed up the installation process, making it even more convenient and efficient. The original red backlight turns on when the curl ionization function is activated.
PHS1151
The “Style to go” collection of styling devices was created specifically for dynamic women. The compact size makes it easy to take the iron with you on any trip.
The device is universal. With it you can create different hairstyles - from perfectly straight strands with a mirror shine to flirty curls - everything is possible with it. The special shape also allows you to give your hair an incredible root volume, creating the visual effect of thick and voluminous hair.
The ceramic inner surface ensures gentle styling. And the chrome-plated outer side guarantees the strength and durability of the device.
PHS 9948
This ceramic-coated straightener features record heat-up time. Within 25 seconds the device will be ready for use.
Five modes allow you to adjust the temperature level. The ionicization option neutralizes frizz and retains moisture inside the hair. Thermally insulated tip and auto shut-off feature ensure safe use of the device. The swivel cord gives maximum freedom of movement. The rounded shape of the plates allows you to use the iron for both straightening and curling. The kit includes special clips for fixing strands and a heat-resistant mat-stand.
PHS 2101B
This ergonomically designed device heats up in 45 seconds. The device is compact, easy to use, and has a stylish design. The mobility of the anodized plates ensures delicate installation. The iron straightens and curls hair, protecting it from overheating and drying out.
What to do if your hair straightener doesn't heat up?
Last edited by Alex-GT Tue Feb 26, 2013 10:26:37 AM, edited 1 time in total.
| Cat's friend |
Karma:
9
Message rating:
61
Registered:
Sat Nov 07, 2009 11:45:42
Messages:
4348
Message rating:
0
Register and receive two coupons for $5 each: https://jlcpcb.com/quote
| Cat's drinking buddy |
Karma:
8
Message rating:
126
Registered:
Wed Sep 28, 2011 22:18:14
Messages:
2976
From:
Moscow
Message rating:
0
_________________ People can live without brains.
Wolfspeed offers discrete silicon carbide diodes manufactured using JBS and MPS technologies, with maximum permissible voltages of 600 V, 650 V, 1200 V and 1700 V and maximum current from 1 to 50 A. A distinctive feature of all models is the low charge value shutter and high overload capacity.
BlueNRG-LP is STMicroelectronics' new programmable SoC chip. It complies with the BLE specification version 5.2, supports Bluetooth Mesh networks, and is suitable for wireless communication at a frequency of 2.4 GHz. The new chip has high performance.
| Cat's drinking buddy |
Karma:
8
Message rating:
126
Registered:
Wed Sep 28, 2011 22:18:14
Messages:
2976
From:
Moscow
Message rating:
0
_________________ People can live without brains.
| Cat's drinking buddy |
Karma:
8
Message rating:
126
Registered:
Wed Sep 28, 2011 22:18:14
Messages:
2976
From:
Moscow
Message rating:
0
_________________ People can live without brains.
PRIST expands its range
| Cat's friend |
Karma:
52
Post rating:
846
Registered:
Tue Sep 07, 2010 03:01:06
Posts:
16548
From:
Moscow-Izmaylovo
Post rating:
0
You can't get the firmware from this MK; it's locked. But it definitely has nothing to do with it - firmware and microcontroller. This styler . The wires there are crappy, as are the contacts.
You can connect these heaters through a 220 light bulb and check their functionality.
_________________ I'm going to WWW treat your crippled equipment.
You can't get the firmware from this MK; it's locked. But it definitely has nothing to do with it - firmware and microcontroller. This styler . The wires there are crappy, as are the contacts.
You can connect these heaters through a 220 light bulb and check their functionality.
Heaters are OK. We tested and retested. The wires are ringing, bent this way and that.” Is there 5v on the lite? — the MK should work from external power.” How do you understand this? What is lit? I don’t quite understand some of the abbreviations
With R18 everything is fine. It’s something like glue on the board. It doesn’t conduct current and doesn’t interfere with life. The zener diodes and diode are in perfect order. Up to the semmistor, the circuit is absolutely working. All problems are on the control power supply.
| Cat's friend |
Karma:
52
Post rating:
846
Registered:
Tue Sep 07, 2010 03:01:06
Posts:
16548
From:
Moscow-Izmaylovo
Post rating:
0
The R18 you have - judging by the picture - should not work at all - the scalp has been removed from it - remove it at an angle of 45 degrees in an enlarged format.
Measure it with a toaster - no better tester - multimeter - ohmmeter
_________________ I'm going to WWW treat your crippled equipment.
| Cat's friend |
Karma:
27
Message rating:
458
Registered:
Sat Nov 20, 2010 21:54:31
Messages:
3567
Message rating:
0
| Cat's friend |
Karma:
27
Message rating:
458
Registered:
Sat Nov 20, 2010 21:54:31
Messages:
3567
Message rating:
0
| Cat's friend |
Karma:
52
Post rating:
846
Registered:
Tue Sep 07, 2010 03:01:06
Posts:
16548
From:
Moscow-Izmaylovo
Post rating:
0
give it five volts, I would have done it long ago
If there's a hell of a lot on it, then you're not getting power to it - there's a broken wire or stabilizer.
_________________ I'm going to WWW treat your crippled equipment.
give it five volts, I would have done it long ago
If there's a hell of a lot on it, then you're not getting power to it - there's a broken wire or stabilizer.
| Cat's drinking buddy |
Karma:
8
Message rating:
126
Registered:
Wed Sep 28, 2011 22:18:14
Messages:
2976
From:
Moscow
Message rating:
0
_________________ People can live without brains.
| Cat's drinking buddy |
Karma:
8
Message rating:
126
Registered:
Wed Sep 28, 2011 22:18:14
Messages:
2976
From:
Moscow
Message rating:
0
_________________ People can live without brains.