Electrician in the house
Encyclopedia about electricity from A to Z
Masters catalog
Find the best master or company in your city
Hidden cable wiring for TV
It's hard to imagine a city apartment without a TV. In today's dynamic pace of life, it is an integral attribute of any home. In this case, the image must be of high quality, with surround sound, and clear color reproduction.
Even good antennas and the latest equipment will be powerless if the television cable wiring in the apartment is of poor quality. The article will tell you the rules for its installation.
- Selecting a TV cable
- Accessories and distribution equipment
- Cable laying procedure Rules for installing antenna cable
- Cable wiring in the apartment
- How to disguise a TV cable
Choosing a TV cable: what to pay attention to first?
Many providers, for example, such as Tricolor, lay out the cable for cable or satellite television themselves. However, in this case, the quality of the cable may be lower than desired. And in connection with this, there is an option to search for this product yourself, focusing on a number of parameters. We will choose the RK 75 model (analogous to SAT 602).
Quality is something you cannot skimp on when laying cables. Ideally, we do this once and for many years, since sometimes such communication elements are located under the baseboard or even under the trim. And if we want to re-stretch them, it may involve a lot of extra work. At the same time, a high-quality cable has minimal signal attenuation, which means that the picture and sound will be of the highest quality.
The wire must be flexible enough so that we can lay it with our own hands at different angles if necessary. At the same time, it must have high-quality external insulation that is resistant to water and other factors. This is especially true if some of the wiring is located on the street.
Depending on what kind of television we conduct, we are looking for the following types of cable:
- Digital television: RK 75-4.8-312, or RK 75-4.8-318;
- Cable television: RK 50-7-11, or RK 75-4-11;
- A simple cable from TV sockets to a TV: RK 75-2-1.
How to connect the plug to the antenna cable?
It is much easier to carry out the procedure when you do not need to look for materials: the cable is laid all the way to the television receiver and there is a spare, working plug.
But what to do if one of the “participants” in the technical operation is not available? Let’s take a closer look at what we need to quickly establish a television signal.
Stage #1 - choosing a cable and plug
Any wire will not work, so to connect the antenna with a television receiver or set-top box for digital signal transmission, you need a special type of cable - coaxial. The optimal resistance parameter is 75 Ohms.
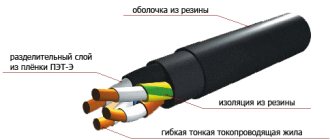
A coaxial cable consists of two main elements - a central conductor and a screen (therefore, the type of cable is called shielded). There is an insulating polymer coating on top, another insulating layer separates the shield from the conductor
To make the core, either copper or copper-plated steel is used. The first option is characterized by low resistance and is typical for equipping satellite television.
The second option can be safely used for switching terrestrial television systems - even taking into account small losses, the signal will be stable. The copper-plated steel analogue costs about 2 times less than the copper one.
Rules for choosing a cable for an antenna:
- There are no special requirements for the manufacturer, but for a satellite dish it is better to purchase a more expensive product from a famous brand, and for terrestrial TV, a domestic one will do.
- Be sure to consider the length of the route. If the distance from the antenna to the television receiver is more than 5 m, the signal loses strength.
- Core thickness standards are 0.5-1.1 mm. The best option is millimeter.
- Pay attention to the quality of shielding. If powerful electrical wiring is located near the antenna route, the screen must be solid, with maximum protection parameters.
- If in indoor conditions the type of insulation does not matter, then for outdoor installation we recommend using only a stronger cable with a PVC sheath painted black.
You can't go wrong when choosing a cable marked RG 6 - this is the most popular standard with a 1 mm core, aluminum screen and PVC insulation.
The RG 6 coaxial cable is well suited for self-installation not only due to its technical parameters. Thick core and soft screen allow for quick and precise cutting
In addition to it, you can use the domestic alternative RK 75 or the Italian one - SAT 50 . An option such as RG 59 is not suitable, especially if the signal transmission distance is more than 200 m. Its conductor resistance is too high.
All that remains is to select the plug. Previously, when connecting old-style products, soldering was used. has become unnecessary, since there is a steel plug of standard F. For amateurs with minimal electrical knowledge, it is good because it can be mounted using conventional screwing.
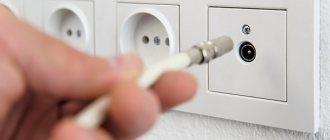
The antenna plug is made of steel and consists of 2 parts. When connecting a TV to a set-top box, the second part is not required, but to connect an antenna, both halves are needed
The F-plug is an inexpensive product, and if the old one breaks, there will be no difficulties in purchasing a replacement. LED, LCD, and plasma TVs have a special connector for it on the rear panel.
When you have both the cable and the plug at hand, you can start cutting. This is a simple operation, accessible even to a schoolchild.
Stage #2 - cutting the antenna cable
Now we will find out the nuances of the procedure itself and will analyze step by step how to correctly and accurately connect a shielded antenna cable to the plug.
To remove the insulation, you will need a sharp knife - a construction knife, a stationery knife, an assembly knife, or any knife that happens to be nearby. Wire cutters and pliers may come in handy during the process.
Step #1 – removing the top insulation
At a distance of approximately 1 cm from the end of the cable, use a knife to carefully, pressing lightly, make a circular cut. In order not to damage the screen located under the plastic, do not cut through the insulation. Then, shaking, with little effort, remove the outer insulation.
Under the polymer protective coating there is a screen consisting of thin metallized threads and a layer of foil. It is designed to protect the cable from force fields and other interference that could disrupt the signal.
Step #2 – folding the screen
There is no need to cut off the aluminum braid and foil layer that are located immediately under the insulation.
Carefully, one by one, bend them towards the remaining polymer coating and press firmly against it.
The braiding threads can be collected into one flagellum and placed on any side, or they can simply be bent along the entire circumference. Together with the foil, they form a thin layer that will not be visible at the end of the procedure.
Step #3 - Removing Internal Insulation
Under the screen there is a second polymer layer that separates the central core and the aluminum braid. We also carefully cut it off, trying not to damage the conductor, and remove it.
Before screwing on the fastening nut of the plug, the central copper core must be exposed, and the screen must be bent onto the polymer shell. The main condition is that they do not touch even after installing the plug.
Stage #3 – plug installation
The simplest, but no less important procedure remains - screwing the plug onto the antenna cable. There is no need to cut off the bent screen elements; they should remain under the nut.
We take the plug and unscrew it along the thread to separate it into two halves. The one that has a thickening in the form of a nut at the end, screw the other side directly onto the bent insulation. To make the fit as tight as possible, we help ourselves with pliers.
If the ends of the braid or foil stick out, it’s okay; they can be cut off at the end. The main thing is that the core gets into the center of the hole in the plug
Then, using wire cutters, we cut off the tip of the core so that it protrudes from the half of the plug by 2-3 mm, no more. All that remains is to put on and screw on the other half.
Stage #4 – testing and error analysis
You can find out whether the installation was done correctly in a simple way - turn on the TV. If the signal is stable, there is no interference, the picture is clear, and the sound is clear - everything is done correctly.
To connect the antenna cable to the TV, on the rear panel of the receiver we find a connector marked “ANT”, “ANT IN” or similar. It is difficult to confuse it with others - it is round in shape and fits perfectly in diameter
If there are problems with signal transmission, you need to find the cause.
Here are a few of the most common:
- The cable length is more than 5 m, and the signal simply weakens before reaching the TV receiver. You should choose a more powerful cable or find a way to shorten its length.
- The antenna is broken . You will have to inspect it if it is installed on a balcony or on the roof. You can call a representative of the service organization if it is responsible for the serviceability of the equipment.
- Installation errors when connecting the plug. Unscrew the plug, remove it from the cable and reinstall it. It is possible that the aluminum braid somehow came into contact with the central core - this should not be allowed.
Poor performance may be caused by a cable failure. For example, it was squeezed tightly by a door or chewed by a puppy. To make sure it is in good condition, you need to check the route along its entire length.
If everything works great, but the cable prevents you from installing the TV near the wall, the straight F-plug must be replaced with an angled one. The principle of installation on a cable is the same
Another reason for a weak signal does not lie at all in installation errors, but is associated with a large distance to the transmitter. Therefore, we will further analyze what an amplifier is and what it is intended for.
Cable laying rules and sequence of actions
Important! When laying the TV cable, try to place it at a distance from the electrical wiring. In this case, electromagnetic radiation will not affect the quality of the television signal. This effect is called stray currents.
The fewer branches and interruptions, the better. Ideally, the cable should be laid directly from the point to the outlet or TV. But sometimes this is difficult to do, and you need to connect splitters in series. The signal in this case may be worse.
A few other rules for laying a TV cable:
Television cable is low-current. If it is laid in a cable channel with other types of wiring, it is best to also choose a “low current”, such as a telephone or the Internet;
When laying the cable, you must not create loops or twists (coils). All this can lead to significant signal degradation.
Now let's talk about the procedure itself:
- We find the shield, and in it the cable we need;
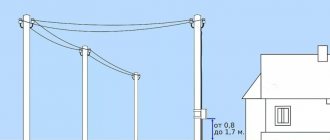
- We pull it along the panel tunnel in the case of a vertical installation in an apartment building. If the signal source, an antenna, is connected directly, then you often have to pull the cable along the outside of the house and through a window or wall;
- We drill a hole in the wall or plastic window and run the cable into it;
- We run the cable through the room directly to the receiving device.
Installation of TV wiring is carried out using special plastic holders, nailed to short nails included in the kit.
Accessories and distribution equipment
Connecting TV cables to each other and connecting them to receivers is done using various devices, which are presented in the table:
| Device | Purpose |
| Such a device is used to amplify the signal coming from a general television antenna to a specific television. The amplifier is connected to the TV cable using threaded plug connectors. |
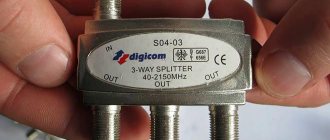
| The TV signal arriving at the “weak point”, from the common antenna to the interfloor switchboard installed in the entrance through a TV cable splitter, goes to different rooms of the apartment to the televisions. Their main purpose is to divide the input signal into the required number of possible TV connection points. In this case, there can be quite a lot of points, but in proportion to their number, the quality of the signal will decrease. |
| In appearance, the device resembles a splitter. The adder is designed to sum television signals from antennas of different frequencies into one common television signal, which is supplied via a single cable to the desired television receiver. |
| TV socket for F-connector when connecting an antenna plug | This is the ultimate device for supplying a TV signal to a TV. The socket is mounted in a special box located in the wall, and the TV cable that fits to it is connected with a screw clamp. |
| Antenna plug | These devices are used for the final connection of the cable, equipped with antenna plugs on both sides, to the TV and TV socket. The plugs are connected to the cable by soldering, or by screwing the plug onto the cable, thereby creating a fairly reliable, well-shielded connection of the elements. |
After getting acquainted with all the devices and choosing the right cable, you can wire it yourself.
How to install a television cable around an apartment
Often we need to use not one, but several TVs. And in this case, it may be necessary to route one cable to a number corresponding to the number of receivers planned for use.
For those who thought that this process could be carried out by simply cutting and twisting the cable and then fixing it with “blue electrical tape”, let’s say that this method is unacceptable. In this case, the quality loss can be catastrophic. It is necessary to use only factory splitters that will ensure reliable wiring. Splitters should be placed in places that can be easily accessed.
Do you need an antenna amplifier?
The question of purchasing an antenna amplifier arises when signal loss becomes systemic.
Due to insufficient transmission, the receiver or digital tuner cannot cope with the processing of the organization. You may see a “no signal” or “weak signal” message on the TV screen.
If communication is carried out without an electronic intermediary, then signal loss can be expressed by the absence of sound, a “freezing” image, an unclear or “pixelated” picture
If the signal is too weak, an antenna amplifier is installed, the main purpose of which is to make the signal more powerful. It is integrated into the TV system on the section of the route between the television receiver and the antenna.
Most often, external devices are used that cut into the antenna cable using two connectors. More “serious” amplifiers look like a set-top box, and some have an additional power supply
Active type antennas already have built-in amplifiers; installing a second one will not help. Also, it will not cope with its function if the antenna is broken or, due to its parameters, is simply not able to receive a signal at a long distance.
In the area of stable reception, the amplifier can even cause harm, since too powerful a signal is also one of the reasons for the failure of the digital tuner.
Hiding television communications in a house or apartment
Nobody likes to have wires lying on the floor. They are easy to trip over and can be played with by children or animals. Therefore, we will hide the cable. There are several ways to do this:
- A plastic box, also called a cable duct. This is a long, hollow structure into which one or more cables can be routed. The channel itself is attached to the wall, and sometimes to the ceiling. The method is simple, but for some it is not suitable due to the fact that, having hidden the cables, we continue to see a box for them, which may not be combined with the interior, especially if it is necessary to maintain the integrity of the latter;
- Skirting board. Some modern models of skirting boards are equipped with cable channels. However, the necessary space can also be found under the old baseboard;
- Hiding the cable with trim. If the installation of television communications is carried out simultaneously with repairs, then there is an option to hide it all in the walls. Some people gouge the wall to create a channel there, and then cover the whole thing with plaster. In other cases, the cable is hidden under drywall.
The best option for connecting a satellite dish to several TVs
If we talk about two, three or four TVs connected to one satellite dish. A variant of twin and quad converters - “satellite heads” with several outputs.
Perhaps the most optimal.
2 or 4 cables come out of each converter and are connected to separate drives, each of which is connected to separate satellite receivers and TVs.
In this case, we get independent reception of different satellites and channels on all TVs.
Another very good option for independently connecting one or more satellite dishes to two or more TVs is to use for this purpose. But in many cases, one antenna is rarely sufficient.
I hope the information was useful and you will be happy to watch your favorite TV shows regardless of your wife, children or parents in another room or kitchen.
In one of the previous articles we talked about how to install and configure a digital terrestrial television antenna. But it should be taken into account that many homes today already have several televisions, for example, in the living room and in the bedroom or in the kitchen. If you use cable television or paid satellite, providers will require an additional fee for a second TV. When using a T2 digital antenna, this feature is available completely free of charge. You just need to properly split the signal into multiple devices.
What is the best way to do this? What additional items will you need to purchase? We will provide answers to these questions and even a little more in today’s material.
First of all, let's look at what additional things you will need to prepare for signal separation and cable routing throughout the apartment.
FAQ
Question No. 1. Is the F-plug suitable for digital TV signal transmission, or only for analogue?
Despite the fact that this type of plug has been used for quite a long time, both its connector and characteristics allow you to fully enjoy not only analog (by the way, broadcasting will cease forever in the near future) television, but also digital and satellite television signals.
Question No. 2. What to do and what to do if the diameter of the cable is slightly smaller than the diameter of the internal thread of the plug? After all, in this case, reliable compression will not work.
In this case, it is recommended to screw the required number of layers of electrical tape onto the cable in order to adjust the diameter of the cable close to the inner diameter of the plug.
Question No. 3. When installing the plug into the corresponding socket, the TV cannot be placed close to the wall. What is the way out of this situation?
In this case, you should use an angled plug, which can be purchased at almost any store that sells electrical household appliances.
Question No. 4. In old Soviet-made TVs, the cable was connected to the plug by soldering. How to connect a modern type of cable to it?
If the signal quality deteriorates or the cable needs to be replaced due to poor contact, the plug and cable can be connected, as before, by soldering.
Question No. 5. How can you connect several TVs to an antenna or cable television network at once?
To connect several television receivers, you can use a special device - a splitter, also called a “divider” or “splitter”.
Using splitters to connect several TVs to one TV cable
Connecting to an antenna without an amplifier
The easiest way to use two TVs with one television antenna, causing a minimum of headaches during setup, is to use an antenna without an amplifier. We recommend using it if you live in an area with good reception, as it will protect you from possible over-amplification of the signal.
One of the main conditions when using an antenna with a built-in amplifier is that power must be supplied to the amplifier continuously. If you use the circuit described above, problems will certainly arise, since the power supply will be constantly interrupted. Fortunately, the problem is very easy to solve; you just need to slightly change the connection diagram. How will it change?
- Buy a splitter and install it in a convenient place.
- Cut and crimp the cables as described above. There is absolutely no difference.
- At one end of the cable, directly next to the TV input, you will need to connect an antenna power supply. Taking into account the use of a separator with a power pass (denoted as Power Pass), the voltage will flow to the amplifier on the antenna, ensuring its uninterrupted operation.
- If you cannot purchase a splitter with a power supply pass anywhere, you can use a regular one, but the power supply must be carried out before entering the splitter. To do this, you need to use a special adapter, one end of which will be inserted into the input of the divider, and the other, which has an antenna type connector, into the power supply.
IMPORTANT. When using this type of connection in conjunction with a set-top box, you do not need to turn on the antenna power in its settings!
