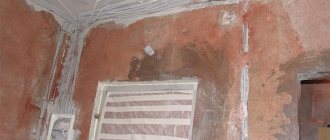
Working with wires and cables requires high qualifications: improper handling and installation will lead to serious problems in the system and accidents. Skimping on the preparation and integration of critical elements will result in greater costs during operation. A significant role is played by high-quality equipment that will not let you down at a crucial moment.
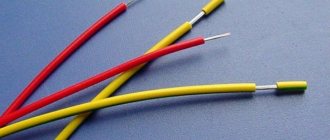
All enterprises related to electronics, from industrial equipment to aviation and space technology, need proper installation of wired systems. The first stage of electrical network integration is the processing of cables and wires, that is, their cutting and stripping.
Manual processing methods are gradually becoming obsolete. They are being replaced by machines and machines for automatic stripping and cutting of wires and cables. The devices significantly reduce production costs, increase efficiency and optimize work completion times. In this case, the operator can control the process remotely.
Why cutting cables and wires is beneficial
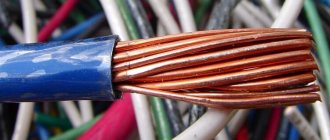
If we approach this issue from a commercial point of view, then extracting metal from waste wire products can become a source of additional income. The average price at collection points for non-ferrous scrap metal per 1 kg is:
- copper – 400 rub.;
- brass – 240 rub.;
- lead - 100 rubles;
- aluminum – 110 rub.
Important! It is unprofitable to recycle cables and wires because processing enterprises incur the costs of removing the insulating coating from wire products to recover the metal. Therefore, delivery may cost more than the profit from delivering the insulated cable.
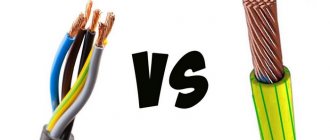
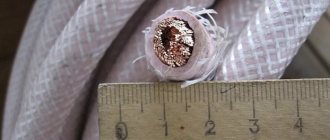
The metal of wires and cables contains a minimum of impurities, so it is valued much higher than any other type of scrap. With a skillful approach, you can quickly strip flexible electrical conductors in your home workshop. To do this, you will need special equipment - a cable cutting machine (stripper).
A simple device for stripping cable insulation
In this review, the author shows how to make a simple device with which you can easily and quickly remove insulation from electrical wires and cables.
To make this device you will need a piece of metal plate and bolts and nuts.
First of all, cut a piece of thick metal plate of a suitable size. If you have a ready-made piece of metal at hand, that’s even better. You won't have to cut anything.
Main stages of work
At the next stage, the author makes markings according to which it will be necessary to drill holes for the bolts in the plate.
After this, perpendicular to the drilled holes, we drill more holes for wires of different diameters.
We cut threads in the holes for the bolts. Then we select bolts and nuts of suitable diameter.
The bottom of the bolts will need to be sharpened using a grinder or a metal file. The homemade product is ready - now all that remains is to assemble it.
For details on how to make a simple device for stripping cables of insulation, see the video below.
This material was created based on the author’s video from the YouTube channel Mr Novruz. If you like the idea, write about it in the comments.
Hand Operated Scrap Cable Wire Stripper, Manual Copper Wire Stripping And Peeling Machine
The principle of mechanical removal of cable insulation and braiding
DIY digital voltmeter
The mechanics of cutting a cable or wire is to make one or more longitudinal cuts in the insulating layer. Shells are usually made of PVC or rubber. These are quite soft materials. To cut them, simply pull the wire through the sharp blade of the cutter.
The principle of mechanical cutting of cable products is that the wire is fed into the machine socket by drawing conical rollers, which are rotated by an electric motor drive. The cable is cut with a knife, only metal appears at the output, the removed braiding and insulation remain on the back of the equipment.
The design of a machine for cutting wires can be different, depending on the characteristics of the processed product: the diameter of the wire, the thickness of the insulating coating, the multi-core filling, the presence of armored braiding.
Stripper designs and sequence of their operation
DIY soldering iron
The structure of the machine for cutting wire products consists of two moving units enclosed in a massive body. The lower assembly is two bevel gears on an axle. The rollers face each other with narrowed tops in the form of a Y-shaped opening.
The roller axis is connected directly or through a drive belt to the electric motor shaft. The end of the cable is laid on the cones of the lower node.
In the upper part of the machine, a frame with a circular knife moves along vertical guides on a horizontal axis. Using the adjusting screw, the knife is pressed against the cable so that it enters the wire only to a depth equal to the thickness of the insulating coating.
Machine drawing
Once the cable is installed, the bevel gears are driven. The knife cuts the insulation along the wire. All that remains is to wind the bare wires into a compact coil or twist them into a convenient bundle.
Wire cutting and stripping machine SWT508C
Let me spice up the reviews of flashlights, watches and batteries with something not quite ordinary. I’ll warn you right away - the thing is quite specific and it’s unlikely that the number in “I’m planning to buy” will begin to grow by leaps and bounds. But suddenly it will come in handy for someone. And for some people it will just be interesting to watch and read, for their personal horizons. The product under review is a desktop automatic machine for cutting and stripping wires. Yes, there are such. If you are interested, see the continuation under the cut. Lots of text! Background
It turned out that one of the developments “for yourself and friends” turned out to be in demand a little more widely than expected. And the device involves more than 30 wires of different lengths - from 10 cm to 1.5 m. Some of them need to be stripped longer, some shorter, some generally require stripping the area in the middle, individual groups of wires should be as uniform in length as possible... And it became not interesting to do all this by hand Plus there were ideas for the future that would increase the amount of cut and stripped wire at times. The question arose about automating this process. A quick Google showed that there are such machines, they are sold even here in Russia... for 100+ thousand. A little less cursory googling showed that in China these same machines are much cheaper. And it was decided to take the risk of contacting Tao and the intermediary (he also delivers to Russia).
What the hell is this thing (characteristics)
As the name suggests, this is a machine that can cut wires to the required length and strip them. The principle of operation is simple: two rollers that clamp the wire can drive the wire in both directions with decent force. Between these rollers is a knife mechanism consisting of two V-shaped sheaths with cutouts facing each other. These knives can be moved towards each other at a given distance, which ensures a cut of insulation or trimming of a wire - depending on how close they move. To strip, the machine pulls the wire to the required length, cuts the insulation with knives and, without releasing the knives, pulls the wire. The cut part of the insulation moves.
Characteristics: Power supply - 110/220 V 50 Hz Power consumption - 160 W Weight - 30 kg Dimensions - 390x350x255 mm Wire cutting length - 1-9999 mm Accuracy of the cut length - 0.2 (+-0.2%) mm Section of the processed wire - 0.1-2.5 sq.mm Stripping length - in the middle of the wire up to 60 mm, ends up to 35 mm Acceptable wire insulation - PVC, fluoroplastic, silicone, fiberglass.
What it can do: — Cut wires (and thin heat shrink) to a given length from 1 mm to 10 m. — Strip both the ends of the wire and expose up to 10 points in the middle of the wire. — Stop work when the specified total number of cut wires is reached. — Suspend work for a short time upon reaching the specified number of cut wires in the batch.
What can be adjusted: — Wire clamping separately on each pulling roller. — Diameter of the wire core. — Thickness of wire insulation (depth of cut when stripping). — Length of the wire to be cut. — The stripping length of each end and the distance by which the cut insulation moves. — The position and width of the exposure of each of the 10 sections in the middle of the wire. — Total number of cut wires. — The number of wires to be cut in a batch (for example, you need to cut only 1000 wires, but distribute them in batches of 100 pieces). — Delay in seconds after the end of the next game. — Speed of operation of the broaching mechanism. All these settings are saved in programs, a total of 99 programs can be configured. Programs have only numbers; no text description can be given to them. Moreover, the program numbers are divided into certain ranges: 1-59 - general programs with stripping only the ends, 60-89 - programs for stripping the middle of the wire, 90-99 - programs for cutting ultra-short wires. For those interested, here is the manual in English from the manufacturer’s website.
Purchase, delivery
The choice of site fell on Tao for several reasons. The most important of them is that such machines are presented in much more variety than on Ali. In addition, they offer more delicious options and lower prices. The seller was chosen, not with the lowest prices and with a seemingly satisfactory package (Google and I were unable to achieve a clear translation of the different configuration options, but we liked the pictures). The carrier was given a link to the product page and asked questions: what he thinks about this seller (ratings, reviews, etc.) and how the hieroglyphs indicating different configurations are deciphered. The carrier responded quite quickly that the seller had a good rating and positive reviews and described in human terms what was in the packages. Having received the go-ahead from us for the purchase and delivery of the selected set, the carrier issued an invoice, we paid for it and began to wait, instructing him to be sure to photograph the machine and everything that came with it and check the interface of the machine by turning it on. After 20 days (the delay was due to the fault of the bank, the money could not reach the carrier’s account for a very long time), the carrier announced the receipt of the machine at its warehouse in China and attached photographs. The machine, as it turned out, could only speak Chinese. On his own initiative, the carrier contacted the seller and asked him for a chip for the machine with English (a controller programmed for the English language) - free of charge. After another 7-8 days, the machine was sent slowly along the rails by a Russian transport company to my city. Slowly - this means that he traveled for almost a month from Blagoveshchensk to Krasnodar (Zheldorekspeditsiya, damn it) Result: Link given to the carrier - 10/28/2013 The machine was delivered to Zheldorekspedition - 12/03/2013 The machine was received in Krasnodar - 12/21/2013 Weight - 32 kg or more .
Unpacking, completeness
It was packed conscientiously - a good-quality wooden box, the machine itself was lined with foam plastic inside. Unfortunately, the unpacking photo was not preserved. In addition to the machine itself, the kit includes: several spare fuses, three hexagons, several guide tubes for different wire diameters, spare knives.
The machine itself is delivered assembled and completely ready for use. In the box there was also a package with a chip stitched with an English-language interface. Moreover, the Chinese even included a new film panel with English signatures. I changed the chip without any problems, it takes about 5 minutes with a coffee break and studying the insides of the machine. But I decided not to touch the panel - in general, there are not many inscriptions that need translation. So let it be as a spare.
External and internal views
The machine is well assembled. I did not find any obvious flaws either on the body or inside. The only thing that raises some doubt is the film panel - who knows how long it will last, and even in the places where the bolts are screwed in, it swells slightly.
In addition to buttons and indicators (of which, by the way, half do not work), the panel also has a 30 cm ruler. Sometimes it helps when setting up another program. On the front part there is the broaching mechanism itself, the knife mechanism and roller pressure regulators (twisters in the upper corners). These regulators are needed to adjust the pulling mechanism to the diameter of the wire. If you clamp too tightly, the wire will squash between the rollers; if you clamp too weakly, the pulling mechanism will not be able to pull the wire, shifting the insulation and will slip. On the right there is a bunch of rollers - this is a device for straightening the wire (eliminates kinks and residual deformation after coiling). Surprisingly quite effective, although not very well executed.Everything inside is incredibly simple: a controller and display board, a power supply, three stepper motors and drivers for them. Two motors rotate the rollers of the broaching mechanisms, and one compresses and unclenches the knives.
The control is built on the basis of some 51st controller. If you really want to, you can completely replace the entire control board with your own, but I haven’t had such a desire yetControl, interface
The machine is equipped with a film keyboard, several LED indicators and a graphic monochrome display. For some unknown reason, the indicators do not light up under any conditions. This did not upset me too much and I simply ignored them (it is possible that they are not soldered on the board at all). The keyboard has a block of numeric buttons with a dot and an “Exit” button, arrows, “+”, “-”, “Start” and “Stop” buttons. This is quite enough for convenient management and for setting up programs. What is missing is a large emergency stop mushroom button. Maybe later I’ll add a display, although it’s graphical, but the programmers didn’t bother - all the information is displayed only in the form of text. The numerical values of the parameters can be changed using the + and - buttons, or you can enter the number directly from the numeric keypad. The up and down arrows move the cursor between program parameters, the “Exit” button exits the program settings (with saving changes), the “Start” and “Stop” buttons respectively start and stop the operation of the machine. Easy to set up. Press the up or down arrow, the program number becomes highlighted (the speed is already highlighted in the photo):
This is the first settings screen.
It is used to configure: PRG - current program number SPD - machine operating speed LEN - length of the cut wire in mm AMT - total counter of cut wires AC - stripping length of the beginning of the wire in mm AS - shift length of the stripped insulation of the beginning of the wire in mm (if equal to or greater AC, then the insulation is completely removed) BC and BS - the same for the end of the wire. PS: why do you need to not completely remove the insulation from the tip being stripped, but only move it slightly?
So that later, when storing these sections, the stranded wire does not become shaggy at the stripped ends. Second settings screen:
TOT - the total number of wires to be cut, after which the machine will stop completely GRP - the number of wires after which the machine will pause (batch) DLY - the duration of the pause after the next batch in seconds MS - enable stripping in the middle of the wire DIA - wire diameter in some conventional units RTL - insulation thickness, also in some units There is something in the manual about setting DIA and RTL, but I still don’t understand. It was easier to select them experimentally for the desired wire
When you select a program with a number from 60 to 89, the ability to strip in the middle of the wire is enabled:
OPN - stripping length (insulation shift) MS0-MS9 - distance of the next stripping section from the end of the wire.
Use plus or minus to select the number of the desired program (or enter directly with numbers), then use the plus and minus arrows to move through the parameters and use the plus-minus buttons or numbers to change the parameter values. When finished, click “Exit” and all parameters are saved into the program under the current number.
Machine operation
First, here's an example of what it can do:
The bottom two segments are “combat” modes; such segments are cut for work. The top one is just a demonstration Below the video will show the process of work, but for now a few words in writing The machine is quite noisy. And during operation, the engines make noise, and during idle time, the cooling fan makes noise. The second point is that the machine needs to supply wire. That is, he himself cannot wind the wire, for example, from a bobbin hanging on an axis. This is due to the fact that he starts pulling the wire abruptly and the heavy reel, due to its inertia, does not have time to turn. Because of this, the wire begins to slip between the pull rollers and the length of the wires begins to vary greatly. It is necessary to ensure that the wire flows freely. This, by the way, is not a drawback of the machine, it’s a lack of equipment - special machines are sold for feeding wire from a reel. But for now the toad is choking to buy one . A bunch of leveling rollers on the right side of the machine do their job, but on this particular machine they are assembled disgustingly. In theory, they sit on bearings and should rotate freely, but due to a design flaw (or washers?...) when you tighten the roller with a bolt, its bearing stops rotating normally. It turns out that the bolts are not properly tightened and from time to time they get unscrewed due to vibrations. Another drawback of this model is that it does not detect the end of the wire. The reel may have been empty for a long time, and the machine will continue to hum and click with knives until it counts the specified number of cuts. Setting the speed of the machine... It would seem - why? Let it thresh at maximum. However, there are nuances. Depending on the thickness and type of insulation and on the cross-section of the wire, when the speed increases, stripping may fail at high speed - on the piece being stripped, the insulation is only slightly cut, but does not move, remaining bonded to the main insulation. Therefore, it is better to select the speed experimentally, starting with the maximum and reducing it, achieving a stable result.
Well, a video of the machine working
Bottom line
In general, the machine works very well, I have never regretted buying it. During the work, more than 10 km of wire have already been cut and stripped (the knives, by the way, have not yet been sharpened or changed). In addition to its intended purpose, it also cuts thin heat shrink of 5 and 15 mm (as I cursed when I cut it by hand) and wire for wrapping bundles of wires (the Chinese use this wire to wind bundles of wires on power supplies, for example). Pros: + Reliability + Accuracy + Small size and weight + Relatively inexpensive + Doesn’t make you want to modify or redo anything, settings and operating modes are well thought out Cons - The design of the part with the leveling rollers is obscene - Does not press contacts onto cut wires, does not insert them into connectors, does not solder to boards and in general - does not do all the housework :)))
PS: Well, and a photo with the latest periodicals, so that they don’t think that I’m Chinese, who has learned all the intricacies of Google translator ;)))
If something is unclear or interesting, ask, I will try to answer.
Manufacturing and operation of individual components
Do-it-yourself electrical wiring in the apartment
The stripper consists of several main components, these are:
- frame;
- feed unit;
- cutting block;
- power block
Design of the cutting machine
Frame
The supporting block can be a frame made of metal plates. These are the top platform, base and sides.
Feeding unit
The assembly consists of tapered rollers mounted on an axis, which rests on bearings in the side plates. The axle protrudes beyond the frame and is connected to the drive shaft of the power unit.
Cutting block
The unit is a U-shaped frame consisting of two side plates and a horizontal platform. An axis with a cutting disk is mounted at the bottom of the frame, which rotates on a bearing on one of the sidewalls.
A vertical rod is inserted into the platform, which can rotate around its axis. The top of the threaded rod passes through the housing top plate nut. A handle is attached to the end of the rod.
Cutting block
Power block
The feeding unit is driven by an electric motor, the shaft of which can be connected directly to the knife axis or through a transmission system (gearbox, belt). For small volumes of work, a simple lever is used as a propulsion device. It is activated by simple rotation by the worker’s hand.
A simple tool for quickly stripping wires
In this review, the author shares an idea on how to make a simple tool for quickly stripping cables and electrical wires with your own hands.
This tool will be useful not only for electricians, but for everyone who is faced with the installation of electrical wiring in an apartment, private house and country house. Making such a device is very simple.
Required materials and tools:
- a small piece of metal strip;
- blade for a stationery knife;
- fasteners: bolt, two washers, wing nut;
- welding machine;
- spray paint.
Main stages of work
First of all, the author bends a piece of metal strip, using a round steel bar as a “template” (you can take a piece of round wood or a plastic pipe of a suitable diameter).
1
Features of working with machines for armored cables
Armored cable is a universal conductor of electric current. Unlike simple insulated wires, the metal braiding of the conductor gives it special strength and creates reliable protection from external negative factors.
The armor is a two-layer spiral shell made of steel tape. The cross-sectional structure of the armored cable is shown in the lower figure.
Cross section of armored cable
Removing metal tape requires a powerful power unit and durable, sharp disc blades. Industrial machines are equipped with cutting units that can clean several armored cables of different diameters at once. This is due to the need to process large quantities of wire products per work shift.
Note! Passing through the cutting unit, the knife cleans the cable from the surface polymer or rubber hose, electrically conductive screen (armor) and PVC belt insulation.
Only factory-made machines can remove metal insulation. They are large units. After the armor is removed, as a rule, three insulated cores are obtained. They are cut on the same machine, placing them in other openings of the cutting block.
Stripper for cutting armored cable
Technical equipment
The versatility of the devices presented in our catalog allows you not to buy several models for different purposes and thereby achieve significant savings.
On the budget model Komax Kappa 310 you can perform up to 14 different tasks, including:
- stripping internal conductors;
- multiple stripping;
- heat stamping markings, etc.
Multifunctionality is one of the main advantages of Komax devices over competitors.
Another important advantage in terms of functionality is that the machines are equipped with innovative sensors, new cable handling systems, and a touch screen. Thanks to modern technologies, they are easy to set up, adapt to the required tasks and successfully control the work process.
The sensors minimize wire loss without compromising the speed of work. The diameter is measured by a special inductive sensor, saving the performer from long manual adjustments.
Types of equipment
For small volumes of work, purchasing expensive equipment is not practical. Home craftsmen assemble simple devices for cleaning small-diameter wires; they also make quite complex universal strippers for cutting cables.
Simple device
The easiest way to strip a wire from PVC insulation is to make a device from the following materials:
- two wooden blocks measuring 40 x 40 x 400 mm;
- two screws 90 mm long with M 8 nuts;
- painting or stationery knife.
Step by step assembly:
- The bars are tightened with a clamp.
- Stepping back from the ends of the planks by 40 mm on both sides, the planks are drilled through.
- The screws are threaded through the holes and the wooden elements are tightened with nuts.
- 6 holes ø from 2 to 12 mm are drilled along the connection line.
- Before stripping the wires of insulation, insert a knife blade into the gap.
- The tip of the cutter is placed in the middle of the opening of the required diameter.
- The nuts are finally tightened. The device is ready for use.
Simple device
Remove insulation as follows:
- Having loosened the nuts, the knife is moved to the desired hole, the bars are tightened again;
- the wire is inserted into the opening so that its end comes out on the other side of the device;
- Having grabbed the core with pliers, pull the entire wire through the hole;
- metal wires are separated from the insulation and given a compact shape.
Universal stripper
In order to strip wire products in relatively large volumes, you will need a universal machine. Making it yourself is not easy. Experience and skill in handling and availability of metalworking equipment will be required. As a last resort, having made drawings, the parts can be made in the nearest workshop.
To assemble a homemade stripper you will need:
- steel sheet 8 mm thick;
- two bevel gears;
- rod with threaded M 8;
- round steel rod ø 8 mm;
- L-shaped lever;
- M 8 nuts and washers.
Step-by-step instructions for assembling the machine:
- According to the drawing, the metal strip is marked using a tape measure and a marker.
- An angle machine with a diamond wheel is used to cut the metal into assembly elements.
- Corner slots are made in the strip. Along these lines, the workpiece is bent into a frame, resulting in a stripper body.
- They also make a movable U-shaped frame of the cutting unit.
- The side walls of the housing and block are drilled on both sides.
- A shaft with rollers mounted on it is inserted into the housing.
- An L-shaped handle is attached to the end of the shaft.
- A shaft with a disk knife is inserted into the holes of the inner frame.
- The cutting disc is made from a flat washer, the edges of which are sharpened using sandpaper.
- An M8 nut is inserted into the pre-drilled hole in the upper platform in the center.
- Screw in the rod, the lower end of which is secured in the hinge seat of the cutting block using a spring washer.
- By rotating the rod handle, you set the height of the gap between the knife and the drive rollers.
- Insert the end of the cable into the opening and begin to turn the handle.
- Instead of a lever, an electric motor is installed, the shaft of which is connected to the axis of the feed rollers.
Cutting machine with electric motor
Additional Information. This instruction is advisory in nature. Each master is free to add or come up with his own design for a cable cutting machine. The main thing is the principle of pulling the wire along the cutter blade.
The topic of the article “Do-it-yourself cable cutting machine drawings” is of interest to those people who can realize themselves in this type of business, such as extracting non-ferrous metal from waste wire products. Today, cutting cables and wires at home using a homemade machine is a great idea for earning extra income.
Video
Coffee capsule Nescafe Dolce Gusto Cappuccino, 3 packs of 16 capsules
1305 ₽ More details
Coffee capsules Nescafe Dolce Gusto Cappuccino, 8 servings (16 capsules)
435 ₽ More details
The best headphones