For most car owners, a garage is not only a place to park their car, but also their own workshop, which allows them to carry out minor repairs to a four-wheeled unit. Due to the lack of sources of natural light, even during daylight hours, all repair operations are carried out under artificial lighting in the garage. Therefore, the quality of repairs and other work will directly depend on the competent choice and arrangement of lighting. Consider the procedure for making your own garage lighting.
Garage Lighting Options
Depending on the type of device, lighting in the garage can be performed:
- Incandescent lamps;
- Fluorescent lamps;
- Halogen lamps;
- LED lighting devices.
The main difference between the above options is the ratio of the generated luminous flux in Lumens per 1 Watt of electricity. Therefore, before choosing a specific type of permanent lighting fixture, consider the pros and cons of each.
Advantages and disadvantages of lighting devices.
Incandescent light bulbs have a relatively low cost and are much less capricious to operate. But, in comparison with other types of lamps, they provide a luminous flux of only 7 - 17 Lm/W. They are also afraid of depressurization of the glass flask.
Fluorescent lamps are many times more expensive than incandescent lamps, but they produce about 45 Lm/W, which makes them much more economical. But the glass bulb of such a lamp is filled with a mixture of gases and mercury, which can cause harm if depressurized. Another significant drawback is that the lamp requires time to warm up until the declared level of luminous flux is achieved. And at a temperature less than +5ºС, such a lamp does not light up well.
Halogen lamps produce from 15 to 22 Lm/W, but unlike the previous ones, they must be powered from a low voltage - 12 V. Also, these lamps are afraid of touching with bare hands, which is why they are very demanding during installation and operation.
LED lamps can provide about 120 Lm/W, which is why they are considered the most economical lamps. An important advantage of LED spotlights is their independence from depressurization of the bulb - LEDs will provide the same illumination even if the bulb is broken. The disadvantages of such lamps include sensitivity to the shape and magnitude of the supply voltage.
Test review of spotlights
Matrix
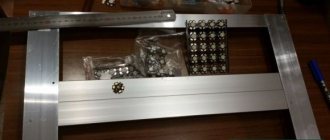
When manufacturing a spotlight matrix, cluster super-bright diodes or a large matrix with conventional high-brightness SOD diodes can be used. Which LED floodlight is best seen from their technical features.
This is a spotlight with an SOD matrix, several hundred LEDs are installed on it. Such matrices are cheaper than a cluster of ultra-bright LEDs, but with a large number of light-emitting elements, a scatter in their parameters is inevitable. If one of the LEDs fails, it increases the load on the others. With comparable brightness of matrix and cluster devices, the price of the former is 30-40% less, but the service life is 3-4 times lower.
In cluster spotlights, the matrix is made of ultra-bright LEDs of the 5050, 5630 series with the most identical parameters. The small emitted surface area provides a powerful, uniform flow of light. The effective life reaches 30,000 hours.
Matrix color temperature
The higher the color temperature of the LED, the higher the light output. At a temperature of 6500K and a power of 40 W, the luminous flux will be about 4000 lumens, at a temperature of 5000K - about 3600 lumens, at 3500K - 3000 lumens. Therefore, cold light is more effective for illuminating areas, although it has a blue tint. But for illuminating the work surface and reading, they are worse than the 5000K option, which produces pure white light.
Garage lighting requirements
All requirements can be divided into three categories:
- Sufficient and uniform distribution of light flux, both over the entire area of the garage and over the height of the vehicle;
- Sectioning the lighting in the garage so that only a certain area can be illuminated while work is being carried out on it;
- Cost-effectiveness - when performing any manipulations in the garage for a long time, minimum energy consumption should be ensured.
Security Recommendations
It is important to consider the following recommendations:
- Any work on restoration or replacement of electrical wiring is permitted only in the event of a complete absence of voltage.
- It is recommended to wear comfortable shoes that do not impede movement.
- Electrical devices must be intact, without damaged cables. The connection must be of high quality.
- The handles on the tool must be insulated.
- If you plan to carry out work at high altitudes, you will need to prepare platforms. The use of barrels, foam blocks, chairs on tables and other structures is not permitted.
- All work should be done slowly.
The work should be approached responsibly, since the correct installation of electrical wiring in the garage guarantees its uninterrupted operation for 30 years. The slightest mistake can lead to breakdown of the entire electrical network. If hidden wiring is performed, heavy repair work will be required. Accordingly, if there is no work experience, it is recommended to invite highly qualified specialists.
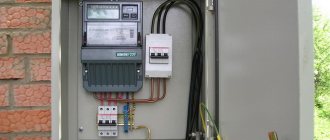
To work, you will need the help of a specialist who can supply electricity from the pole to the electrical panel, connect the transformer, electric meter and switching devices. You won’t be able to do it without calling a technician, since in order to have an external branch of the wire from the central power line, you need to have a license to perform work with high voltage.
The technology for installing electrical wiring differs significantly from the option with a private house or apartment. It is recommended to pay an experienced technician so that after the cable connection is completed, he can help check the quality of the fastening of the wires and the correctness of the work performed. The amount will be small, but you will not need to worry about security.
Step-by-step instructions for organizing lighting in the garage
To ensure adequate lighting of the room, the garage owner must adhere to the proposed sequence. The type of lighting equipment is pre-selected.
Choosing a wiring diagram in the garage
The electrical wiring diagram is drawn up based on the type of lamps (spot or general) and the needs of the garage space. Decide on the location of the wiring (hidden or external). Draw a general view of the garage on the diagram and note on it:
- Installation location of the distribution meter and panel;
- Places for laying cables - on the walls or ceiling;
- Installation points for distribution boxes, sockets and switches;
- Connection points for general and local lighting;
- If necessary, connection to any equipment.
After this, all data is transferred to the wiring diagram. An example of such schemes is shown in the figures.
Rice. 1: Garage lighting scheme
Figure 2: Lighting diagram without pit
Rice. 3: Lighting circuit for two terminals
Calculation of the number and power of lighting points
First, determine the lighting power required for the garage. For example, you chose 20 W LED lamps and decided that 5 W would be enough for one square meter. Measure the area of the garage, for example, the dimensions of the garage are 6 m × 4 m = 24 m2.
The number of points is calculated by the formula: N = (S × Pm)/Pl, where S is the area of the entire room, Pm is the lighting power for one square meter, Pl is the power of one light bulb. For the above parameters, we obtain the calculation N = (24 × 5) / 20 = 6. Accordingly, you will need to install 6 lamps, but their location in the garage should provide uniform lighting, so the next step is to choose the place and method of their location.
Selecting the location of light sources
Depending on the chosen type of lamps and the area of the room, lighting can be achieved with one lighting device in the center of the ceiling. But this will not always provide the required level of illumination near the wheels, bumpers, under the hood, etc. Therefore, when choosing the location of artificial lighting in the garage, you should be guided by the following principles:
- Spotlights should not only be placed at an equal distance from each other, but also be directed strictly into the work area from different sides. Avoid unnecessary dispersion of flow on walls and ceilings.
Rice. 4: Example of the location of lamps on the ceiling - In addition to general lighting devices, you can use portable lamps that will provide light in hard-to-reach places. For them, install a sufficient number of accessible sockets around the perimeter.
Figure 5: Example of portable light installation - If you install one lamp on the ceiling, then it is better to mount it on a rotating bracket, which will allow you to change the angle and redistribute the light flux.
- With a ceiling height of 3 m or more, it is necessary to provide light from three levels at different heights, for example, the first at a height of 0.4 - 0.5 m from the floor, the second 0.75 - 1 m and the third 1.5 - 1 .8 m. The specific height should be selected on site, in accordance with the individual characteristics of the room.
- If there is a metalworking table or workbench above it, it is advisable to install a separate lighting element aimed at the surface of the table, movable spotlights and a group of sockets for connecting power tools.
Rice. 6: Table lighting
Required tools and materials
To mark the walls for wiring, use a level and marking pencils. When drawing lines on the walls for grooves, placement of cable ducts or corrugations, mark the attachment points for lamps and sockets.
From the tools, take those that will help in installing the lighting and mounting it: a hammer drill for drilling walls and a screwdriver for installation work. A screwdriver can be replaced with a regular screwdriver, but it will require much more effort and time.
The materials you will need are lighting devices (lamps, lamps, LED strips) and switches for them. For the point of entry and distribution of the electrical network, take a panel with an RCD. Sockets and electrical wires are selected based on the load on them. To do this, the power of the devices powered from them is summed up, from which the minimum cross-section is determined according to Table 1.
Table 1 selection of wire cross-section
| Copper wire | Aluminum wire | |||||
| Section of veins. mm | Current. A | Power. kW | Section of veins. mm | Current. A | Power, kWt | |
| 1.5 | 19 | 4.1 | 2.5 | 22 | 4.4 | |
| 2.5 | 27 | 5.9 | 4 | 28 | 6.1 | |
| 4 | 38 | 8.3 | 6 | 36 | 7.9 | |
| 6 | 46 | 10.1 | 10 | 50 | 11 | |
| 10 | 70 | 15.4 | 16 | 60 | 13.2 | |
| 16 | 80 | 18.7 | 25 | 85 | 18.7 | |
| 25 | 115 | 25.3 | 35 | 100 | 22 | |
| 35 | 135 | 29.7 | 50 | 135 | 29.7 | |
| 50 | 175 | 38.5 | 70 | 165 | 36.3 | |
| 70 | 215 | 47.3 | 95 | 200 | 44 | |
| 95 | 265 | 57.2 | 120 | 230 | 50.6 | |
| 120 | 300 | 66 | ||||
For example, you plan to connect 10 100 W lamps to one wire, respectively, the total power will be 1000 W or 1 kW. For them, a copper conductor of 1.5 mm2 or an aluminum conductor of 2.5 mm2 will be sufficient. The cross-sectional margin must also be ensured.
Another option is a cable that powers a group of sockets for portable lights and heating stoves, let's say you use 3 2.5 kW stoves and 2 portable lights 0.5 kW. In total we get a power of 3 × 2.5 + 2 × 0.5 = 8.5 kW. For the second option, a power cable of 6 mm2 for copper or 10 mm2 for aluminum is suitable.
Basic work step by step
Installation of lighting in a garage can be divided into the following stages:
- marking - transfer the previously drawn up connection diagram to the walls of the garage;
Rice. 7: Marking the walls - wall gating if you plan hidden wiring or install cable channels for an open method;
- wiring installation - place and secure the cable in grooves or trays;
Rice. 8: Laying wires in grooves - installation of boxes - install boxes for sockets, switches, for routing wires;
Figure 9: Junction Box Installation - installation of stationary lamps - depending on the method of mounting the selected lighting devices, install them on the ceiling and walls of the garage;
Rice. 10: Installation of the lamp - connecting wires - connect the cable to the terminals of sockets, switches and lamps;
Rice. 11: Connecting sockets and switches - installation of glass on lamps, sockets and switches - place power points and switching devices in socket boxes and boxes;
- test the functionality - before finishing work, power the garage lighting from an electricity source; perhaps a lamp somewhere will not light up or there will be no voltage in the socket;
- finishing work - after testing the functionality and eliminating defects, close the gates or trays, install decorative panels on sockets and switches, close the garage lighting lamps.
Calculation
When selecting a rational motorhome lighting system, experts recommend that you take into account the light reflectance coefficient. It shows the percentage of luminous flux that is reflected from surfaces and continues to participate in illumination.
White and cream tones have the highest reflectivity, which is why the surfaces of the walls and ceiling of a garage structure should be decorated with a light finish. Then the lamps will require less power. But how do you know exactly how many products you need and what power they should have?
Scheme of replacing a fluorescent lamp with an LED one.
It is generally accepted that comfortable conditions in a garage from an incandescent lamp will be formed when the light output exceeds 15 W per 1 m2. Considering the fact that the LED analogue is capable of consuming 8-9 times less electricity, for calculations we take the value of 2 W per 1 m2.
Then the light calculation will be as follows: to illuminate a space of 15 m2 you need 3 LED lamps of 10 W each, for an area of 30 m2 the number of lamps will double. In addition, you will need a portable or stationary LED flashlight to illuminate your workplace. Select a device with a consumption of around 7-10 W.
Many car owners are confident that large electric currents flow in the +12V lighting network, which affects the brightness of the glow. Practice shows that as the current increases, the voltage drop in the wiring increases, it heats up, and then the efficiency of the entire system decreases.
Note that this idea applies exclusively to incandescent lamps and halogen lighting devices, the parallel connection of which will lead to currents in the secondary circuit of the transformer of tens of amperes. The LED strip is designed differently, so it has a lower load capacity.
Let's give an example. Every 3 LED chips connected in series have their own limiting resistor, the value of which determines the type of LEDs installed. This figure can reach 470 Ohms in SMD5050 tapes. The resistivity of copper wires with a cross-section of 1.5 mm2 will not exceed 1 Ohm over a length of 50 m (ρ=0.0175 Ohm*mm2/m).
Lighting of the inspection pit
Unlike the rest of the room, the inspection pit is characterized by high humidity, which poses a threat not only to metal elements, but also to humans. Since moisture can cause electric shock, it was previously believed that the inspection pit should be powered from a safe supply voltage of 12 V, which cannot harm a person. But with the advent of circuit breakers, power can also be supplied from a 220 V network, provided that there is an RCD with a shutdown current of at least 30 mA and a lamp with a protection level from 1 to 3 in accordance with clause 6.1.14 of the PUE.
In relation to the illumination of the inspection hole, it is directed upward. Due to the small space, the lamps should protrude as little as possible or even be recessed flush with the wall.
Rice. 12. Lamp in the recess
Installation of electrical wiring differs from garage lighting in the need to protect it from contact with water in case of flooding. To do this, they use plastic corrugation, make the wiring hidden in the wall, seal and seal the electrical contacts.
Rice. 13: Sealing wiring in plastic corrugation
Internal organization
The LED lamp is designed as follows:
- The light source is a lamp consisting of LEDs. The power is directly affected by the number of lamps and their type.
- The number of LEDs in a light bulb can vary from one to dozens.
- The LEDs are combined into a common chain, which is connected to the control circuit via a power supply.
- The design of the lighting device includes a heat sink, since heat removal is necessary to avoid overheating during operation. The quality of the radiator affects the stability and durability of the entire device.
Installation and installation of electrical panel
The electrical panel is designed to redistribute electrical energy from input to consumers through circuit breakers. For installation, select the most convenient location at the entrance. If you arrange lighting for the observation room, you can mount a separate panel for it.
Rice. 14: Installation of machines in the panel
In the panel, install circuit breakers of the appropriate rating, according to the calculation of the loads for each group of consumers that you made when choosing the wire cross-section. Most panels are prefabricated, so you can install the number of RCDs in them depending on the diagram drawn up. For example, separately for general lighting, separately for sockets and a locksmith corner. This principle of sectioning will allow you to turn off only the area where the damage occurred, while the rest of the room will receive power.
Figure 15: Connecting the distribution panel
Installation work
It is recommended to provide illumination in the inspection hole as well.
For the work you will need an electric drill and a hammer drill with a set of drills suitable for the material from which the walls are made, as well as a screwdriver. You also need to purchase a multimeter. The screwdriver and gloves must be electrically insulated. You also need to prepare a level and pliers. The cross-section of the cables used for wiring is selected according to tables that take into account the rated electric current and power.
The places where the devices, distribution box, switches and sockets will be located are marked on the walls. Then they check that the wiring fits comfortably in the path of the planned installation, and put the car in the garage. If the arrangement of the system elements is comfortable, the car is taken out and holes are drilled to install the main components. Then the walls are grooved, a box is attached to them and a cable is threaded into it. When the input panel is installed, the wires are connected to the machines. You need to check that the input devices and RCDs are connected correctly. After installing sockets and lighting fixtures, the performance of the system is tested.
A low-voltage circuit is required for the inspection pit, since high humidity creates corresponding safety requirements. The permissible maximum direct current is 24 V, alternating current is 36. Power is supplied by a system consisting of a transformer, stabilizer and rectifier. The light stream should be directed to the bottom of the vehicle. Car transformers cannot be used.
Useful tips from an electrician
- If you have divided all the lighting into certain zones, it is advisable to install the switch directly next to it. For example, near the mechanic’s table, near the hood, etc. If desired, you can install pass-through switches that will allow you to turn the lighting on and off, both from the entrance and from the zone itself.
- In case of a power outage, install emergency lighting in your garage. Halogen lamps or 12 V LED lamps are perfect for this. If the power goes out during repairs, you can always continue by powering the emergency lighting from the battery.
- If you have a spotlight at the entrance, connect it through a motion sensor, this way you will save on street lighting and can create a kind of alarm system.
- For greater efficiency, the luminous flux from stationary lighting in the garage must be diffused, which can be achieved with the help of lampshades and reflectors. But portable local illumination can be done with one beam of light for a specific point.
- Install a grounding loop and lay a third wire in the wiring, this will prevent electrical injury and fire due to a short to the frame.
- When choosing materials and devices, purchase products from well-known manufacturers.
Preparatory stage
In both large and small garages, open wiring will require the use of boxes (made of metal or plastic). Corrugated pipe can be a replacement for boxes. It would be more advisable to rely on advice from professionals when choosing an option. In any case, a mandatory element will be a general switch, which is located at the entrance or even at the entrance to the garage.
It makes it possible to turn on the overhead light when entering the garage, or immediately turn it off when leaving. For illumination in the inspection pit, Anna lamps of 36 or 12 volts are required (the choice is only a matter of taste).
Electrical power supply to light sources must be done using a multi-core cable, the cross-section of which will be from 1.5 to 2 mm. It is recommended to choose lamps with a color temperature in the range of 4000-5500 K. The base type can be E40 or E27.
LED fixtures come in the following typical sizes:
- SMD 5730;
- SMD 5630;
- SMD 3014;
- COB matrix.
To reduce the cost of purchasing lamps and energy consumption, you should place a mirror in the darkest places. By reflecting the rays, it will make it possible to increase the degree of illumination without high costs.
We light everything around for free
This idea is based on the potential difference that exists between the neutral cable in the network and the ground.
The basis is taken only by the difference in voltage between the network zero of two hundred and twenty volts and its grounding.
Translating into human language, we get the following picture. Electricians pull a wire from their station to us that has three phases and one zero. All wires have their own resistance, which means that voltage will drop across them. It is this “lost” tension that we need to “catch.”
This technique is completely legal, since it is not prohibited by anyone. Energy engineers are not punished with fines for such experiments. And there is nothing to punish for, because we are not taking anything away from them. We don't even touch the phase.
Do meters react to this electrical energy?
And here everything will depend on the meter itself. There are two types of electric meters in use. Single-shunt and double-shunt. In other words, they have different numbers of measuring elements. The most common option is where there is only one measuring element. This model does not count lost electrical energy.
And how much electricity does this technique produce?
How many subscribers are there in your network and how powerful is the wiring? As a rule, it turns out to produce up to three to ten volts. If you introduce a step-up transformer into the system, the LED light will light up quietly. The fact is that the step-up transformer, receiving our insignificant energy, already delivers up to one hundred or two hundred and twenty volts.
Any transformers can be used. For example, from old tape recorders or radios. It is better if the secondary winding has a voltage of three to nine volts.
The most important thing in this entire procedure is to follow the necessary safety precautions. Either a fuse or a 5–10 ampere circuit breaker must be installed between the zero and the transformer
This will allow us to save our entire structure if suddenly someone swaps phase and zero.
Of course, this will not happen before the Moon falls to Earth, but... With our electricians, you can expect anything. It is more likely that the neutral cable will break. In this case, a circuit breaker is needed.
Naturally, when working with a network, you need to take care of security - turn it off. Even if you only work with scratch. And the main thing is that even though the light is free, you shouldn’t leave it unattended.
Peculiarities
With the switch off? It should be noted that the LED bulb is economical. It reduces electricity costs by almost six times. Long service life is one of the features of the device: the lamp retains its ability to illuminate for fifty thousand hours. It turns on immediately, without delay, like regular incandescent lamps. The LED does not contain hazardous elements, such as mercury and other heavy metals, which would have a negative impact on human health. In addition, the device practically does not heat up during operation, since it does not emit heat. White light does not irritate the human eye, even so bright.
Homemade wind generator
An alternative option for autonomous power supply to a garage and a dacha in general is to install a windmill, which can also generate free electricity. You can buy a ready-made device, but it will be quite expensive. For a 2-kilowatt model you will have to pay about 100 thousand rubles. That is why we suggest you make a wind generator with your own hands, thanks to which you can use light in the garage without electricity.
The only thing to consider is wind speed. If there are no strong gusts of wind in your region or site location, it is unlikely that you will be able to get free electricity.
Things to consider
The walls of the garage should be light.
You need to determine which lighting option is best for a given garage. They draw up a plan, taking into account the features of the room, the characteristics of the lighting devices used, and the owner’s preferences.
The final scheme depends on the following factors:
- box area, ceiling height;
- availability of shelving and dedicated work areas;
- type of lamps;
- lamp characteristics;
- material and color of wall covering.
Don't underestimate the color of the walls of the room. Light shades reflect light, increasing illumination, while dark shades absorb light rays, darkening the garage space.
Selection of lamps
As a rule, an inspection pit is installed in each garage, with the help of which all basic repair work is carried out. But finding a broken part or a necessary tool in this hole without good light will be quite difficult. And constantly using a flashlight is simply inconvenient. Therefore, good light in such a room is extremely necessary.
When installing lamps, the following factors must be considered:
- height and total area of the garage;
- finishing material;
- number of work areas and where they are located;
- specific power of the lamp per square meter.
Conventional types of incandescent light bulbs are not suitable for lighting a garage space. The fact is that they have too low efficiency, which means that most of the energy they produce turns into heat rather than light. Everything that remains simply cannot provide good and comfortable conditions for repairs. In addition, such lamps emit yellow-red light, which damages vision.
Therefore, it is best to choose the following types of lamps for the garage:
- Halogen. Excellent lighting fixtures with a long service life. But when installing such lamps, you need to take care of the stabilizer, this will help protect the device from power surges. In addition, it is recommended to operate such devices in special shades so as not to touch them with your hands again, as this leads to a decrease in their service life.
- Luminescent. These devices are presented in the form of glass flasks with electrodes that are filled with an inert gas. The inside of the flask is painted with luminescent paint, which begins to glow under ultraviolet light.
- LED lamps are modern lamps that are more expensive than conventional devices, but pay for themselves fairly quickly. When illuminated, they do not emit harmful substances, and their light is brighter and more vibrant than that of similar devices.

