If you have identified a fault with the motion sensor, you should not urgently call a repairman or take the device to service; you can repair the motion sensor yourself. The devices are common in security systems to save energy consumption in lighting systems. Interruptions occur due to external influences or changes in the circuit, the consequences of which are easy to eliminate without additional outside help. The elements of the device rarely break or become unusable.
False alarms of the motion sensor - reasons and how to eliminate them
One of the main sensors that are part of security systems are sensors for identifying moving objects in the protected area.
With proper alarm design and proper installation, false alarms are a very rare occurrence. But, still, no one is immune from such occurrences.
Among all security sensors, the most common false alarms are the motion sensor.
This is due to the principle of their operation and, importantly, when designing an alarm system it is not always possible to completely eliminate the possibility of false alarms. Especially if the alarm system is installed in a complex facility with a large number of rooms.
Advantages and disadvantages
The advantages include:
- the ability to automate lighting systems, minimizing manual control;
- energy saving;
- versatility: a motion sensor can be added to any lamp;
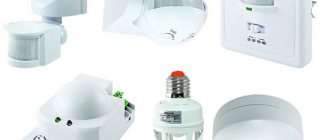
- a large selection of design solutions (relevant for landscape design);
- long service life;
- Possibility of connecting an alarm system to the DD.
Disadvantages include:
- false positives;
- high price;
- the infrared sensor does not notice movement that is perpendicular to it;
- ultrasonic sensors have a harmful effect on animals;
- microwave and ultrasonic DD are of little use in crowded areas.
What can cause a false positive?
To understand why the motion sensor turns on spontaneously, you should highlight possible problems in its operation.
These may include technical problems or external factors. False alarms due to technical problems are extremely rare.
To identify it, they either use special devices that can be used to monitor the correct operation of the sensor, or replace incorrectly functioning sensors with new devices.
Basically, a technical malfunction of the sensor, leading to its false operation, is associated with incorrect installation, poor contacts or incorrect configuration of functional parameters.
External influences are the main factors to which the motion sensor reacts. Since they incorporate IR radiation sensors, any external emitters or reflectors of rays in this part of the spectrum can cause the motion sensor to malfunction.
Reasons for false alarms of motion sensors
The main reasons that can lead to the motion sensor constantly triggering include:
Quite often the question arises whether the motion sensor works through glass.
It turns out that IR radiation that passes through windows from the sun or even from the headlights of a passing car can trigger the sensor. Therefore, these factors should also be taken into account when installing a security alarm.
Elimination methods
To prevent false alarms from motion sensors caused by pets, devices with a special design should be used. Such sensors are “immune” from animals and will not disturb over trifles.
It is important to monitor the condition of the sensor, namely its housing. If you periodically clean the sensor, you can prevent it from being triggered by living creatures that have gotten inside the housing.
Before arming the alarm, you need to make sure that all vents and windows are tightly closed and that the air conditioner or fan is turned off. This will eliminate drafts and movement of air masses, which also provoke false alarms.
When installing sensors, you should choose places for their installation so that they are not affected by heat rays from radiators of the heating system, autonomous heaters and other devices that can generate thermal radiation. After all, even an ordinary incandescent light bulb can cause an alarm to go off for no reason.
You should also exclude the possibility of infrared radiation coming from outside the house. Curtains or blinds will help solve this problem; they can be used to cover windows from solar and other external radiation.
If you follow these simple recommendations, you can almost 100% eliminate the possibility of a false alarm of the security sensor. In this case, you won’t have to worry about how to turn off the motion sensor, which causes constant inconvenience.
Having excluded the listed factors, the main reason that can trigger the alarm can only be a technical malfunction of the sensor.
As a rule, this happens quite rarely, since modern motion sensors are fault-tolerant and very reliable devices.
Conclusion
To prevent alarms from being disturbed due to false alarms of the motion sensor, it is important to fulfill several simple requirements.
Firstly, the installation and installation of sensors must be carried out by professional personnel.
Secondly, the factors listed above that provoke triggering should be taken into account. And thirdly, it is necessary to periodically inspect and maintain the sensors.
Video: The reason for false alarms of the motion sensor is the cockroach clan
Source
Types and types of controllers
Depending on the method of receiving the signal, there are two types of controllers: active and passive.
The active controller consists of a receiver and an emitter. It itself sends a signal (waves of different natures) to the object, then monitors changes in the interference pattern of the reflected waves. If there are changes, the detector is triggered and the light turns on. Ultrasonic and microwave chips have an active controller.
The passive controller monitors and records changes in the movement of thermal bodies through a Fresnel lens. Static objects will not be noticed by the sensor. Their device is much simpler, they cost less, but they make mistakes much more often. These include infrared sensors.
Why does the motion sensor not work or does it work incorrectly?
A motion sensor, like any other device, can fail, for example, due to incorrect connection, or not work as it should. If the sensor does not turn off, does not go out, or turns on completely unexpectedly, then there is obviously a malfunction in its operation.
To repair the sensor, it is necessary to determine the cause of the failure. To do this, it is best to contact the equipment manufacturer or warranty department. Specialists will be able to conduct testing and identify the exact reason why the sensor failed.
You can check some parameters that may affect the operation of the sensor yourself. We'll tell you about them today.
Is it possible to disable the presence sensor in the SPO-107 LED luminaire?
SPO-170D is an LED lamp that has a motion sensor. The motion sensor in the lamp is configured automatically. The sensor has special adjustments that automatically turn off and turn on at a specified time.
The LED lamp turns on when a person approaches, and when he leaves, the light goes out; such lamps save electricity well.
As for the presence sensor, the SPO-170D LED lamp does not have such a sensor. Probably, when you installed the LED lamp on the motion sensor, you also installed a presence sensor.
To disable the presence sensor, the very first thing is to look at where the sensors were connected, turn off the electricity, then look at how the presence sensor is connected, if it is simply connected to an outlet and there is a switch, then just use the switch, but there are cases when without a good electrician there's simply no way around it.
Each sensor has its own way of connecting and disconnecting; you may have to completely dismantle it.
Adjust your settings
If your motion sensor does not turn off the lights or is not working correctly, first take a closer look at the settings. There are three regulators on the body of the device: SENS, TIME and LUX.
These settings help prepare the sensor for specific conditions. Initially, they must be set either by the installer company or by the owner of the sensor.
When working with professional equipment, it is important to adhere to the recommended values. For example, the LUX regulator has these.
As practice shows, in passage areas it is approximately 75-200 lux, in work areas (offices and cubicles) - 600 lux, when working with heavy eye strain - 1000 lux. The average range of illumination levels in sensors is 2-2000 lux.
If you do not know the correct values, then it is better not to adjust these indicators yourself. Set the lowest value - the sensor will turn on at minimum illumination, set the maximum - the sensor will turn on constantly.
At the same time, from a technical point of view, the device will work correctly, that is, it will perform its functions based on the settings. On the practical side, its operation will not bring any benefit to the owner, so in case of such problems it is worth contacting a specialist who can adjust the device settings.
An incorrectly adjusted SENS parameter can also disrupt the operation of the motion sensor. If you set its value incorrectly, the sensitivity of the area where the motion sensor is present will decrease, and in certain cases, for example, with minimal movements, the device may simply not work.
Due to incorrect settings of the SENS, LUX and TIME parameters, the lighting may not go out. If the lamp does not turn off for a long time, in the absence of movement, then it is worth checking the turn-off delay time.
The TIME control may be set too high, preventing the output contact that controls the lights from opening. This indicator also has its average values: for passage areas - 5 minutes, for work areas - 15 minutes.
Join the discussion
You are posting as a guest. If you have an account, log in to post under your account. Note: Your post will be reviewed by a moderator before it becomes visible.
Latest Visitors 0 users online
ads
Messages
Related content
Good day everyone! We installed these lamps on our floors in the entrance hall, with a built-in motion and light sensor. Soon the sensor on our floor began to malfunction. and cannot be adjusted. We bought it on ALI EX. the other / I attach a photo /, but it has the same connections to the lamp. No matter how hard I tried, I couldn’t find the power supply circuit for our lamp. The question is: how to light a lamp without a native sensor? There are five pins coming out of the block—the two outer ones go to the LED, and the three middle ones go to the sensor.
If you just fold it back, it won't light. I took a photo of the dead block for review... Here the extreme conclusions have been bitten off. If you manage to light it without the original sensor, then you can probably attach a new one to the input of the block, that is, connect it like an ordinary light bulb.
Good day everyone. During the renovation of the house I made a mistake - I purchased lamps for a regular dimmer with a twist - Legrand Valena Life, but they turned out to be non-dimmable. Disaster. A lamp from the JazzWay company, model PTR 2310, is installed on the track, the stated power is 10w. It itself is an aluminum cylinder with a radius of 8 cm and a length of 40 cm. When I realized what a mistake I had made, the first thing that came to my mind was to take it apart and see what was inside) It turned out that at the ends of this cylinder there was simply a plug and a stopper for the lens screwed into the thread. Under which I found a driver (probably that’s what it’s called) and an LED labeled LM002. I will attach a photo in the post. During operation, it will output 73V to the LED contacts. The power is 130mA, although I’m not sure about this because I don’t quite understand how to measure this correctly, at a line break or also with marks. (measurement was done on the LED marks as well as the voltage) Next question - What are the possibilities to convert the lamp into a dimmable one and what will the budget be? Is it possible to replace this power supply with a dimmable one without replacing the LED? Is it possible, for example, to purchase a light bulb with a similar or matching LED and replace the board or the whole thing while maintaining the standard locations?
I ask for help from people who understand this topic))) Help
Tell me what's the matter. There is a spotlight with LED lights, 3 of them burned out and it did not work. I removed 1 light and put a jumper in its place, it worked! But the resistors in front of the DB157 diode bridge heat up in a couple of seconds. 2 have already come out and when I was building I replaced them with the same rating but 1 watt and not 0.5 as it was. Instead of a jumper, I installed a 1K resistor, it lit up, but the resistor quickly began to heat up and had to be opened. If instead of all 3, installing jumpers will help?
Hello. Radio ruined on the air. Long time no see. Here it is, such a thing. It means the driver from Alika for LEDs has arrived. I'm making a homemade lamp for the radio room. Here he is in the picture.
Power - 30-50 W. Produces a current of 480mA. That for my 3-watt 5730 diode assemblies is a big deal, I need at least 300mA, and better yet 280mA. Well, actually, there are parallel current-setting resistors, these are rs1 - 1.5 ohms, rs2 - 1.8 ohms, and for rs3 rs4, respectively. In total, the resistance is somewhere around 0.8 ohms. I connected two assemblies in series and an ammeter in the gap, turned it on, the driver started up, the assemblies lit up very brightly, the current is really 480 mA, I think about the horse heating of the assemblies literally in seconds from such a current it is unnecessary to say. This means you need to reduce the current. To begin with, I simply unsoldered rs2 and rs4, which are 1.8 ohms each. The final resistance became 1.5 ohms. I connected it to two assemblies, the current output was 270 mA. Just what I needed, I thought. Connected 15 LED assemblies. I turned it on, and the diodes glow weakly, the current is 125mA. I unsoldered one assembly, connected it again, the current is higher, it shines brighter, but still weak. I soldered another one, better, but not enough. More. And now minus 3 assemblies, it shines normally at a current of 270mA. I would like to power all the diodes. Driver power allows. 3V for 15 assemblies we get 45W of power. I started trying to select the total resistance of the current-setting resistors. I soldered back the soldered 1.8 ohms - I connect them, all 15 pieces shine brightly, but the current is 480 mA. I soldered in a 3.3 ohm resistor instead of 1.8 ohm. All diodes are shining. The current dropped to 350mA, which is also too much. Soldered in 5.1 ohm. And this is where things started to get interesting. When turned on, the current starts at 170 mA and begins to grow slowly, the assemblies blink, the growth lasts about half a minute and reaches 315 mA. I started looking for why this is so. On Alika, one person wrote a detailed review and mentioned that: “S9268D microcircuit. When selecting resistors, the driver may not start, the lamp will blink, in this case it is necessary to select “setting resistors R3 and R4.” Well, that’s my case, I thought. Just in which direction and what denomination should I choose them? Unfortunately this was not said. Here's a video of how it all happens. What will the local pros say?
Check the location of the sensor
When choosing a motion sensor, you should pay attention to its detection range and range. The same parameters must be taken into account when selecting the location of the device.
During installation, the device must be installed and focused so that these parameters optimally suit the characteristics of the selected room. The optimal location for the sensor corresponds to the following indicators:
If one of these parameters does not match, the motion sensor may malfunction. You can check this yourself, and to troubleshoot problems due to the incorrect position of the device, contact a specialist.
Main signs of sensor malfunction, possible causes
There may be three signs:
- unauthorized activation, at any time without any reason;
- does not turn off the lighting lamp;
- does not turn on the lighting lamp or other terminal devices, and does not respond to obvious signs of movement in its field of view.
Sequence of troubleshooting and troubleshooting
In any case, you need to start by inspecting the appearance to see if there is any obvious mechanical damage to the optical system of the Fresnel lens, or a simple layer of dust and dirt. If necessary, clean the lens and check the functionality of the sensor. This is the most common and simplest cause of malfunction. If there is no positive result, you will have to perform more complex operations:
- Remove the housing and check that the connection is correct.
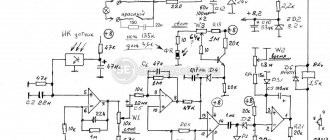
Motion Sensor Circuit Boards
- If, when simulating driving conditions, the relay is activated, a characteristic click is heard, and the lamp does not light up, it means that the circuit between the relay contacts and the lamp is faulty, ring it. The relay contacts may have oxidized; replace it or clean the contacts. I do not consider the lamp to be faulty; this needs to be checked first.
- Measure the DC voltage after the converter; depending on the sensor model, it can be from 8–24 V (see diagram and other documentation). The measurements are carried out relative to zero; it is convenient to take the “-” diode bridge on the boards.
- If there is no required voltage, ring the elements in the converter circuit, most often these are diodes of the rectifier bridge.
It happens that a short circuit in the circuit following the bridge or stabilizer extinguishes the incoming voltage. To verify this, disconnect the entire circuit after the stabilizer. If there is voltage, look for a short circuit, a faulty element after the stabilizer. This way you can ring the entire circuit up to the relay and lamp; if faulty elements are identified, replace them and check their functionality. If you follow this method, you will definitely find the cause of the malfunction; this method is good when a person has skills in working with electronic equipment, measuring instruments, and knows how to solder. When you don’t have such skills, you need to limit yourself to the first points: wiping, setting up, checking the power supply. If the elements on the board are faulty, contact a specialist.
Failures of radio equipment can be repaired independently. This method involves quickly solving problems and saving money. Using the instructions below, it is easy to perform high-quality repairs of the motion sensor yourself.
Prevent false positives
Foreign objects can affect the operation of the motion sensor both directly and indirectly. The infrared sensor is directly affected by large moving heat flows from objects such as a fan coil, convector, etc. Large objects (racks, cabinets, etc.) limit the detection area of the sensor and create “dead zones” in the room.
Heaters indirectly affect the operation of the sensor. The thermal air flows they transmit will lead to malfunctions due to which the motion sensor will turn on randomly. To limit the sensor and eliminate false alarms, you need to reduce the sensitivity of the sensor or use special lens masks that come with the sensor
High-frequency sensors are almost impervious to external factors. Their work is practically independent of ambient temperature, sound or light. But such sensors are only suitable for indoor installation. Outdoors, they will react to any movement, such as falling leaves or swaying trees.
This type of sensor is installed in rooms with a large number of partitions. For example, public bathrooms. To automate lighting, it will need several PIR sensors.
With the help of high-frequency sensors, you can close the entire room with one device, since they easily detect movement through light partitions. Some models of high-frequency sensors, for example, HF-MD1, are suitable for installation in a luminaire. Also, sensors with two technologies are suitable for this type of room: PIR and noise.
Installation Tips
Installation purposes may vary
First, you need to determine the purpose of installing the DD, and then choose the right location. Experts advise hanging lamps with sensors on the ceiling indoors, this way the maximum coverage area is achieved. If you need to service a narrower area, you can hang the lamp on the wall. Keep in mind that almost all sensor lamps are suitable for wall and ceiling mounting.
When installing indoors, make sure that nothing interferes with the sensor: air conditioners, heating pipes, warm air flows, or other warm objects. They will cause false positives. When used outdoors, there should be no trees or bushes in the sensor’s coverage area. The operation of street sensors can be affected by power lines, cell towers, and major highways.
Installation of a lighting device with a motion sensor
Let's consider the internal installation of a lamp with DD.
- Prepare the luminaire for installation: insert special rubber seals into the holes for the cables.
- De-energize the room.
- Insert the power cable into the lamp body.
- Attach the lamp body to the wall or ceiling.
- Remove the braid from the cable, strip the neutral and phase wires of insulation to a length of approximately 7 mm.
- Connect the phase wire to terminal L and the neutral wire to terminal N. Terminal L' will remain unused. It can be used to connect other lamps or other equipment.
Connecting a lamp with a remote sensor
Connecting such a lamp begins with installing the sensor:
- To do this, determine the installation location with the best viewing angle.
- Attach the stand that needs to be removed from the sensor. Secure at a height of at least 240 cm.
- Strip the ends of the supply wire from insulation to a length of approximately 10 mm.
- Open the cover of the sensor terminal box, connect the neutral and phase wires to the supply wire. Insulate connections.
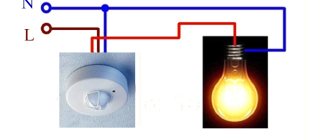
Next, the sensor and the light source are connected: a phase is connected to one end of the lamp, and the connection point is isolated. The other end of the lamp is connected to the neutral wire of the sensor. If you mix up the phases, the DD will not work. In this case, it is enough to swap the wires.
Why doesn't the motion sensor work?
When choosing a motion sensor, do not forget to check the quality of the device. Cheap Chinese models are unlikely to last long, and in most cases they do not work correctly. Having installed such a device at home, you will very soon ask the question: “Why doesn’t the motion sensor work?”
It is also important what type of luminaires the sensor will control. If the model is selected incorrectly, this will affect the service life of the lighting device.
To ensure that the sensor is installed correctly and operates correctly, contact BEG. We will select the necessary models, develop a project and provide a five-year warranty on all products.
And subscribe to our blog, here you will find interesting materials about lighting automation and features of motion sensors.
Source
How motion sensors work
Motion sensors differ in their operating principles, but they all perform the same task. Each has advantages and disadvantages:
The most effective motion detectors are active sensors, although they consume more power to run and require calibration to prevent false alarms. Passive infrared allows you to cover a much larger area with less power, but slowly rising temperatures can cause delays in detector response.
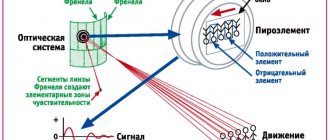
The most popular type of sensors are passive infrared detectors. Their sensitive element detects infrared waves, which are focused through lenses. Built-in lenses also help expand the sensor's coverage area. In this case, the voltage is increased through the amplifier, compared with the background signal and sent to the relay. If the signal does not go beyond the background, the relay contacts remain open. As soon as the signal level increases, the relay closes the contacts and connects the load circuits.
Operating principle of an infrared motion sensor
Additional Information. People with a skin temperature of 36.6°C emit infrared energy with a wavelength of 9 to 10 micrometers. Therefore, sensors are typically sensitive in the range of 8-12 micrometers.
Motion sensor repair methods
You should always start with a visual inspection of the sensor. There may be mechanical defects, damage to lenses or housing. Pollution accumulates on them. Often, simply wiping the lens will fix the problem.
When all external factors that can affect the operation of the device have been checked, the case is opened and the search for internal defects begins.
Important! You will need to check the device under voltage, so you must know and follow all electrical safety rules.
Motion detector connection diagram
Motion sensor circuit board
Adjusting Sensor Settings
On the front of the motion sensor housing there are adjustable adjustment knobs for lighting:
Motion Detector Controls
Adjusting the settings serves to set the operating parameters required by the user. The settings affect the correct operation of the detector.
For the LUX regulator, they usually start adjusting from the middle position, but if the installation sites are too dark, then you can set it closer to the “night” icon.
Important! Particular care must be taken in adjusting the SENS regulator, since incorrect operation of the sensitivity parameter blocks the functioning of the complete sensor circuit.
When regulation begins, SENS is set to maximum and TIME to minimum, and artificial conditions for the circuit to operate are created. During normal operation of the sensor with these settings, you can gradually set the desired indicators, checking the correct functioning of the device with each shift of the controls.
A working detector does not turn off the circuit
There are situations when the sensor is working properly, but the lighting devices do not turn off, despite the absence of external conditions for operation. The reasons may be the following:
Spontaneous sensor activations can be observed in the presence of nearby sources of radio waves, electromagnetic fields, and nearby heat sources. Most of these factors can be eliminated by correctly positioning the sensors.
Correct installation of sensors
If the motion sensor does not work, the search for causes should begin with external inspections and checking the settings. Only trained users can begin more complex repairs on their own.
Typical faults
There are several signs by which it is concluded that there are interruptions in the operation of the device:
- the detector turns on at any time without any reason;
- does not turn off the lamp when the conditions for sensor operation are not met;
- relay contacts do not close when the sensor is operating
- stops responding in the presence of moving objects
- the sensor operates and turns off spontaneously, regardless of the environment
Doesn't turn on
If the detector does not work or the light does not come on, then first check whether it is connected correctly. Next, try to remember or find out when the sensor stopped working and under what conditions this happened. Reasons for malfunction of the device:
- voltage drop in the network
- water got on the detector: it rained or there was flooding from neighbors on the floor above
- mechanical impact in the form of a blow
- power outage in the area
- Unstable operation of the device has occurred before
Having established the cause of the disruption, it will become clear what to do next.
Doesn't turn off
Lighting that burns around the clock is not required in apartments and private houses. It makes sense to spend time and try to repair the sensor. Often the root of the problem lies in closed relay contacts, which happens due to violations of the connection rules or installation by an inexperienced specialist. Also find out what is located opposite the motion sensor. There should be no devices that emit heat near the operating detector. After all, it is known that the device is triggered when the thermal environment changes. Do not place a heater or other devices that generate heat in front of the appliance.
- It is recommended to check the time delay adjustment. The power circuit does not open if the delay regulator is set to too high a value;
- setting the brightness threshold (LUX) too high;
- there is a peculiarity in the operation of the detector's electrical circuit. If the sensor is not new and has been in use for a long period of time, the contacts do not open because there is a residual load. If the device does not turn off the light, you should disconnect the sensor from the mains voltage for half a minute;
- The degree of sensitivity of the motion sensor to infrared waves (SENS regulator) is incorrectly adjusted;
Recommended values are indicated in the technical documentation; it is important to use them. If the dimmer is set to maximum (2000 lux), the light stops turning off. The operation of the device loses all meaning
If you don't know what the values should be, you shouldn't change them yourself. The best solution is to contact a professional for help with setup.
Unpredictable on and off
When high-frequency radio signals appear in the scanning area of the sensor, the device begins to operate unstably. In this regard, it is not recommended to place the detector where devices that generate radio waves (for example, a WIFI router) operate. In the same way, the sensor device reacts to electromagnetic fields that are created by nearby starters, contactors, and welding equipment.
What to do if the listed devices need to be used within the range of the sensor. Here are the troubleshooting methods:
- shielding the detector by wrapping it in foil. It is important to ground the screen;
- decreasing the sensitivity of the SENS regulator.
Other reasons for unstable operation of the device:
- The contact has come loose, there has been an insulation breakdown or a break in the hidden electrical wiring. As a result, electromagnetic fields arise that disrupt the normal operation of the sensor;
- objects that were not initially located in the scanning zone entered the scanning zone. An example is tree branches; with a gust of wind, they easily end up in the scanner’s range of action;
- heating of the detector body under the influence of sunlight or heat-emitting electrical appliances. If the source of heat radiation cannot be removed, then a barrier is installed.
Video
Motion sensors (MS) are widely used in alarm and security systems to minimize electrical energy consumption in lighting systems and other needs. They are distinguished by their simple design, the ability to configure various sensitivity parameters and excellent performance. Taking into account the simple design and relatively simple electronic circuit, independent repair of a DD of this type will be a completely feasible task, which anyone who understands at least a little about radio electronics can cope with.
Types of breakdowns
When using DD, users deal with a variety of malfunctions. Because, like any other devices, DDs sometimes fail, break, or function incorrectly. All this may be associated with malfunctions inside the device or with incorrect connection and configuration. If the device malfunctions, it is necessary to find the cause and eliminate it. The following types of damage may occur:
How to repair?
It is always necessary to start with an external examination of the detector. There may be mechanical damage, defects in the case or lenses. Pollution accumulates on them. Often, simply wiping the lens will resolve the problem. After checking all external factors that can affect the performance of the device, the case is opened and the search for internal damage begins.
Important! The device must be inspected without removing the voltage; therefore, all electrical safety instructions must be taken into account and followed.
Finding internal damage involves several steps.
How to set it up correctly?
If your device does not turn off the lights or does not work correctly, or there is no sound in the alarm systems, first analyze the settings.
Detector setup
All modern DDs are equipped with a regulator for adjusting the properties of the actuation process. They are necessary for error-free operation so that the device fully performs its duties. Through them, sensitivity, illumination, and the turn-off delay time interval are adjusted. The mounting angle is adjusted mechanically. If older modifications of motion sensors are used, you can control only two values - sensitivity and delay interval. In this case, you can connect an additional light detector.
Function settings
If you correctly set all the characteristics, then energy savings can reach up to 50%. This is an impressive result given today's energy prices.
Basically, on the latest modifications of DD, the following 3 regulators are installed:
Mounting angle
When installing a motion sensor indoors, it is usually placed in a corner at the highest point, which allows for the most accurate location relative to the area where the most active movement will occur. When, for example, the DD is mounted in the hallway, where it is possible to enter from several living rooms or the kitchen at once, then it is directed in the direction where the rays will cover the largest area. So that, as soon as an object appears from any passage, the warning system is activated by closing the network. Outdoor height and installation location may vary. But you need to make sure that there are no plant branches or other objects in the working area of the IR rays that are not recommended for triggering the detector.
Key Settings
Of course, there is also an area of view that is inaccessible to IR rays, and the device is not able to respond. However, with proper installation, they are minimized and do not affect the performance of the device.
If the DD has stopped functioning, it is necessary to quickly eliminate this problem so that the object under protection is not left without the supervision of electronic security systems.
If problems are detected and you can fix them on your own, this can be done at home, spending a little time and money. When you cannot repair the detector on your own, you can always use the help of a service. It is likely that the device is simply beyond repair and will need to be replaced with a new one.
How to repair a motion sensor, see the video below.
One of the main sensors that are part of security systems are sensors for identifying moving objects in the protected area.
With proper alarm design and proper installation, false alarms are a very rare occurrence. But, still, no one is immune from such occurrences.
Among all security sensors, the most common false alarms are the motion sensor.
This is due to the principle of their operation and, importantly, when designing an alarm system it is not always possible to completely eliminate the possibility of false alarms. Especially if the alarm system is installed in a complex facility with a large number of rooms.
Infrared sensor design
One of its main elements is a pyroelectric detector, which consists of a pair of rectangular crystals that respond to infrared radiation within a certain distance. With a uniform background of space, currents of the same magnitude are induced in the crystals. When a heat source appears in a sector of one of the crystals, a difference in current values occurs. This pulse is amplified, converted into a digital signal and sent to actuators, relays with a group of closing contacts.
For more efficient operation, a Fresnel lens is installed in front of the pyrotransmitter at a distance of 1.5–2.5 cm, which focuses infrared radiation on the crystals. More precisely, it is an optical system from a group of lenses of 20–60 pieces, milky or gray in color, made of plastic. The system has a spherical shape, thereby expanding the field of view of the sensor.
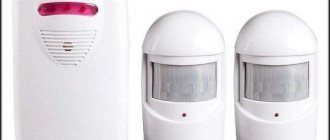
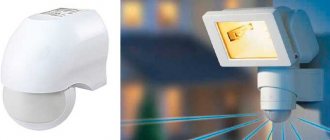
The sensor, which is located in the figure on the left, is recommended to be hung on the ceiling in the center of a large room with several entrances. An overview of such a device is 360˚, three pyroelements with a sector of 120˚ each.
The second sensor has a horizontal viewing sector of no more than 180 ̊, it is usually placed in the direction of a door or external gate, fixed to the walls of buildings, it has the ability to change the direction of the vertical viewing sector.
What can cause a false positive?
To understand why the motion sensor turns on spontaneously, you should highlight possible problems in its operation.
These may include technical problems or external factors. False alarms due to technical problems are extremely rare.
To identify it, they either use special devices that can be used to monitor the correct operation of the sensor, or replace incorrectly functioning sensors with new devices.
Basically, a technical malfunction of the sensor, leading to its false operation, is associated with incorrect installation, poor contacts or incorrect configuration of functional parameters.
External influences are the main factors to which the motion sensor reacts. Since they incorporate IR radiation sensors, any external emitters or reflectors of rays in this part of the spectrum can cause the motion sensor to malfunction.
Reasons for false alarms of motion sensors
The main reasons that can lead to the motion sensor constantly triggering include:
Quite often the question arises whether the motion sensor works through glass.
It turns out that IR radiation that passes through windows from the sun or even from the headlights of a passing car can trigger the sensor. Therefore, these factors should also be taken into account when installing a security alarm.
Elimination methods
To prevent false alarms from motion sensors caused by pets, devices with a special design should be used. Such sensors are “immune” from animals and will not disturb over trifles.
It is important to monitor the condition of the sensor, namely its housing. If you periodically clean the sensor, you can prevent it from being triggered by living creatures that have gotten inside the housing.
Before arming the alarm, you need to make sure that all vents and windows are tightly closed and that the air conditioner or fan is turned off. This will eliminate drafts and movement of air masses, which also provoke false alarms.
When installing sensors, you should choose places for their installation so that they are not affected by heat rays from radiators of the heating system, autonomous heaters and other devices that can generate thermal radiation. After all, even an ordinary incandescent light bulb can cause an alarm to go off for no reason.
You should also exclude the possibility of infrared radiation coming from outside the house. Curtains or blinds will help solve this problem; they can be used to cover windows from solar and other external radiation.
If you follow these simple recommendations, you can almost 100% eliminate the possibility of a false alarm of the security sensor. In this case, you won’t have to worry about how to turn off the motion sensor, which causes constant inconvenience.
Having excluded the listed factors, the main reason that can trigger the alarm can only be a technical malfunction of the sensor.
As a rule, this happens quite rarely, since modern motion sensors are fault-tolerant and very reliable devices.
Conclusion
To prevent alarms from being disturbed due to false alarms of the motion sensor, it is important to fulfill several simple requirements.
Firstly, the installation and installation of sensors must be carried out by professional personnel.
Secondly, the factors listed above that provoke triggering should be taken into account. And thirdly, it is necessary to periodically inspect and maintain the sensors.
Choosing a Suitable Place to Set the Light Timer
What kind of lighting do you prefer?
Built-in Chandelier
For uninterrupted and correct operation of the photo sensor, you need to choose the right place for its installation. The following factors are taken into account:
- The device must be exposed to sunlight. The structure should be in the open air or canopy, but not at the very top.
- Lamps, lanterns and windows should be located as far away as possible, as they can cause frequent false alarms.
- It is not recommended that the day-night sensor be regularly exposed to light from car headlights.
- Do not mount the sensors too high. This will cause difficulties in maintenance and preventive measures.
There are common cases when sensors are installed directly on poles, but this is not always practical or convenient. It is preferable to attach it to the wall of the house and run the power cable.

