A well-designed interior is one that combines comfort and functionality, but at the same time has a beautiful appearance. For example, modern lamps not only provide light and save energy, but also often become decorative elements, giving a completely unusual look to ordinary things. All kinds of lighting today can be used to decorate curtains functionally; one of the popular options is a night light for curtains.
Curtain lighting is an indispensable part of the interior of modern apartments.
This is one of the best, non-trivial and bright ways to improve the design of an apartment or private house.
Option to suit your taste
There are indeed quite a few ways to “illuminate” curtains and make an original night light. Among the most popular:
- Garlands,
- LED curtains,
- lighting built into the cornice,
- curtains, which themselves are LED “waves” (they are also called “waterfall”).
Often the method of illuminating curtains is used in administrative centers, sports or shopping areas.
But first things first.
What size should I make?
The width and depth of the niche depends on the type of curtains and measurements taken. For example, for a string cornice it is not necessary to make a deep niche, while for a multi-row busbar the box must be wider and deeper. The most important step is to take the measurements correctly. When planning a niche, we must not forget that the curtains in it should be positioned freely, and when open they should not touch either the niche, the window sill, or the heating radiator.
Many examples demonstrate that if you forget to take into account the location of the radiator or window sill (whichever protrudes more), you will not get a beautiful view in the future. Therefore, measurements should start with this part. Typically, the window sill/radiator projection is 15 cm, but it is better to measure it individually for your room.
It is also necessary to establish the distance between the outer rails of the cornice (for example, for a standard double-row, the width is 4 cm). By adding up all the parameters (removal of the battery/window sill + distance between the cornice guides + adjustment for curtain assemblies), you will get the ideal niche width.
To calculate the depth of the niche, you need to add up the height of the cornice (about 1.5 cm), the height of the curtain tape (5-15 cm depending on the type chosen) and the correction for the viewing angle (about 8 cm). The minimum depth of the niche is 15 cm, the maximum is 40 cm. The option with a 20-centimeter depth is considered the optimal choice.
When calculating the length of the box above the window opening, the following parameters should be added:
- Window opening width.
- If the edges of the window sill protrude beyond the opening, instead of the width of the window opening, take the length of the window sill from edge to edge.
- The allowance for gathers ranges from 10 to 50 cm, depending on the type of curtains chosen (10 cm for drop-down Roman curtains, 50 cm for thick curtains).
Types of garlands
You definitely won’t encounter a paucity of choice in this matter; there are very, very many varieties of garlands and lighting structures that can be used to illuminate curtains. Let's list some of them.
An additional light source that consumes minimal electricity visually enlarges the room.
- universal linear garland (lamps arranged in series on a long wire)
- curtain garland (long wires not connected to each other)
- fringe garland (branches of different lengths from the main wire)
- mesh (looks almost like a fishing net, only with small lamps)
- duralight (flexible cord with LEDs, especially suitable if you need to give the light picture a certain shape)
Cozy and comfortable rooms in small spaces will become much more spacious and brighter thanks to LED lighting.
Modern trend in curtain decoration
Interior designers often use several sources of artificial light to zone rooms. Light streaming from different parts of the room can create a different mood and sense of space depending on what functions a particular zone performs.
So, in small living rooms, in addition to central lighting, floor lamps, sconces are used, or walls, curtains, and ceilings are illuminated. For example, a floor lamp and an easy chair are installed in the recreation area for cozy reading books or listening to music.
At the same time, the curtains can be illuminated, and if you turn on all the lighting sources at the same time, you will get bright illumination for family and friendly gatherings. In the evening, illuminated curtains not only perform a decorative function, but also serve as an additional source of light; for example, in children's rooms they can be used as a night light.
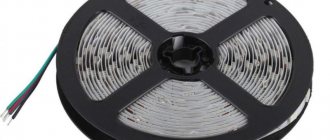
Technologies do not stand still, and at the moment there are LED strips that are available to almost everyone. And the use of LED strip makes it possible to mount the product anywhere on a hard surface. Let's take a closer look at the use of LED strip for illuminating curtains.
Garland for curtains
How much the garland will fill the curtain area is up to you to decide. Some prefer the curtains to be illuminated in their entirety and look like brightly glowing curtains, for some a couple of single garlands are enough, while others get creative by laying out a light pattern on the curtains.
Such systems are qualified according to two criteria - the direction of the glow and the location of the backlight.
What to attach it to?
The method of attaching the garland to the curtains depends on its weight and your idea.
Various installation methods are used, and they are all correct in their own way: the consumer has the right to decide which tape to use and how to install it.
- If the garland is not very large and light in weight, then you can attach it simply - with double-sided tape. Moreover, if you decide to use a window as the basis for fastening, first wipe the desired area with alcohol. You can install lighting on the curtain itself, both in front and behind it on the window.
- A more reliable option is to fix it with a hot glue gun.
- If the basis of the fastening is a cornice, hooks for tulle or thread can be used.
- Are you attaching it to a wooden window frame? Drive a small nail into it not completely.
- If you want the curtain to be backlit, you can attach it directly to it.
As for the location, the lighting of the curtains can be lower or upper.
Connection
There are also differences in connection types. If there is a free outlet near the window, choose a garland that runs on electricity. If there is none, it is better to choose a battery-powered garland. By the way, it’s better to stock up on the latter for future use, so as not to be left without a magical mood at the most inopportune moment.
The top mounting method is the most preferable, since on a subconscious level a person always pays attention to the upper half of the room.
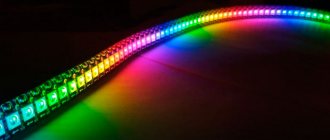
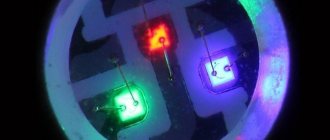
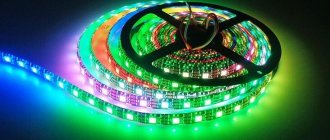
The effect of dynamic lighting is possible when using an RGB strip with several hundred shades.
Assembly and connection of the electrical part
When designing and assembling, keep in mind that the LED boards are connected in parallel; the length of the fragments does not exceed one reel (5 m). Five-meter ice strips are not connected in series - they are connected to the driver in parallel. For a powerful unit with a large size, leave more space.
- To cut the LED strip into fragments, use sharp scissors or a knife with a backing. Guide the cutting lines along the marks between the modules so as not to damage the conductive paths.
- Strip the ends of the wire and the edges of paths carrying current. Solder the wire according to the markings on the tape. Soldering temperature – 240-250 °C. For SMD tape, use a two-core copper wire, for RGB tape, use a four-core wire. To avoid damaging the base, do not solder for more than 10 seconds.
- Strip the free end of the wire, connect it to the adapter terminals, guided by the color of the marking, tighten the fastening screws.
- Check the functionality of the circuit by connecting the system to the network. Check if all the fragments are glowing, check the heating at the soldering site.
- When installing the tape, use a self-adhesive base to secure the system.
LED Strip Light
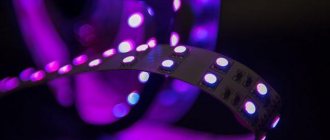
Illuminating curtains with LED strip creates a different visual effect. If the garland fills the area of the curtains, then the ribbon fills the space at the cornice, spreading its light in a gradient: bright at the top and calmer towards the bottom.
By switching from one shade to another, you can change the perception of the fabric.
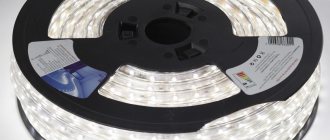
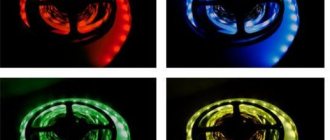
Types of tape
There are several models of LED strips. They differ in the types of LEDs and the frequency of their installation. Do not choose a tape with too high a light intensity; it will dazzle your eyes and “eat up” an unreasonably large amount of electricity.
For thin and transparent curtains, low-power LEDs are used, turning them into a light haze - it looks simply great!
To illuminate the ceiling, experts recommend installing an SMD 5050 strip (from 30 warm white LEDs per 1 meter).
Mood color
The advantage of LED strips is that they can emit light of any color, you can choose the one you need to suit your mood. Warm home gatherings? – use soft white or yellow. Small party? Neon blue or purple will create the atmosphere.
This method will allow you to realize any design ideas.
Installation Tips
Before you begin installing the backlight, you should consider the following recommendations:
- Lighting must be selected based on the type and color of curtains. As a result, they should form an integral composition.
- To avoid a short circuit, you should ensure that the insulation is in good condition.
- It is not recommended to block the light flow with other decorative elements.
- Diodes should be located as far as possible from flammable objects.
- No need to choose cheap Chinese products and too bright LEDs.
LED curtains “Waterfall”
LED garland that creates the effect of “falling” waves due to the play of light from top to bottom. Each wire looks like a separate stream of water.
During long-term use, the product practically does not heat up.
Installation materials
To make installation as hassle-free as possible, stock up on everything you need in advance. Don’t forget about measurements; you need to know the width of your window before you go to the store.
The backlight creates an original and unique effect of falling sunlight at any time of the day.
- Transformer. Necessary for the LED device to function. The fact is that the LEDs will not be able to work if the standard network values are set. In our case, a lower voltage and current of a different quality are required: voltage input - 220V with a frequency of 50 G, output - 12 V and direct current.
- The waterfall itself. The length of the waterfall must match the length of the distance you want to illuminate, and the values must match the parameters of the transformer.
- The wire. We also remember about timely measurements. The cross-section of the wire suitable for the transformer must be at least 1.5 mm2, on the side connected to the tape - 0.75 - 1 mm2. The wire must have 2 different colored cores.
- Single-pole switch (standard will do) and RCD (for additional safety).
- Plastic boxes for wires. This point and the following are for those who want to hide the mounting location and install a waterfall under a suspended ceiling.
- Drywall. You can use it to make a niche in which unnecessary wires will be hidden.
- Heat shrink tubing or insulating tape.
Let's start installation
Naturally, you need to start work by turning off the voltage, otherwise the consequences may not be the most favorable. Well, to do everything right, follow a certain sequence.
Illuminating curtains visually enlarges the living space.
- Install a plasterboard box as close to the curtains as possible. If you need it, of course. If you are installing lighting under a suspended ceiling, you can safely skip this point.
- We attach the transformer. It is better to install it where the LED waterfall will come from. You can attach it directly to the ceiling using standard dowels.
- We installed the transformer - we supply voltage. This is where the nearest outlet or junction box will come to the rescue. Connection diagram: a wire with red insulation is connected to the phase, a wire with blue insulation is connected to zero. To determine phase and zero, use an indicator screwdriver.
- Now you can start attaching our LED garland. To do this, you can use construction adhesive (we wrote more about fastening methods at the beginning of the article). The place where you will attach the waterfall must be cleared of debris and dust.
- And finally, we connect our waterfall curtain through a transformer. There are 2 terminals on the transformer: V+ and V- from them to the corresponding terminals on the garland, connect a wire with a cross-section of 1.5 mm2.
- Well, to control all this beauty, install a switch. Make sure that it is not set to zero, only to phase.
LED products consume a minimal amount of electricity, which cannot be said about conventional incandescent lamps.
Photos of examples of ready-made solutions
FKM_Bereich=3&FKM_PDB_TU=1&PKM_Objekt=4914&FKM_Seite=26975&U_Position=21&PKM_Bild=10622&url=/guide/design-examples-indoor/radiance-and-illumination-4914/images/eur-erco-radiance-and-illumination-simulation-1-2 1.jpg&S_Urbild =pboxx-pixelboxx-887761
Illuminated cornices
Another spectacular and at the same time practical lighting option is cornice lighting. In the previous part, we considered the option of attaching a waterfall curtain, including under the cornice; you can also attach other lighting options to it.
LEDs are much more durable and fireproof compared to all other lighting devices.
You can highlight any cornice:
- ceiling,
- wall-ceiling,
- wall.
Since the backlight requires low voltage, it does not damage the fabric of the curtains or the material of the blinds.
It is better to choose those models in which the part that is glued to the wall will be much wider than the ceiling part. That is, classic and decorative skirting boards will not work; it is better to choose a wide molding. But even in this case there are some nuances: make sure that the upper part of the molding is not positioned horizontally and is not slanted down from the wall, otherwise it will eat up the light.
The most suitable option is a polyurethane curtain rod for lighting; it was originally designed for convenient placement of light inside.
Choosing a lighting fixture to illuminate the cornice
Traditional lamps will definitely not be suitable right away. They can direct the light in a fairly powerful beam, and therefore fall unevenly. It is better to use LED strip or various types of garlands with LED lamps. It does not heat up as much and is more economical.
Lighting is selected in accordance with the curtains used.
Installation of cornice lighting
The person looking at the curtain should not see the tape. Ideally, it should be hidden inside the box.
- Glue the cornice onto the prepared wall.
- The cornice should be installed at a distance of 5-10 cm from the ceiling.
- Glue the corners of the baguettes together (corner to corner).
- We glue the LED strip to the wall or install lamps. Or we “invest” it in the space behind the eaves.
- We attach the power supply next to the wall or below. It is better to place it where access to it will be as convenient as possible, in a place where your hand can reach.
- Ready!
It is advisable to direct the light along a tangent line relative to the curtain.
Sequence of installation work
First of all, we thoroughly install the cornice on which the curtains will be hung. This is done in order to determine the optimal size of the future niche. But during the installation of a suspended ceiling structure, the cornice can be damaged, so it is advisable to protect it with a polyethylene box. If the moving elements are large enough and will interfere, then they must be removed.
Further work is performed in the following sequence:
- A wooden frame base for a tensile structure is mounted to the concrete slab. 2-3 cm is removed from the installed cornice and the timber is attached. A prerequisite is compliance with a single line of the lower edge of the main frame and the level of the stretch ceiling. The beam is located along the entire wall of the room.
- A profile in the form of an invisible wall molding, which is an integral part of the tension structure, is attached to the wooden frame from the eaves side. The profile is necessary for threading the fabric into it.
Installation of a stretch ceiling with a niche for curtains
The end result is a complete, perfectly flat ceiling surface with a hidden recess. The niche for curtains on the ceiling can only be seen when you come close.
Once again about the main thing
In order for the lighting decoration to really please you not only with beautiful effects, but also with ease of use and safety of operation, be sure to think through all the details before going to the store and starting installation.
Try to create smooth lighting, and no curtains or curtains should interfere with the light.
Advantages
By using this method for interior decoration, consumers receive the following benefits:
- creating an original and unique effect of falling sunlight at any time of the day;
- visual increase in living space;
- Possibility of installation inside and outside the house.
LED products consume a minimal amount of electricity, which cannot be said about conventional incandescent lamps. They are much more durable and fireproof compared to all other lighting devices. Since the backlight requires low voltage, it does not damage the fabric of the curtains or the material of the blinds.
It is necessary to design future lighting for curtains before installing the curtain rod, since power is supplied to the flexible board first. Hide the transformer in a box along with the tape, and use dowels inside the mounting niche.
At the same time, it is necessary to guarantee free access to the wires, as well as quick dismantling, which may be required in the event of a device failure.
To install you will need:
- electric drill (hammer);
- nails;
- screwdriver;
- power supply for LED;
- RGB strip;
- tool for removing insulation from the ends of the wire;
- soldering iron;
- glue.
Before starting the process, turn off the power supply, and then connect the wires according to the “phase to phase, zero to zero” principle. The V+ and V– pins are used to power the LED board.
Step-by-step instructions for installing the tape:
- choosing a wire of a suitable length;
- stripping ends (removing insulation);
- tinning of wire ends;
- selection of drilling points for installing the power supply (PSU) and attaching it to the wall or ceiling;
- connection of a 220 V phase voltage with a switch;
- connecting the ground wire and zero to the power supply;
- soldering all wires.
to contents
DIY installation
The most common type of cornice is a cornice with a side. This decision was made out of habit, when the eaves lighting was done using fluorescent lamps or neon tubes and the side hid them from view. LED strips are miniature in size, and there is no need to mask them in any way.
Today, experts do not recommend using curtain rods with a side.
The result of such illumination will be the formation of a light contour and unnecessary shadows on the ceiling, which will reflect all the unevenness of the side. But if this particular version of the cornice is chosen, it is best to install an LED strip on the side, which will not provide as much light as we would like. but it will be as uniform as possible.
The next option is a straight cornice. This is the most competent solution when creating hidden ceiling lighting. The LED strip must be placed closer to the edge of the cornice, due to which the distribution of the light flux will be uniform and the degree of illumination of the ceiling will increase.
Placing the tape on the wall is not a good idea. Firstly, a clear light contour and an unlit piece of the wall will be visible. Secondly, the LEDs will be visible and there is a possibility of glare.
The only case when this is permissible is when illuminating round niches. To obtain uniform illumination of the wall, it is recommended to place the LED strip on the surface of the cornice. This installation option will provide the most even lighting and will favorably emphasize the texture of the wall.
Reference by topic: Installation of LED strips with your own hands