- April 25, 2020
- Electricity
- Marina Lobacheva
LED strip is an ideal option for creating lighting in the kitchen. It is attached to cabinets or other parts of the kitchen unit. With its help, you can not only illuminate the work or dining area, but also improve the appearance of the entire room.
The installation process can be done by yourself, as it is very easy to figure out how to attach the LED strip to the kitchen set. Various methods can be used for this, but it is advisable to take into account the advice of professionals so as not to spoil expensive materials.
Concept and characteristics of LED strip
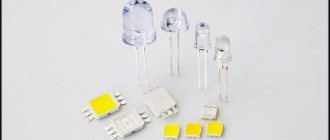
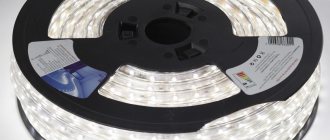
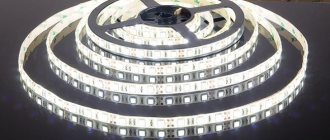
It is represented by a special tape, which is attached in different ways to different parts of the kitchen set, and is available in different lengths and colors. It consists of LEDs, represented by light-emitting diodes. They are semiconductor elements that emit light when electrical current is applied. The intensity of such radiation depends on the chemical composition with which the diode is filled.
The LED strip is connected using a stabilizer. If you connect directly, it may cause overheating and damage to the product. Lighting a kitchen set with an LED strip can significantly simplify the process of using the set, as well as improve the appearance of the entire room. Often the lighting is concentrated on an apron made of matte materials. This allows you to get soft and pleasant lighting.
The LED strip is made of a plastic base, which is equipped with a stabilizing load resistor. It is on this that diodes are applied that emit light.
Features of use
Before attaching an LED strip to a kitchen unit, it is recommended to study its characteristics. These include positive qualities:
- room owners can independently adjust the intensity and even color of lighting;
- the tape can be used to illuminate useful areas in the kitchen or as decoration;
- the strips differ in the number of LEDs and their colors, brightness and direction of light;
- Ribbons are available in multi-colored or plain colors;
- Some tapes are even equipped with a remote control, which greatly simplifies the process of using them, since you can remotely change the brightness and other parameters.
Anyone can figure out how to attach an LED strip to a kitchen unit, so you don’t have to use the help of professional installers. This allows you to save a large amount.
Benefits of use
Fixing the LED strip on different parts of the kitchen unit has some undeniable advantages. These include:
- long product life;
- high reliability of LED strip;
- absence of hazardous components;
- low electricity consumption;
- the luminous flux utilization rate is considered very high, as it is close to 100%;
- the LED strip is small in size, so it can be hidden in different niches or recesses, which prevents deterioration in the appearance of the room;
- the elements are completely safe to use;
- they are resistant to numerous mechanical influences;
- installation and dismantling are simple actions that can be easily accomplished on your own;
- The structure of the tape is considered simple, since there is no diffuser, reflector or lens.
Usually the tape is fixed directly above the work area, which simplifies the cooking procedure. Often, only lighting is used at all, so there is no need to turn on the central chandelier.
Wide variety of lighting for the kitchen
Depending on which LED strip you decide to choose for your kitchen, the impression of the entire interior largely depends. When searching for lighting and installation location, it is worth considering:
- room area;
- design;
- arrangement of interior items.
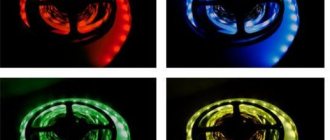
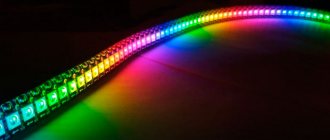
The advantages of LED strip for the kitchen are a large selection of brightness and color of light. Lighting can be made cold or warm, single-color or multi-colored. This is very convenient, as some people like dim light, while others like bright, cool colors. Most often, we recommend daylight glow (neutral), since it does not distort the color of food during cooking (which is important, for example, for confectioners) and is familiar to vision.
There are several other important factors that make LED strips the best option for the kitchen:
- small sizes - compact light sources do not spoil the design of other interior elements, but, on the contrary, emphasize them advantageously;
- low energy consumption - you won’t get huge electricity bills;
- safety – LEDs can be used under temperature changes and high humidity;
- durability – the backlight will last flawlessly for several years.
Which LED strip to buy for the kitchen primarily depends on your project. The scope for design ideas is limitless - the product can be cut to any desired length and mounted in places inaccessible to traditional light sources. You can install lighting along the entire wall, interrupt it with a hood, or focus on individual cabinets.
Where is it installed?
The connection of the LED strip is carried out after the formation of a special plan, which shows where its main parts need to be glued. Typically, a strip with LEDs is attached to the following elements of the kitchen set:
- under wall cabinets attached to the wall of the room, which allows you to direct light directly to the work area, which is used for cooking, washing food and other similar activities;
- in the top drawers, which makes it easy to examine their contents;
- in plinths, since they are usually represented by darkened areas of the structure.
If you do not decide in advance on the location of the lighting, this may negatively affect the operation of the entire room. Often it is necessary to completely dismantle some parts of the kitchen unit.
Location options
Before you organize a wardrobe with lighting, or illuminate your dressing room, decide exactly how the strip or spotlights will be positioned.
Some use a recessed furniture lamp, while others prefer more modern LED strips that take up minimal space.
To connect LED strips, you must use a transformer. It's a power supply. And you need to choose a place to place it.
In total, there are several options for how lighting in a closet can be implemented:
- from the outside;
- in the middle on top of the cabinet;
- on the front edge of the shelves inside;
- on the rear edge of the shelves;
- along the side walls.
You can place lighting elements inside and outside the cabinet.
These are the top 5 ideas that are usually used.
On the other hand, lighting the glass shelves in the closet will look very beautiful and also provide the necessary practicality.
Furniture lighting should be installed in such a way that when using shelves, doors and drawers, they do not touch wires, lamps, as well as ribbons or the power supply.
Therefore, everything should be planned in advance.
Preparation for installation
If you plan to install the LED strip in the kitchen with your own hands, then initially preparatory work is carried out. To do this, purchase the necessary materials and direct tape, which will be used to create the backlight. The following elements are being prepared for the planned work:
- LED strip of suitable power;
- electrical cable, its cross-section should be 0.74 mm;
- transformer;
- dimmer, sold together with the control panel;
- electric soldering iron;
- sharp scissors;
- material intended for soldering and rosin;
- Double-sided tape;
- electrical tape, which can be replaced with a thermal tube and a hair dryer;
- aluminum profile or PVC corner, which is intended for attaching the tape;
- electric drill;
- brackets for fixation.
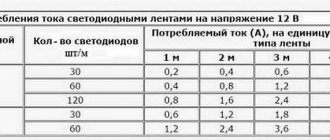
The power of the LED strip for a kitchen set is chosen by the direct users, but usually 12 W is used. Installation can be done in different ways.
Using tape
The LED strip is connected to the network using a transformer and stabilizer, but its fixation can be done using various methods. Often, ordinary double-sided tape is used for these purposes. The protective layer is removed from one side, after which the product is glued to different parts of the kitchen unit where it is planned to create lighting.
After this, the second layer is removed, to which a direct tape is applied, which is pre-cut into the required sections. The cutting procedure is performed only along special dotted lines, which are applied by the manufacturer.
In order not to use separate tape, choose a self-adhesive 220V LED strip. On the reverse side it is already equipped with a special adhesive base. First, the protective strip is removed, after which the tape is applied to the necessary elements of the headset. It is allowed to work on both flat and rough surfaces.
The tape is a very flexible element, so it can stick to curved and uneven surfaces. To increase adhesion, additional glue or paint is sometimes used. This method allows you to attach the tape, but it will not be possible to change its location in the future.
Installation steps
Installation work is performed in the following sequence:
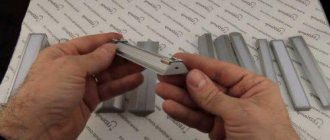
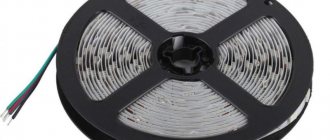
- The tape is most often offered in reels on which it is wound 5 m long. To cut off the desired section, scissors are used. Cut strictly along the marked line. Then clean the contact area from silicone (1-1.5 cm).
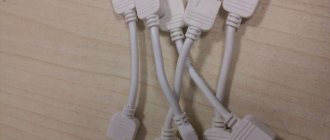
- 2 cables are soldered to the bare contacts. If soldering is not possible, use an alternative option - connection using connectors.
- When soldering is completed, insulation is carried out. The best option is to use heat shrink tubing. To do this, cut off a section 2 cm long and place it on the welded area. Then the tube is heated with a construction hair dryer, as a result of which it is fixed.
- The tape can be secured with either double-sided tape or special staples. The area where the lamp will be fixed is cleaned and degreased in advance. This is the only way to secure the device with the required quality.
- The location of the power supply should be thought out in advance. It is advisable to mount the transformer in close proximity to the tape. Then connect the plug to the cable.
- The conductors are connected using the parallel method.
- Install a plastic box. The conductor in it is fixed with brackets.
- If there is a dimmer, its installation is the final stage of work.
After this, the functionality of the system is checked.
Note! When installing the tape on the ceiling, use a polyvinyl chloride corner.
What to do if the tape comes off?
Typically, citizens prefer to glue the product, for which they buy a 220V self-adhesive LED strip. But sometimes manufacturers skimp on the adhesive base, so literally after a few days or months the tape begins to peel off. Usually the reason is poor preparation of the base or poor quality tape.
Therefore, before starting work, it is recommended to carry out some preparatory work with the base. It is cleaned of dirt and wiped dry. Next, a degreaser is applied, and the procedure is performed a few minutes before gluing the tape. If you buy inexpensive tape, it is advisable to secure it with your own high-quality double-sided tape.
Application of glue
People who are interested in how to attach an LED strip to a kitchen set often use glue for this purpose. Only superglue is selected, which has high adhesion and dries quickly. It will allow you to securely attach the tape, so it will not fall off under different influences.
It is advisable to use gel glue, as it is easy to use. In this case, there is no need to apply glue to the entire surface of the tape, since it is enough to use a drop of 5 cm of tape. The glue is applied directly to the surface of cabinets or other parts of the kitchen unit.
Buying aluminum tape
People who do not know how to make an LED strip on a kitchen set often choose aluminum tape. This is what sellers in construction stores recommend. This is due to the fact that the material is reliable and durable.
Initially, the tape is glued to the surface of the headset, and then the LED strip is applied. To increase adhesion, some people additionally apply a small amount of superglue. With this installation, aluminum not only acts as a method of fixation, but also plays the role of a heat sink and reflector.
Selection of cable cross-section
During installation, any cables with a cross-section from 0.5 to 2.5 mm2 are suitable. To accurately select the cross-section, you should use the following formula before installation:
Designations:
I is the current strength in the circuit; calculated by the formula: I = P/U, I = U/R, where P is the source power, U is the voltage, and R is the resistance;
p—resistivity; the value of this value is always constant, taken from reference books for different metals;
l — cable length in meters;
— a value characterizing the permissible voltage difference between the unit and the backlight.
Consider a table of power depending on the characteristics of the wire. The larger the cable, the less power is transferred to the backlight.
| Length, m | Output power, W | |||
| Section area, mm2 | ||||
| 1,5 | 2,5 | 4 | 6 | |
| 50,0 | 50,0 | 50,0 | 50 | |
| 2 | 45,5 | 47,2 | 48,2 | 48,8 |
| 4 | 41,5 | 44,6 | 46,5 | 47,7 |
| 6 | 38,1 | 42,3 | 44,9 | 46,5 |
| 8 | 35,0 | 40,1 | 43,4 | 45,5 |
| 10 | 32,4 | 38,1 | 42,0 | 44,4 |
Installation of aluminum profile
If the choice of LED strip for kitchen lighting falls on products that have high power, then installation of an aluminum profile is required. It can be overhead, mortise or corner.
Initially, with the help of fasteners, an aluminum profile is attached to parts of the kitchen unit. The tape is fixed inside it using tape or glue. Due to the presence of a perfectly flat surface, the product will hold firmly and reliably.
When removing the protective layer, conductive paths are often exposed, so if they are directly applied to the surface of their aluminum, this will lead to a short circuit. Therefore, to prevent such negative consequences, it is recommended to apply a layer of hot-melt adhesive that has insulating properties to the surface of the profile, and you can also make an insulating substrate.
During operation, you can attach a diffuser to the profile, which will soften the light from the backlight. It is fixed with plastic clamps or nylon ties.
What common mistakes are made?
If you do not understand how the LED strip is attached to the kitchen set, you can make many serious mistakes. These include:
- gluing high-power tape directly to the walls of cabinets without using a profile, which leads to the product falling off, and also the LEDs quickly fail;
- using a construction stapler, with which the tape is attached to a surface made of wood or drywall, but if you choose the wrong place for fastening, this leads to damage to the LEDs;
- gluing open LEDs directly to an aluminum profile, which leads to their rapid breakage;
- the use of a plastic profile, which does not provide the desired cooling effect, so you need to use only materials specifically designed for this work;
- the use of hot-melt adhesive, which when heated emits a harmful and unpleasant odor, and it can also lead to overheating of the LEDs.
Therefore, the choice of LED strip for kitchen lighting, as well as additional materials, should be done with the participation of professionals. How durable, safe and attractive the lighting will be depends on the correct choice of elements and the execution of the work.
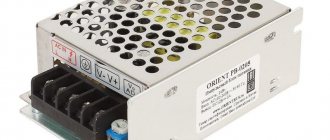
Choosing the right power supply
LED lighting cannot be connected directly to the network. This needs to be done only through a power supply, which is selected depending on the power and length of the tape. Its power should be 15-20% higher than the total power of all connected devices. You can find out the required indicators from a store consultant or read the product instructions.
Usually the power supply is made small, so it is easy to hide even in hard-to-reach places. It is worth thinking in advance where it will be located. The power supply must be in an accessible place, for example, a separate box, so that it can be accessed for servicing the equipment in the event of failure.
Where to hide the tape?
In order for the lighting to be beautiful and not spoil the appearance of the room, it is advisable to fix it in such a way that it is hidden. It can be hidden in different places:
- in ceiling niches;
- in recesses or niches on the wall;
- behind the ceiling plinth;
- fastening to the bottom or side of a wall cabinet;
- inside the kitchen unit.
Properly placed and correctly attached LED strip kitchen lighting looks bright and attractive. At the same time, the process of cooking or finding the necessary utensils and products is greatly simplified.
Useful tips
Even before purchasing the tape, you should take measurements of the place where it will be located. You always need to buy material with some reserve (15-25%).
After soldering is completed, it is recommended to check all contacts. There should not be any contact between them. Poorly soldered contacts often cause short circuits.
The transformer is not installed in a visible place. The optimal location for the unit is a cabinet. In this case, the conductor with the plug is routed to the socket. This location of the block is optimal from the point of view of aesthetics and as a way to minimize the risk of mechanical damage.