The LED board is made of segments that can be used as independent light sources. When connecting, it is important to know how to cut the LED strip if the entire product does not fit the dimensions of the installation site. For this purpose, there are most often marks on the board; the length of the segments depends on the model. You can cut the source to the required length with scissors or a sharp knife.
Why is this necessary?
LED filaments are often sold in stores in large rolls (from 5 meters), and when purchasing, it becomes necessary to cut off some part. Depending on the room in which the LED strip will be installed, sections of different lengths may be needed. Therefore, individual pieces of the required size are cut from the roll so that electricity can be supplied to them on both sides.
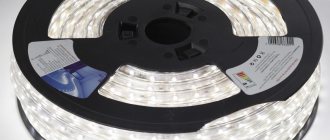
Standard 5 meter roll.
Soldering process
A soldering iron for a radio amateur is the main tool in his practice. It’s not for nothing that lovers of crafts with technology are jokingly called “those born with a soldering iron.”
Important!
We recommend unplugging the soldering iron every 15–20 minutes of operation. Moreover, on some devices, due to overheating, the tin stops sticking to the tip, and it becomes difficult to solder anything.
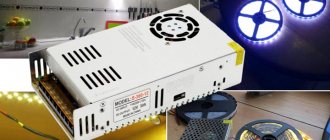
You can install a power regulator (dimmer):
Attention!
We recommend that you look at the chapter “Soldering errors” before soldering.
How to solder together
- We deserve the contacts of one piece of tape, then another. Be careful not to overheat them!
- We cut off the wires (three centimeters will be enough) and solder the pieces together.
- Pull the wires towards you to check the quality of the soldering.
- Wrap it with electrical tape or put on heat shrink and fix it with a hairdryer.
You can make a butt joint:
If the tape is cut by mistake or for other reasons in the wrong place, you can solder it (but this is a rough job). We do it in this order:
- Clean the current-carrying paths so that they are visible.
- Carefully apply solder to them.
- Two methods - end-to-end connection or wire connection.
- Check if the wires are tightly soldered. Just don’t yank them, but pull them a little towards you.
- Insulate with heat shrink or electrical tape.
Soldering silicone coated tape
Soldering the LED strip is made difficult by the silicone protective casing. Cut the protection with a sharp knife. We recommend buying silicone glue: when soldering, fill the bare area with glue.
Soldering wires at an angle
Soldered wires often become stiffer when they are saturated with flux and solder. Therefore, if you need to connect one part of the tape to another at an angle, it is better to bend the wires in advance. You also need to select wires of different lengths so that they do not interfere with each other when they are at an angle.
Cover the wires and contacts with electrical tape or heat shrink. A good method is to fill with silicone those places that are dangerous from electric shock or, for example, water ingress.
Where should you cut?
Before you start cutting the LED strip, it is important to understand: the luminous thread can be shortened only along specially marked lines - conductive strips. Structurally, they are made so that they are located between the contact pads of the diodes. Accordingly, there is no threat of damage to the LED strip. Cutting in the wrong place is almost guaranteed to destroy some diodes. If the tape is plugged in, a short circuit may even occur or the power supply will burn out. There are 2 conductive strips along the low- and high-voltage strips, and 4 along the RGB stripes.
Places for cutting on the RGB thread are additionally marked with a dotted line or a scissors icon.
What cutting steps occur
Different strip models have different numbers of LEDs per meter. There can be from 30 to 240. A standard 12-volt LED filament is cut in increments of 3 LEDs, a 24-volt filament is cut in increments of 6 LEDs. For a luminous thread with a voltage of 220 V, the cutting step range ranges from 0.5-2 m. This depends on the manufacturer’s brand.
In metric terms, the cutting step will be:
- for 30 diodes – 10 cm;
- for 60 diodes – 5 cm;
- for 120 diodes – 2.5 cm;
- for 240 diodes - 1.5 cm.
How to cut LED strip
Now let’s talk about how to properly cut LED strips of different voltages and types.
12 volts
The 12V LED filament has cutting lines between each group of 3 bulbs.
Here you can clearly see the places for the cut every 3 LEDs.
This tape has a thin coating that allows you to use a regular stationery knife or scissors. The main thing is accuracy in work. The tape is cut strictly along the dotted lines, otherwise some of the diodes will fail, and such a luminous device will only have to be thrown away.
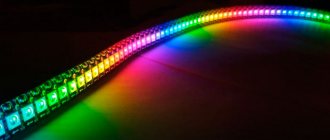
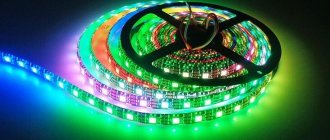
RGB technology
RGB is a module with the ability to configure and adjust parameters based on three primary colors.
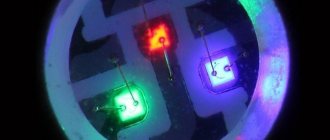
A three-color LED consists of 3 multi-colored crystals installed in 1 housing. The required color is obtained using various combinations of the basic colors (red, blue and green). Due to the close proximity, the glow mixes. Control requires a controller that changes color according to the installed program.
Three-color LEDs are different:
- with a common anode;
- with a common cathode;
- with six terminals (without matching through the anode or cathode).
For control it is used:
- with a combined anode - supply of negative pulses to the anode;
- with a combined cathode - supply of positive pulses to the cathode;
- with six pins - any option.
Differences from regular tape
RGB (the same as single-color) is an elastic, narrow board with conductive tracks.
Structurally there can be three types:
- from color SMD 3528 (5050), which are soldered side by side along the entire length of the strip, the controller changes the glow intensity separately for each color;
- from three-color SMD LEDs 3528 (5050);
- from WS2812B (WS2812S) LEDs equipped with a PWM controller.
Regardless of the type of LEDs, all RGB strips are divided into analog and digital. Firstly, the chips are connected in parallel, the controller can only change the color of the strip. Secondly, each diode is connected to a microcircuit that allows the controller to control individual chips or groups of chips.
Analog RGB strips are cheaper and easier to install.
Benefits and uses
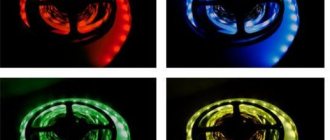
Multicolor LED strips make it possible to change the color of lighting manually or automatically, create lighting effects (flickering, shimmering), and light music.
A multi-colored source allows you to create different lighting systems:
- basic (power is selected based on the area and purpose of the room);
- additional (lighting of individual zones);
- workplace lighting;
- decorative.
In residential premises, RGB strips are most often installed around the perimeter on the ceiling or floor, in niches and arches, and on furniture. The ability to adjust the color and intensity of the glow allows you to change the atmosphere in the room and save on lighting stairs and corridors.
But this is not the main area of application; more often these sources are used:
- in shop windows;
- on billboards;
- on stages during entertainment events;
- on the facades of buildings before the holidays;
- for illumination of monuments, bridges, fountains, swimming pools.
LED type
Most often, tapes are made from RGB Led SMD 5050, consisting of three crystals of different colors. These LEDs have 6 pins, light flux 0.6-2.5 lm (depending on the color of the crystal). Power of a roll 5 m long 144 W. Another similar option is SMD 3528 with a light flux of 0.3-1.6 lm.
When purchasing, the type of LEDs is easily determined by size (3.5x2.8 mm or 5x5 mm).
Multi-colored SMD 3528 (5050) can also be soldered onto the RGB tape. The peculiarity of the latter is that there are 3 crystals of the same color in one chip. The luminous flux in this design is 0.6-2.2 lm for SMD 3528 and 2-8 lm for SMD 5050.
WS2812B and WS2812S are only externally similar to the SMD 5050, but have 4 pins and a PWM controller in the case. It allows you to create various lighting effects (“star rain”, “running lights”). You can even make an LED screen from these chips. There are two disadvantages: high price and the need for a special regulator.
Cutting during installation
Sometimes during installation of an LED filament you can inadvertently damage it. After all, this thing is quite fragile, and sometimes you have to bend it a lot. Fortunately, this is not a “death sentence” for the LED strip; such malfunctions are easily fixed. You need to cut off the part that has failed and measure its exact length. Then a new piece of strip is taken and installed in place of the old one using a connector. To connect these two parts, it is best to use a soldering iron. If the adhesion is very noticeable, this area (or the entire tape at once) can be isolated.
Advice. To prevent the LED strip from breaking down during installation, do not bend it to a radius of more than 5 cm, wrap it around objects, or weave shapes or knots.
Pros and cons of different connections
Let's look at some of the advantages and disadvantages of connecting diode strips using the two above methods in order to see what is the best way to connect these lighting devices.
Connection with connectors
| Advantages | Flaws |
| Easy to install and dismantle | Fear of rooms with high humidity levels |
| Have many different types | Rapid oxidation of contacts |
| Tapes can be joined into different shapes | Poor quality connectors (if you buy bad connectors, there will simply be no contact and the tape will not even light up) |
| Does not require additional insulation | The junction of two pieces of tape is visible |
| Available for sale | |
| Inexpensive in cost |
Solder connection
| Advantages | Flaws |
| Soldering allows you to make ribbons that can then bend in any direction | The difficulty of soldering without experience |
| Connection reliability | Fear of high temperature tape |
| Contacts do not oxidize | You must have a soldering iron with a thin tip, rosin and thin solder. |
| Free connection | |
| Invisible tape connection point |
No markings: how to cut such a tape
Sometimes you come across LED strips on the shelves without marking the conductive strips with dotted lines, symbols, letters and other marks. It is best to refrain from buying them. It's not just the lack of clues. Such a device will most likely be of low quality.
If you still have to deal with an LED strip without markings, there is no need to despair. The contact pad will be a reliable reference point. It disrupts the visual “harmony” of the light filament and looks like an extension.
The cut line creates a slight expansion between the diodes.
You need to cut exactly in the middle of this area. Again, in most LED strips, the cut point is located every 3 diodes - you can also rely on this with confidence.
Connecting the controller
RGB controllers are used to control the operation of color LED strips. Connecting these devices is also not particularly difficult. The red and black wires coming from the adapter are connected to the controller input
When connecting them, it is important to observe the polarity (red wire is “plus”, black wire is “minus”). Next, the wires going to the LED strip are connected to the controller output
Markings used:
- R – wire with red insulation.
- G – with green.
- B – blue.
The fourth wire is common. As when connecting a single-color tape, it is undesirable to combine sections of them with a total length exceeding 5 m into serial connections.
The infrared sensor with which the controllers are equipped should be placed in such a way that its location does not interfere with the transmission of the control signal from the remote control.
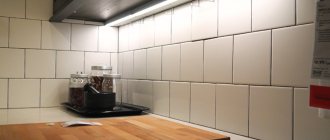
LED ceiling lighting is most in demand as additional lighting systems that can advantageously highlight certain interior details, emphasize some of its elements, or highlight functional areas of the room. Since the installation of LED strips is quite simple, and their price is quite reasonable, today these devices are quickly gaining popularity as an element of home electrical wiring.