Applicability
Use helps to collect from 15 - 20 meters or more into one circuit and control it using one controller. It follows that it is used wherever the length reaches more than 10 m, namely:
Ceiling lighting;
Illumination of facades of buildings and structures;
Illumination of large signs;
Decorative lighting of furniture (if the length is more than 10-15 meters);
Etc.
When choosing a controller, pay attention to the need to purchase an RGB amplifier - this will also remove excess load and ensure long-term operation
How to install?
See the connection diagram or how to connect below:
2 Podkl RGB lentyusilitel posled
As can be seen from the diagram, the RGB amplifier is additionally supplied with power from the power supply (connected in parallel or an additional power supply is used) and the end of the tape opposite the controller should be connected to it, and on the other side the second end of the tape is connected to the amplifier.
There are inscriptions OUTIN - for connecting the LED strip coming from the controller and OUTPUT - for connecting the second segment.
As the length increases, when you need to connect 3 or 4 segments, it will look the same, and the number of RGB amplifiers will increase.
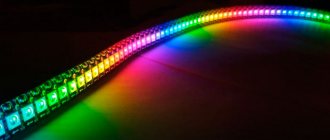
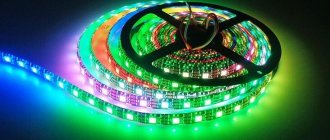
What is RGB LED strip
RGB (Red, Green, Blue - red, green, blue) is an LED strip that can change its color during operation. Each LED module contains three LEDs - red, blue and green. By changing the brightness of each crystal separately, you get any color in the visible spectrum.
What is rgb led
Externally, RGB LED differs from monocolor only in the number of pins. There are 4 of them - three of them for powering each individual crystal and one common plus.
There are special LED strips with five terminals. They are marked as LED RGB W (W – white). The fifth pin is responsible for white light. The fact is that in a three-color diode, white color is obtained by mixing all three colors in equal proportions. This “white” is different from pure mono light. Therefore, the led type appeared with a fourth white crystal.
These tapes (like monocolor ones) have several classes of dust and moisture protection:
- IP20 – without protection, afraid of moisture and dust;
- IP67-69 – not afraid of dust, can be used in a damp environment (bath, aquarium).
Connecting RGB LED strip
The correct order of connecting the circuit elements is as follows:
Correct connection order
Remember. Sections of tape longer than 5 meters must only be connected in parallel.
What happens if you connect it in series?
Firstly, you will noticeably lose brightness at the end of the section. Although LEDs have very low resistance, there are losses. With such a length, the voltage at the end will be about 10V. Reduced voltage will result in reduced brightness, already noticeable to the eye.
Incorrect connection
Correct connection
Secondly, the conductive tracks of the tape are designed for a maximum length of 5 m. By connecting 5 more in series, the tracks will overheat and the lighting will most likely burn out at the very beginning of the section.
RGB connector
The tapes can be connected to each other using soldering or terminals. For single-color options, two-pin terminals (connectors) are sold, for RGB - four or five. Please check this point when purchasing.
Learn more about how to connect rgb tape to each other.
The power supply is connected to a 220V network (AC terminals, polarity is not important), converts alternating voltage to direct 12V (terminals V+, V-). When connecting the following circuit elements, it is important to observe polarity.
Connection terminals on the power supply
The RGB controller is connected after the power supply (maintaining polarity), and the RGB strip is connected to it. Each pin on the case is designed for a specific LED output. If you mix them up, nothing bad will happen, just the colors will be mixed up.
Terminals for connecting the controller to the LEDs
As a result, the finished circuit assembly should look like:
Complete circuit
The amplifier is similar in appearance to the controller, it is connected separately to the power supply, only it has not one die with terminals, but two. Most often labeled as Led Amplifier, it is installed in the tape gap. Connects according to the diagram:
The procedure for connecting an RGB amplifier to a circuit
Purpose of led amplifier terminals
Let us now analyze the connection diagrams for tapes of different lengths with and without an amplifier, with one or more power supplies.
Connection diagram for RGB LED strip without amplifier
This is the simplest scheme for switching on an RGB LED strip up to 5 meters long through a controller with a remote control.
Electrical connection diagram for RGB lighting
To connect an RGB LED strip 10 or 15 meters long, make sure that the controller and power supply have enough power (with a reserve), and connect according to the following diagram:
Connection diagram 10 or 15
Connection diagram for strip with RGB amplifier
We use an amplifier if the controller power is not enough. If the power of the power supply allows you to connect the controller and amplifier, we use the following circuit:
When the total power of the controller and amplifier is higher than the power of the power supply unit or it is irrational to use a block of such power (large, very hot or noisy), then we connect the led amplifier to a separate power supply according to the following diagram:
Connection diagram for amplifier with 2 power supplies
Using this scheme, you can increase the total length of the tape as much as you like. All of it will be controlled from one remote control.
In addition to serial connection, as in the examples above, amplifiers can be connected in parallel.
Diagram of parallel connection of several RGB amplifiers with one power supply.
Scheme: one power supply several amplifiers
Circuit with several parallel amplifiers with separate power supply.
Scheme: several parallel amplifiers with separate power supplies
If there are no terminals, use a soldering iron and mounting wire, BUT do not overheat the contact pads. Learn more about how to connect the tape.
The correct connection diagram for 20 meters of RGB tape is shown in the video.
What you need to connect an RGB strip
Let's figure out how to properly connect an RGB LED strip. For a complete lighting scheme we will need:
- LED Strip Light;
- power unit;
- RGB controller with remote control;
- RGB amplifier (optional).
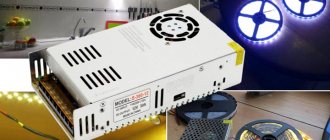
power unit
The power supply for the LED strip must be selected taking into account the expected load and its future location. Let's look at the example of SMD5050 60 led. Power consumption – 14.4 W/m.
With a length of 5 meters, the required power of the power supply will be:
5m * 14.4W * 1.25 (safety factor) = 90W
Types of power supplies for LED
If the length is 15 meters, then the power supply is accordingly needed 3 times more powerful - 270W. If the length of the tape is 20, 25 or more meters, it is advisable to install several power supplies of lower power.
The degree of protection depends on the location of the power supply. If located in a dry, closed room, IP20 is sufficient. If in a bathroom or other aggressive conditions, then no lower than IP67.
Read more about calculating the power supply for an LED strip.
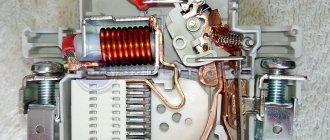
RGB controller
Light control is carried out through a special controller. It connects between the power supply and the LEDs, and is equipped with a wired or wireless remote control.
RGB controller
The controller, like the power supply, is selected depending on the total power of the tape. With the difference that 25-30% of the reserve is added to the required power of the power supply, and the controller is selected closely according to power.
For example . You need to connect 10 meters of SMD5050 60 led. The power of 1 meter is 14.4 W, so we need a 144 W controller.
According to the control principle, they are distinguished: wired - often mounted on the wall; wireless controlled via:
- Infrared port (IR) – the remote control must be in line of sight;
- radio channel - allows you to use it within the home;
- Wi-Fi – allows you to control both from the remote control and from an application on your smartphone.
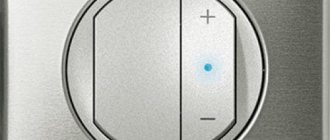
Lighting control from your smartphone
After installation and connection, you will be able to:
- Set color manually. Both pure colors and mixed shades are available.
- Adjusting brightness is similar to a regular dimmer (more about dimmers).
- Automatic modes. These include color switching, fast flickering, smooth changing, smooth fading and other algorithms.
What if the power of the RGB controller is not enough to connect all the lighting (more than 20 meters)? You can install 2 controllers, but you will have to control the light in one room from two remote controls, which is inconvenient and expensive. The second (correct) option is to use an RGB amplifier.
RGB amplifier (led amplifier)
This device allows you to amplify and transmit the signal from the controller further along the circuit. Thus, by using several amplifiers, you can assemble a lighting circuit of any length.
RGB amplifier (led amplifier)
The amplifier is installed in the gap of the tape and has a separate connection to the power supply (about connection below). We select the power based on the remainder of the tape, which does not have enough controller power.
Some people think that an amplifier is needed to increase brightness and should be used even for a distance of up to 5 meters. This is fundamentally wrong.
A good example . You need to connect 20m SMD 3528 (14.4 W/m), with a total power of 288 W. We only have a controller with a power of 216 W and a power supply of 300 W. Accordingly, you need an amplifier:
288 W - 216 W = 72 W
The power supply is 300 W, which is enough to power the controller and amplifier. If the power supply is not enough (for example, 250W), you need a separate power supply for the amplifier.
Typical connection errors
Serial connection of more than 5 meters of tape. This cannot be done.
Twisting instead of soldering wires (or connectors). If you don't want to solder, use connectors, they're cheap.
Failure to follow the connection order: power supply ⇒ controller ⇒ tape ⇒ amplifier ⇒ tape.
Save on the power supply by buying “back to back” in terms of power. Unfortunately, LEDs are both plus and minus in terms of watts consumed. If you buy a power supply without a 20-25% reserve, it will wear out and in a year you will buy a new one, but with a reserve.
Buying a controller with excess power. It won't get any worse, but you'll overpay. Correctly select the power 1 to 1.
Selection of very powerful tapes and installation without heat sink. For example, SMD5050 120 led/m consumes 28.8 W/m. With such power, the LEDs heat up quite strongly and the structure must be mounted on a heat sink - an aluminum profile. Otherwise, the diodes begin to degrade, lose power and burn out.
“Many, Many Meters of Tape” or RGB Funner
As many will know, the Chinese have long conquered the world. At least in the field of consumer electronics, for sure. But does she always do everything we want from her? Hardly. At least this is what happened when I decided to look for an amplifier for the RGB output of my RGB DASHBOARD CONTROL device (an inquisitive reader will find entries on my blog and in the logbook of my car). Next there will be a small deepening and bombarding the reader with all sorts of technical words. Therefore, I ask those unprepared to go straight to the end of the article, because what follows will be a story about how I made this very amplifier. Those remaining after these words - welcome! I'm writing for you =)
First, educational program - why are they even needed? Let's say you're doing asphalt illumination (that's what I call it, sorry) =) On average, about 6-7 meters of tape are used per car. If you use a Chinese controller (those with a remote control), then even though it’s creaky, it will handle that amount. But what if you need to connect to any other device? Well, at least my RGB DASHBOARD? Each output draws only 120 milliamps (or rather, 3 x 120 mA, because there are 3 colors). This is enough to illuminate the tidy, but what if you connect the lighting for the footwells, or the asphalt lighting, or the wheel arches and rims? Here we need to strengthen the output.
Or, for example, you are lighting a room. Let’s say it takes you 20 meters to cover the entire perimeter. You won’t be able to simply turn it on sequentially - and the controller won’t work, and the tracks on the first tape will stupidly burn out. They are not designed for such currents. This is where an RGB amplifier comes in handy. From the first tape the wires go to the amplifier, and from the amplifier to the second tape. And so on as many times as you like, even if you can reach Antarctica =)
Now about my adventures: There are now more than a dozen RGB amplifiers on the market, 90 percent of them are from the Middle Kingdom. They differ from each other like... twin brothers =) The elemental base is the same, the parameters are the same. Except that some people make them even cheaper by throwing out what they consider “unnecessary” optical isolations and transistors for driving powerful output MOSFETs. What do we get as a result? It seems to work, but does not produce the declared power, it gets hot like an iron. We turned it on from a separate power supply - we got fireworks and threw them in the trash can...
And so, after reviewing about a hundred amplifiers, I seemed to have found what I was looking for. Optical isolation of the input - you can safely extend the tapes without worrying about the occurrence of current loops and other debris.
A more or less efficient MOSFET driver based on bipolar transistors - the output mosfets will not get crazy hot. But it completely flew by with the maximum supported PWM operating frequency. In all such amplifiers, the optical isolation usually contains PC817 optons (and their analogues) with a maximum frequency that does not allow working with the RGB DASHBOARD CONTROL controller. It seems to work with Chinese rattles, but if you try to connect it to some other (with more serious parameters) RGB signal source, that’s it. Bobby is dead! It does not handle more or less serious frequencies. Weak.