Basic set for learning PCB soldering. Learn to solder. This will come in handy!
What's in the set?
Soldering iron and 3 printed circuit boards with parts. There are 113 components in total. For whom? For children and adults who want to learn how to solder printed circuit boards.
The basic set will teach you how to use a soldering iron. The set contains 3 boards and components for them, by soldering them you will get a synthesizer, a heart of LEDs and a flashlight.
| If the task is to study the principles of operation of electronic devices, then there is nothing better than assembling circuits on a breadboard. You can easily, quickly and clearly connect various components together on a breadboard and implement a variety of projects. From the simplest circuit breakers and oscillating systems to circuits based on logical elements and sound-generating circuits. This is exactly what the starter and main sets “Evolvector” of level No. 1 are dedicated to. |
However, if you are seriously interested in electronics, then after gaining basic knowledge of assembling electronic circuits, you will probably want to move on to the next stage of studying electronics. Of course, this will involve the creation of more complex or more reliable and durable electronic devices.
Have you seen that modern computers, phones, tablets and other electronic equipment are assembled on one or more breadboards?
If you open the case of any modern electronic device, you will see that it uses only printed circuit boards. And various chips and components are soldered to the board.
The use of printed circuit boards in consumer goods is absolutely logical. Due to the fact that all the elements are soldered to the board, they are very securely attached to it. Unlike circuits assembled on a breadboard, printed circuit boards can be rotated and shaken as desired. In this case, you don’t have to worry at all about some important wiring falling out or contact between electronic components being lost over time. And the small size of printed circuit boards is an undeniable advantage in consumer electronics. All other things being equal, a circuit assembled on a breadboard is many times larger in size than one made in the form of a printed circuit board. Small size is very convenient.
Therefore, inevitably, in the life of every lover of electronics (as well as robotics), sooner or later there comes a time when it’s time to move on to working with printed circuit boards. And you can’t do anything without them in your projects.
The Evolvector Basic Set for learning how to solder printed circuit boards is specially designed to make the transition from breadboards to printed circuit boards as easy and simple as possible. The set contains an extensive training course that will help you quickly master the intricacies of soldering work and protect you from mistakes common to novice installers. Particular attention is paid to the correct selection of tools and materials so that soldering brings only pleasure and there are no problems when performing this type of work. Moreover, this training course is reflected not only in the textbook included in the set, but is also implemented in the form of training videos. This makes mastering soldering as visual and efficient as possible.
Of course, in addition to educational materials, the kit includes everything a beginner will need. This is a necessary tool, a special balsa wood backing to protect furniture from damage when performing soldering work, materials in the form of fluxes with solder, and, of course, several sets of components for soldering your first devices.
The design of these devices includes components made in both DIP packages for through-hole mounting and SMD packages for surface mounting. In fact, when assembling a “flashlight”, “electric piano” and “dynamic light heart” you will have to solve all kinds of problems that arise during soldering. The skills acquired will allow you to solder devices of almost any complexity in the future.
The Evolvector basic set for learning how to solder printed circuit boards is one of the best ways to acquire the first skills in competently mounting electronic components on printed circuit boards.
High-quality soldering is available to everyone!
Basic definitions
Soldering is the process of joining parts made of metals and non-metals as a result of their heating to a temperature below the melting point, wetting with solder, its flow into the gap and subsequent crystallization. In this way, elements from any materials, different thicknesses and shapes are connected. When soldering, a reliable, strong seam is obtained, suitable for further separation and re-soldering.
For soldering you need to have the necessary tools and consumables. It is convenient to purchase universal do-it-yourself soldering kits, which include:
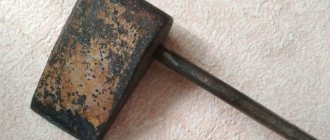
- soldering iron - the main tool of a soldering iron; the soldering iron tip is heated from the heating element up to 3000C;
- solder - an alloy or metal with a lower melting point than the components being connected, is introduced into the gap between the surfaces of the elements;
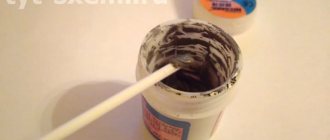
- flux is an active substance that serves for improved soldering of products and prevents the formation of an oxide film at the seam.
Set contents:
| 1. | Tutorial - Basics of soldering printed circuit boards. | - 1 PC. |
| 2. | DVD with educational materials | - 1 PC. |
| 3. | Soldering iron with a long-lasting tip - 25 W. | - 1 PC. |
| 4. | Soldering iron stand | - 1 PC. |
| 5. | Wire cutters | - 1 PC. |
| 6. | Long nose pliers | - 1 PC. |
| 7. | Slotted screwdriver (-) | - 1 PC. |
| 8. | Protective glasses | - 1 PC. |
| 9. | Tip cleaning sponge | - 1 PC. |
| 10. | Circuit board cleaning brush | - 1 PC. |
| 11. | Straight tweezers | - 1 PC. |
| 12. | Angled tweezers | - 1 PC. |
| 13. | Substrate for installation work (cork) | - 1 PC. |
| 14. | Solder POS-61 (wire diameter 1 mm) | - 1m. |
| 15. | Flux (water-soluble) in a bottle with a brush | - 20 ml. |
| 16. | Pine rosin | - 20 gr. |
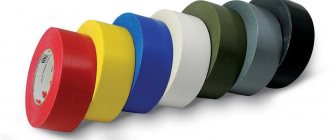
| 17. | Insulating tape | - 1 pack. |
| 18. | Heat shrink tube with a diameter of 2 mm | - 50 cm. |
| 19. | Heat shrink tube with a diameter of 4 mm | - 50 cm. |
| 20. | Braid for desoldering | - 30 cm. |
| 21. | Desoldering wire | - 1m. |
| 22. | Set of parts for soldering the device - “LED flashlight” | - 1 PC. |
| 23. | Set of parts for soldering the device - “Electropiano” | - 1 PC. |
| 24. | Set of parts for soldering the device - “Light-dynamic heart” | - 1 PC. |
How to solder pipes
Copper pipes are soldered using a high-temperature method with any hard copper solder with activated flux paste, which does not require removal of residues. Next, there are 3 options:
- In copper (brass, bronze) couplings - soldering fittings.
- With full distribution.
- With incomplete distribution and compression.
Soldering copper pipes into fittings is more reliable than others, but requires significant additional costs for couplings. The only case when it is irreplaceable is a drainage device; then a tee fitting is used. Both soldered surfaces are not tinned in advance, but are coated with flux. Then the pipe is inserted into the fitting, securely fixed and the joint is soldered. Soldering is considered complete when the solder stops going into the gap between the pipe and the coupling (0.5-1 mm is needed) and protrudes outward as a small bead. The fastener is removed no earlier than 3-5 minutes after the solder has hardened, when the joint can already be held by hand, otherwise the solder will not gain strength and the joint will eventually leak.
How pipes with full distribution are soldered is shown on the left in Fig. The “distributed” soldering holds the same pressure as the fitting one, but requires additional pressure. special tools for unrolling the socket and increased solder consumption. Fixing the soldered pipe is not necessary; it can be pushed into the socket with a twist until it jams tightly, so soldering with full distribution is often done in places that are inconvenient for installing the clamp.
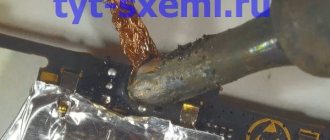
Soldering copper pipes
In home wiring made from thin-walled pipes of small diameter, where the pressure is already low and its losses are insignificant, soldering with incomplete expansion of one pipe and narrowing of the other may be advisable, pos. I on the right in Fig. To prepare the pipes, a round stick made of hard wood with a conical tip of 10-12 degrees on one side and a truncated-conical hole of 15-20 degrees on the other, pos. II, is sufficient. The ends of the pipes are processed until they fit into each other without jamming for approx. by 10-12 mm. The surfaces are tinned in advance, more flux is applied to the tinned ones and they are connected until they jam. Then they heat until the solder melts and prop up the narrowed pipe until it jams. Solder consumption is minimal.
The most important condition for the reliability of such a joint is that the narrowing must be oriented along the flow of water, pos. III. Bernoulli's school law is a generalization for an ideal fluid in a wide pipe, and for a real fluid in a narrow pipe, due to its (liquid) viscosity, the maximum pressure jump shifts opposite to the current, pos. IV. A component of pressure force arises, pressing the narrowed pipe against the distributor, and the soldering turns out to be very reliable.
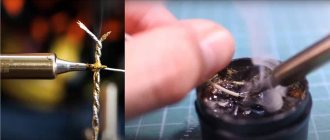
Soldering wires: what do you need to know for quality work?
- Remove the insulation to the desired length, usually 3-5 cm.
- If necessary, clean and degrease the wires (depending on the type of wire).
- Twist the wires tightly together.
- Cover the soldering area with flux.
- Place solder on the tip and solder the twist. It is important to heat the wires evenly so that the solder covers all surfaces and fills the cavities.
- Insulate the resulting connection using heat shrink tubing (must be put on before soldering) or regular electrical tape.
If the soldering iron is new, you need to turn it on for a few minutes and let it run “idle”. This is necessary for the factory grease to burn out. With such preparation, the soldering iron may smoke, so do not be alarmed.
Usually soldering irons are sold with a tinned tip (coated with a layer of tin). If the tip is uncovered, it needs to be lightly sanded with sandpaper, heated, then dipped in flux and coated with solder.
Sometimes even a tinned tip needs to be lightly cleaned before soldering. During operation, the tip becomes covered with an oxide film, which impairs the adhesion of solder. To do this, lightly clean it with sandpaper or a cloth, depending on the degree of contamination.
Then you can proceed directly to soldering. It is usually necessary to tin both parts. To remove oxides, you can use a soldering iron tip, sandpaper or a sharp knife.
Soldering aluminum with copper, tin and rosin
So how to solder aluminum with copper so that the connection is high-quality and durable. In terms of complexity, the method of tinning aluminum with tin and rosin is even easier than tinning aluminum with F 64 flux. But the quality and reliability when tinning with rosin will be high. When tinning aluminum in rosin, you need to make or select a low bath for liquid rosin (rosin 60% and alcohol 40%).
Regarding the method of soldering aluminum with a soldering iron with a rosin solution, I did something like this. I pre-cleaned the surface, lubricated it with a solution and sprinkled it with copper or iron filings. Then, pressing with the soldering iron tip (the harder the better) and stripping off the oxide, I tinned it with regular solder.
Soldering an aluminum tube with a copper one.
Useful tips Connection diagrams Principles of operation of devices Main concepts Meters from Energomer Precautions Incandescent lamps Video instructions for the master Testing with a multimeter
Pros and cons of the profession
pros
- The profession can be mastered after 11th grade.
- The master receives a huge number of orders, because BGA elements often fail. He can fulfill up to 5 orders per day.
- The work does not involve heavy physical labor; the master performs assigned tasks in a warm and comfortable office/workshop.
- You can get a job in a good service center that will provide the craftsman with stable orders and the necessary tools.
- A BGA soldering technician can open his own workshop.
Minuses
- Expensive training, but high fees for work allow you to quickly recoup the cost of the course, which offsets this disadvantage.
- The work is monotonous and very painstaking.
- High responsibility, because the master deals with expensive equipment and gadgets.