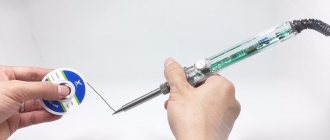
Soldering iron. What he really is? This is a device used not only in soldering, heating and melting various metal parts, but also in tinning or any other electrical processes.
This device is capable of converting one type of energy into another (usually electrical into thermal). Thanks to this, the “system” heats up (the temperature can reach up to 450 degrees) and the built-in tip, due to which melting, joining, etc. is carried out.
What kind of soldering irons are there?
Soldering irons vary in heating, design and purpose. There are both gas and arc ones. But it is electric soldering irons that have gained the greatest popularity. In this article we will look at different types of soldering irons and soldering stations, and their features.
We will mainly consider tools for soldering electronic circuit boards, rather than water pipes and massive structures.
Copper and “eternal” stings
Before reviewing the soldering irons themselves, you need to give a general idea of the main types of tips and their differences.
There are copper tips, and so-called non-burning “eternal” tips.
Features of copper tips
Copper tips are the most common type of tips. However, today they are losing ground to other types of stings. Let's look at the pros and cons of copper tips.
Pros of copper tips:
- Low price;
- Available at any radio store;
- They heat up faster and lose heat more slowly;
- Copper blades are low maintenance. They can even be cleaned with files;
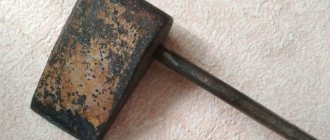
- Copper tips can be machined, i.e. give them shape with a hammer;
- They make it easier to start your journey in soldering.
And yet, the disadvantages of copper tips are quite critical:
- A meager set of stings in shape and size. Even if you find a thin copper tip. then it will quickly lose its shape;
- There is also the need for tinning before work. It's not difficult, but it takes time;
- Copper tips quickly lose their shape due to high temperatures and need to be replaced.
Care of copper tips
It's time to forget about cleaning the tip with wooden planks. For these purposes there are sponges and copper shavings.
Caring for these stings is simple. Excess solder and soldering flux residues can be removed with a damp sponge. And with the help of copper shavings you can remove both excess solder from the tip and carbon deposits from its surface.
As a last resort, you can process the surface of the copper tip with a file.
You can also give them the desired shape using a hammer and anvil. They are easily deformed by light blows with a hammer.
Copper tip tinning
Before you start soldering, the copper tip must be tinned, i.e. Cover the work surface with a small layer of solder.
Without tinning the copper tip, soldering will be difficult.
Leading fireproof tips
This is a type of tip (they are also called “eternal”) that does not need to be tinned before starting work, does not lose its shape, and can be used for years. They have a special coating, usually a thin layer of nickel alloy. These types of stings have their own significant advantages and disadvantages.
Advantages of fireproof “eternal” stings:
- Can be used for a long time;
- There is no need to tin them;
- Wide variety of different shapes and sizes;
- High-quality tips keep their proper shape for a long time.
Flaws:
- It is strictly forbidden to clean such tips with a file, needle files or sandpaper. You risk destroying the non-burnable surface of the sting. An exception is copper shavings for cleaning carbon deposits and excess solder;
- The tip gives off heat quickly and gains it more slowly, unlike a copper one (strongly dependent on the design of the tip and the soldering iron as a whole);
- Very easy to care for. Beginners may have difficulty with them;
- Non-burnable surfaces are easily corroded by soldering acid;
- It is more difficult to get used to them after copper stings.
Caring for unburnt tips
Non-flammable tips cannot be handled or cleaned with any tools. You can clean the surface of the tip from excess or old solder with a damp sponge.
The sponge should not be too wet, otherwise there will be splashes and steam. You can remove oxides and excess solder from the tip with copper shavings. Copper shavings do not damage the coating of the tip.
But the main thing to remember is one rule - there should always be solder on the tip. The exception is when you need to remove excess solder from the board or parts.
We removed the braided solder from the board contacts and immediately applied new solder to the surface of the tip.
Solder on the tip protects the working surface from strong oxides that arise during soldering due to air.
If the tip is covered in oxides, then solder will stop sticking to its surface.
It can be re-tinned, and even restored using a sting activator. Read more in this article. If you had to solder with acid, then immediately after work clean the tip with a sponge or shavings to remove solder, and cover the tip with fresh solder.
It is also unacceptable to mechanically process a non-burnable tip or shape it with a hammer (as is done with copper tips).
In terms of a number of advantages, “eternal” stings are in the lead. Just one good quality tip can be used for years, and it will be like new. But not everything is as simple as it might seem at first glance.
Application of technology
When tinning, tin or alloys based on it are used.
Tin coating is used for:
- application to brass parts that are subject to soldering;
- protection of surfaces of steel products during nitriding;
- separating metal products by applying a layer of tin when mating copper surfaces with steel or aluminum in order to equalize the electrode potentials;
- To protect against the effects of sulfur contained in the rubber insulating layer, it is necessary to tin the cable;
- applying a corrosion-resistant coating to tin, which is used for the manufacture of canning containers;
- protection of various metal products from rust.
Tin-lead coating (PLC) is used in the following cases:
- preparing radio components for soldering and protecting them from corrosion;
- Tinning wires to improve solderability.
The recommended thickness of the poluda layer is given in the table.
| Purpose | Thickness, microns |
| Protection of steel parts: | |
| from corrosion | 21-24 |
| during nitriding | 9-12 |
| when gumming | 12-15 |
| Improved solderability: | |
| spring parts | 3-9 |
| steel parts | 6-15 |
| parts made of copper and copper alloys | 3-9 |
| parts made of aluminum and its alloys | 6-15 |
Conditional separation of instruments
All tools (no matter for what job) can be divided into three conditional groups:
- Tools that require experience to operate. They do not tolerate mistakes, and give a false idea of the craft;
- Tools that don't require much experience. They will help you learn this or that job, and tolerate the mistakes of beginners;
- Professional tools that are too good for beginners. They require a lot of experience to realize their rich potential in work, but can also help in training.
Now let's look at examples of soldering irons and soldering stations.
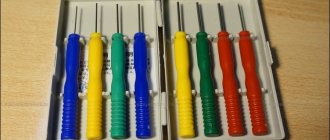
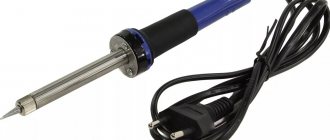
The simplest nichrome and EPSN soldering irons
The most popular soldering irons are nichrome soldering irons with copper tips without a temperature controller.
These are old Soviet soldering irons and EPSN. They work very simply.
The nichrome spiral heats up from the electric current passing through it (usually a mains voltage of 230 V). And it heats up the soldering iron tip.
Soldering irons with this design have been around since the dawn of electronics. They are still ideal for soldering wires and simple DIP mounting of large parts on boards. And also for soldering radiators and cooling systems.
Conventionally, 60 years ago they produced more soldering irons. Not every KT315 could withstand huge stings that heated up to 380 ℃. Radio amateurs soldered as best they could. Someone assembled a temperature controller using triacs. And someone wound copper wire over the tip, having previously tinned the edge of the wire. And in this way an even smaller tip was obtained, which was heated from the main one to acceptable temperatures.
These soldering irons are already obsolete. Yes, they are still being produced, but this is due to their cheapness and simple assembly. Of course, modern soldering irons are much better than their previous generations, but due to their features and capabilities, they are poorly suited for thin SMD soldering.
The tip of such soldering irons is usually secured with bolts or nuts with bushings. The advantages of such soldering irons:
- Low price;
- Sold in any store for radios, electricians and apartment repairs;
- They are ideal for soldering wires and large DIP pins.
However, in current realities, such soldering irons have significant disadvantages:
- Even the smallest soldering iron (25 W) overheats boards and parts. It is necessary to assemble an additional temperature regulator to reduce the temperature at the soldering iron tip;
- There is no grounding;
- As a rule, such soldering irons are powered directly from the mains and are not controlled by anything. Yes, you can buy a soldering iron powered by 40 V with a step-down transformer, but the price will be higher;
- Lack of even the simplest temperature display, not to mention calibration;
- Poorly suitable for fine work;
- It takes a very long time to heat up and cool down (heating time can reach 10 or 15 minutes depending on the size);
- Poor selection of stings due to mounting and heating.
Slightly improved soldering irons of this type are currently being produced, but they are not far removed from their ancestor. All the same copper tips, all the same simple design.
The more power a soldering iron requires, the larger it will be. A 25 W and a 100 W nichrome soldering iron differ in size by almost 3 times.
An example of a SPARTA soldering iron. Copper tip, coated. Burns out. Suitable for soldering wires and DIP parts for the first time. The price is only 150 rubles, and a soldering iron stand is also included (albeit very fragile). Copper tips for nichrome soldering irons are of poor variety. Usually these are conical, flat and wave-type stings. All copper tips are solid, i.e. they are heated by a nichrome thread from the outside, not from the inside.
Also, copper tips for such soldering irons can be produced with a special coating, which slightly extends the service life of the copper tip (but not for long). Should beginners buy these soldering irons? Yes, at least because of its price and for the sake of the first experience. You can simply desolder parts with such a soldering iron, solder wires, or assemble simple radio sets. Enough for the first 10-15 hours of practice.
These soldering irons are cheap, reliable and simple. And are available in any radio parts and repair stores. You can solder wires and pipes (with high-power soldering irons), but nothing more. This option is not suitable for fine work. Modern electronics are much more complex, so the requirements for installation and soldering irons have changed.
The main thing is to take a soldering iron with a wooden handle, and no more than 25 W. A wooden handle heats up less and does not smell as strong as a plastic one. And it is advisable to assemble a temperature regulator for such a soldering iron. You can take, for example, an EPSN soldering iron.
Materials and tools
The materials are tin and fluxes.
- Tin and alloys. When tinning, tin grade 01 (Sn 99.1%, impurities 0.1%) and grade 02 (Sn 99.5%, impurities 0.5%) are used. Pure tin serves as the basis for a protective coating for dishes. Tin is not used as a solder for soldering, because at low temperatures it becomes brittle. Durability is ensured by adding other components to tin, mainly lead. Tin and lead alloys are used: POS-18, POS-30, POS-50, POS-90. The number in the designation shows the tin content as a percentage.
- Fluxes. They make it easier to clean surfaces from dirt, grease and oxides, and reduce the melting point. The most common fluxes are ammonia (ammonium chloride) and soldering acid (zinc chloride). Often when soldering copper and steel, a mixture of them is used.
The following tools are used:
- measuring instruments (ruler, tape measures, calipers);
- tinning pliers for supporting and moving parts;
- scrapers for scraping contaminants from coated surfaces;
- brushes for applying lubricant and cleaning surfaces;
- blowtorches for heating products before applying poluda.
The choice of technological equipment is determined by the method of tinning and soldering. Auxiliary and main equipment used:
- Baths for galvanic tinning:
- stationary;
- rotating bell baths.
- Tinning machines and installations. These are complex systems consisting of series-connected preparation and tinning baths. They are usually placed in a housing equipped with suction hoods, which improves working conditions.
- Workbenches for tinning and auxiliary work. Preparation of products
The quality of preparation of the surface of a part for tinning determines the strength of its adhesion to the coating. The preparation method depends on the condition of the surface.
- Brushing. This method is used if there is scale or heavy contamination on the surface of the product. It is recommended to wash the product thoroughly before processing. For a better effect, you can use an abrasive substance: sand, lime, pumice.
- Grinding. This is how surfaces that have uneven surfaces are prepared. When sanding, you can use an abrasive wheel or sandpaper.
- Chemical degreasing. It is carried out with special solutions: 5-10% sodium hydroxide solution, 10-15% sodium carbonate solution; 10-15% sodium phosphate solution. They need to be heated to 60-80 degrees. Fat solvents can be used: Vienna lime, gasoline, kerosene. When using gasoline and kerosene, keep in mind that they are explosive and fire hazardous. After removing grease, the products should be washed with water. You can determine whether fat has been removed from the surface or not visually. If water spreads evenly over the surface of the product and does not collect in drops, then the surface is degreased.
After preparation, you can tinning the parts.
Modern soldering irons are already soldering stations
What is a soldering station? This is not necessarily a soldering iron + soldering iron set. It can be one soldering iron, but with regulation, configuration, control and temperature indication. Modern soldering irons can fit all this right into the handle. Therefore, such soldering irons can be considered stations. But due to the more familiar format “just a soldering iron and a power cord from it”, it is still perceived as an ordinary soldering iron, and not a station.
A soldering station doesn't have to be expensive. It may even be cheaper than some soldering irons. Further in the article there will be examples of such conventional “soldering stations”.
As modern electronics installation has become more complex, the need for different types of tips and temperature control has increased.
How to choose the best coat?
There is no doubt that any of us may need this tool. After all, it is in demand both for repair work and for “operational” installations.
Therefore, to choose the most effective soldering iron, you need to pay attention to the following:
- In appearance, they are divided into electric, gas, spiral, pulse, ceramic and induction (each type has its own purpose, so this must be taken into account);
- On its power (the higher the better);
- On the power cord (the quality often has “defects” that will certainly appear during operation);
- On the handle (it should be comfortable so that it is convenient for you to operate the device);
- For temperature characteristics;
- For the kit (you need to know exactly the presence of the elements you are going to “make” with);
- On the price (it should not be low, otherwise the product, with a high degree of probability, will not last long).
To help you choose, we have compiled the “top 10 soldering irons” for 2022. See the rating below!
Requirements for modern soldering equipment for 2022
If you are going to solder boards or repair electronics, then the soldering irons and stations are required to:
- Availability of temperature control with stabilization, indication and adjustment functions;
- Various fireproof “eternal” stings in shape and size;
- Sleep and temperature memory functions (so as not to keep the soldering iron constantly on, thereby saving electricity and reducing the load on the tip);
- Good characteristics of temperature stability on the tip.
Currently, not all soldering irons meet the requirements presented. Let's look at popular soldering irons and stations among radio amateurs and electronics engineers.
Soldering irons 900 series
The next most popular are CXG soldering irons with HAKKO 900 series tips.
The most popular were the 900M. The sting sizes are given below (sometimes they may differ, especially Chinese copies).
These are the most popular fireproof stings. They are sold in almost any radio store, not to mention AliExpress. The variety of shapes allows you to perform a wide range of tasks for soldering boards and radio components (DIP, SMD and BGA).
Numerical and letter designations are practically not mentioned. Typically, stings are named by their visual shape (cone, hatchet, flat, etc.).
Compared to conventional tips for nichrome soldering irons, the 900M tips are hollow (empty inside, because they are put on the heating element). Attaching the tip to the heating element of the soldering iron differs from simple nichrome ones. Here the tip is secured with a nut and bushing. Installed on a huge number of soldering irons of different stations. For example, on Lukey HAKKO 702, 936, 902, 701, 8586, etc. In addition to Lukey, there are different copies of the station under other names.
However, despite all the advantages, this type of tip has a serious drawback - the gap between the heating element and the tip itself.
But first, let's look at examples of soldering irons with such tips. They are also different.
Soldering iron with blue handle SumSour 220 V from AliExpress
This is practically the most common soldering iron. Usually sold as a set with soldering tools like this: Power 60 W. Power supply: 220 V. Temperature adjustment is carried out by turning the potentiometer from left to right.
Features a typical 900M series blade mount.
This soldering iron doesn't even have a thermocouple to measure and control temperature.
This is an example not from the series of “soldering stations”. This soldering iron only has power control and a power indicator. That's all. There is no real regulation here, much less control and stabilization of the temperature on the tip.
Power adjustment is carried out by changing the position of the potentiometer, which in turn regulates the BT136S triac. And BT136S supplies voltage to the heater.
These soldering irons are sold individually and in sets. It is not recommended to buy sets due to low-quality components. An example of low-quality components from a typical set:
Tweezers are curved. Low quality solder. Even the stings burn out quickly. Yes, stings from AliExpress can also be of good or terrible quality.
The tips from this set quickly lose their shape after a few days of use. The tip in the photo example on the right lasted more than 7 years. Therefore, soldering with the tips included in the soldering iron kit is not recommended.
The only thing that is really good in this set is a thin copper wire for jumpers, a sponge for cleaning the tip from solder, and a stand for the soldering iron (although it is also flimsy).
Pros of SumSour 220 V from AliExpress:
- Low cost;
- The popular 900M series tips are used;
- There is an indication of inclusion;
- There is power adjustment.
Serious disadvantages of the soldering iron:
- Mediocre build quality due to cheaper production;
- No grounding;
- Not heat resistant wire;
- No temperature control. The temperature is regulated by a triac. There is no thermocouple that would measure temperature in this soldering iron;
- The problem with overheating of the tips from the point above;
- Slow heating of unburnt tips of the 900M series (this is a common problem for all soldering irons with such tips, but here without a thermocouple everything is much more serious);
- There is no temperature display, not to mention sleep mode and other useful and mandatory functions of modern soldering irons.
This soldering iron can solder wires, DIP chips, SMD parts and even BGAs, but it is absolutely not suitable for beginners. Without experience and practice, you can stumble upon serious shortcomings of such a soldering iron. It doesn’t even make sense to buy it for such quality, not to mention sets.
If you already have such a soldering iron, then be sure to buy a new set of high-quality fireproof tips for it. And if possible, it’s better to buy another soldering iron.
Soldering irons GS90D
These are no longer just soldering irons, but full-fledged stations.
Available in different capacities. The control and display board of the GS90D is located in the handle itself. Temperature adjustment is carried out using buttons.
The GS90D is better, and on average 3 times more expensive, than the blue handled SumSour soldering iron shown above, but it still has the same tip problem of the 900M series.
Pros of the GS90D:
- Availability of temperature indication;
- Good adjustment;
- Uses the popular 900M series tips;
- Heat-resistant wire (at first glance this is a trifle, but sometimes due to carelessness you can accidentally burn the wire and not notice it in time. Here the wire is protected from such cases);
- There are additional functions.
Minuses:
- Not the best thermal stabilization;
- Overpriced.
Of course, this soldering iron goes to a new level compared to the simplest ones, but it is not the best choice for beginners. It just doesn't hold the temperature well and has the disadvantage of the 900M series tips.
Soldering station Lukey 702
Popular soldering station Lukey 702 among radio amateurs and electronics engineers. The station's soldering iron is a clone of Japanese HAKKO soldering irons. In general, in other Lukey models the soldering iron is the same as in the 702 (there may be differences in the type of heater, but more on that below). The station has a soldering gun, which makes soldering any components much easier. This is a significant plus.
This station also has a soldering iron with 900M series tips. As you can see, this plug has more internals than the SumSour 220 V.
5 wires are connected to the station from the soldering iron. The first two are a thermocouple for controlling and measuring temperature, the other two are a heater.
The fifth wire is ground.
Grounding allows you to reduce the risk of damage to the chips on the board by static electricity, which can appear on the soldering iron tip or even on the station itself.
The temperatures of the hair dryer and soldering iron are adjusted using buttons.
There is a soldering gun and a soldering iron that can be used to perform 90% of soldering work and replacing display modules or back covers of smartphones and tablets. In addition, the hair dryer has replaceable nozzles for different sized jobs.
From the soldering gun the following are connected to the station: a thermocouple, a heating element, a turbine, grounding and a reed sensor. The reed sensor responds to a magnet that is installed in the hair dryer stand. Need to put your hair dryer into standby mode? Just place it on the stand with a magnet. The hair dryer will begin to cool down quickly and go into standby mode. And if you need the hairdryer again, you just need to take it from the stand. The hair dryer will begin to heat up to the temperature at which it was placed on the stand. On the other hand, this station has a number of disadvantages that can be problematic for both beginners and experienced electronics engineers. Let's look at the pros and cons of the station.
Pros of 702 station:
- There is a soldering iron with 900M type tips and a hair dryer;
- It is possible to change the nozzles on the hair dryer and the tips on the soldering iron;
- Easy adjustment of temperatures and air flow;
- Thermal stabilization and temperature control;
- Automatic shutdown of the hair dryer (there is a reed switch in the handle of the hair dryer that turns off the hair dryer if you put it on the stand);
- Digital temperature display;
- Fast heating;
- It is possible to calibrate the temperature.
On the one hand, this is a good price-quality station for a small workshop for repairing equipment. But it is outdated and has a number of disadvantages:
- There is no automatic shutdown of the soldering iron;
- Still the same problem with 900M tips;
- High price;
- Without disconnecting from the network, the station can turn on itself;
- Not heat resistant wires.
- Terrible PS/2 connector on the soldering iron;
- A large hair dryer with a lot of vibration in the body due to the turbine.
If desired, you can reflash the Lukey 702 using a programmer, improving the operation of the station.
Disadvantages of 702 station and its improvements
The problem with wires is that they are not heat resistant. You can melt them by mistake or accidentally.
Connecting a soldering iron leaves no room for improvement. It is made through a PS/2 connector, which can be found on old computer keyboards and mice. If the mount for the computer is not critical, then for the station everything is in vain. The connector is not fixed by anything, and can often simply fall out when working with a soldering iron.
And the hair dryer cannot be disconnected from the station if it is not needed (and if it breaks, it will be more difficult to replace it with a new one). In other analogue stations there is practically no such defect. So, should we take station Lukey 702? There are two options. Either take 702 and improve it, or take a similar station that will have these shortcomings corrected.
For example, this Eruntop 8586 station has power off buttons (not to be confused with regular power off buttons, which do not disconnect the station from the network). And overall it is much cheaper. Although it does not have a soldering iron temperature indicator.
And in general, the analogues look more compact than the original 702 station itself. From the point of view of circuitry, they are identical (except for the control function for adjusting the air flow. It is digital. Although this is even more convenient.
Or here is an example of a station that is a close analogue of 702.
Therefore, the purchase of station 702 is in question. You will overpay for the brand and popularity of the station, although you can buy exactly the same modified station. And of course, the connectors for connecting a soldering iron and hair dryer to the station may differ.
There are also options with compressor control of the hair dryer. This hair dryer is lighter, it produces less vibration and noise, however, due to the compressor, the station itself is large, and the hair dryer cannot be disconnected from the station. And the compressor at the station is very noisy. If you still decide to buy a 702, then remember that it must be turned off from the network after use. Or install a plug with an off button. There is a design flaw in the station. Even if you turn off the soldering gun from the front button, and it is on the stand, it may turn on spontaneously due to the failure of the triac. Such cases have already happened. The hairdryer just caught fire. The on and off buttons on the front side of the station do not turn it off from the network. Therefore, the station must be disconnected from the network if you are finished soldering.
An example of modification of the Lukey 702 soldering station:
Problem with 900M series tips
The main problem with these tips is the presence of a large empty space between the heating element and the tip itself.
There are several possible solutions.
Reducing the gap
You can move the heating element, fill the gap with sand in empty places, or pick up a small nut on the tip of the heating element.
Or you can even move the heating element closer to the tip. Although these solutions, to put it mildly, are not very good. If you need a different type of tip, you will have to install everything again. By the way, the heating element itself is very fragile. Such modifications can easily damage it.
You can also replace the old nozzle with a new one, which is smaller in size. This will allow you to reduce the distance between the heating element and the tip.
Installation of a ceramic heater
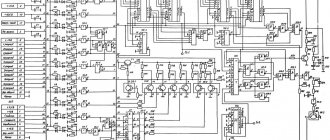
There are two types of heating elements. These are ceramic and nichrome. Ceramic heats up faster and holds the temperature better. But it's more expensive. It’s true that simply replacing a nichrome heating element with a ceramic one will not work. Firstly, they have different temperature sensors. Secondly, you will have to calibrate the station. Well, the final touch is the need to replace the operational amplifiers that amplify the data from the temperature sensor. The sensor values for nichrome and ceramic heaters will be different. For one, the sensor can be made using a thermocouple, and for the other, using a thermistor. This is a significant difference.
In the Lukey 868 station, Japanese ceramic heaters were installed in the soldering irons, and in the Lukey 702, Chinese nichrome ones were installed. They are not compatible without additional changes to the circuits.
Station calibration
Many stations have a calibration function. There is software calibration where you can adjust the station’s custom temperature to the real one. And there is the usual setting using potentiometers. Such potentiometers are installed on boards.
Temperature meters are needed to calibrate the station. Without them, it will not be possible to accurately calibrate the station. Of course, you can set it approximately to the melting temperature of the solder, but this will not be as accurate as checking with another independent temperature measuring device.
Working together with a soldering gun
Using a soldering gun you can stabilize the soldering temperature of the soldering iron. It is enough to simply heat the soldering area with a hairdryer at 100-150 °C with medium air flow.
This method allows you to avoid the appearance of large drops of solder on small contacts (especially when soldering any connectors, such as micro usb)
Use of copper tips
Alternatively, you can use copper tips. They heat up faster than non-burnable ones. You can choose an identical copper tip in shape and size exactly the same as the non-burnable one. Installs exactly the same as fireproof. Although this option is not ideal. Yes, such tips are in demand, but copper tips lose their shape during operation. Of course, they are not as expensive as fireproof ones, but this is still not a solution. They also need to be tinned constantly before work. And modern stings have long ceased to be consumables. And changing the shape is a very critical parameter, especially if you solder every day. And finding really good copper tips on AliExpress is quite problematic. The problem with the 900M stings has been resolved in the next generation.
Peculiarities
The solder bath does not require special maintenance and can serve its owner for many years. Another important advantage of this device is that it can be used to solder small-sized elements using the dip soldering method.
This is indeed a very simple soldering method - you just need to immerse the object being processed (for example, a printed circuit board) for a certain time, first in flux, and then in a bath of already molten solder. When the flux has evaporated and the seam is filled with solder material, you should remove the product from the bath and complete soldering.
New generation of tips – T12 cartridges
The new generation of stings is structurally different from those presented above. It's not even a sting anymore, it's a cartridge.
It is even incorrect to simply compare the 900M tip and the T12 cartridge.
A single T12 housing contains both a thermocouple and a heating element.
A correct comparison of T12 with 900M blades would be like this. T12 tips do not have such a gap between the tip itself and the heating element. This will allow you to achieve the best contact between the heating element and the tip itself.
There are only 2 wires coming from the cartridge itself. This is both a heater and a temperature sensor.
The 900M from Lukey 702 has separate wires for the heating element and temperature sensor.
The tip itself is made of copper inside and covered with an alloy on the outside. Of course, T12 tips (cartridges) will cost more (especially original ones) than 900M. One cartridge will cost approximately the same as a whole set of different types 900M! But do not forget that the T12 cartridge is both a heating element and a temperature sensor. And all this in one building!
Let's compare different types of tips in one photo: And of course, T12 tips have a wider selection of a wide variety of tips. No 900M tip can achieve exactly the same miniature tip as the T12 and still maintain its performance.
Now let's look at a typical T12 soldering iron.
Externally, it looks like a soldering iron with 900M tips. Of course, the cartridge (tip) changes differently. Simply unscrew the nut and sleeve and you can change the cartridge. To completely disassemble you need to unscrew the base of the handle. There is nothing inside except the contacts for connecting the T12 cartridge and the switch (vibration sensor).
But where is the grounding? This soldering iron does not have it. Those. The station itself to which this soldering iron is connected is grounded, but the soldering iron itself is not grounded. There are different soldering irons and T12 stations. Somewhere there is a grounding of the soldering iron, and somewhere there is not.
The SW-200D ball switch (vibration sensor) allows you to put the soldering iron into sleep mode. You stop using the tip, put it on a stand, and the temperature on the tip automatically decreases to room temperature. This is economical, convenient and protects the tip from unnecessary excess heat. And the most important thing is that you can use any stand. This is a ball sensor. It only reacts to prolonged inactivity. The same reed sensor in a soldering gun on a Lukey 702 will turn on only when a magnet approaches, i.e. when you place the hair dryer on the stand with a magnet. And here, while the soldering iron is in operation, it periodically moves, and the ball sensor does not put the soldering iron into sleep mode.
T12 cartridges heat up faster, transfer heat better, and are much better at soldering, unlike the above-mentioned soldering irons. Pins with T12 cartridges have deservedly gained fame as very high quality and the best of their kind among repair shops and radio amateurs.
Finding something better in terms of price and quality is currently simply unrealistic. If there is something better, it is only ten times more expensive.
Among the disadvantages of T12 soldering irons, we can highlight the wear of contacts in the body. Those. Over time, when cartridges are frequently replaced, the contacts may begin to lose contact with each other. To a large extent, everything depends on the type of soldering iron body. There are plastic cases for 500 rubles, and there are metal ones for 2,000.
Now let's look at a soldering station based on T12.
Soldering station Quicko T12-952
One of the best T12 stations. There is a power off button and a standard network cable connection. There is also a 24 V power supply option instead of mains power. If necessary, the fuse can be changed without disassembling (although it is better to look at the station board for faults if the fuse does blow).
A display with the main menu is installed. Lukey 702 doesn't have nearly as much information about the station. When you press the encoder (temperature regulator) for 2 seconds, a menu of settings and additional functions will appear. You can set the auto-shutdown time of the soldering iron and adjust the temperature. increase the voltage, find out the firmware version, turn off the sound notification, etc. A whole mini PC!
Among the shortcomings of the station, you can cancel the lack of grounding of the soldering iron and the lack of Russian language in the menu and settings.
KSGER T12 FX9501
This is basically the same station, but it has different firmware and a different developer. You can even select the type of tip used, the time, and even set a password for the station (although why do you need to set a password for the soldering station?). This station has a soldering iron grounding.
The entire T12 station in one handle
There are T12 stations with a control board directly in the soldering iron handle.
True, for such a soldering iron you will need a 24 V 72 W power source.
T12 DIY KIT
Or you can even assemble the T12 station yourself without a display, only with a temperature indicator. And it will even have an automatic shutdown of the soldering iron thanks to the SW-200D ball vibration sensor. The following KIT DIY kits are sold: And in general, the station will be several times cheaper than ready-made options. True, for the station to work you will need a power supply. In the ready-made versions of T12 Quicko T12-952 and KSGER T12 FX9501, the power supply is already inside the case.
How to do it yourself
Nowadays you can easily find instructions on the Internet on how to make a solder bath with your own hands. The simplest method is this. You need to take any container made of non-flammable and non-melting (refractory) material.
Then lower a tubular electric heater (TEH) into this container, and lower it so that it is suspended. The result should be an efficient bath for tinning, working with circuit boards, and melting solder.
Another instruction suggests using an old electric stove as a heater and attaching, for example, a ladle to it, which can then be heated to the desired temperature.
Ultimately, all the options for how to make a solder bath come down to the following. You need some kind of container that itself will not melt at the melting temperature of the solder, and some kind of heating element. As for the rest, the master has the right to act at his own discretion.
Solder baths: their types and purpose
offers the consumer a wide selection of soldering equipment from global manufacturers, including soldering stations, soldering baths, hot air guns and much more. The soldering bath is designed to heat a large volume of solder to the required temperature and maintain this temperature regime for a long time to carry out high-quality soldering work. Solder baths of various modifications are very convenient for work, both in continuous production conditions and for use in small workshops for repairing television and radio equipment.
The online store's assortment includes soldering baths of various capacities from 100 to 850 grams of solder, which allows the consumer to choose soldering equipment that meets production tasks. There is a compact ST-11S 150W soldering bath equipped with microprocessor control that allows you to achieve the desired temperature in a short period of time. The bath is made of stainless steel with an anti-corrosion coating, allowing you to work with solder in the temperature range from 200 to 430 degrees Celsius.
We also sell soldering baths ROT-11S 90W, soldering baths for lead-free solder brand ROT-22S 200W, and a tabletop soldering bath with a double digital display brand ROT-51S. The capacity of the bath is 850 grams of solder. You can buy solder baths of various modifications with wide functionality at retail and wholesale. In the online store, along with soldering equipment, you can purchase various types of solders and fluxes at competitive prices.
T12 competitors
In addition to the T12, soldering irons and stations similar in concept are produced. Some of them are superior to any T12, but their price is several times higher.
TS100
Miniature and powerful soldering iron. The entire control unit is located directly in the soldering iron handle. Combines the most important advantages of T12. And this soldering iron can be flashed and further configured via USB.
TS80
Even smaller and better TS100. It will be especially useful for those who repair equipment on the road. There is a grounding connection for the soldering iron.
The disadvantages include the high price and crude firmware.
Is the TS100 AND TS80 worth buying for beginners? More likely no than yes. The price is several times higher than that of any fully equipped T12 station. In addition, some of its functions are useless for beginners.
And why do you need mobility, fine-tuning and compactness if a beginner is just learning to solder and learning the basics of electronics?
Heating control
To heat a massive part to the required temperature, you need an equally massive soldering iron tip so that the heating rate is higher than the heat removal rate of the part.
A tool that can simultaneously cope with the tasks posed above is a fairly powerful soldering iron with temperature control.
That is, the maximum power of the soldering iron should be sufficient to heat large leads, and the temperature should be regulated within certain limits and selected in accordance with the operating conditions.
Then the massive tip will have greater thermal inertia and will heat the part to the required degree, without the risk of overheating.
There are several ways to adjust the temperature of the soldering iron:
- maximum-minimum heating (simple switch);
- dimmer adjustment;
- the use of control microcircuits in the handle of the device;
- external control unit;
- using a hair dryer.
Using an adjustable soldering iron, in addition to the advantages described above, you can significantly save on electricity consumption for large volumes of work performed, extend the life of the device due to less time operating at maximum power, and reduce the amount of harmful substances released during high-temperature soldering.
A little more about originals and copies
A set of original tips sometimes costs almost as much as a full-fledged station. And this is the price of quality. Few copies can come close to the original in terms of characteristics. However, even the lowest quality copies can be soldered.
Yes, copies of tips and other components for soldering irons will not be equal to the originals.
On the other hand, you can buy the original later, when you learn how to solder copies, which are several times cheaper in price. The money saved can be spent on radio components, screwdrivers, multimeters and other necessary things.
And a copy is not a fake. The fake will repeat everything, right down to the name (Lukey 702 is a copy of HAKKO, but is called and assembled differently).
Professional equipment
Professional equipment costs tens of times more than their cheap analogues and copies. At first glance it may seem that this is an unnecessary overpayment of money, but this is not so. In service centers, where the average day of soldering can be 6 or 7 hours in one day, this difference can be quickly noticed. Speed, quality and temperature control are important here. Radio amateurs, in principle, have little need for such equipment. In assembly shops or service centers they can solder as many boards and parts in one day as a radio amateur could not solder in several months. This is not a reproach towards radio amateurs, but rather an explanation that for a hobby, professional equipment at a price of 50,000 and 100,000 rubles will be excessive, and amateur radio practice will not reveal even part of the potential of such equipment (not to mention the payback).
ATTEN ST-862D and Quick 861DW
There is no point in even comparing Lukey 702 with these stations. These stations have a hairdryer power of 1 kW. These stations also have angled attachments for hair dryers, which are convenient to work with under a microscope. A real battle of the titans.
JBC and HAKKO
Soldering stations from this company, as well as from the Japanese HAKKO, do not give a chance to either the Chinese T12 or the Chinese TS. Only the price for them can even reach 600,000 rubles. Thermal tweezers, attachments for any microcircuits, convenient and thoughtful ergonomics and the highest quality. It doesn’t even make much sense to consider them, since beginners don’t even need such stations in theory.
Bottom and top heating
Also, do not forget about the lower and upper heating (IR heating). Without them, it will not be possible to efficiently solder massive BGA chips. And soldering a huge number of identical boards using solder paste using only one hair dryer is quite a task. You can read more about this in the article about soldering.
Thermopro is not cheap equipment, but first you can assemble your own bottom heating using available components.
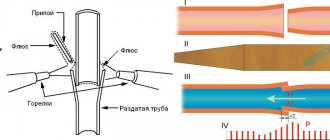
Making heater leads
Direct connection of high resistance wire
and
an electrical cord
supplying power to the heater is not a good technical solution.
If this is done near a heater, the joint will be exposed to high temperatures and will quickly collapse. If this is done inside the handle, where it is cooler, then such a connection, although it will last longer, will also collapse. Moreover, the ends of the high-resistance wire will generate unnecessary heat all the way from the heater to the handle. A reasonable solution is to use an intermediate link made of metal that can withstand high temperatures well and, at the same time, has a low resistivity
. Steel is quite suitable for this role.
For making heater leads
I used two pieces of steel wire in my soldering iron. Considering the high temperature, there is no point in soldering here. The connection is made by twisting one wire onto another. But simple twisting is unreliable. To increase reliability, the connections are crimped with tin tubes, which are made in exactly the same way as the base of the heater - by folding a tin rectangle on a mandrel. But here it is better that the edges of the tin strip meet with some overlap. You can use a needle of suitable thickness as a mandrel. With the correct diameter, the finished tube is put on the joint with some friction. Next, each inserted tube is compressed with pliers and slightly flattened, which ultimately ensures high strength of the connection.
The next step is to isolate the findings. The same materials were used for this - asbestos
and
silicate glue
.
At this stage, it is necessary to exclude any possibility of shorting the heater terminals. This is especially true for joints crimped with tin tubes, since these places are much thicker. steel leads
are coated with an insulating composite up to the point where they meet the copper conductors
of the electrical cord
inside the handle.
Next, the finished heater was thoroughly dried. Dry the soldering iron heater
you can simply put it somewhere and forget about its existence for a long time, or apply a small voltage to its terminals to speed up drying. In the second case, it should be remembered that too high a voltage can cause the temperature to rise to such a value at which the silicate glue begins to boil. Until the glue dries completely, you cannot bring the temperature to the boiling point, otherwise this will lead to various swelling and deformation of the product, which can ultimately ruin the entire work. Irregularities on the surface of the dried heater can be eliminated using a file and sandpaper, bringing the product into a cylindrical shape.
By measuring the resistance between the base of the heater and its terminals, you can to some extent judge the completion of drying. In my case, this resistance after thoroughly drying the heater was 20-30 kOhm. By this time there was no longer any danger of the glue boiling over. After warming up the soldering iron
in operating mode, this resistance increased to several megaohms.
Bottom line
There are dozens of types of stations and soldering irons. And in general, for beginners there is an opportunity to quickly learn professional soldering on budget equipment.
What to choose
For beginners, you can buy a regular nichrome soldering iron. You can solder boards with it, desolder parts, and assemble radio sets. Available at any household. store.
Learn how to handle such a soldering iron and care for the tip. Enough for 10 hours of practice. You can solder homemade printed circuit boards. And with such a simple nichrome soldering iron, you can start your journey in electronics repair, for example, by resoldering transistors and failed electrolytic capacitors.
Next are two options. Or buy T12 right away, and then buy a hairdryer separately for it, or instead of T12, Lukey 702 (or its equivalent). These two options will cover all your amateur (and even professional) soldering needs. Of course, it’s better to immediately take the T12, since the 702 and its analogues have outdated tips like 900M, which you need to get used to. But the kit includes a soldering gun, with which you can solder microcircuits and change modules on smartphones.
Is it possible to assemble a station or soldering iron with your own hands at home?
The soldering iron itself is unlikely, but the station is quite good, especially the bottom heating.
You can change the firmware, do voice control, whatever. Even modding the station by changing the color of the temperature indicators. But making a homemade hairdryer, soldering iron or tips is already unrealistic. There are ready-made options for any price and need. It’s difficult to make something new, especially if you don’t have a metal processing machine and the necessary workpieces.
Post Views: 54
Stand
But what really has a serious problem is with the stand.
I looked at a dozen stands on AliExpress and in its local branch. None of them fit! For example, one, two, three, four, five. They are all either too big and the handle falls through, or too short and the tip rests against the wall. I had to sit down with a 3D editor and model it myself. I wanted: there was a place for a sponge; the stings were stored directly on the stand; The mercury tilt angle sensor was working for the “sleep” mode. And the most important thing: you need to make sure that you can take out and put down the handle without looking, blindly. It should be removed and stowed away easily and quickly, like Clint Eastwood's revolver.
After a dozen unsuccessful options and about five prototypes, this appeared:
Model on Thingiverse, project on Onshape.
For assembly you will need the following parts:
- Screw M3x50 - 1 pc.;
- Nut M3 - 5 pcs.;
- M4 washer - 2 pcs.;
- Brass sheet 0.2 mm or aluminum tape - 1 pc.;
- Rubber or silicone self-adhesive feet - 4 or 6 pcs.;
The screw is inserted into the holes in the racks.
Nuts are screwed onto it, and washers are clamped between them. This is precisely the “know-how” of ease of use - the tip rests on the screw, and the washers prevent it from moving to the sides. Therefore, it is possible to remove and remove the handle blindly, in one movement. The distance between the washers is selected experimentally; for me it is 8.6 mm. Either a piece of brass or aluminum tape is glued under the sponge and under the tip so that the plastic does not melt with solder balls that can roll off the hot tip.
The stand can be printed from any plastic. Mine is generally made of PLA, the least heat-resistant material. I thought it would melt - but no, after several months of use there are no traces of melting anywhere.