It’s great if your TV works well and on long evenings you have something to do by watching your favorite TV shows. But it happens that television works intermittently. In order not to feel discomfort, you can buy an NTV dish, and use the receiver to set up a satellite dish, and ultimately enjoy your favorite programs at any time of the day or night.
Installation and configuration of the NTV antenna is available to every user who can try to do it themselves. But still, it is better to trust the professionals to enter some parameters if you are not sure that you can carry out all the procedures on your own. There can be no question about choosing the right satellite television provider; NTV is one of the leaders in the Russian market, which is why NTV dishes are so wildly popular.
Some historical facts
NTV Plus is the digital equipment of the Russian television company NTV. She became the founder of satellite television in Russia. At first, the broadcast was analogue, but only a few years later, broadcasting began to be carried out in digital format. “Digital” made it possible to receive high-quality television pictures without interference.
Since 2000, the main video signal transmitters have been the Eutelsat W4, W7 and Bonum 1 satellites. For more than 15 years, satellite TV NTV Plus has been widely popular among television viewers in Russia and other countries. The broadcast is mainly carried out in Russian for a Russian-speaking audience not only in the Russian Federation, but also in many countries around the world.
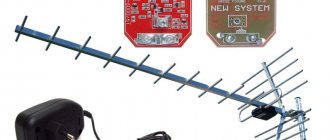
What does the kit consist of?
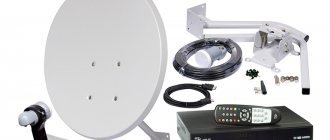
Before connecting NTV Plus, the user must purchase a set of equipment from official suppliers. It includes:
- receiver;
- coaxial cable and connectors;
- satellite dish with a diameter of 60 cm;
- converter;
- smart card;
- contract;
- fastenings;
- instructions.
Connecting to NTV Plus is possible only after registering with the provider as a subscriber. If you buy the kit second-hand and connect it to the TV yourself without registering and receiving a personal account, it will be impossible to start watching television.
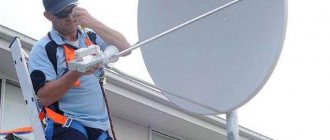
Installation of NTV plus antenna
The NTV Plus antenna ensures high-quality satellite television reception by the television receiver. Digital technology does not stand still and is actively developing. Installing NTV antennas allows people to enjoy watching high-definition programs on their TV screens.
Plate NTV plus
Satellite dish: do-it-yourself setup and installation
Choosing the highest point to install the dish is subject to the risk of lightning strikes. To prevent this from happening, you need to worry about grounding and installing a lightning rod.
Important! If you have difficulty installing the plate yourself, it is better to invite a specialist. He will deliver all the necessary equipment, install and configure the satellite dish.
Choosing the right installation location
How to connect to NTV Plus via the Internet
Hybrid set-top box
If there is no dish, you can enjoy television with just a hybrid set-top box. How to connect it:
- The equipment is placed in a stable place.
- Insert the access card into the slot (chip side down).
- Connect the set-top box to the TV (via RCA or HDMI).
- A cable is connected to the set-top box (if the Internet connection is wired).
- The receiver is connected to a power source.
- Register on the official website of the service.
provides 24/7 access to content. The service is available from any device connected to the Internet. What are its advantages:
- access to paid channels;
- no need for third-party software (smartphones on iOS and Android have their own applications);
- one-time payment;
- "Favorites" list;
- free access to the Match TV channel.
If you need more channels, activate one of the paid packages, including both basic and thematic ones.
Selecting and setting a plate
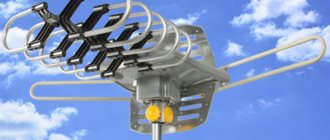
Active antenna for car
When installing the dish, follow the general rules for selecting and configuring a satellite dish. They are aimed at how to configure the NTV antenna to the satellite yourself so that there is no interference with the television broadcast:
- The antenna diameter depends on the location of the consumer. For example, for a resident of the Tver region, the best option would be to purchase a plate with a diameter of 1.2 m.
- Setting up the NTV+ antenna for the Eutelsat W4-Eutelsat Sesat satellite.
- Setting the dish azimuth, rotation angle and position elevation angle.
Elevation angle and azimuth of the dish
Important! A map of the area where the equipment is being installed is printed from the network. From the point where the dwelling is located, draw a line due north. The second line is drawn at an azimuth angle. This will be the direction axis of the center of the plate.
Self-connection
If the client decides not to use the services of the company’s specialists, and prefers to do everything on his own, then first of all it is necessary to carefully study the instructions. It is included in the equipment package; the entire process of installing and connecting an NTV satellite dish is described there in detail.
To install a satellite dish, it is important to choose a convenient place, with a minimum of interference that prevents direct signal reception - tall buildings, trees, and so on. The wall of the house or the roof is best suited. We must not forget that the plate must be protected from bad weather - snow, hail, rain, so it is important to choose the safest points.
Using the instructions, the satellite dish is assembled and installed on the bracket. Consumables for installation are supplied included.
Next, a cable is connected to the receiver, and it is connected to the TV. The receiver must be de-energized, otherwise the equipment may burn out.
Antenna device assembly
Red black: plus minus, how to determine polarity
Each antenna delivery kit contains a detailed diagram of the assembly of the dish with bracket.
To assemble and attach the plate to the wall of the building you will need:
- hammer drill or drill;
- anchor dowels;
- set of wrenches;
- knife for stripping cable insulation.
The support bracket is secured with dowels, driving them into the holes made with a hammer drill. In wooden walls, fastening is carried out using self-tapping screws using a screwdriver or through holes are drilled with a drill, followed by fastening the support with threaded rods and nuts.
A reflector and an external bracket are screwed to the support platform, at the end of which a converter is installed. The tilt angle of the head is set according to the marks on the converter body. The end of the cable is stripped and an F-connector is attached to it, which is then inserted into the head socket.
How to set up an NTV+ Vostok satellite dish
The antenna is tuned to the Express AT1 satellite, located at position 56 deg. e.d.
First you need to choose a location to install the antenna and determine at least the approximate direction to the satellite.
Where should I point the antenna, or what horizontal direction should I set?
For settlements located west of 56° east. the satellite will be located in the southeast (and if you live exactly at 56 degrees east, then the satellite will be exactly in the south for you). If you live east of 56°E, then your satellite will be in the southwest.
That is, the further you are from 56g. e.d. , the greater will be the azimuth (horizontal) deviation of the antenna from the south, west or east, depending on which side of 56 degrees. v.d you are.
For example, you live in Izhevsk. The city is located exactly at 56 degrees. e.d. This means that the NTV+Vostok satellite (Express AT1) will be in Izhevsk exactly in the south. That is, in azimuth (horizontal) we turn the antenna to the south.
In Novosibirsk, which is located at 83° East, the installation location of the NTV+Vostok antenna is located east of the position where the satellite is located (56°). This means you need to turn the antenna to the west by approximately 83° - 56° = 27°.
Kyzyl, for example, is located at 94° east longitude. This means you need to turn the antenna to the west by 94° - 56° = 38°.
This is the principle used to calculate the angle of rotation of the antenna in azimuth. It is clear that it is almost impossible to absolutely accurately calculate the direction of the antenna to the satellite without special instruments and calculations. But in this way we narrow the horizontal search sector to 5-10 degrees. And this will greatly simplify the process of setting up the antenna for the NTV+Vostok satellite.
If you have the Internet, then finding out the direction of the antenna is even easier. To do this, go to the NTV website + Coverage Area, enter the name of your locality in the “Search by address” line and you will immediately receive detailed information indicating the required antenna size and direction to the satellite. For example, I live in Kyzyl. I enter the name of the city and get the necessary information:
If desired, by increasing the scale, you can find out with great accuracy, sometimes right down to your home, the direction of the antenna to the satellite. We increase the scale, move the pointer to the address we need and get a picture with the direction to the satellite. Very comfortably.
In the case of small settlements, the map will not be able to provide an image with accuracy down to the house, but you can still get a completely acceptable result. For example, for small Tanzybey
Also, here you can switch to satellite mode and get an image on which you can quite accurately assess the presence of obstacles interfering with NTV+ reception.
When choosing a location to install the antenna, it is important that no obstacles block the signal from the satellite. Since the exact position of the satellite in the sky cannot be established without special calculations, it is better to choose a place to install the antenna where there are no obstacles in the place of the intended direction to the satellite, or their height is not much higher than the height of the antenna installation site.
How to determine how much to tilt the antenna?
Again, without going into exact calculations, you should adhere to the following principle: the farther the antenna installation location is from 56 degrees. v.d., the more you need to tilt the antenna forward. To begin with, you can install the antenna slightly higher than vertical (so that it points slightly upward), and then, as you scan, as indicated in the figure below, tilt the antenna until a signal appears.
Satellite receivers
A receiver is a device that converts a satellite signal into a television picture format. Among the receivers most compatible with the Eutelsat 36B/36C satellite are the following receivers:
- NTV-PLUS 1 HD VA.
- HUMAX VAHD93100S.
- Humax VA-4SD.
- Humax VHDR 3000S.
- Sagemcom 87-1HD.
- Sagemcom DSI74 HD.
- Opentech OHS1740V.
Receivers
Without leaving an armchair or sofa, the viewer can easily control satellite TV using the remote control. Receivers contain electronic circuits that allow you to set delayed viewing of your favorite programs. You can also pause the demonstration of the program and make a video recording of it.
Equipment set
Decoder
To connect to a minimum configuration service package you need:
- antenna;
- decoder;
- digital set-top box or CAM module (coding system adapter);
- TV.
Often, when connecting, it turns out that the “native” cable is not long enough, so it is better to immediately take a similar, longer one. You will need tools with which to mount fasteners, adapters, lay wires, and so on.
You don't always need to buy a separate antenna. Sometimes previously installed equipment is compatible with the connected service, but it is better to immediately check with the operator about this.
If you need to connect NTV Plus via the Internet, that is, without installing a dish, you just need to leave a request on the service’s website or call the operator and agree on a package of services. Next, a company representative comes to the user and connects the set-top box (the house must be connected to the Internet).
What decoders does NTV+ offer: receiver, KAM module, digital set-top box.
Standard receiver
The receiver is not suitable for watching television online.
A classic, one might say outdated, but still relevant type of equipment with the following advantages:
- suitable for any TV;
- expands the functionality of the TV panel (even if there were no functions initially), making it possible to record broadcasts, view media files, and so on.
The receiver has a number of disadvantages:
- a separate remote control is used for control;
- requires free space, connects to the outlet, occupying it;
- complex menu with many interfaces that are easy to get lost in (difficulty setting up);
- not suitable for watching TV online.
CAM module
CAM module
Many TV models have a connector on the side that looks like a SIM card slot in smartphones, but larger. It's called CI+.
A KAM module is inserted into it - an adapter with an already installed plastic card issued by the operator. This SIM card unlocks digital channels.
Advantages of using a KAM module to connect NTV+:
- compactness;
- does not require free space (apart from a few centimeters in the TV case);
- no separate remote control is needed for control;
- The antenna is connected to the TV, without a set-top box.
Minuses:
- for TVs with CI+ connector;
- The newer the TV panel model, the richer the functionality.
Interactive console
To access digital television, you need to call a specialist who will connect the service.
Often, special hybrid set-top boxes are used to connect digital television. They are most relevant for residents of megacities, where dense buildings “interrupt” the signal or there is simply no way to install an antenna on the roof of the house.
That is, anyone living in a small or big city can access digital television even without having a dish. All you need to do is call a technician who will connect the service and make sure that the Internet is connected to the house.
NTV+ plus uses the VA-1020 set-top box, but alternative models are also suitable. Equipment advantages:
- In addition to the fact that they “receive” a satellite signal, they can also work from the Internet. This greatly expands the functionality. Thus, the user gets the opportunity to pause the broadcast, search for films in online cinemas, and so on;
- serves as a complement to the TV, expanding its capabilities;
- Suitable for new and old TV models.
Minuses:
- the set-top box requires free space and access to an outlet;
- separate remote control;
- price (if you take into account Internet fees and access to paid content).
Based on the TV model and preferences, they choose one of the methods of connecting to the service. The interactive option is one that works in conjunction with the Internet.
If you only plan to watch satellite television, a KAM module will suffice. A regular receiver is a universal, affordable solution, and can be used for any TV, regardless of the newness of the model.
Manual Tuning Method
After the dish is correctly installed on the wall or roof of the house, you can begin setting up the satellite equipment yourself. Before you start setting up the receiver, you need to find out the frequencies of the signals from the satellite.
Setting the required parameters for receiving a satellite signal is done automatically or manually. If the antenna is adjusted correctly, the receiver is set to channel search mode. Otherwise, the dish is adjusted manually. Proceed as follows:
- All previous settings are reset on the receiver.
- The start of a new setting is reflected on the receiver display with 4 zeros – “0000”.
- In the menu there is a window with the name of the satellite - EutelsatW4 36E.
- Adjust transponder settings – 12130R, Lnb.
- Set the mode to “Manual configuration”. Enter the known frequency of the desired channel.
- A search is underway for him.
Equipment setup
When determining the position of the plate, it is better to enlist help. One person moves it, the second looks at how it affects the quality of the signal. The procedure is repeated until the optimal position of the receiver is found - this is a signal with a level of more than 70%.
Search channels
The dish setup is complete, you can start searching for TV channels. Search can be manual or automatic. For those who are doing this work for the first time, we recommend automatic search, which is launched from the main menu of the receiver.
True, the method does not always give the desired result, so knowledge about manual settings will not be superfluous:
- Menu > Default Setup > Channel > Antenna > Reset All Settings.
- After selecting the “Antenna” item, a window appears where you need to enter a code (by default it is “0000”).
- The menu that opens will contain a list of satellites. The user removes all tags, but leaves “EutelsatW4 36E”.
- To manually start searching for channels, you will need data for the transponder and LNB levels. The value of the first is 12130 R, for levels – 0 (lower), 10750 (upper).
After entering the data, you just have to wait for the result. As a rule, the process is not fast.
Including NTV+ in Spectrum TV
It has been operating in the Russian satellite television market since 2003. The company installs equipment, configures installed dish antennas, both for individual use and for apartment buildings. The company is the official installer of NTV+ (IN 9708066).
Note! In addition to installation and configuration, Spectr TV repairs NTV plus satellite equipment. The company has been repeatedly noted for its high level of service.
Possible problems and difficulties
At each stage there are difficulties:
- it is not possible to adjust the dish so that it reliably catches the signal;
- The supplied antenna cable is not long enough;
- the receiver finds few channels;
- I can’t connect the equipment to the TV, and so on.
To avoid these problems, you should start everything by carefully studying the instructions for the devices. If possible, they hire company representatives who will quickly do everything and give a guarantee, although it will cost a lot.
Setting up NTV Plus is not a difficult task, but it is a responsible task that requires care. During the work, it is necessary to correctly install, secure and direct the satellite dish, and enter the correct data to search for TV channels. If you do not have the skills to work with television equipment, it is better not to risk the safety of the equipment by entrusting this task to specialists.
Subscription fee
Payment for the use of NTV+ satellite television is made in several ways:
- Online
- Off-line.
Online payment
It is paid either with or without a commission - it depends on direct payment or through an intermediary. Monthly fees are accepted without commission through bank cards, from a smartphone account number or in cash at banks: Gazprombank, AKB Promsvyazbank, AKB Rosbank, URALSIB, Sberbank and VTB24. You can also pay your bill at their ATMs.
Through the online banking system, the payment will be accepted with a commission by Bank Vozrozhdenie.
Off-line
NTV+ offices will accept subscription fees without commission. They are located in official representative offices, showrooms and regional centers.
Retail chains such as Euroset, ION, MAXIMUS, Svyaznoy, Tekhnosila, ELEX and Eldorado will charge a commission fee.
Is it worth ordering NTV installation from private specialists?
Assembling, setting up and connecting equipment takes a lot of time and requires tools, materials and knowledge. If you have the time and skills, you can do the work yourself. Otherwise, contact professionals, they will do everything as quickly as possible, correctly and with a guarantee for the work.
How much does it cost to install NTV? Important pricing factors:
- Region of residence (minimum prices in different regions of the Russian Federation may differ significantly).
- Distance from the office of the company that carries out the installation. The further from the boundaries of the serviced area, the higher the price.
- Installation difficulties. This includes the method of laying the antenna cable, the need to equip a separate mast for the antenna, connecting several antennas at once, etc.
Average prices for a standard installation are 2000-3000 rubles. In Moscow and the region you can often find a fixed price - 2500 rubles.
Conditions may vary in other regions.
The services of private craftsmen cost approximately the same. But based on the results, the client will not receive a formal contract, which automatically complicates the procedure for challenging the quality of services provided. Yes, there are also scammers in this area.
Channels and tariffs
The tariff schedule of the monthly fee is divided into several packages. The main ones are “Basic” and “Economy”, additional packages.
The NTV+ company offers a “Basic” tariff, which includes 187 channels for 149 rubles/month. The “Economy” package (72 channels) will cost the user 50 rubles monthly.
At the same time, you can purchase subscriptions for additional packages.
Tariff table for additional NTV+ packages
| Package name | Number of channels | Tariff, rub./month |
| Cinema + | 16 | 280 |
| Supersport | 11 | 300 |
| Informative | 17 | 150 |
| Children's | 14 | 90 |
| Night | 3 | 170 |
| Entertaining | 11 | 60 |
| Musical | 12 | 70 |
| Amedia premium | 3 | 200 |
| Egoist | 2 | 150 |
| N Cinema | 4 | 300 |
| Viasat premium HD | 6 | 400 |
| Football | 2 | 220 |
| HD+ | 41 | 850 |
Additional Information. Since November last year, subscribers in the western regions of Russia can combine the “Basic package” with their preferred additional channels with a 30% discount, subject to an annual subscription.
Equipment setup
An access card is inserted into the receiver, and the “Signal Information” tab is selected in the “Menu” section.
This stage requires the participation of two people, since one needs to directly set up the NTV antenna, and the other remains with the equipment and monitors the quality of the signal. For ease of communication, you can use a cell phone.
First, slowly rotate the plate until the first appearance of a minimal image and sound. After each revolution, we wait 2-3 seconds so that the set-top box has time to contact the satellite.
As soon as the signal appears, we carefully adjust the plate until a high-quality picture appears, after which we firmly fix all the fasteners.
Difficulty connecting
When a homeowner decides to install and configure a satellite dish with his own hands, he may encounter certain difficulties, such as:
- incorrect orientation of the sectoral reflector of the satellite signal;
- improper fastening of the plate;
- purchasing a receiver that does not meet NTV+ settings;
- the smart card does not match the receiving device;
- inaccurate focusing of the converter irradiator;
- the diameter of the dish does not correspond to the reception of electromagnetic flux from the satellite in this region;
- incorrectly chosen form of payment for services.
All this can be avoided if you contact the specialists of NTV Plus or an affiliated company. Professionals will deliver all the equipment using their own transport, determine the most advantageous location of the reflector, securely fasten the dish, and set up the receiver and TV.
NTV Plus subscribers have the opportunity to watch not only domestic programs, but also receive the most popular foreign TV channels on their televisions. The NTV Plus company is constantly improving the quality of satellite equipment components, replenishing it with new models of receivers, converters, etc. The constantly changing system of discounts allows the consumer to expand the range of received TV channels.
Everyone chooses their own method of receiving channels in digital quality, this is what I proceeded from when choosing:.
— Terrestrial digital television did not suit me, due to the small number of channels.
- Cable television - everything is more complicated here, the operator that provides television via coaxial cable without using coding (no set-top boxes are needed) does not serve my home, and the operators that provide television through the set-top box did not suit me either, since I have to pay a subscription fee for connecting one TV 300 rubles or more, in my opinion expensive. Based on this, I chose satellite television. The disadvantage of this method is that to use it you must initially have an amount of about 10 thousand rubles. for the purchase of equipment. But you can always save money, for example, I had an old NTV+ receiver, and through a promotion I exchanged it with an additional payment for a new NTV+ receiver - I’ll immediately clarify that this was a temporary promotion, I was just lucky to meet the deadline. But promotions change and there is always the opportunity to buy a satellite kit cheaper. So, I didn’t have to choose between satellite operators, since I got an NTV+ set with a contract and a card for cheap. All that remained was to install the dish and enjoy digital channels, even channels in HD quality.
A little theory about satellite television.
For those who are not at all aware of the installation of satellite equipment, I will explain that the dish must look strictly at the satellite broadcasting signal. Here it’s worth telling a little more about satellite television technology.
The television signal is broadcast from a geostationary satellite hovering above the Earth. If you go a little deeper, then the satellite rotates in the plane of the earth's equator at an altitude of approximately 35,000 km above the earth's surface. The period of revolution in this orbit is one day. That is, a satellite moving in a geostationary orbit does not change its position relative to the Earth’s surface (it constantly “hangs” above the same point of the equator).
Using a satellite dish, we focus the signal from the satellite to the point where the converter is located.
A converter is a receiving device that is mounted at the focus of a signal reflected from a satellite dish and converts this signal into an electrical signal, after which it transmits it to the receiver - the receiver.
A receiver is a device that converts the signal coming from the converter into a “understandable” signal for the TV. The receiver connects to the TV using an HDMI, SCART, “tulip”, etc. interface. depends on the model of the receiver and the connectors on the TV.
The general diagram is presented below.
Installation of NTV+ dish
So, let's move from theory to practice. Below I will describe how I installed and configured NTV+ (for those who set up Tricolor, the connection diagram will be similar).
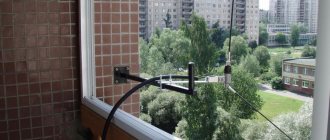
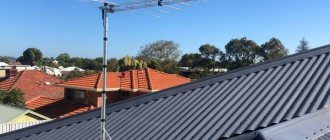
I climbed onto the roof of my house and saw the following picture - two satellite dishes hanging, there was a place left just for mine.
If you pay attention, one dish is used for Tricolor (judging by the inscription on the plate, although this may not be the case), this is good, since Tricolor and NTV+ broadcast from the same satellite, which means they are directed to the same point in the sky, adjust the direction accordingly antennas will be easier, since the sample will be nearby. When installing a satellite dish, you can also look around, since most people use either Tricolor or NTV+, accordingly you will understand in which direction you need to turn the antenna. If there are no dishes nearby, turn the dish to the south (since the satellite “hangs” on the equator), it should be noted that there should not be any trees or buildings on the path between the satellite and the direction of the dish, since they will not allow the signal to reach the dish.
The first step is to fasten the antenna bracket using anchor bolts (usually they come with the antenna). To do this, attach the bracket to the wall, mark the places where you need to drill holes, and use a drill to make holes with a depth and a radius the size of an anchor bolt. Then insert the bolts there.
Then attach the bracket to the wall and screw it.
As a result of all actions, check that the bracket is firmly secured and does not wobble.
After this, assemble the plate and attach it to the bracket.
Next, you need to run a coaxial cable from the receiver (where the TV will be) to the satellite dish converter. If the cable exceeds 10 meters, you can buy a high-quality 75 Ohm coaxial cable of the required length.
After that, use an HDMI, SCART or tulip cable to connect the receiver to the TV. Then turn on the receiver, select AV mode (corresponding interface) on the TV. You will see the receiver menu, select the satellite in the settings (let me remind you, for NTV+ and Tricolor it will be the same satellite), for the European zone it will be EUTELSAT W4/ W7 or EUTELSAT 36A/ 36B (they have been renamed).
The next step is to set the dish strictly to the satellite. In order not to use additional devices to help set up channels, which cost a lot of money (and there’s no need if you want to set up one satellite dish for yourself), you will need an assistant who will monitor the signal level, while you turn plate. You can use a cell phone for communication.
You should rotate the plate millimeter by millimeter in order to catch a good signal. The antenna rotates not only horizontally, but also vertically, do not forget about this.
In the end, I set up an NTV+ dish (I decided prematurely).
I managed to achieve a signal of more than 70 percent; it was cloudy, so perhaps the result was no better. Coming down after setting up the antenna, I quickly tuned in the channels using auto search and was quite pleased. BUT, when I turned on the HD channel, an information sign “No signal” appeared in front of me.
How so?! All channels work normally, but all HDs write “No signal”.
A call to technical support did not bring any results. I decided to spin the plate some more to achieve at least some signal level (as you can see in the picture below, the signal level of HD channels is 0%). To do this, in the menu I selected List TP - 11823/27500/V (it is responsible for some of the HD channels).
I climbed onto the roof and again began to slowly turn the antenna; my assistant remained near the TV and told me the signal level. After literally 10-15 minutes I managed to set up the HD channels; they showed a signal level of about 73%. Having gone down, I could already see the channels in HD quality, the other channels were also excellent.
The bottom line of this whole story is, do not believe people who say that only specialists with special equipment can install and configure satellite television. Almost anyone can do this!!!